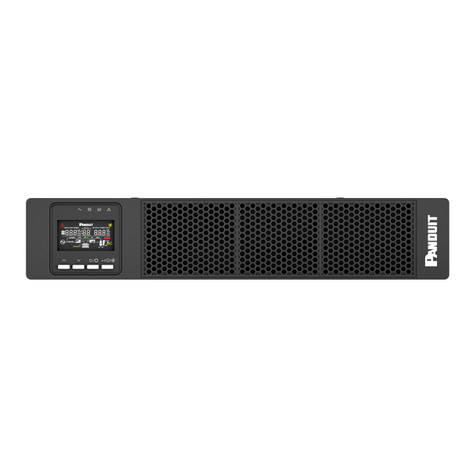
Panduit smartzone U01N11L User manual

Installation Manual V2.3
1-20 kVA Uninterruptible Power Supply,
1-20 kVA External Battery Pack,
Maintenance Bypass Switch,
Battery Cartridges,

SMARTZONE UPS INSTALLATION MANUAL
1
Contents
Section 1 –Overview ......................................................................................................4
SKU List.......................................................................................................................5
UPSs (Uninterruptable Power Supplies)..................................................................5
EBPs (External Battery Packs).................................................................................5
MBS (Maintenance Bypass Switch).........................................................................6
Battery Cartridges and Cartridge Sets .....................................................................6
Section 2 –Handling (Safety)..........................................................................................7
Important Safety Warnings ..........................................................................................7
Overview..................................................................................................................7
Handling Instructions................................................................................................7
Preparation ..............................................................................................................7
Installation................................................................................................................8
Operation.................................................................................................................9
Maintenance, service, and faults..............................................................................9
Section 3 –UPS, EBP and MBS Mounting ...................................................................11
Racks.........................................................................................................................11
Four-Post Racks ....................................................................................................11
Install 2U UPS Units (U01N11L, U01N11V, U01S11L, U01S11V, U01N12L, U01N12V,
U01S12L, U01S12V, U01N13V, U01S13V, U02N11L, U02N11V, U02S11L, U02S11V,
U02N12L, U02N12V, U02S12L, U02S12V, U03N11L, U03N11V, U03S11L, U03S11V,
U03N12L, U03N12V, U03S12L, U03S12V)....................................................................... 11
Install 2U EBP Units (UVP024, UVP036, UVP048, UVP072) ............................................. 16
Install 3U UPS Units (U05N11V, U05S11V, U06N11V, U06S11V, U06N12V, U06S12V,
U10N11V, U10S11V, U10N12V, U10S12V, U10N32V, U10S32V, U15N32V, U15S32V,

SMARTZONE UPS INSTALLATION MANUAL
2
U20N32V, U20S32V) ..................................................................................................... 20
Install 3U EBP Unit (UVP240)......................................................................................... 23
Install 3U MBS Unit (UMB20K) ...................................................................................... 29
Install 4U EBP Unit (UVP480)......................................................................................... 32
Two-Post Racks.....................................................................................................37
Tower.........................................................................................................................37
2U Units (U01N11L, U01N11V, U01S11L, U01S11V, U01N12L, U01N12V,
U01S12L, U01S12V, U01N13V, U01S13V, U02N11L, U02N11V, U02S11L,
U02S11V, U02N12L, U02N12V, U02S12L, U02S12V, U03N11L, U03N11V,
U03S11L, U03S11V, U03N12L, U03N12V, U03S12L, U03S12V, UVP024,
UVP036, UVP048, UVP072)..................................................................................38
3U Units (U05N11V, U05S11V, U06N11V, U06S11V, U06N12V, U06S12V,
U10N11V, U10S11V, U10N12V, U10S12V, UVP240)...........................................43
3-Phase Units (U10N32V, U10S32V, U15N32V, U15S32V, U20N32V, U20S32V,
UVP480, UMB20K)................................................................................................45
Section 4 –Electrical Connections................................................................................46
1-10kVA Single-Phase UPS and Associated EBP (U01N11L, U01N11V, U01S11L,
U01S11V, U01N12L, U01N12V, U01S12L, U01S12V, U01N13V, U01S13V,
U02N11L, U02N11V, U02S11L, U02S11V, U02N12L, U02N12V, U02S12L,
U02S12V, U03N11L, U03N11V, U03S11L, U03S11V, U03N12L, U03N12V,
U03S12L, U03S12V, U05N11V, U05S11V, U06N11V, U06S11V, U06N12V,
U06S12V, U10N11V, U10S11V, U10N12V, U10S12V, UVP024, UVP036, UVP048,
UVP072, UVP240).....................................................................................................46
10-20kVA 3-Phase UPS and Associated EBP (U10N32V, U10S32V, U15N32V,
U15S32V, U20N32V, U20S32V, UVP480)................................................................51
Single Mode System Configuration with 3-Phase or Single-Phase Output............51
Parallel Mode System Configuration with 3-Phase or Single-Phase Output..........58
Optional MBS for 3-Phase UPS.................................................................................61
Section 5 –Replacing Battery Cartridges......................................................................70
Internal Battery Cartridges in the 1-3kVA UPS Units (UVC024, UVC036, UVC048,
UVC072)....................................................................................................................70
EBP Battery Cartridge Sets for the 1-3kVA UPS Systems (UVD024, UVD036,
UVD048, UVD072) ....................................................................................................72
SMARTZONE UPS INSTALLATION MANUAL
3
EBP Battery Cartridge Sets for the 5-10kVA UPS Systems (UVD240)......................74
EBP Battery Cartridge Sets for the 10-20kVA 3-Phase UPS Systems (UVD480).....77
Appendix A: What’s Included: 1-3kVA NA VRLA UPS (U01N11V, U01S11V, U01N13V,
U01S13V, U02N11V, U02S11V, U03N11V, U03S11V,)...............................................80
Appendix B: What’s Included: 1-3kVA EU VRLA UPS (U01N12V, U01S12V, U02N12V,
U02S12V, U03N12V, U03S12V)...................................................................................81
Appendix C: What’s Included: 1-3kVA VRLA EBP (UVP024, UVP036, UVP048,
UVP072)........................................................................................................................82
Appendix D: What’s Included: 5-10kVA VRLA 1-Phase UPS (U05N11V, U05S11V,
U06N11V, U06S11V, U06N12V, U06S12V, U10N11V, U10S11V, U10N12V, U10S12V)
......................................................................................................................................83
Appendix E: What’s Included: 10-20kVA VRLA 3-Phase UPS (U10N32V, U10S32V,
U15N32V, U15S32V, U20N32V, U20S32V) .................................................................85
Appendix F: What’s Included: 5-10kVA VRLA EBP (UVP240)......................................87
Appendix G: What’s Included: 10-20kVA 3-Phase EBP (UVP480)...............................88
Appendix H: What’s Included: Maintenance Bypass Switch (UMB20K) ........................89
Appendix I: What’s Included: 1-3kVA NA Li UPS (U01N11L, U01S11L, U02N11L,
U02S11L, U03N11L, U03S11L,)...................................................................................90
Appendix J: What’s Included: 1-3kVA EU Li UPS (U01N12V, U01S12V, U02N12V,
U02S12V, U03N12V, U03S12V)...................................................................................91
Appendix K: Ground Screw Location and Ground Wire Size ........................................92

SMARTZONE UPS INSTALLATION MANUAL
4
Section 1 –Overview
This Manual provides the instructions for installing the Uninterruptable Power Supply
Units, the External Battery Pack Units, the Maintenance Bypass Switch Unit, and the
UPS/EBP Battery Cartridges. Refer to the table below for all SKUs included in this
Installation Manual.
All units should be installed in an environment that is within the operating parameters of
the units.
•Operating Temperature: 0-40°C (no derating)
•Operating Humidity: 0-95% (non-condensing)
•Max. Operating Elevation: 3000 m (10% derating); 1000 m (no derating)
•Protection Class: IP20
All units require mounting support when mounted in a rack. A rail mounting kit and a
tower mounting kit are provided with most units. The rail mounting kit is used for the
preferred mounting, in a four-post rack. The tower mounting kit is used for mounting on
the floor or desk in a vertical orientation.
Refer to the appropriate Appendix in this manual for a detailed list of the components
included with the product.
The following three sections provide the information on handling, installing, and wiring
the SKUs in this manual. There are many common installation steps between the
various unit models. Subsections are provided for unique installation steps that must be
completed on specific models.

SMARTZONE UPS INSTALLATION MANUAL
5
SKU List
These are the SKUs included in this Installation Manual.
UPSs (Uninterruptable Power Supplies)
SKU
Dimension
W*D*H (mm)
Form
Factor
Net Weight
(kg / lbs)
UPS
Replacement
Battery
Cartridge
Matched
External
Battery
Pack
U01N11L / U01S11L
440*460*86.5
2U
13.5 / 29.8
ULC024
NA
U01N11V / U01S11V
440*460*86.5
2U
16.6 / 36.6
UVC036
UVP036
U01N12L / U01S12L
440*325*86.5
2U
9.1 / 20.1
ULC024
NA
U01N12V / U01S12V
440*460*86.5
2U
16.2 / 35.7
UVC036
UVP036
U01N13V / U01S13V
440*325*86.5
2U
12.4 / 27.3
UVC024
UVP024
U02N11L / U02S11L
440*460*86.5
2U
15.1 / 33.3
ULC048
NA
U02N11V / U02S11V
440*460*86.5
2U
21.5 / 47.4
UVC048
UVP048
U02N12L / U02S12L
440*500*86.5
2U
15.8 / 34.8
ULC272
NA
U02N12V / U02S12V
440*460*86.5
2U
20.5 / 45.2
UVC048
UVP048
U03N11L / U03S11L
440*640*86.5
2U
28.1 / 61.9
ULC372
NA
U03N11V / U03S11V
440*600*86.5
2U
27.6 / 60.8
UVC072
UVP072
U03N12L / U03S12L
440*640*86.5
2U
20.6 / 45.4
ULC372
NA
U03N12V / U03S12V
440*600*86.5
2U
27.9 / 61.5
UVC072
UVP072
U05N11V / U05S11V
440*666.5*131
3U
19.3 / 42.5
67.5 / 148.5
NA
UVP240
U06N11V / U06S11V
440*666.5*131
3U
17.5 / 38.5
67.5 / 148.5
NA
UVP240
U10N11V / U10S11V
440*666.5*131
3U
20 / 44
67.5 / 148.5
NA
UVP240
U06N12V / U06S12V
440*666.5*131
3U
17.5 / 38.5
67.5 / 148.5
NA
UVP240
U10N12V / U10S12V
440*666.5*131
3U
20 / 44
67.5 / 148.5
NA
UVP240
U10N32V / U10S32V
440*660*131
3U
25 / 55.1
145 / 319
NA
UVP480
U15N32V / U15S32V
440*660*131
3U
27 / 59.5
145 / 319
NA
UVP480
U20N32V / U20S32V
440*660*131
3U
30 / 66.1
145 / 319
NA
UVP480
EBPs (External Battery Packs)
SKU
Dimension
W*D*H (mm)
Form
Factor
Net Weight
(kg / lbs)
EBP
Replacement
Battery
Cartridge Set
UVP024
440*430*86.5
2U
17.9 / 39.3
UVD024
UVP036
440*430*86.5
2U
23.1 / 50.8
UVD036
UVP048
440*550*86.5
2U
30 / 66
UVD048
UVP072
440*710*86.5
2U
43 / 94.6
UVD072

SMARTZONE UPS INSTALLATION MANUAL
6
UVP240
440*666.5*131
3U
67.5 / 148.5
UVD240
UVP480
443*896.5*175
4U
145 / 319
UVD480
MBS (Maintenance Bypass Switch)
SKU
Dimension
W*D*H (mm)
Form
Factor
Net Weight
(kg / lbs)
UMB20K
440*660*131
3U
15 / 33.1
Battery Cartridges and Cartridge Sets
SKU
Dimension
W*D*H (mm)
Net Weight
(kg / lbs)
ULC024
193*173*78
2.7 / 5.9
ULC048
193*173*78
4.0 / 8.8
ULC272
193*340*78
5.3 / 11.8
ULC372
193*506*78
8.0 / 17.6
UVC024
202*153*74
5.3 / 11.6
UVC036
153*306*74
7.7 / 16.9
UVC048
202*304*74
10.4 / 22.8
UVC072
202*455*74
15.6 / 34.3
UVD024
2x 153*306*74
2x 5.3 / 2x 11.6
UVD036
2x 153*306*74
2x 7.7 / 2x 16.9
UVD048
2x 153*403*74
2x 10.4 / 2x 22.8
UVD072
2x 153*603*74
2x 15.6 / 2x 34.3
UVD240
2x 334*607*114
1x 167*607*114
2x 21.4 / 2x 47.2
1x 10.4 / 1x 22.8
UVD480
4x 107*701*156
4x 30.4 / 4x 67.0

SMARTZONE UPS INSTALLATION MANUAL
7
Section 2 –Handling (Safety)
Important Safety Warnings
Important safety instructions –Save these instructions
Overview
Please comply with all warnings and operating instructions. Save this manual for future
reference. Carefully read and follow these instructions before installing the unit. Do not
operate this unit before reading through all safety information and operating instructions
carefully.
Dangerous voltages and high temperatures exist inside the UPS. During the installation,
operation, and maintenance of these units, please abide by the local safety rules and
relative laws. Failure to do so may result in personnel injury or equipment damage.
Safety instructions in this manual act as a supplementary for the local safety rules. No
liability is assumed for not following the safety rules.
Handling Instructions
Before moving the UPS, be sure to use the original packaging materials to prevent or
reduce the possibility of personal injury or damage to the product.
This product may expose you to chemicals including Nickel (Metallic), which is known to
the State of California to cause cancer and birth defects or other reproductive harm. For
more information, go to www.P65Warnings.ca.gov.
Preparation
•Consideration must be taken if the UPS system is moved directly from a cold to
warm environment. The UPS system must be free of any moisture before
installation. Please allow at least two hours for the UPS system to acclimate to the
environment.
•Do not install the UPS system near water or in humid environments.
•Do not install the UPS system where it would be exposed to direct sunlight or near
heat sources.
•Do not block ventilation holes in the UPS housing.

SMARTZONE UPS INSTALLATION MANUAL
8
•It is recommended to mount the UPS and EBP unit near the bottom of the rack
due to the physical weight of these units.
Installation
•The UPS system must be installed in an environment with a temperature range
from 0°C to 40°C.
•The UPS system must be installed in an environment with a humidity from 20 to
90% RH, non-condensing.
•The UPS system should be installed in an environment with an altitude of 1000
meters (3,281ft.) or lower with no derating. Derate 1% for every 100 meters above
1000 meters per IEC 62040-3. This is an example of power derating according to
altitude:
Altitude (m)
1000
2000
2500
3000
3500
4000
4500
5000
Load
coefficient
100%
90%
85%
80%
75%
70%
65%
60%
•Most UPS system units with battery cartridges are heavy and may require a lift to
install in the rack/cabinet.
•Each power input on the UPS unit must be protected by a branch circuit protective
device rated for the UPS specified on the product rating label.
•Pluggable UPS systems may be installed and operated by a trained qualified
layman.
•Connect the UPS system only to an earth grounded outlet that is easily accessible
and close to the UPS system.
•Permanently wired UPS systems must be installed and wired by trained qualified
electricians only.
•For permanently connected UPS systems, ensure source power is off and locked
out before installing permanently wired connections to the UPS disconnect device
or UPS system.
•For permanently connected UPS systems, a readily accessible disconnect device
should be incorporated external to the UPS system.
•For permanently connected UPS systems, each power input on the UPS systems
must be wired with the appropriate wire gauge for the system being installed, refer
to Section 4 –Electrical Connections in this document.
•For permanently connected UPS systems, check for hazardous voltages between
terminals before wiring.
•For permanently connected UPS systems, ensure that cover plates on all units are
installed before providing power to the UPS system.
•Ensure that all units in the UPS system (includes UPS, EBP, MBS, etc.) are
properly grounded before power is applied to the system, refer to Section 4 –
Electrical Connections in this document.
•It is recommended to install external isolators on the UPS system to prevent back-
feed on the input from the battery if an internal UPS fault occurs.

SMARTZONE UPS INSTALLATION MANUAL
9
•When installing the equipment, ensure that the sum of the leakage current of the
UPS and the connected devices does not exceed 3.5mA.
•Do not connect appliances or devices which would overload the UPS system to
the UPS output
•Route cables to eliminate tripping hazards.
•Do not connect domestic appliances such as hair dryers to UPS output.
•Use only UL, VDE, CE certified power cables to connect the UPS system to the
building wiring source (Mains).
•Use only UL, VDE, CE certified power cables to connect the loads to the UPS
system.
•The UPS cooling is depending on fans, so it should be kept in good air ventilation
area. There are many ventilation holes on the front and rear, so they should not
be blocked by any exotic obstacles.
Operation
•Do not disconnect the input (Mains) cable on the UPS system or thebuilding wiring
source, thus removing protective earth of the UPS system and of all connected
loads, during operation.
•The UPS system features its own, internal power source (batteries). The UPS
output may be electrically live even if the UPS system input is not connected to the
building source.
•To fully disconnect the UPS system, first press the OFF/Enter button then
disconnect the input source (Mains).
•Prevent fluids or other foreign objects from entering the UPS system.
Maintenance, service, and faults
The UPS units should only be serviced by trained qualified personnel approved by the
manufacturer.
•Unit may be energized from more than one source. Each circuit must be
individually disconnected before servicing.
•Caution –There is risk of electric shock even after the unit is disconnected from
all input sources, components inside the UPS system are still connected to the
battery and electrically live and dangerous.
•Before performing any service and/or maintenance, disconnect the battery
cartridge(s) and verify that no hazardous voltage is present on the terminals of the
high voltage components such as BUS-capacitors.
•It is recommended that personal with adequate knowledge of batteries that follow
the required precautionary measures should replace the battery cartridge(s) or
supervise the replacement of the battery cartridge(s).
•Caution –there is risk of electric shock. The battery circuit is not isolated from the
input voltage. Hazardous voltages may exist between the battery terminals and the
ground on the UPS. Before touching, please verify that no voltage is present.

SMARTZONE UPS INSTALLATION MANUAL
10
•Batteries may cause electric shock and have a high short-circuit current. Take the
precautionary measures specified below and any other measures necessary when
working with the battery cartridges:
oRemove jewelry and any other metal objects.
oUse only tools with insulated grips and handles.
oAvoid touching or shorting battery cartridge terminals.
•When changing battery cartridge(s), only replace with the same battery cartridge
part number as specified for that UPS.
•Do not attempt to dispose of battery cartridges by burning them. This could cause
the batteries to explode.
•Do not open or destroybatteries. Escaping electrolytes can cause injury to the skin
and eyes and may be toxic.
•Must replace any fuses only with the same type and amperage to avoid fire
hazards.
•Do not disassemble any components in the UPS system (UPS, EBP, MBS, etc.).
•Risk of electrical shock; do not touch uninsulated battery terminals.
•Risk of explosion if battery cartridge is replaced with an incorrect battery cartridge
type.
•Batteries should be mounted in an environment where the temperature is within
the required specs. Temperature is a major factor in determining battery life and
capacity. In a normal installation, the battery temperature is maintained between
15°C and 25°C. Keep batteries away from heat sources or main air ventilation
area, etc.
•Units with internal battery cartridges and battery cartridges must be stored in an
environment to protect against excessive humidity and heat source.
oTypical battery performance is based on an operating temperature between
20°C and 25°C. Operating the battery cartridges above this range will
reduce the battery life, while operating below this range will reduce the
battery capacity.
oAn unused battery cartridge must be fully recharged every 3 months.

SMARTZONE UPS INSTALLATION MANUAL
11
Section 3 –UPS, EBP and MBS Mounting
The UPS, EBP and the MBS have different mounting options. Refer to the following
section that matches the desired mounting technique desired.
Racks
Four-post rack mounting is the recommended preferred mounting technique for all UPS,
EBP and MBS units. The mounting hardware for this technique is provided with most
units. The units may also be mounted in a two-post rack, this will require additional
mounting hardware that is specified in the below section. (Note: It is recommended to
mount the UPS and EBP unit near the bottom of the rack due to the physical weight of
these units). The third mounting option is tower mounting. This is not the preferred
mounting technique, but tower mounting stands are provided with most units. The 3-
Phase UPS and EBP unit should not use this mounting technique due to physical
configuration and physical weight of the unit.
Four-Post Racks
The UPS, EBP and MBS units come with the hardware required for installation in a
standard EIA or JIS seismic rated four-post rack with square or M5 threaded mounting
holes. The rail assemblies adjust to mount in 19” racks with a front to rear distance of
460~1000 mm (18 to 39 inches).
CAUTION
⚫
The unit is heavy. Removing the unit from its carton requires a
minimum of two people.
⚫
If installing optional EBP(s), make sure to install the EBP(s)
directly below the UPS so the wiring between the units can use
the wiring provided with the units.
Note:
Mounting rails are required for each individual unit.
Install 2U UPS Units (U01N11L, U01N11V, U01S11L, U01S11V, U01N12L, U01N12V,
U01S12L, U01S12V, U01N13V, U01S13V, U02N11L, U02N11V, U02S11L, U02S11V,
U02N12L, U02N12V, U02S12L, U02S12V, U03N11L, U03N11V, U03S11L, U03S11V,
U03N12L, U03N12V, U03S12L, U03S12V)
1. Install the URMKIT2 rail kit:
a. Install the front side of the rail kit with 3x Phillips Pan Head M5 screws (see
figure below) on each rail. Do not tighten the screws.

SMARTZONE UPS INSTALLATION MANUAL
12
Figure 1: Install the Front Side of Rails
b. Adjust the rail size according to the depth of the rack
c. Install the rear side of the rail kit with 3x Phillips Pan Head M5 screws (see
figure below) on each rail.
Figure 2: Install the Rear Side of Rails
d. Tighten all 12x screws to secure the left and right rails to the rack.
e. Install the 4x M5 cage nuts in the rack front equipment rail, with square holes.
One in each of the first locations below the bottom rail kit screw and one in
each of the first locations above the top rail kit screw (see figure below).
Figure 3: Install Cage Nuts in the Front Equipment Rail with Square Holes

SMARTZONE UPS INSTALLATION MANUAL
13
2. Remove the faceplate:
a. Press both sides of UPS faceplate until the latches release (see figure below).
Figure 4: Press the Latches to Remove Faceplate
b. Remove the faceplate (see figure below).
Figure 5: Remove the Faceplate
c. Make sure the screen is rotated in the proper orientation for mounting in a
rack. The screen may be manually rotated ¼ turn for rack or tower mounting.
3. Connect the internal battery cartridge:
a. Connect the internal battery cartridge connector (see figure below). Press the
connector tightly together to ensure a proper connection.

SMARTZONE UPS INSTALLATION MANUAL
14
Figure 6: Connect the Internal Battery Cartridge Connector
b. Reinstall the faceplate on the UPS, by aligning the front panel display through
the hole in the faceplate and snapping the faceplate onto the front of the UPS.
Should have a positive snap of the latches on the faceplate.
CAUTION
A small amount of arcing may occur when connecting the internal battery
cartridge. This is normal and will not harm personnel. Connect the cables quickly
and firmly.
4. Install the mounting brackets:
a. Remove the 2x Phillips Flat Head M4x8 screws from the front of each side the
UPS and retain.
b. Align the mounting brackets with the screw holes on each side of the UPS and
secure with the previously removed Phillips Flat Head M4×8 screws (see
figure below).

SMARTZONE UPS INSTALLATION MANUAL
15
Figure 7: Install the Mounting Bracket
5. Install the UPS unit into the rack:
a. After installing the mounting brackets onto the UPS, slide the UPS into the
rack on the rail kit (see figure below).
Figure 8: Slide UPS into the Rack
b. Align the mounting brackets with the screw holes on the rack and secure the
UPS with the supplied 4x Phillips Hex Head M5 screws (see figure below).

SMARTZONE UPS INSTALLATION MANUAL
16
Figure 9: Secure the Mounting Brackets to the Rack
Install 2U EBP Units (UVP024, UVP036, UVP048, UVP072)
It is recommended to install the first EBP unit directly under the UPS unit. It is
recommended to install all subsequent EBP units directly under the previous EBP unit.
1. Install the URMKIT2 rail kit:
a. Install the front side of the rail kit with 3x Phillips Pan Head M5 screws (see
figure below) on each rail. Do not tighten the screws.
Figure 10: Install the Front Side of Rails
b. Adjust the rail size according to the depth of the rack

SMARTZONE UPS INSTALLATION MANUAL
17
c. install the rear side of the rail kit with 3x Phillips Pan Head M5 screws (see
figure below) on each rail.
Figure 11: Install the Rear Side of Rails
d. Tighten all 12x screws to secure the rail kit to the rack.
e. Install the 4x M5 cage nuts in the rack front equipment rail, with square holes.
One in each of the first locations below the bottom rail kit screw and one in
each of the first locations above the top rail kit screw (see figure below).
Figure 12: Install Cage Nuts in the Front Equipment Rail with Square
Holes
2. Remove the faceplate:
a. Press both sides of EBP faceplate until the latches release and remove (see
figure below).
Figure 13: Press the Latches and Remove Faceplate

SMARTZONE UPS INSTALLATION MANUAL
18
3. Connect the internal battery cartridges:
a. Remove and retain the two screws on top and bottom each battery cover near
the center of the unit, slide the battery cover toward the center, then remove
and retain (see figure below).
Figure 14: Remove the Faceplate
b. Pull both battery cartridge connectors through the middle hole in the chassis,
connect a battery cartridge to each connector (see figure below). Press the
connector tightly together to ensure a proper connection. Connect the other
battery cartridge in the EBP. Both internal battery cartridges should be
connected. Press each connector tightly together to ensure a proper
connection.
Figure 15: Connect the First Internal Battery Cartridge Connector

SMARTZONE UPS INSTALLATION MANUAL
19
c. Insert the connectors back into the middle hole on the chassis.
d. Reinstall and secure the retained battery covers in reverse order of above
step.
e. Reinstall the faceplate on the EBP, by aligning the front panel latches with the
holes in the front of the unit and snapping the faceplate onto the front of the
EBP unit. Should have a positive snap of the latches on the faceplate.
4. Install the mounting brackets:
a. Remove the 2x Phillips Flat Head M4x8 screws from the front of each side the
EBP and retain.
b. Align the mounting brackets with the screw holes on each side of the EBP and
secure with the previously removed Phillips Flat Head M4×8 screws (see
figure below).
Figure 16: Install the Mounting Bracket
5. Install the EBP unit into the rack:
a. After installing the mounting brackets onto the EBP, slide the EBP unit into the
rack on the rail kit (see figure below).
Figure 17: Slide EBP into the Rack
This manual suits for next models
62
Table of contents
Other Panduit UPS manuals

Panduit
Panduit UPS003LSM User manual

Panduit
Panduit Smartzone U01N11V User manual

Panduit
Panduit smartzone 1-3KVA User manual

Panduit
Panduit UPS003LSM User manual

Panduit
Panduit SmartZone User manual

Panduit
Panduit UPS003024024015 User manual

Panduit
Panduit smartzone 5-10KVA User manual

Panduit
Panduit SmartZone User manual

Panduit
Panduit UPS00100DC User manual