manuals.online logo
Brands
  1. Home
  2. •
  3. Brands
  4. •
  5. Parrot
  6. •
  7. Automobile Accessories
  8. •
  9. Parrot CK3100 LCD User manual

Parrot CK3100 LCD User manual

C-MAX 2011
This document is a tool to assist with the installation of a Parrot product and is supplied purely for information. Any installation performed in
compliance with the instructions appearing in this document is done under the sole responsibility of the installer, who is entirely responsible
for the quality of the installation. All rights reserved © Copyright 2011 PARROT SA RCS PARIS 394 149 496. May not be reproduced without
the authorisation of Parrot SA. Pictures for information only.
C-MAX
The brand name FORD C-MAX and the FORD logo are the property of FORD.
This document is only valid for the vehicle model C-MAX® year 2010 to 2011, excluding all other models in the same range and excluding later
modifications made to the vehicle by the manufacturer.
The Parrot brand name and logos are the exclusive property of Parrot SA.
Installation manual:
Parrot MKi + Parrot
CK3100 range
C-MAX 2011
This document is a tool to assist with the installation of a Parrot product and is supplied purely for information. Any installation performed in
compliance with the instructions appearing in this document is done under the sole responsibility of the installer, who is entirely responsible
for the quality of the installation. All rights reserved © Copyright 2011 PARROT SA RCS PARIS 394 149 496. May not be reproduced without
the authorisation of Parrot SA. Pictures for information only.
Disassembly 40min
Mounting kit 10min
Refitting 40min
Testing 15min
Total 1h45min
YES APC
NO ISO
N/A UNIKA
FRONT LOUDSPEAKER TEL mode
ALL MUSIC mode
Fitting time (estimated) / Main features
Tools
-Torx 4 and 5 screwdrivers
- Cutting pliers
- Multimeter
- Wire tie
- Electrical tape
FACOM CR D5
Accessories required
To get the most out of your hands-free kit, we recommend that you update your
software regularly. The procedure for doing this can be found at
http://www.parrot.com/usa/support/downloads
Updating
Kram ref.
Dealer ref.
CK range 86 291 1457910
MKi range 84 291 1457910
"Please contact your wholesaler to purchase
accessories. List of wholesalers available at
www.certified.parrot.com." »
MKi range
Photos for illustration purposes
CK range
C-MAX 2011
This document is a tool to assist with the installation of a Parrot product and is supplied purely for information. Any installation performed in
compliance with the instructions appearing in this document is done under the sole responsibility of the installer, who is entirely responsible
for the quality of the installation. All rights reserved © Copyright 2011 PARROT SA RCS PARIS 394 149 496. May not be reproduced without
the authorisation of Parrot SA. Pictures for information only.
Disassembly
C-MAX 2011
This document is a tool to assist with the installation of a Parrot product and is supplied purely for information. Any installation performed in
compliance with the instructions appearing in this document is done under the sole responsibility of the installer, who is entirely responsible
for the quality of the installation. All rights reserved © Copyright 2011 PARROT SA RCS PARIS 394 149 496. May not be reproduced without
the authorisation of Parrot SA. Pictures for information only.
Disassembly 1 / 2
Remove the
rubber panel
located on top of
the dashboard
and in front of
the central
screen
Remove the shell
using the plastic
trim tools
ATTENTION: the
shell is in 2 parts.
Properly position
the trim tools
under the clips
as shown in the
photo
Remove screws 1
and 2
Remove screws 3
and 4 above the
centre screen
Lift and
disconnect the
centre screen
Unscrew the 5
screws under the
centre screen
Unscrew screws 6
and 7 located
above the radio.
Remove the façade,
pulling downwards,
and unplug the
connector
3
21
5
4
6
7 8
1 2
3 4
5 6 7
C-MAX 2011
This document is a tool to assist with the installation of a Parrot product and is supplied purely for information. Any installation performed in
compliance with the instructions appearing in this document is done under the sole responsibility of the installer, who is entirely responsible
for the quality of the installation. All rights reserved © Copyright 2011 PARROT SA RCS PARIS 394 149 496. May not be reproduced without
the authorisation of Parrot SA. Pictures for information only.
Disassembly 2 / 2
Unscrew screws
8 and 9 then pull
on the radio.
Unplug the radio
connector and
antenna
Unscrew screw
10 in the glove
box under the
left side of the
dashboard
11
10
Unscrew screw
11 in the glove
box under the
centre of the
dashboard
Unscrew screw
12 in the glove
box under the
right side of the
dashboard
Gently pull the
glove box to
remove it and
place it on the
floor
Using the plastic
trim tools,
remove the right
side cover
Remove the
passenger door
seal up to the
roof
9
14
12
15
9
8
10
11 12
C-MAX 2011
This document is a tool to assist with the installation of a Parrot product and is supplied purely for information. Any installation performed in
compliance with the instructions appearing in this document is done under the sole responsibility of the installer, who is entirely responsible
for the quality of the installation. All rights reserved © Copyright 2011 PARROT SA RCS PARIS 394 149 496. May not be reproduced without
the authorisation of Parrot SA. Pictures for information only.
Microphone passage
Place the adhesive
bracket (supplied)
on the windscreen
after thoroughly
degreasing. Run
the cable under the
headliner along the
windscreen
Slide the cable
into the post
cover and
replace the door
seal
Pass the cable into
the dashboard
from the right side
then attach it with
wire ties to the
factory cables
Replace the right
side cover
3
21
4
C-MAX 2011
This document is a tool to assist with the installation of a Parrot product and is supplied purely for information. Any installation performed in
compliance with the instructions appearing in this document is done under the sole responsibility of the installer, who is entirely responsible
for the quality of the installation. All rights reserved © Copyright 2011 PARROT SA RCS PARIS 394 149 496. May not be reproduced without
the authorisation of Parrot SA. Pictures for information only.
Feeding the accessory cable
Bring out the
accessory cable
through the
glove box vanes
by cutting one of
the vane
mountings
Leave sufficient
length and
attach the rest
with a wire tie to
the factory
cables
21
C-MAX 2011
This document is a tool to assist with the installation of a Parrot product and is supplied purely for information. Any installation performed in
compliance with the instructions appearing in this document is done under the sole responsibility of the installer, who is entirely responsible
for the quality of the installation. All rights reserved © Copyright 2011 PARROT SA RCS PARIS 394 149 496. May not be reproduced without
the authorisation of Parrot SA. Pictures for information only.
Fitting the hands-free system
Pass the factory
radio cable to the
right behind the
glove box then
connect it to the
adapter and bring
the adapter
connector to the
rear of the radio
Pass the screen
cable into the
dashboard to the
rear of the glove
box using a rigid
guide
Replace the upper
cover passing the
screen cable to the
side and after
degreasing the
panel, glue the
screen with the
mounting
(supplied) passing
the cable from the
top
Connect the
group of cables
to the blue box,
position it
lengthways and
attach with wire
ties
3
21
4
C-MAX 2011
This document is a tool to assist with the installation of a Parrot product and is supplied purely for information. Any installation performed in
compliance with the instructions appearing in this document is done under the sole responsibility of the installer, who is entirely responsible
for the quality of the installation. All rights reserved © Copyright 2011 PARROT SA RCS PARIS 394 149 496. May not be reproduced without
the authorisation of Parrot SA. Pictures for information only.
Testing
Before refitting the system, switch the kit on using the
ignition (or by starting the car). By pushing the central knob
of the remote control, check:
1 - that the menu is displayed on the screen (language or
iPod etc)
2 - that the radio system is muted when the kit is in use (click
in the blue box)
3 - that the sound through all speakers is properly muted
4 - that there is sound through the front speakers for spoken
menus
5 - then turn off the ignition, verify that the kit turns off and
that the message “goodbye” is displayed on the screen
(otherwise reverse the fuses on the kit power supply
harness)
6 - pair a telephone with the kit and make a call (check that
both the microphone and the kit are working)
C-MAX 2011
This document is a tool to assist with the installation of a Parrot product and is supplied purely for information. Any installation performed in
compliance with the instructions appearing in this document is done under the sole responsibility of the installer, who is entirely responsible
for the quality of the installation. All rights reserved © Copyright 2011 PARROT SA RCS PARIS 394 149 496. May not be reproduced without
the authorisation of Parrot SA. Pictures for information only.
Refitting
Refit the system using the following procedure:
1 - remount the glove box (3 screws)
2 - remount the radio connecting the power supply cable and antenna (take care
not to cut the cable when sliding the unit into the housing) and re-screw the top
part (2 screws)
3 - remount the radio façade connecting the cable behind and clipping it at the
bottom then re-screwing the top (2 screws)
4 - Re-screw the bottom cover (3 screws)
5 - slide the original centre screen connecting the cable behind and re-screwing (2
screws)
6 - place the shell on the top in its positions and attach it by pressing firmly on the
top.
7 - replace the rubber mat on the top
8 - retest to check that the system is working correctly

Other manuals for CK3100 LCD

22

Other Parrot Automobile Accessories manuals

Parrot MULTICAN User manual

Parrot

Parrot MULTICAN User manual

Parrot Multicomm User manual

Parrot

Parrot Multicomm User manual

Parrot CK 3000 Evolution Manual

Parrot

Parrot CK 3000 Evolution Manual

Parrot MKi9100 User manual

Parrot

Parrot MKi9100 User manual
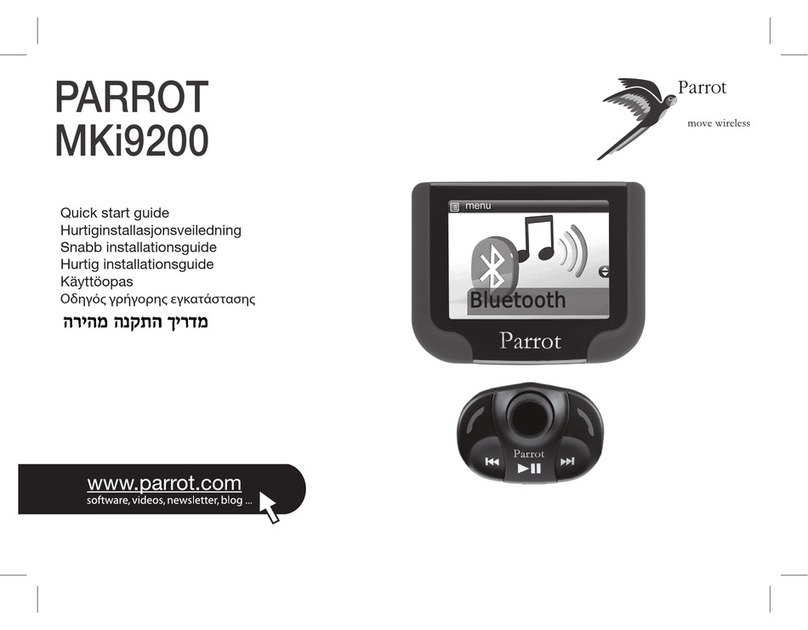
Parrot MKi9200 RU User manual

Parrot

Parrot MKi9200 RU User manual

Parrot Minikit Neo 2 HD User manual

Parrot

Parrot Minikit Neo 2 HD User manual

Parrot CK3100 LCD User manual

Parrot

Parrot CK3100 LCD User manual

Parrot CK3100 Series User manual

Parrot

Parrot CK3100 Series User manual

Parrot MINIKIT SLIM User manual

Parrot

Parrot MINIKIT SLIM User manual

Parrot MK6100 User manual

Parrot

Parrot MK6100 User manual

Parrot CK3100 Series User manual

Parrot

Parrot CK3100 Series User manual

Parrot PS7100 User manual

Parrot

Parrot PS7100 User manual

Parrot CK3100 LCD User manual

Parrot

Parrot CK3100 LCD User manual

Parrot 3400 LS-GPS User manual

Parrot

Parrot 3400 LS-GPS User manual

Parrot Parrot MKi + Parrot CK3100 range 2008 User manual

Parrot

Parrot Parrot MKi + Parrot CK3100 range 2008 User manual

Parrot Minikit+ User manual

Parrot

Parrot Minikit+ User manual

Parrot ADVANCED User manual

Parrot

Parrot ADVANCED User manual

Parrot MKi9000 User manual

Parrot

Parrot MKi9000 User manual

Parrot Minikit+ User manual

Parrot

Parrot Minikit+ User manual

Parrot 3200 LS-Color User manual

Parrot

Parrot 3200 LS-Color User manual

Parrot MKi9200 RU User manual

Parrot

Parrot MKi9200 RU User manual

Parrot 3200 LS-COLOR PLUS User manual

Parrot

Parrot 3200 LS-COLOR PLUS User manual

Parrot MKi9000 User manual

Parrot

Parrot MKi9000 User manual

Parrot 3400 LS-GPS Manual

Parrot

Parrot 3400 LS-GPS Manual

Popular Automobile Accessories manuals by other brands

mPTech RMX-140212 user manual

mPTech

mPTech RMX-140212 user manual

Thule VeloSpace 917 instructions

Thule

Thule VeloSpace 917 instructions

Starkey 6280 manual

Starkey

Starkey 6280 manual

Cruz Cargo XPro Assembly instructions

Cruz

Cruz Cargo XPro Assembly instructions

Parkmate ClearView 7 user manual

Parkmate

Parkmate ClearView 7 user manual

Metra Electronics 99-8201 installation instructions

Metra Electronics

Metra Electronics 99-8201 installation instructions

BGS technic 40108 manual

BGS technic

BGS technic 40108 manual

PNEUMATIC KU-MI-AX00-00 Installation instruction

PNEUMATIC

PNEUMATIC KU-MI-AX00-00 Installation instruction

Volvo Ski box installation instructions

Volvo

Volvo Ski box installation instructions

Havis C-VS-1500-DUR-1 Install instructions

Havis

Havis C-VS-1500-DUR-1 Install instructions

Hyundai 82302-3N700-W2R Technical service bulletin

Hyundai

Hyundai 82302-3N700-W2R Technical service bulletin

Rhino-Rack SRB011 Fitting instructions

Rhino-Rack

Rhino-Rack SRB011 Fitting instructions

AL-KO 605 363 operating instructions

AL-KO

AL-KO 605 363 operating instructions

Romik RAL-S 62804418 installation instructions

Romik

Romik RAL-S 62804418 installation instructions

Thule 875xt HYDROGLIDE XT quick start guide

Thule

Thule 875xt HYDROGLIDE XT quick start guide

Black Horse Off Road TO20 installation instructions

Black Horse Off Road

Black Horse Off Road TO20 installation instructions

Front Runner LAMS001 manual

Front Runner

Front Runner LAMS001 manual

Thule Kit 1111 instructions

Thule

Thule Kit 1111 instructions

manuals.online logo
manuals.online logoBrands
  • About & Mission
  • Contact us
  • Privacy Policy
  • Terms and Conditions

Copyright 2025 Manuals.Online. All Rights Reserved.