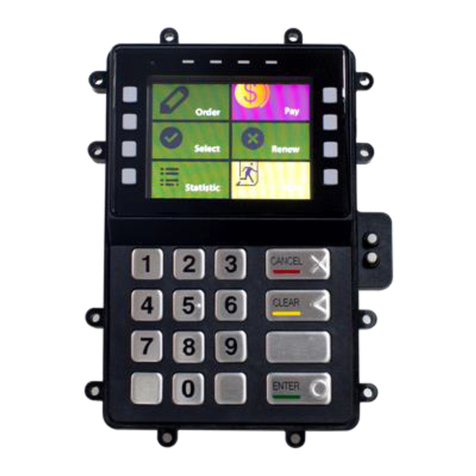
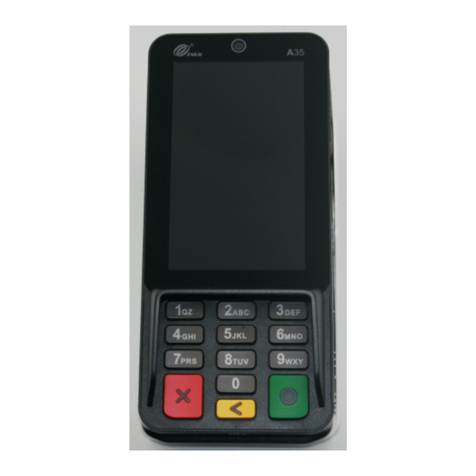
PC-EFTPOS PX328 User manual

Confidential Page 1 4/23/2008
Bankwest
PC-EFTPOS
Reference Guide
Version 1.04
April 2008
PX328
NPT-710

Confidential Page 2 4/23/2008
Table of Contents
PC-EFTPOS Contact Details.............................................................................................................................2
Introduction........................................................................................................................................................2
Using PC-EFTPOS with a POS.........................................................................................................................3
Bankwest Specific Details .................................................................................................................................3
Terminal Functionality Supported by Bankwest ...............................................................................................3
PC-EFTPOS Overview......................................................................................................................................4
PC-EFTPOS Hardware Installation...................................................................................................................5
PC-EFTPOS Software Installation ....................................................................................................................7
Function Key Menus..........................................................................................................................................8
Standalone Mode .............................................................................................................................................10
System Timeouts..............................................................................................................................................12
PC-EFTPOS Generated Response Codes........................................................................................................12
Bank Generated Response Codes ....................................................................................................................14
Argent Error Codes..........................................................................................................................................17
Settlement Receipts and Options.....................................................................................................................19
Receipt Layouts ...............................................................................................................................................21
Trouble Shooting .............................................................................................................................................23
Who to Contact for Help..................................................................................................................................25
PC-EFTPOS Contact Details
PC-EFTPOS office hours are Monday to Friday, 8:30am to 5:30pm EST.
PC-EFTPOS Reception: Phone (02) 9998 9800
PC-EFTPOS Website: http://www.pceftpos.com/
Support Website: http://support.pceftpos.com/
General Enquiries Email: [email protected]
Introduction
The PC-EFTPOS terminal allows online transactions to be processed for Debit Cards (Savings and Cheque
accounts), Credit Cards (Bankcard, Visa and MasterCard) and Charge Cards (American Express, Diners
Club and JCB)
The features of PC-EFTPOS include:
Process Purchases, Cashout, Refunds
Process Mail/Telephone Order Transactions
Integrate to POS
Standalone EFTPOS terminal (model NPT710 only)
PSTN, Argent ISDN or WAN communications

Confidential Page 3 4/23/2008
Using PC-EFTPOS with a POS
When PC-EFTPOS is configured to be used with a POS, all the EFTPOS functionality is initiated through
the POS. Consult your POS vendor on the operation of EFTPOS through your POS.
When configured in Standalone Lite Mode PC-EFTPOS offers a limited functionality standalone EFTPOS
pinpad. Depending on the model the pinpad can be configured to use the internal modem or an external
connection via a PC.
Bankwest Specific Details
Bankwest help Desk Number: 1800 621 344
Requires both terminal ID and merchant ID. Both are normally the same and are 7 digits.
Dial-up system uses TPDU headers. The default NII is 020
Terminal Functionality Supported by Bankwest
Functionality
EFTPOS Functionality:
Purchase
Cash Out
Refund
MOTO processing
Pre-Authorisation
Completion
Tipping
Training Mode
Balance Enquiry
Voucher Entry
Electronic Fallback (EFB)
EMV processing
Settlement Options
Settlement
Pre-Settlement
Last Settlement
Sub-Totals
Summary Totals
Shift Totals
Hardware Options:
PX318 Pinpad
PX328 Pinpad
PX368 Pinpad
NPT Terminal

Confidential Page 4 4/23/2008
PC-EFTPOS Overview
EFT-Client Settings:
EFTPOS Control Panel
Press the control panel button on the Client settings page (above) to activate the control panel.
COM port: that the pinpad is
plugged into.
Printer: (Not used when POS is
printing). NPT denotes using
the internal printer of NPT
Host Interface: This is
normally blank. It is the IP
address of the EFTSRV which
is normally on this machine.
NPT indicates to use the
internal NPT modem.
Tracing: This is enabled by
default and records information
on the hard-drive to help us
track down any issues.
Logon: Performs a
logon to the host
Reprint: reprints
last receipt
Diagnostics:
Provides reports on
s/w configuration
and version
Setup Page:
Enter terminal
details.
Press APPLY and
then 7410 as the
password

Confidential Page 5 4/23/2008
PC-EFTPOS Hardware Installation
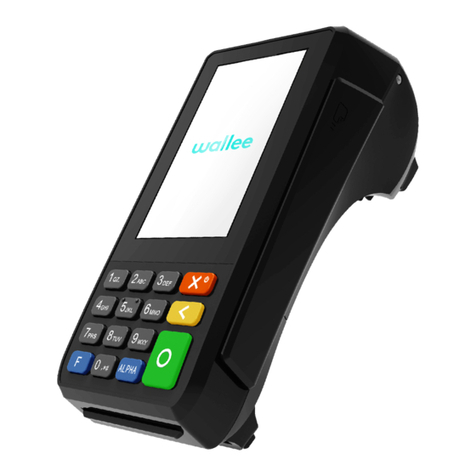
PX328 EFTPOS PINpad
Supplied Equipment with terminal:
EFTPOS PINpad
PINpad Power Supply
Installation Steps
1. Plug the supplied power adaptor into a
power point
2. Connect the power supplies DB9 connector
into the PC Com Port that will be used for the
PINpad
3. Plug the PINpad into the RJ45 connector on
the powered adaptor
NPT-710 EFTPOS Terminal
Supplied Equipment with terminal:
NPT-710 Terminal
Power brick and cord
POS connector cable (RS232 Cable)
Dial-up phone cable
Installation Steps
1. Power the terminal. Connect the brick and
cord then plug into a power point.
2. Connect the power adaptor to the power
socket on the back of the terminal
3. Connect the RS232 cable (supplied) to the
COM port on the back of the PC (normally
COM 1)
4. For a terminal integrated to a POS, connect
the other end of the RS232 cable to the RS232
connector on the back of the terminal. (The
slot next to the power supply)
5. If the terminal is using the internal modem,
plug the phone cable in to the phone connector
on the back of the terminal.
Hardware Installation

Confidential Page 6 4/23/2008
P66 Dialup Modem
Installation Steps
1. Power the P66 modem
2. Connect the power adaptor to the power socket on the back of the modem, and plug the cord into a
power socket.
3. Connect the P60 Load cable (modem cable) into the “PINpad” slot and the other end to the com port
on the pc.
4. Connect the Dial Up phone cable into the “Line” slot and the other end into the phone socket in the
wall.
Telstra Argent Terminal Adapter
Telstra use an ATA. Optus supply an MTA.
PC-EFTPOS connects to both devices the same way.
Argent Enhanced Terminal Adaptor Back-plate
Supplied Equipment:
P66 Modem
Power brick and cord
P60 Load Cable (Modem cable)
Dial Up Phone Cable
RS232 cable
connects to here
Argent does not need a P66 modem
The connection from ATA to PC is via a
standard 25-pin to 9-pin RS232 modem cable.
This is generally not supplied by Telstra and
will need to be purchased separately.
See back-plate of ATA for correct connection
of RS232 cable.
You will need your “POSAME” or “Argent
Terminal ID” when installing the Telstra ATA.
You can get this number from Telstra or your
bank. The Telstra Argent help desk number is
1300137100 option 4. Ensure you have your
Argent line number ready when you call.

Confidential Page 7 4/23/2008
PC-EFTPOS Software Installation
1. Install Terminal
See Hardware Installation for PINpad.
2. Install Software
If the POS does not have the latest PC-EFTPOS software installed, install the software from the PC-
EFTPOS installation CD, or the setup file available for download from our website.
Follow installation wizard closely.
3. Configure Terminal
To configure the terminal, either
Press FUNC, 7410, ENTER, 1 and then enter the Terminal ID (7 digits) and then 2, ENTER and
enter the Merchant ID (7 digits).
From the Client Control Panel, go to the setup page and enter the details and press APPLY. The
confirmation password is 2468
OR
Consult your POS provider to see how the details are entered into the POS
5. Bank Logon
Open the PC-EFTPOS EFTPOS Control Panel and click on the “Logon” button.
6. Ready to Go
If the previous steps were successful the PINpad is ready to use.
PC-EFTPOS Client icon

Confidential Page 8 4/23/2008
Function Key Menus
To access the functions, press the FUNC key on the pinpad when the terminal is in its IDLE mode. The
following function menus are available:
Function Number
Description
3824
View terminal config
7410
Configure Terminal
20493824
Protected Functions
11112222
Switch to standalone mode
11112223
Configure Standalone mode
11112224
Configure Idle Display
11112225
Show or Hide EFTPOS Menu for standalone Mode
11113333
TMS Logon
11113334
TMS Configuration
11114440
Show EFT-Client on POS
11114441
Show EFTSRV on POS
11114442
Show EMS-client on POS
11114455
N-TMS logon only
11114456
Set Date/Time
3824 - (Maintenance Functions - Display Only)
Option
Description
0
Display S/W Version
1
Display TID
2
Display MID
3
Display PPID
4
Tran$end ID
5
SAF and TIP count.
8
Display Dallas Version
9
Card Read Test
7410 - (Configuration Functions)
Option
Description
1
Configure TID
2
Configure MID
4
Tran$end ID
5
Comms Parameters
6
Header Type
7
Terminal Options (mostly for standalone mode. Eg refund)
8
Refund Password
9
Year
11113333 - Connect to TMS
This function connects the terminal to TMS.
11112222 - Invoke Stand-Alone Lite Mode.
This function will switch the terminal to/from standalone mode.

Confidential Page 9 4/23/2008
11112224 - Configure idle mode
Terminal display
Comment
FUNCTION
********
Press [FUNC] then enter [1] [1] [1] [1] [2] [2] [2] [4] and press [ENTER].
ENABLE IDLE
MODE?
If the operator selects [ENTER], the terminal will revert to Idle mode after a defined timeout
when in Standalone-lite mode.
ENABLE IDLE IMG
Pressing [ENTER] will allow the terminal to display its customer logo on the Idle screen.
DISPLAY THE DATE
Pressing [ENTER] will display the current date on the bottom line of the Idle display
DISPLAY THE TIME
Pressing [ENTER] will display the current time on the bottom line of the Idle display
IDLE TIMEOUT
-10 20 +10
This allows the setting of the Idle Timeout. The middle value indicates the current value (inc
seconds). Selecting the function key under -10 decreases the value by 10 and the function key
under the +10 increases the value by 10. Pressing [ENTER] selects the new value
11112222 - Invoke Stand-Alone Lite Mode.
This function will switch the terminal to/from standalone mode.
11113333 - Connect to TMS
This function connects the terminal to TMS.

Confidential Page 10 4/23/2008
Standalone Mode
The NPT710 and PX328 support a simple standalone mode.
Configure Standalone Mode
1. If using the internal NPT modem, ensure Dial-up parameters are set up.
2. Configure Standalone Mode options (Function 11112223), refer to table below.
3. Switch to Standalone Mode by pressing [Func] button then enter, followed by 11112222 then enter. The
terminal will prompt switch to standalone mode, press enter to accept.
Terminal display
Comment
The merchant press [FUNC].
FUNCTION
********
The merchant enters [1] [1] [1] [1] [2] [2] [2] [3] and press [ENTER].
INTERNAL PRINT?
Pressing [ENTER] will enable the terminal to use the internal printer. Pressing
[CLEAR] will allow the terminal to send receipts to the POS to be printed.
USE WINDOWS
DEFAULT PRINTER?
If the operator selected [ENTER] from above, this will prompt. Select [ENTER] if the
default Windows printer is to be used on the POS. Select [CLEAR] if the POS printer
is to be used for printing.
INTERNAL MODEM?
Pressing [ENTER] will enable the terminal to use the internal modem. Pressing
[CLEAR] will allow the terminal to use the POS to send messages to and from the
bank.
JOURNAL TXNS?
If both Internal Print and Internal modem were both selected, this option will be
displayed. It allows the terminal to journal the transactions to the EFT-Client on the
POS. It should only be selected if the POS will be connected and the Eft-client is
running.
PRINT SECOND
RECEIPT?
Selecting [ENTER] will allow the standalone mode to prompt for the printing of a
customer receipt after the merchant receipt has been printed. Selecting [CLEAR] will
only print the customer copy of debit card receipts.
SWIPE START
TRANSACTIONS?
Selecting [ENTER] will allow the standalone mode to start a transaction by the
customer swiping a card or selecting the option from the menu, Selecting [CLEAR]
will only allow a transaction to be started by the menu.

Confidential Page 11 4/23/2008
Using Standalone Mode
Terminal Menu Screens
The menu system represents the user interface for the terminal. The menu allows the operator to access all of
the terminal functionality without the need for a POS system.
The terminals functionality is grouped with similar functions and is accessed via menus. A menu contains up
to 3 menu items. Each of the menu items allows access to a function or sub menu. If the terminal as other
applications installed, these menus will follow on from EFTPOS
Key
Description
ENTER
Cycles clockwise through the menus.
CLEAR
Cycles anti-clockwise through the menus.
CANCEL
Exit from Totals Sub-menu
CHQ
Selects the menu item directly above the soft function key.
SAV
Selects the menu item directly above the soft function key.
CR
Selects the menu item directly above the soft function key.
The diagram below illustrates the terminal’s menu structure
EFTPOS
PURC CASH RFND
SETTLEMENT
SETL LAST SHFT
SUPERVISOR
INTI COPY

Confidential Page 12 4/23/2008
System Timeouts
The PIN pad will support the following 'time outs' for its PCEFTPOS Client and Network interface:
PINPAD
TIMEOUT
EVENT
3 seconds
PCEFTPOS Client ACK to PIN pad request
3 seconds
PCEFTPOS Client ACK to send Host message request
10 seconds
PCEFTPOS Client response to display request
10 seconds
PCEFTPOS Client response to print request
45 seconds
Host response to Financial Transaction requests
45 seconds
Host response to administration requests
45 seconds
Host response to Reversals and SAF uploads
60 seconds
Customer response to Card entry prompt
30 seconds
Customer response to Account prompt
60 seconds
Customer response to PIN entry prompt
180 seconds
PCEFTPOS Client response to insert slip request
120 seconds
PCEFTPOS Client response to verify signature request
PC-EFTPOS Generated Response Codes
CODE
DESCRIPTION
PINPAD DISPLAY
T0
PINpad is in the Idle mode awaiting a PCEFT Client request.
READY
T8
Invalid amount or zero amount (when not allowed) was
received from the PCEFT Client System
TRAN CANCELLED
SYSTEM ERROR
TE
No cash out allowed on credit card sales.
TRAN CANCELLED
SYSTEM ERROR
TF
The pinpad is not logged on.
TRAN CANCELLED
SYSTEM ERROR
TH
TI
The customer has exceeded the PINpad's time out limit.
TRAN CANCELLED
OPERATOR TIMEOUT
TL
The operator has cancelled the transaction because of an
invalid signature.
DECLINED
SIGNATURE ERROR
TM
The operator has cancelled the transaction when a card or PIN
or Account retry prompt is being displayed.
TRAN CANCELLED
BY OPERATOR
TN
Refund password wrong in standalone mode
TT
Store & Forward batch is full.
TERMINAL FULL
TU
PINpad has SAF transactions Pending and cannot be
reconfigured
TV
PINpad has a Reversal and cannot be re-configured

Confidential Page 13 4/23/2008
CODE
DESCRIPTION
PINPAD DISPLAY
TX
The PINpad is unable to process the request because it is not
ready or the Host has rejected a Reversal or Payment advice
transaction.
TRAN CANCELLED
CANNOT PROCESS
X0
No answer was received from the Bank for the transaction
request.
DECLINED
NO RESPONSE
X4
The PINpad has received a Host message with an incorrect
System Trace Audit Number (STAN).
TRAN CANCELLED
SYSTEM ERROR
X6
The PINpad has received a Host message with an incorrect
Terminal Id.
TRAN CANCELLED
SYSTEM ERROR
X7
The PINpad has received a message from the Bank that failed
its authentication.
TRAN CANCELLED
SYSTEM ERROR
X8
An error code has been returned from the Tran$end network -
'XX' represents the PDU error and 'YY' the PDU Code.
TRAN CANCELLED
SYSTEM ERROR
X9
A message with an incorrect length was received from the
network.
TRAN CANCELLED
SYSTEM ERROR
XA
A message with an incorrect address was received from the
network.
TRAN CANCELLED
SYSTEM ERROR
XB
A message with an incorrect Response Code has been received
from the Bank.
TRAN CANCELLED
SYSTEM ERROR
XC
A message with an incorrect Message Type has been received
from the Bank OR the message received is greater than 360
bytes.
TRAN CANCELLED
SYSTEM ERROR
XD
The luhn check on a manual card read has failed.
XE
The month of the expiry date on a manual card read is invalid
XG
The transaction is not supported by the pinpad.
XH
The tip adjust being performed cannot be found in the
terminals memory.
XK
The batch for tips is empty, and an attempt to adjust a tip was
made.
Z0
Modem error. There has been a general modem error in the
communications.
Z1
No Dial Tone. There is no phone line connected to the modem.
Z2
No Answer. The number that was dialled did not answer.
Z3
Line Busy. The number that was dialled was engaged.
Z4
No phone number programmed in terminal
Z5
Power fail. The terminal has power failed during processing
Z6
No Carrier. The modem lost carrier during processing
Z7
No EFT Server. The connection from the client to the
EFTSRV is missing.

Confidential Page 14 4/23/2008
Bank Generated Response Codes
*For assistance with the following codes, contact your Bank.
Response
Code
Description
PIN Pad Display
00
Approved or completed successfully
Approved
01
Declined-refer to card issuer
Transaction Declined
Please Call
02
Declined-issuer’s special conditions
Transaction Declined
Call Referral
03
Invalid sequence number
System Error
See Your Bank
04
Pick up card
Transaction Declined
See Your Bank
05
Do not honour
Transaction Declined
See Your Bank
07
Pick up card-special conditions
Transaction Declined
See Your Bank
08
Honour with identification
Sign receipt
09
Request in progress
Declined
Error in Processing
10
Approved for partial amount
Approved
11
Approved VIP
Approved
12
Invalid Transaction
Transaction Declined
Invalid Transaction
13
Invalid Amount
Transaction Declined
Invalid Amount
14
Invalid card number (no such number)
Transaction Declined
Card Not Valid
15
No such issuer
Transaction Declined
Card Not Valid
16
Approved - update track 3
Approved
19
Re-enter transaction
Transaction Declined
Retry Transaction
21
No action taken
(For a request response)
Transaction Declined
No Action taken
(For a reversal response)
Approved
22
Suspected malfunction
System error
23
Unacceptable transaction fee
Transaction Declined
See Your Bank
25
Unable to locate record on file
Transaction Declined
See Your Bank
30
Format Error
Transaction Declined
Format Error
31
Bank not supported by switch
Transaction Declined
Card Not Valid
32
Completed partially - not supported
Transaction Declined
See Your Bank
33
Expired card
Transaction Declined
Card Expired
34
Suspected fraud
Transaction Declined
Card Error
35
Card acceptor contract acquirer
Transaction Declined
Card Error
36
Restricted card
Transaction Declined
Card Error

Confidential Page 15 4/23/2008
Response
Code
Description
PIN Pad Display
37
Card acceptor call acquirer security
Transaction Declined
See Your Bank
38
Allowable PIN retries exceeded
Transaction Declined
PIN tries exceeded
39
No credit account
Transaction Declined
Invalid Account
40
Requested function not supported
Transaction Declined
Invalid Transaction
41
Lost card
Transaction Declined
See Your Bank
42
No universal account
Transaction Declined
Invalid Account
43
Stolen card
Transaction Declined
See Your Bank
44
No investment account
Transaction Declined
Invalid Account
51
Not sufficient funds
Transaction Declined
See Your Bank
52
No cheque account
Transaction Declined
Invalid Account
53
No savings account
Transaction Declined
Invalid Account
54
Expired card
Transaction Declined
Card Expired
55
Incorrect PIN
Transaction Declined
PIN Incorrect
56
No card record
Transaction Declined
Invalid Card
57
Transaction not permitted to cardholder
Transaction Declined
Invalid Transaction
58
Transaction not permitted to terminal
Transaction Declined
Invalid Transaction
59
Suspected fraud
Transaction Declined
See Your Bank
61
Exceeds withdrawal amount limit
Transaction Declined
Exceeds Limit
62
Restricted Card
Transaction Declined
See Your Bank
64
Original amount incorrect
Transaction Declined
Invalid Amount
65
Exceeds withdrawal frequency limit
Transaction Declined
See Your Bank
66
Card acceptor call acquirer’s sec dept.
Transaction Declined
See Your Bank
67
No card record
Transaction Declined
Invalid Card
68
Response received too late
Transaction Declined
No Response
72
Pre Auth Completion amount too large (> 115% of orig pre auth)
Declined
73
Completion declined pre auth has expired
Declined
74
Completion does not match a pre auth held on file
Declined
75
Allowable number of PIN tries exceeded
Transaction Declined
PIN tries exceeded

Confidential Page 16 4/23/2008
Response
Code
Description
PIN Pad Display
76
Invalid product codes
Transaction Declined
See Your Bank
77
Reconcile error
Transaction Declined
See Your Bank
78
Trace number not found
Transaction Declined
See Your Bank
79
Batch error
Transaction Declined
See Your Bank
80
Batch number not found
Transaction Declined
See Your Bank
81
CVV Validation Crypto error
Transaction Declined
System Error
82
Invalid CVV on card
Transaction Declined
Card Not Valid
83
Reserved
Transaction Declined
See Your Bank
85
Batch not found
Transaction Declined
See Your Bank
88
AMEX Only
Transaction Declined
Contact AMEX
89
Bad terminal ID
Transaction Declined
See Your Bank
91
Issuer or switch is inoperative
Transaction Declined
Link Down
93
Transaction can not be completed
Transaction Declined
System Error
94
Duplicate transmission
Transaction Declined
System Error
95
Reconcile error
Transaction Declined
System Error
96
System malfunction
Transaction Declined
System Error
98
MAC error
Transaction Declined
System Error

Confidential Page 17 4/23/2008
Argent Error Codes
Argent Basics
The seven segment display on the Argent Terminal Adaptor will light up and will move
through a sequence of numbers on start-up. The numbers displayed will be steady when
the call is progressing and the configuration downloading normally on the D-channel during
start-up. The display will flash continuously if call progress encounters an error condition
during start-up.
The table below provides a list of “start-up status codes” that the ATA will display in order of
sequence when the power is being applied, the call is being set up and the configuration is being
downloaded by the Argent Network Management System (NMS).
Argent Error Codes
Display Interpretation
Building Bars..........Program decompressing into memory
Steady 1 .................Power-on test executing. Dot will pulse on/off
Steady 2 ................D-channel interface active for EFTPOS
Steady 3 ................Pre-configuration in progress, learning identity
Steady 4.................Remote management in progress, configuration
Steady 5 ................Software download in progress
Steady 6 ................Reserved
Steady 7 ................Reserved
Steady 8 ................Reserved
Steady 9 ................Reserved
Steady 0 ................Reserved
Steady dot..............Normal Operation (no fault)
ATA Seven Segment Display Start-up Status Codes
Display Interpretation
Flashing 1...............Power up test fails
Flashing 2...............ISDN connection down
Flashing 3..............No carrier on EFTPOS port
Flashing 4..............Data overrun/underrun on Serial V.24 port
Flashing 5 .............No stations responding to polls on EFTPOS port
Flashing 6 .............Last call attempt failed-Channel
(X.25 fault or Argent server or NMS unavailable)
Flashing 7 .............Not applicable
Flashing 8 .............NMS has no pre-configuration to download
Flashing 9 .............NMS main configuration failure
Flashing 0 .............Not applicable

Confidential Page 18 4/23/2008
CLNP error codes
CLNP error codes are reported as XX/YY where XX =Information code and YY=Error code
as below:
Info Code Meaning
0 Unspecified
1 Validation failure on incoming Terminal message
2 Not Supported
3 Reserved
4 Reserved
5 Validation failure on sign-on command
6 Successful sign-on
7 Validation failure on sign-off command
8 Successful sign-off
Error Code Meaning
0 No Error
1 Unknown terminal ID
2 Invalid AME
3 Not Supported
4 Not Supported
5 Unknown Host reference
6 (Reserved)
7 Not Supported
8 Destination unreachable
9 Not Supported
10 Not Supported
11-16 (Reserved)
17 Not Supported
18 Not Supported
19 (Reserved)
20 Not Supported
21 Not Supported
22 Undefined Symbolic Host Address
23 Invalid Station for Terminal
24 Invalid Command from Terminal
25 Not Supported
26 Not Supported
27-29 (Reserved)
30 No Data in PDU
31 Not Supported
32 Unknown Host
33 Not Supported

Confidential Page 19 4/23/2008
Settlement Receipts and Options
Pre-Settlement Receipt
------------------------
MERCHANT NAME
MERCHANT ADDRESS 1
MERCHANT ADDRESS 2
TERMINAL ID xxxxxxxx
Terminal ID of terminal
SEQUENCE NO 999999
STAN
PRE SETTLEMENT AS AT
DD/MM/YY HH:MM 999999
PRE SETTLEMENT SUMMARY
CREDIT CARD
Bank totals for credit and Debit
Purch nnn $$$$$$$.cc
Ref nnn $$$$$$$.cc
nnn $$$$$$$.cc
DEBIT CARD (chq/sav)
Purch nnn $$$$$$$.cc
Ref nnn $$$$$$$.cc
Cash nnn $$$$$$$.cc
nnn $$$$$$$.cc
TOTALS
Purch nnn $$$$$$$.cc
Ref nnn $$$$$$$.cc
Cash nnn $$$$$$$.cc
nnn $$$$$$$.cc
Not For Value Totals
Totals for non bank affiliated cards.
CREDIT CARD
Auth nnn $$$$$$$.cc
DINERS
Purch nnn $$$$$$$.cc
Ref nnn $$$$$$$.cc
AMEX
Purch nnn $$$$$$$.cc
Ref nnn $$$$$$$.cc
JCB
Purch nnn $$$$$$$.cc
Ref nnn $$$$$$$.cc
GREETING TEXT 1
GREETING TEXT 2
------------------------

Confidential Page 20 4/23/2008
Settlement Receipt
------------------------
MERCHANT NAME
MERCHANT ADDRESS 1
MERCHANT ADDRESS 2
TERMINAL ID xxxxxxxx
Terminal ID of terminal
SEQUENCE NO 999999
STAN
PRE SETTLEMENT AS AT
DD/MM/YY HH:MM 999999
PRE SETTLEMENT SUMMARY
CREDIT CARD
Purch nnn $$$$$$$.cc
Ref nnn $$$$$$$.cc
nnn $$$$$$$.cc
DEBIT CARD (chq/sav)
Purch nnn $$$$$$$.cc
Ref nnn $$$$$$$.cc
Cash nnn $$$$$$$.cc
nnn $$$$$$$.cc
TOTALS
Purch nnn $$$$$$$.cc
Ref nnn $$$$$$$.cc
Cash nnn $$$$$$$.cc
nnn $$$$$$$.cc
Not For Value Totals
CREDIT CARD
Auth nnn $$$$$$$.cc
DINERS
Purch nnn $$$$$$$.cc
Ref nnn $$$$$$$.cc
AMEX
Purch nnn $$$$$$$.cc
Ref nnn $$$$$$$.cc
JCB
Purch nnn $$$$$$$.cc
Ref nnn $$$$$$$.cc
GREETING TEXT 1
GREETING TEXT 2
------------------------
Other manuals for PX328
2
This manual suits for next models
1
Table of contents
Other PC-EFTPOS Payment Terminal manuals
