Pentax OS-H4 User manual

- 1 -
WATER BOTTLE ASSEMBLY OS-H4
1. INTENDED USE
The PENTAX water bottle assembly, OS-H4 is- intended to be used with compatible PENTAX flexible endoscopes and
PENTAX air sources (video processor, light source, etc.) for delivery of air and/or water during endoscopic procedures.
NEVER use the water bottle for any purpose other than that for which it has been designed.
Since endoscopic accessories, including the water bottle are designed to be used in conjunction with other medical devices,
the effectiveness of an accessory especially a reusable one, is dependent upon a number of factors, including the condition of
the endoscope and the care and maintenance of the accessory and related devices.
WARNING:
The water bottle assembly identified in this manual is a reusable medical device. Since it is packaged nonsterile, it must
be sterilized BEFORE initial patient use. Subsequently, it should be subjected to an appropriate cleaning and sterilization
process at least on a daily basis or more frequently depending upon the patient and/or type of endoscopic procedure.
2. NOMENCLATURE
NOTE:
If the water bottle assembly has been handled roughly, the water feeding tube inside the hose may be damaged or
disconnected at the A/W connector for the endoscope. To test, remove the cap and using a syringe, inject water into the
water feeding stem. If the water comes out of both the center hole of the A/W connector and the series of holes around
the center hole, the water feeding tube is disconnected. Use another water bottle assembly.
3. DIRECTIONS FOR USE
1) Fill the bottle approximately 2/3 full with sterile water.
2) Screw the bottle cap snugly onto the bottle.
NOTE:
Do NOT use the new PENTAX OS-H4 water bottle cap with the older OS-H2 water container/bottle. Although the cap
may appear to fit onto the bottle, air may escape resulting in insufficient pressure and flow of air and water during the
endoscopic procedure. Both the PENTAX water bottle cap and bottle (container) are identified by their appropriate
model designation. Ensure that an OS-H4 cap is used only with the OS-H4 water container/bottle.
Do NOT over-tighten the bottle cap. Over-tightening can cause the bottle cap to break.
3) Set the Air/Water - Drain lever to A/W position.
4) Insert the air pipe stem into the processor or light source and press until the water bottle ‘clicks’ into position.
A/W Hose
A/W Connector
Holder
Air Pipe Stem
Water Bottle Cap
Water Feeding Stem
Bottle
Air/Water-
Drain Lever
A/W
DRAIN

- 2 -
NOTE:
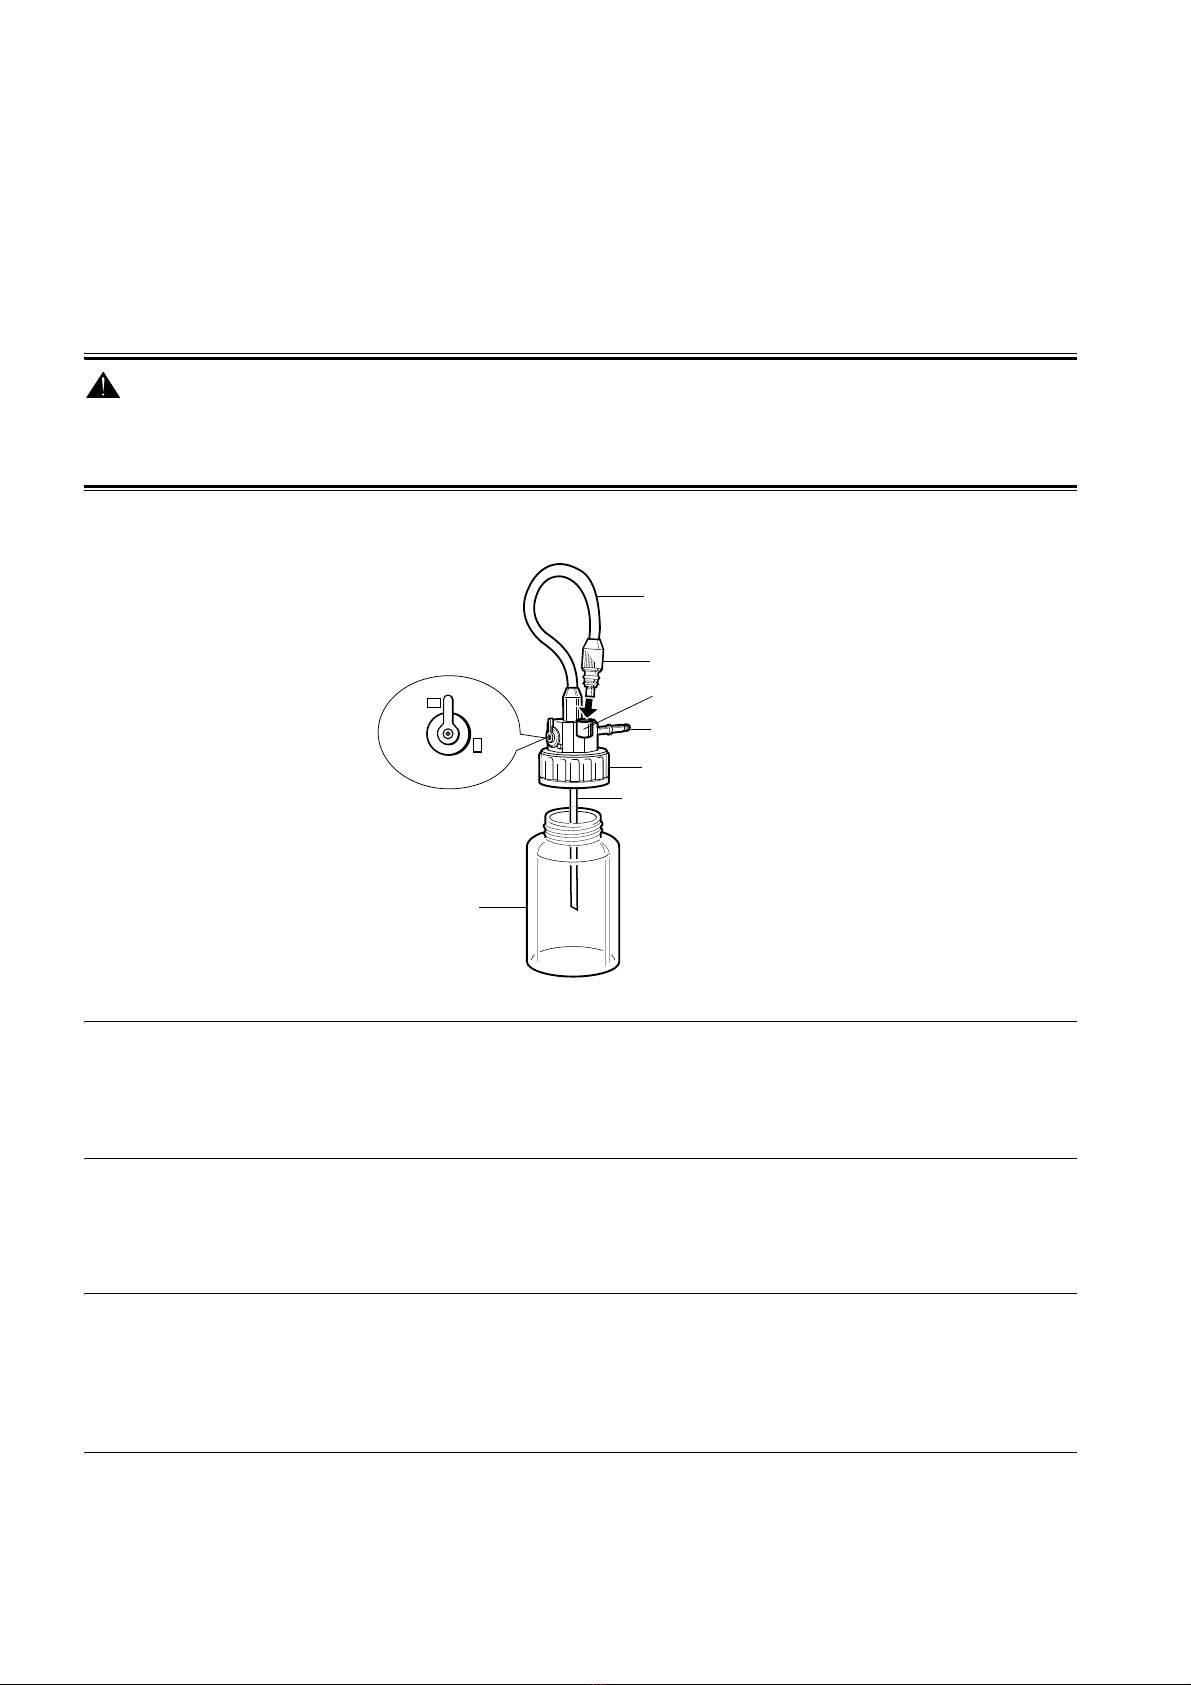
Do NOT press the air pipe stem too forcefully. Rough handling may cause water to leak onto/into the video processor or
light source.
5) Insert the A/W connector into the holder on the bottle cap until the endoscope is connected.
NOTE:
Always disconnect the water bottle assembly before moving the video proccessor (or light source) into a position not
common to normal use. Always disconnect the water bottle before packing the unit for shipment.
6) Properly inspect and connect the endoscope to the video processor (or light source) as per the detailed
instructions supplied with each device.
7) Connect the A/W connector of the water bottle directly to the Air/Water port (receptacle) located on the
endoscope’s umbilical connector.
8) Proceed to inspect and test the endoscope’s air and water delivery functions as per the endoscope owner’s manual.
NOTE:
When removing the Air/Water hose from the endoscope, always grasp the metal A/W connecter to avoid damage or
disconnection of the rubber tubing.
4. CARE AFTER USE
To maintain maximum performance and a patient safe device, proper care after use is important. Each water bottle assembly
should be cleaned and sterilized at least on a daily basis or more frequently depending upon the patient and/or type of
endoscopic procedure.
As with all endoscopic accessories, prior to sterilization, entire water bottle assembly should be thoroughly cleaned. Failure
to do so could result in incomplete or ineffective sterilization.
NOTE:
Take care in handling the water bottle. DO NOT carry the bottle assembly by the A/W Connector or the hose. When the
bottle cap has been removed from the bottle, be careful in handling the water feeding stem.
1) Immediately after use, the entire water bottle assembly (bottle, cap and tubing) should be washed with fresh
detergent solution and a dampened gauze or scrub brush. Complete immersion in a detergent solution should be
used for soiled items. Internal surfaces of the water bottle assembly may be exposed to the detergent by injecting
the detergent into the air pipe stem using a syringe. The A/W-Drain lever should be set to the A/W position to
ensure contact with all internal tubes.
2) Ultrasonic cleaning of the entire water bottle assembly is recommended to access difficult to reach areas. Use an
operating frequency of 44 kHz ±6% or higher for a period of at least 5 minutes.
3) After washing with the cleaning solution, all surface areas of the water bottle assembly should be thoroughly
rinsed and dried. Gauze or lint-free cloth can be used to wipe dry most surfaces. Compressed air and 70% alcohol
may be used to facilitate drying of hard to reach areas.
4) After cleaning and thoroughly rinsing, the water bottle assembly can be sterilized. Before any attempt is made to
sterilize the water bottle assembly, ensure the eleaning process has been completed and all items are thoroughly
dry. For sterilization, autoclaving can be performed.
NOTE:
The sterilization parameters are only valid with sterilization equipment that is properly maintained and calibrated. Use
appropriate heat process indicators and/or biological monitors as recommended by the manufacturer of the sterilizer.
For more detail, refer to the manual supplied with the PENTAX endoscope.
Cooling
Steam
Sterilization
Rinse
and Dry
Ultrasonic
Cleaning
Manual
Pre-Cleaning

- 3 -
Steam Sterilization (Autoclaving)
PENTAX water bottle assemblies, Model OS-H4 have been designed to withstand high-pressure steam sterilization
procedures providing the following parameters are adhered to:
During steam sterilization, ensure that the cap and tubing section have been removed from the water bottle container.
Make sure that the drain lever on the water bottle cap has been set on the A/W position (upright).
Sterilizer Type: Prevacuum
Temperature: 132 ~ 135 °C (270 ~ 275 °F)
Time: 5 minutes

HOYA Corporation
2-7-5 Naka-Ochiai, Shinjuku-ku,
Tokyo 161-8525, Japan
Explanations of the symbols used in the
operating manual, on the devices or on the
packagings.
Symbol for "MANUFACTURER"
Symbol for "DATE OF MANUFACTURE"
Symbol for "AUTHORISED
REPRESENTATIVE"
Symbol for "SERIAL NUMBER"
In the case of endoscopes the serial number
is either on the control body or the light
guide connector. The serial number always
has 6 digits preceded by a letter.
Symbol for "BATCH CODE"
Our representative in your area:
Specifications are subject to change without
notice and without any obligation on the part
of the manufacturer.
Printed in Germany.
HOYA Corporation PENTAX Life Care Tokyo Office
3-16-3 Higashi-Ikebukuro, Toshima-ku,
Tokyo 170-0013, Japan
Tel.: ++81-3-5953 2592
Fax: ++81-3-5953 2595
PENTAX Nederland B.V.
Lage Mosten 35,
4822 NK Breda, Netherlands
Tel.: ++31-76-531 30 31
Fax: ++31-76-531 30 00
SIMMEDICA
Sistemas Integrales
de Medicina S.A.
Avenida del Sistema Solar, 25
28830 San Fernando
de Henares (Madrid), Espagne
Tel.: ++34-91 301 62 40
Fax: ++34-91 751 31 15
PENTAX France Life Care S.A.S.
112, quai de Bezons
B.P. 204
95106 ARGENTEUIL CEDEX, France
Tel.: ++33-1-30 25 75 75
Fax: ++33-1-30 25 75 76
PENTAX U.K. Ltd
Pentax House, Heron Drive,
Langley SLOUGH SL3 8PN, Great Britain
Tel.: ++44-1-75 37 92 792
Fax: ++44-1-75 37 92 794
PENTAX Europe GmbH
Julius-Vosseler-Strasse 104,
22527 Hamburg, Deutschland
Tel.: ++49-40-56 192 0
Fax: ++49-40-56 042 13
PENTAX Italia S.r.l.
Via Dione Cassio, 15
20138 MILANO, Italy
Tel.: ++39-02-509958.1
Fax: ++39-02-50995860
SN
LCPM 04/2012/10/351012XX
R19
0123
Other Pentax Medical Equipment manuals