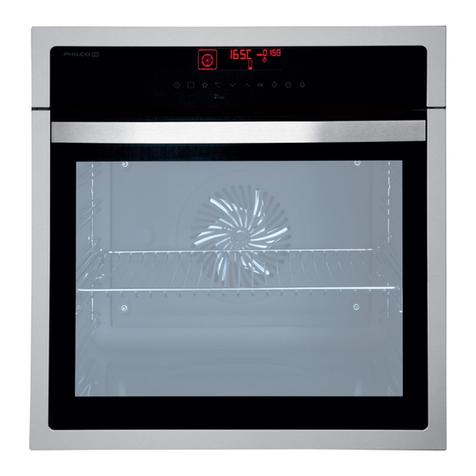
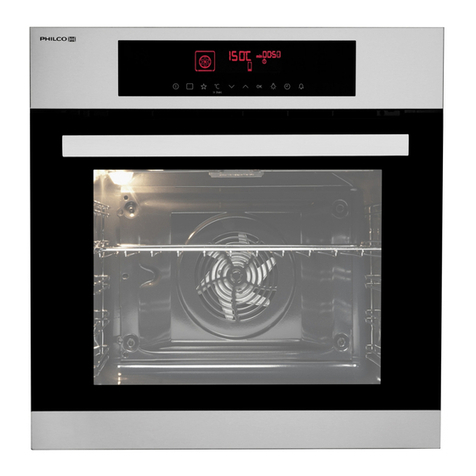
Philco POB 7810 CBX User manual

Built-in Oven
OWNER’S MANUAL
POB 7810 CBX

Dear customer,
Thank you for buying a PHILCO brand product. So that your appliance serves you well, please read all
the instructions in this user’s manual.
Copyright © 2020, Fast ČR, a. s. Revision 02/2020
Thank you for choosing this product.
This User Manual contains important safety information and instructions on the operation and maintenance
of your appliance.
Please take the time to read this User Manual before using your appliance and keep this book for future
reference.
Icon Type Meaning
WARNING Serious injury or death risk
RISK OF ELECTRIC SHOCK Dangerous voltage risk
FIRE Warning; Risk of re / ammable materials
CAUTION Injury or property damage risk
IMPORTANT / NOTE Operating the system correctly

Copyright © 2020, Fast ČR, a. s. Revision 02/2020
EN - 1
CONTENTS
1. SAFETY INSTRUCTIONS................................................................................................................................2
1.1 General Safety Warnings........................................................................................................................................................... 2
1.2 Installation Warnings .................................................................................................................................................................4
1.3 During Use..................................................................................................................................................................................... 5
1.4 During Cleaning and Maintenance ......................................................................................................................................6
2. INSTALLATION AND PREPARATION FOR USE..............................................................................................8
2.1 Installation instructions ............................................................................................................................................................ 8
2.2 Installation of the Oven ............................................................................................................................................................8
2.3 Electrical Connection and Safety.........................................................................................................................................10
3. PRODUCT FEATURES ..................................................................................................................................11
4. USE OF PRODUCT........................................................................................................................................12
4.1 Oven Controls.............................................................................................................................................................................12
4.2 Cooking Table.............................................................................................................................................................................14
4.3 Use of the Smart LCD Control Unit .....................................................................................................................................14
4.4 Accessories ..................................................................................................................................................................................32
5. CLEANING AND MAINTENANCE.................................................................................................................38
5.1 Cleaning........................................................................................................................................................................................38
5.2 Maintenance...............................................................................................................................................................................41
6. TROUBLESHOOTING & TRANSPORT ..........................................................................................................42
6.1 Troubleshooting ........................................................................................................................................................................42
6.2 Transport ......................................................................................................................................................................................42
7. TECHNICAL SPECIFICATIONS .....................................................................................................................43

Copyright © 2020, Fast ČR, a. s. Revision 02/2020
EN - 2
1. SAFETY INSTRUCTIONS
• Carefullyreadallinstructionsbeforeusingyourapplianceand
keep them in a convenient place for reference when necessary.
• Thismanualhasbeenpreparedformorethanonemodel
therefore your appliance may not have some of the features
described within. For this reason, it is important to pay particular
attention to any gures whilst reading the operating manual.
1.1 General Safety Warnings
• Thisappliancecanbeusedbychildrenagedfrom8yearsand
above and by persons with reduced physical, sensory or mental
capabilities or lack of experience and knowledge if they have
been given supervision or instruction concerning use of the
appliance in a safe way and understand the hazards involved.
Children should not play with the appliance. Cleaning and
user maintenance should not be made by children without
supervision.
WARNING: The appliance and its accessible parts become
hot during use. Care should be taken to avoid touching heating
elements. Keep children less than 8 years of age away unless they
are continually supervised.
WARNING: Danger of re: Do not store items on the cooking
surfaces.
WARNING: If the surface is cracked, switch o the appliance
to avoid the possibility of electric shock.
• Donotoperatetheappliancewithanexternaltimerorseparate
remote-control system.
• Duringusetheappliancewillgethot.Careshouldbetakento
avoid touching heating elements inside the oven.

Copyright © 2020, Fast ČR, a. s. Revision 02/2020
EN - 3
• Handlesmaygethotafterashortperiodduringuse.
• Donotuseharshabrasivecleanersorscourerstocleantheoven
door glass and other surface. They can scratch the surfaces which
may result in shattering of the door glass or damage to surfaces.
• Donotusesteamcleanersforcleaningtheappliance.
WARNING: To avoid the possibility of electric shock, make
sure that the appliance is switched o before replacing the lamp.
CAUTION: Accessible parts may be hot when cooking or
grilling. Keep young children away from the appliance when it is in
use.
• Yourapplianceisproducedinaccordancewithallapplicablelocal
and international standards and regulations.
• Maintenanceandrepairworkshouldonlybecarriedoutby
authorised service technicians. Installation and repair work that
is carried out by unauthorised technicians may be dangerous. Do
not alter or modify the specications of the appliance in any way.
Inappropriate hob guards can cause accidents.
• Beforeconnectingyourappliance,makesurethatthelocal
distribution conditions (nature of the gas and gas pressure or
electricity voltage and frequency) and the specications of the
appliance are compatible. The specications for this appliance are
stated on the label.
CAUTION: This appliance is designed only for cooking food and
is intended for indoor domestic household use only. It should not
be used for any other purpose or in any other application, such as
for non-domestic use, in a commercial environment or for heating
a room.

Copyright © 2020, Fast ČR, a. s. Revision 02/2020
EN - 4
• Donotusetheovendoorhandlestoliftormovetheappliance.
• Allpossiblemeasureshavebeentakentoensureyoursafety.
Since the glass may break, care should be taken while cleaning
to avoid scratching. Avoid hitting or knocking the glass with
accessories.
• Makesurethatthesupplycordisnottrappedordamagedduring
installation. If the supply cord is damaged, it must be replaced by
the manufacturer, its service agent or similarly qualied persons
in order to prevent a hazard.
• Donotletchildrenclimbontheovendoororsitonitwhileitis
open.
• Pleasekeepchildrenandanimalsawayfromthisappliance.
1.2 Installation Warnings
• Donotoperatetheappliancebeforeitisfullyinstalled.
• Theappliancemustbeinstalledbyanauthorisedtechnician.The
manufacturer is not responsible for any damage that might be
caused by defective placement and installation by unauthorised
people.
• Whentheapplianceisunpacked,makesurethatitishasnot
been damaged during transportation. In case of any defect do
not use the appliance and contact a qualied service agent
immediately. The materials used for packaging (nylon, staplers,
Styrofoam, etc.) may be harmful to children and they should be
collected and removed immediately.
• Protectyourappliancefromtheatmosphere.Donotexposeitto
eects such as sun, rain, snow, dust or excessive humidity.
• Anymaterials(i.e.cabinets)aroundtheappliancemustbeableto
withstand a minimum temperature of 100°C.
• Theappliancemustnotbeinstalledbehindadecorativedoor,in
order to avoid overheating.

Copyright © 2020, Fast ČR, a. s. Revision 02/2020
EN - 5
1.3 During Use
• Whenyourstuseyourovenyoumaynoticeaslightsmell.Thisis
perfectly normal and is caused by the insulation materials on the
heater elements. We suggest that, before using your oven for the
rst time, you leave it empty and set it at maximum temperature
for 45 minutes. Make sure that the environment in which the
product is installed is well ventilated.
• Takecarewhenopeningtheovendoorduringoraftercooking.
The hot steam from the oven may cause burns.
• Donotputammableorcombustiblematerialsinornearthe
appliance when it is operating.
• Alwaysuseovenglovestoremoveandreplacefoodintheoven.
• Undernocircumstancesshouldtheovenbelinedwith
aluminium foil as overheating may occur.
• Donotplacedishesorbakingtraysdirectlyontothebaseofthe
oven whilst cooking. The base becomes very hot and damage
may be caused to the product.
Do not leave the oven unattended while cooking with
solid or liquid oils. They may catch re under extreme heating
conditions.Neverpourwaterontoamesthatarecausedbyoil,
instead switch the oven o and cover the pan with its lid or a re
blanket.
• Iftheproductwillnotbeusedforalongperiodoftime,turnthe
main control switch o.
• Makesuretheappliancecontrolknobsarealwaysinthe“0”(stop)
position when it is not in use.
• Thetraysinclinewhenpulledout.Takecarenottospillordrop
hot food while removing it from the ovens.
• Donotplaceanythingontheovendoorwhenitisopen.This
could unbalance the oven or damage the door.

Copyright © 2020, Fast ČR, a. s. Revision 02/2020
EN - 6
• Donothangtowels,dishclothsorclothesfromtheapplianceor
its handles.
1.4 During Cleaning and Maintenance
• Makesurethatyourapplianceisturnedoatthemainsbefore
carrying out any cleaning or maintenance operations.
• Donotremovethecontrolknobstocleanthecontrolpanel.
• Tomaintaintheeciencyandsafetyofyourappliance,we
recommend you always use original spare parts and to call our
authorised service agents in case of need.
CE Declaration of conformity
We declare that our products meet the applicable
European Directives, Decisions and Regulations and
the requirements listed in the standards referenced.
This appliance has been designed to be used only for home
cooking. Any other use (such as heating a room) is improper and
dangerous.
Theoperatinginstructionsapplytoseveralmodels.Youmay
notice dierences between these instructions and your model.

Copyright © 2020, Fast ČR, a. s. Revision 02/2020
EN - 7
Disposal of your old machineThis
This symbol on the product or on its packaging indicates
that this product should not be treated as household
waste. Instead it should be handed over to the applicable
collection point for the recycling of electrical and
electronicequipment.Byensuringthisproductisdisposedof
correctly, you will help prevent potential negative consequences
for the environment and human health, which could otherwise be
caused by inappropriate waste handling of this product. For more
detailed information about recycling of this product, please
contactyourlocalcityoce,yourhouseholdwastedisposal
service or the retailer who you purchased this product from.

Copyright © 2020, Fast ČR, a. s. Revision 02/2020
EN - 8
2. INSTALLATION AND PREPARATION FOR USE
WARNING: This appliance must be installed by an authorised service person or qualied technician,
according to the instructions in this guide and in compliance with the current local regulations.
• Incorrectinstallationmaycauseharmanddamage,forwhichthemanufactureracceptsnoresponsibility
and the warranty will not be valid.
• Priortoinstallation,ensurethatthelocaldistributionconditions(electricityvoltageandfrequency)andthe
adjustments of the appliance are compatible. The adjustment conditions for this appliance are stated on
the label.
• The laws, ordinances, directives and standards in force in the country of use are to be followed (safety
regulations, proper recycling in accordance with the regulations, etc.).
2.1 Installation instructions
General instructions
• Afterremovingthepackagingmaterialfromtheapplianceanditsaccessories,ensurethattheappliance
is not damaged. If you suspect any damage, do not use it and contact an authorised service person or
qualied technician immediately.
• Makesurethattherearenoammableorcombustiblematerialsintheclosevicinity,suchascurtains,oil,
cloth etc. which may catch re.
• Theworktopandfurnituresurroundingtheappliancemustbemadeofmaterialsresistanttotemperatures
above 100°C.
• The appliance should not be installed directly above a dishwasher, fridge, freezer, washing machine or
clothes dryer.
2.2 Installation of the Oven
The appliances are supplied with installation kits and can be installed in a worktop with the appropriate
dimensions. The dimensions for hob and oven installation are given below.
A (mm) 557 min./max. F (mm) 560/580
B (mm) 550 min. G (mm) 555
C (mm) 595 min. H/I (mm) 600/590
D (mm) 575 min. J/K (mm) 5/10
E (mm) 574

Copyright © 2020, Fast ČR, a. s. Revision 02/2020
EN - 9
)
$ %
&
&
'
(
*
+
-
Installation under a worktop
)
$%
&
&
'
(
*
,
-
.
Installation in a wall unit

Copyright © 2020, Fast ČR, a. s. Revision 02/2020
EN - 10
After making the electrical connections, insert the oven into the cabinet by pushing it forward. Open the oven
door and insert 2 screws in the holes located on the oven frame. While the product frame touches the wooden
surface of the cabinet, tighten the screws.
2.3 Electrical Connection and Safety
WARNING: The electrical connection of this appliance should be carried out by an authorised service
person or qualied electrician, according to the instructions in this guide and in compliance with the
current local regulations.
WARNING: THE APPLIANCE MUST BE EARTHED.
• Beforeconnectingtheappliancetothepowersupply,thevoltageratingoftheappliance(stampedonthe
appliance identication plate) must be checked for correspondence to the available mains supply voltage,
and the mains electric wiring should be capable of handling the appliance’s power rating (also indicated on
the identication plate).
• During installation, please ensurethatisolatedcablesareused.An incorrect connection could damage
your appliance. If the mains cable is damaged and needs to be replaced this should be done by a qualied
personnel.
• Donotuseadaptors,multiplesocketsand/orextensionleads.
• Thesupplycordshouldbekeptawayfromhotpartsoftheapplianceandmustnotbebentorcompressed.
Otherwise the cord may be damaged, causing a short circuit.
• If theapplianceisnotconnectedtothemainswithaplug,a all-pole disconnector (with at least 3 mm
contact spacing) must be used in order to meet the safety regulations.
• Theapplianceisdesignedforapowersupplyof220-240V~and380-415V3N~.Ifyoursupplyisdierent,
contact the authorised service person or a qualied electrician.
• Thepowercable(H05VV-F)mustbelongenoughtobeconnectedtotheappliance,eveniftheappliance
stands on the front of its cabinet.
• Ensureallconnectionsareadequatelytightened.
• Fixthesupplycableinthecableclampandthenclosethecover.
• Theterminalboxconnectionisplacedontheterminalbox.
Blue
Yellow+GreenBrown

Copyright © 2020, Fast ČR, a. s. Revision 02/2020
EN - 11
3. PRODUCT FEATURES
Important: Specications for the product vary and the appearance of your appliance may dier from
that shown in the gures below.
List of Components
1.ControlPanel
2.OvenDoorHandle
3. Oven Door
Control Panel
1 2 3
1. Control knob
2. LCD display
3. Control knob

Copyright © 2020, Fast ČR, a. s. Revision 02/2020
EN - 12
4. USE OF PRODUCT
4.1 Oven Controls
Left knob
• Longpush:Switchon/o
• Shortpush:Pausecooking
• Turnright:Keylock
• Turnleft:Undo/Gotopreviousmenu
Right knob
• Push:Select/Startcooking
• Turnright:Menunavigation/Increasetemperature
• Turnleft:Menunavigation/Decreasetemperature
Oven Functions
* The functions of your oven may be dierent due to the model of your product.
Oven Lamp: Only the oven light will switch on. It will remain on for the duration of
the cooking function.
Defrosting: The oven’s warning lights will switch on and the fan will start to operate.
To use the defrost function, place your frozen food in the oven on a shelf in the third
slot from the bottom. It is recommended that you place an oven tray under the
defrosting food, to catch the water accumulated due to melting ice. This function will
not cook or bake your food, it will only help to defrost it.
Hot air roasting: The oven’s thermostat and warning lights will switch on, and the
ring heating element and fan will start operating. The turbo function evenly disperses
the heat in the oven so all food on all racks will cook evenly. It is recommended that
you preheat the oven for about 10 minutes.
Static roasting: The oven’s thermostat and warning lights will switch on, and the
lower and upper heating elements will start operating. The static cooking function
emits heat, ensuring even cooking of food. This is ideal for making pastries, cakes,
bakedpasta,lasagneandpizza.Preheatingtheovenfor10minutesisrecommended
and it is best to use only one shelf at a time in this function.

Copyright © 2020, Fast ČR, a. s. Revision 02/2020
EN - 13
Fan-assisted roasting: The oven’s thermostat and warning lights will switch on, and
the upper and lower heating elements and fan will start operating. This function is
good for baking pastry. Cooking is carried out by the lower and upper heating
elements within the oven and by the fan, which provides air circulation, giving a
slightly grilled eect to the food. It is recommended that you preheat the oven for
about 10 minutes.
Pizza: The oven’s thermostat and warning lights will switch on, and the ring, lower
heating elements and fan will start operating. This function is ideal for baking food,
such as pizza, evenly in a short time. While the fan evenly disperses the heat of the
oven, the lower heating element ensures baking of the food.
Small grill: The oven’s thermostat and warning lights will switch on, and the grill
heating element will start operating. This function is used for grilling and toasting
food. Use the upper shelves of the oven. Lightly brush the wire grid with oil to stop
food sticking and place food in the centre of the grid. Always place a tray beneath the
food to catch any drips of oil or fat. It is recommended that you preheat the oven for
about 10 minutes.
WARNING: When grilling, the oven door must be closed and the oven temperature should be adjusted
to 190°C.
Large grill: The oven’s thermostat and warning lights will switch on. The grill and
upper heating elements will start operating. This function is used for faster grilling
and for grilling food with a larger surface area, such as meat. Use the upper shelves of
the oven. Lightly brush the wire grid with oil to stop food sticking and place food in
the centre of the grid. Always place a tray beneath the food to catch any drips of oil or
fat. It is recommended that you preheat the oven for about 10 minutes.
WARNING: When grilling, the oven door must be closed and the oven temperature should be adjusted
to 190°C.
Fan-assisted large grill: The oven’s thermostat and warning lights will switch on, and
the grill, upper heating elements and fan will start operating. This function is used for
fastergrillingofthickerfoodandforgrillingfoodwithalargersurfacearea.Boththe
upper heating elements and grill will be energised along with the fan to ensure even
cooking. Use the upper shelves of the oven. Lightly brush the wire grid with oil to stop
food sticking and place food in the centre of the grid. Always place a tray beneath the
food to catch any drips of oil or fat. It is recommended that you preheat the oven for
about 10 minutes.
WARNING: When grilling, the oven door must be closed and the oven temperature should be adjusted
to 190°C.

Copyright © 2020, Fast ČR, a. s. Revision 02/2020
EN - 14
Vap Clean Function:SettheovenfunctionandthermostattotheVapCleanfunctionsymbol.Pour
200-250ml of water (about 1 cup) into the small tray on the oven base. Vap Clean runs for
approximately 20 minutes and will prepare your oven so that it can be easily cleaned.
4.2 Cooking Table
Function
Dishes
Static
PuPastry 2-3-4 170-190 35-45
Cake 2-3-4 170-190 30-40
Cookie 2-3-4 170-190 30-40
Stew 2 175-200 40-50
Chicken 2-3-4 200 45-60
Fan
PuPastry 2-3-4 170-190 25-35
Cake 2-3-4 150-170 25-35
Cookie 2-3-4 150-170 25-35
Stew 2 175-200 40-50
Chicken 2-3-4 200 45-60
Turbo
PuPastry 2-3-4 170-190 35-45
Cake 2-3-4 150-170 30-40
Cookie 2-3-4 150-170 25-35
Stew 2 175-200 40-50
Grilling
Grilled meatballs 7 200 10-15
Chicken * 190 50-60
Chop 6-7 200 15-25
Beefsteak 6-7 200 15-25
* If available cook with roast chicken skewer.
4.3 Use of the Smart LCD Control Unit
“Ready Cook”is designed to help home users to implement professional cooking recipes easily using the built-
in auto cooking functions.
The“Ready Cook” menu, such as manual roasting, automatic roasting, favourites, cleaning and settings, are
described in the following section.

Copyright © 2020, Fast ČR, a. s. Revision 02/2020
EN - 15
Settings
The settings menu allows you to change and set the date, time, screen brightness, buzzer tone, and language
option.
The main menu
• Rotatetherightknobineitherdirectionuntil‚Settings‘ishighlighted.
• Presstherightknobtoselectthehighlightedoption.
The languages menu
• Rotatetherightknobineitherdirectiontochangethelanguage.
• Presstherightknobtosetthedesiredlanguage.
The brightness menu
• Rotatetherightknobineitherdirectiontochangethescreenbrightnessbetweenthelevels0and4.
• Presstherightknobtosetthescreenbrightness.

Copyright © 2020, Fast ČR, a. s. Revision 02/2020
EN - 16
The date menu
• Rotatetherightknobineitherdirectiontochangethedate.
• Presstherightknobtosetthedate.
• Thedateissetintheformat:month,day,year.
The clock menu
• Rotatetherightknobineitherdirectiontochangetheclock.
• Pushtherightknobtosettheclock.
• Clockissetintheformat:minuteandhour.
On the buzzer tone menu
• Rotatetherightknobineitherdirectiontochoosefrom3dierentbuzzertones.
• Presstherightknobtosetthedesiredbuzzertone.

Copyright © 2020, Fast ČR, a. s. Revision 02/2020
EN - 17
The software version menu
• Thesoftwareversionwillbedisplayedasinformationonly.Itcannotbechanged.
Key lock
The key lock is used to avoid unintentional changes being made to the oven settings. To activate or deactivate
the key lock, rotate the left knob anti-clockwise and hold it for 3 seconds. While the key lock is active, only the
“ON/OFF”button can be activated. All other buttons will be locked.

Copyright © 2020, Fast ČR, a. s. Revision 02/2020
EN - 18
Manual cooking
YoucanadjusteverycookingsettinginManualCookingmode,includingthe7dierentcookingfunctions,
the temperature, the boost function, the cooking duration, and the cooking end time. Follow the steps listed
below to navigate the Manual Cooking menu.
The main menu
• Rotatetherightknobineitherdirectionuntil“Manual Cooking” is highlighted.
• Presstherightknobtoselectthehighlightedoption.
Oven function
• Rotatetherightknobineitherdirectiontonavigatebetweentheavailableovenfunctions.
• Presstherightknobtoselectthehighlightedoption.
Temperature
• Rotatetherightknobineitherdirectiontonavigatebetweentheavailabletemperaturesettings.
• Presstherightknobtoselectthehighlightedoption.
Table of contents
Other Philco Oven manuals

Philco
Philco POB 18 XP User manual

Philco
Philco PSO6072 User manual

Philco
Philco POB70 User manual

Philco
Philco POB 789 BX User manual

Philco
Philco POB62 User manual

Philco
Philco POB 15 X User manual

Philco
Philco POB 321 User manual

Philco
Philco POP 688 BX User manual

Philco
Philco POB93 User manual

Philco
Philco POB68 User manual

Philco
Philco POB 6010 X User manual

Philco
Philco POC 19 STXP User manual

Philco
Philco PSMO634X User manual

Philco
Philco PSO4550 User manual

Philco
Philco M32 Series User manual

Philco
Philco POB 789 FBX User manual

Philco
Philco POB 819 User manual

Philco
Philco POB68 User manual

Philco
Philco POB79 User manual

Philco
Philco POP 788 TBX User manual