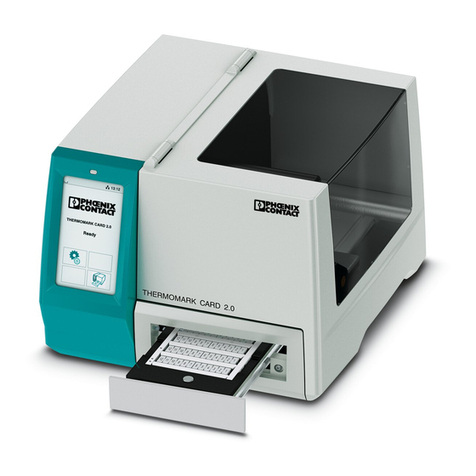
Phoenix Contact THERMOMARK PRIME User manual

User manual
Operating the
THERMOMARK PRIME thermal
transfer card printer
UM EN THERMOMARK PRIME


This user manual is valid for:
2016-11-04
Designation:
Revision:
Order No.:
PHOENIX CONTACT 106876_en_01
Operating the THERMOMARK PRIME thermal transfer
card printer
User manual
UM EN THERMOMARK PRIME
01
–
Designation Version Order No.
THERMOMARK PRIME V/C 01 5148888

THERMOMARK PRIME
4PHOENIX CONTACT 106876_en_01
Please observe the following notes
Explanation of symbols used and signal words
How to contact us
Internet
Up-to-date information on Phoenix Contact products and our General Terms and
Conditions can be found on the Internet at:
phoenixcontact.com
Make sure you always use the latest documentation. It can be downloaded at:
phoenixcontact.net/products
Subsidiaries
If there are any problems that cannot be solved using the documentation, please
contact your Phoenix Contact subsidiary. Subsidiary contact information is avail-
able at:
phoenixcontact.com
This is the safety alert symbol. It is used to alert you to potential personal injury
hazards. Obey all safety measures that follow this symbol to avoid possible injury
or death.
There are three different categories of personal injury that are indicated with a
signal word.
DANGER This indicates a hazardous situation which, if not avoided, will re-
sult in death or serious injury.
WARNING This indicates a hazardous situation which, if not avoided, could
result in death or serious injury.
CAUTION This indicates a hazardous situation which, if not avoided, could
result in minor or moderate injury.
This symbol together with the signal word NOTE and the accompanying text alert
the reader to a situation which may cause damage or malfunction to the device,
hardware/software, or surrounding property.
This symbol and the accompanying text provide the reader with additional infor-
mation or refer to detailed sources of information.

106876_en_01 PHOENIX CONTACT 5
Published by
PHOENIX CONTACT GmbH & Co. KG
Flachsmarktstraße 8
32825 Blomberg
GERMANY
Should you have any suggestions or recommendations for improvement of the
contents and layout of our user manual, please send your comments to:
General Terms and Conditions of Use for technical documentation
Phoenix Contact reserves the right to alter, correct, and/or improve the technical documentation and the
products described in the technical documentation at its own discretion and without giving prior notice, in-
sofar as this is reasonable for the user. The same applies to any changes that serve the purpose of tech-
nical progress.
The receipt of technical documentation (in particular user documentation) does not constitute any further
duty on the part of Phoenix Contact to furnish information on modifications to products and/or technical
documentation. You are responsible for verifying the suitability and intended use of the products in your
specific application, in particular with regard to observing the applicable standards and regulations. All in-
formation made available in the technical data is supplied without any accompanying guarantee, whether
expressly mentioned, implied or tacitly assumed.
In general, the provisions of the current General Terms and Conditions of Phoenix Contact apply exclu-
sively, in particular as concerns any warranty liability.
This user manual, including all illustrations contained herein, is copyright protected. Any changes to the
contents or the publication of extracts of this document is prohibited.
Phoenix Contact reserves the right to register its own intellectual property rights for the product identifica-
tions of Phoenix Contact products that are used here. Registration of such intellectual property rights by
third parties is prohibited.
Other product identifications may be afforded legal protection, even where they may not be indicated as
such.

THERMOMARK PRIME
6PHOENIX CONTACT 106876_en_01
Table of contents
1 For your safety ............................................................................................................7
1.1 Field of application.......................................................................7
1.2 Safety notes.................................................................................7
2 Starting up the printer .................................................................................................9
2.1 Unpacking and setup...................................................................9
2.2 Overview of the device ..............................................................10
2.3 Connecting the power supply ....................................................11
2.4 Connecting the printer ...............................................................14
2.5 Printer menu ..............................................................................17
2.6 Creating print jobs .....................................................................20
3 Printing .....................................................................................................................21
3.1 Switching on the device .............................................................21
3.2 Loading ink ribbon and magazine ..............................................22
3.3 Starting a print job......................................................................24
3.4 Loading the material ..................................................................24
4 Maintenance and troubleshooting ............................................................................26
4.1 Cleaning ....................................................................................26
4.2 Troubleshooting and error messages ........................................27
4.3 Repairs ......................................................................................30
4.4 Transporting the device .............................................................30
4.5 Software update ........................................................................30
4.6 Disposal.....................................................................................31
5 Appendix ..................................................................................................................32
5.1 Ordering data.............................................................................32
5.2 Technical data ...........................................................................35
5.3 Approvals and statements .........................................................36
For your safety
106876_en_01 PHOENIX CONTACT 7
1 For your safety
1.1 Field of application
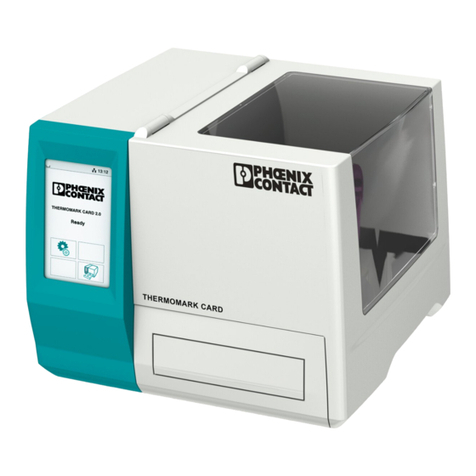
The THERMOMARK PRIME is a portable thermal transfer printer for cards. It is
suitable for printing UCT, UM, and US material from Phoenix Contact. You may
only use the THERMOMARK PRIME with materials and magazines from
Phoenix Contact which are intended for the THERMOMARK PRIME.
1.2 Safety notes
Danger due to mains voltage
Never open the housing of the printer or power supply unit. When the mains plug is
inserted, lethal voltage may be present inside.
Danger of crushing
Always hold the cover by the outside when closing it and do not touch the hinged
area of the cover.
When the tray is moved in and out, make sure that no parts of the body or objects
are within the working range of the tray.
Danger due to rotating parts
When operating the printer with the cover open, make sure that clothing, hair or
similar do not come into contact with the exposed rotating parts.
Risk to operational reliability
Incorrect operation or modifications to the device can endanger your safety or
damage the printer. You must not repair the device. If the device has a fault, contact
Phoenix Contact.
Importance of the warning labels on the printer
Warning labels must never be removed, as otherwise users cannot be informed of
the relevant hazards.
Danger due to mains voltage
Never open the housing of the printer or power supply unit. When the
mains plug is inserted, lethal voltage may be present inside.

THERMOMARK PRIME
8PHOENIX CONTACT 106876_en_01
Radio interference
This is a Class A item of equipment. When using the equipment in residential areas,
it may cause radio interference. In this case, the operator is obligated to implement
appropriate measures.
WARNING: Explosion hazard, fire hazard, and health hazard if the battery
pack is used incorrectly
– Never damage the battery pack, e.g., by throwing, exerting pressure or using
sharp objects.
– Never expose the battery pack to high levels of heat, e.g., caused by fire or
sunlight.
– Never short circuit the battery pack.
– Only ever charge the battery pack in the THERMOMARK PRIME. Do not use
another charger.
– Temperature range when charging the battery pack: 0°C ... 35°C
– Avoid draining the battery pack completely. Draining the battery pack com-
pletely can destroy the battery pack. Recharge the battery pack immediately
if the LED on the battery pack lights up red (see “Checking the state of
charge” on page 12). If the battery pack is not used, the fully charged battery
pack has to be recharged after half a year.
– Protect the battery pack from humidity and moisture.
– Observe the technical data for the battery pack (see page 35).

Starting up the printer
106876_en_01 PHOENIX CONTACT 9
2 Starting up the printer
2.1 Unpacking and setup
Scope of supply
– Printer including battery pack and ink ribbon cartridge
– Wide range power supply unit and one power cable each for Europe and the
USA
– USB cable
– Two printing magazines
Magazine for UCT material (TMP–UCT–MAG1, 0803342)
Magazine for US material (TMP–US–MAG1, 0803341)
– Printing materials (ten UCT-TM 6, ten US-EMLP(85,6X54)) and print sample
from outgoing inspection of the device
– DVD with driver and CLIP PROJECT Marking software. The DVD also con-
tains this user manual in several languages.
Unpacking
•Check the printer for transport damage.
•Retain the original packaging for subsequent transport.
Requirements for the installation location
•Place the printer on a level surface.
Unlocking the transportation safeguard
Figure 2-1 Unlocking the transportation safeguard
•Move the slider to the position.
NOTE: Damage to the printer
Do not operate the printer near high-voltage lines.
Place the printer in a dry location protected from splash water. Protect the printer
and printing materials from humidity, moisture, and dirt.

THERMOMARK PRIME
10 PHOENIX CONTACT 106876_en_01
2.2 Overview of the device
Figure 2-2 Overview
1 Tray, for loading the material, opened and closed via the display
2 ON button, for switching the printer on and off and for waking up the display
3 LED, indicates mains operation and the state of charge of the battery pack
4 Buttons on both sides of the cover for opening the cover
5 Button for releasing the display so that it can be folded down
6 Slider for locking and unlocking the transportation safeguard
7 Socket for connecting the power supply unit
8 Interfaces, see “Overview of the interfaces” on page 14
9 Slider for releasing the battery pack
10 Battery pack

Starting up the printer
106876_en_01 PHOENIX CONTACT 11
2.3 Connecting the power supply
Use a power supply unit or a battery pack to operate the printer.
If the printer is connected to the power supply via the power supply unit, the battery
pack will be automatically charged in the printer.
If you want to permanently operate the printer via the mains only, without the bat-
tery pack, you can insert an empty battery pack housing instead of the battery pack.
Optional accessories
– Replacement battery pack (TMP/ACCU, 0803668)
– Battery pack housing (TMP/ACCU COVER, 0803669)
– Replacement power supply unit (TMP/EXT.POWER-SUPPLY 100-240V,
0803672)
2.3.1 Connecting the power supply unit
The THERMOMARK PRIME is designed for power grids from 100 to 240 V AC.
Only connect the printer to sockets with a ground conductor contact.
Figure 2-3 Mains connection
•Connect the connecting cable of the power supply unit to the socket on the
printer.
•Insert the power cable in the mains socket.
•Connect the power cable to a grounded socket with a ground conductor con-
tact.
•Switch the power supply unit on at the switch.

THERMOMARK PRIME
12 PHOENIX CONTACT 106876_en_01
2.3.2 Replacing the battery pack and checking the state of
charge
Figure 2-4 Inserting the battery pack and checking the state of charge
Removing the battery pack
•Move the slider to the left. Hold the slider in this position.
•Remove the battery pack from the printer.
Inserting the battery pack
•Place the battery pack in the guides.
•Push the battery pack into the printer as far as it will go.
Checking the state of charge
You can check the state of charge directly at the battery pack.
•Press the button on the battery pack.
The LED on the battery pack lights up according to the state of charge:
Green Above 70% charged
Yellow 30% to 70% charged
Red Less than 30% charged
Off Battery pack flat or faulty
NOTE: Avoid draining the battery pack completely. Draining the battery pack
completely can destroy the battery pack. Recharge the battery pack immediately
if the LED on the battery pack lights up red. If the battery pack is not used, the
fully charged battery pack has to be recharged after half a year.

Starting up the printer
106876_en_01 PHOENIX CONTACT 13
Checking the printer power supply
The state of the power supply is indicated via an LED to the left of the display.
A red LED indicates that the battery pack cannot be charged. One possible reason
for this is that the battery pack has overheated. Remove the battery pack from the
device and allow it to cool down.
If the LED is flashing red, the battery pack is faulty.
Green Battery pack fully charged
Flashing green Device switched on, not con-
nected to the mains
Yellow Battery pack charging
Red Charging error
Off Device not connected to the
mains

THERMOMARK PRIME
14 PHOENIX CONTACT 106876_en_01
2.4 Connecting the printer
2.4.1 Overview of the interfaces
Figure 2-5 Interfaces
Task Via Interface Item
Save or read in printing data USB stick USB master B 1
SDHC card SDHC card 2
Software update for firmware and apps USB stick USB master B 1
Connect external keyboard or mouse USB cable USB master B 1
Connect to other printers, such as the
THERMOMARK ROLL, THERMOFOX
USB cable USB master B 1
Receive printing data from PC LAN cable LAN 3
USB cable USB 2.0 slave 4
Memory extension, e.g., for instruction
videos
SDHC card SDHC card 2
Service interface – USB master A 5

Starting up the printer
106876_en_01 PHOENIX CONTACT 15
2.4.2 Connecting to a computer via USB
A printer driver must be installed if a USB interface is to be used for connection.
You will find the printer driver on the DVD that is supplied with the printer or on the
Internet at phoenixcontact.net/qr/5146040.
•Switch on the PC.
•Exit all programs that are currently running.
•Switch on the THERMOMARK PRIME.
•Connect the PC to the THERMOMARK PRIME using the supplied USB cable.
•Insert the DVD containing the driver software. The Windows installation wizard
is started automatically.
•Follow the on-screen instructions.
Following successful installation, an icon for the THERMOMARK PRIME appears
in the Windows “Devices and Printers” system folder.
•Open the CLIP PROJECT Marking software.
•Add the THERMOMARK PRIME as a printer.
For instructions, visit phoenixcontact.net/qr/5146040.
NOTE: Errors during operation due to insufficient or missing shielding
Make sure that all connecting cables connected to the printer are shielded.

THERMOMARK PRIME
16 PHOENIX CONTACT 106876_en_01
2.4.3 Connecting to a network via Ethernet
The integrated Ethernet interface allows the printer to be operated in a network. A
patch cable with RJ45 connector for 10Base-T or 100Base-T is required in order to
connect the printer to a network socket.
The following parameters are required in order to operate the printer in a network.
If necessary, contact your network administrator.
– IP address
– Subnet mask
– Gateway, if necessary
Alternatively, you can also obtain the Ethernet configuration via a DHCP server.
Further setting options are available in the menu. You can configure the Ethernet
interface here.
NOTE: Errors during operation due to insufficient or missing shielding
Make sure that all connecting cables connected to the printer are shielded.
•Touch this symbol.
•Touch this symbol.
•Enter the Admin PIN (“0000”).
•Touch this symbol.
•Touch this symbol.
•Disable DHCP. An input mask appears.
•Enter the IP address, subnet mask, and, if necessary, a gateway.

Starting up the printer
106876_en_01 PHOENIX CONTACT 17
2.5 Printer menu
2.5.1 Operating the display
•To select a menu item, briefly touch the corresponding symbol.
•Move your finger up and down the display to scroll the list.
If the printer is not used for some time, it switches to energy-saving mode automat-
ically. Touch the ON button briefly to wake up the printer.
2.5.2 Changing the language
The language is set when the printer is started up. To later select a different lan-
guage, proceed as follows:
2.5.3 Start screen
•Touch this symbol.
•Touch this symbol.
•Enter the Admin PIN (“0000”).
•Touch this symbol.
•Touch the desired language.
1Switch to the printer settings
2Information about loaded materials
3State of power supply
4Open and close tray
5Open “Marking-Editor”;
After printing: open tray or repeat print job
6Open or close tray
7Back to start screen
8Back to previous view

THERMOMARK PRIME
18 PHOENIX CONTACT 106876_en_01
2.5.4 Printer settings
Menu item Setting option
Adjust brightness of the display
This user manual and instruction videos
Change keyboard
Information about the printer (printer name, number of printouts, etc.)
Software license terms for the Open Source Initiative (OSI)
Imprint and contact information
Start test print

Starting up the printer
106876_en_01 PHOENIX CONTACT 19
2.5.5 Advanced settings (PIN-protected)
Menu item Setting option
Admin PIN “0000”
Move print position horizontally
Move print position vertically
Shutdown time in minutes in battery mode
When data is received, the tray is moved out. If you
cannot see the area where the tray moves out when
starting the print job, disable this function.
Set up DHCP
Enable and disable indication of network errors
Export log file
Set date and time
Set language
Set country to see the relevant Phoenix Contact subsidiary
(under “Imprint and contact information” )
Change Admin PIN

THERMOMARK PRIME
20 PHOENIX CONTACT 106876_en_01
2.6 Creating print jobs
You can create print jobs on the display or on a PC.
You can connect an external keyboard or mouse for entry on the display.
•Connect the keyboard or mouse to the USB interface on the control panel. The
USB interface next to the mains connection is not suitable.
Creating a print job via the display
•On the display, select the “Marking-Editor” item and create a marking.
•Alternatively, load the material and close the tray. A window for entering the
print job appears.
•To start printing, touch the printer symbol in the top right corner.
A window opens where you can set the print parameters.
•Touch the button to print.
Using the CLIP PROJECT Marking software
Create the print jobs using the CLIP PROJECT Marking software.
CLIP PROJECT Marking can be used to create markings on a PC which are tai-
lored to the Phoenix Contact marking material.
Select the THERMOMARK PRIME as the printer. You will be provided with a list of
materials that are suitable for this printer.
The CLIP PROJECT Marking software is supplied with the printer.
CLIP PROJECT Marking can also be downloaded at
phoenixcontact.net/qr/5146053.
You can also output a print job to another printer, e.g., the
THERMOMARK ROLL.
If you establish a connection to the THERMOMARK ROLL, for example, you can
also print a print job on material off the roll. Connect the THERMOMARK ROLL
to the USB interface on the control panel. The USB interface next to the mains
connection is not suitable.
Table of contents
Other Phoenix Contact Printer manuals

Phoenix Contact
Phoenix Contact THERMOMARK ROLLMASTER 600 User manual

Phoenix Contact
Phoenix Contact BLUEMARK ID User manual

Phoenix Contact
Phoenix Contact THERMOMARK GO.K User manual

Phoenix Contact
Phoenix Contact THERMOFOX User manual

Phoenix Contact
Phoenix Contact THERMOMARK CARD Series User manual

Phoenix Contact
Phoenix Contact THERMOMARK ROLL 2.0 User manual

Phoenix Contact
Phoenix Contact Clipline Thermomark S1 Quick start guide

Phoenix Contact
Phoenix Contact THERMOMARK GO User manual

Phoenix Contact
Phoenix Contact UM IA THERMOMARK X1.1 User manual

Phoenix Contact
Phoenix Contact THERMOMARK CARD 2.0 User manual