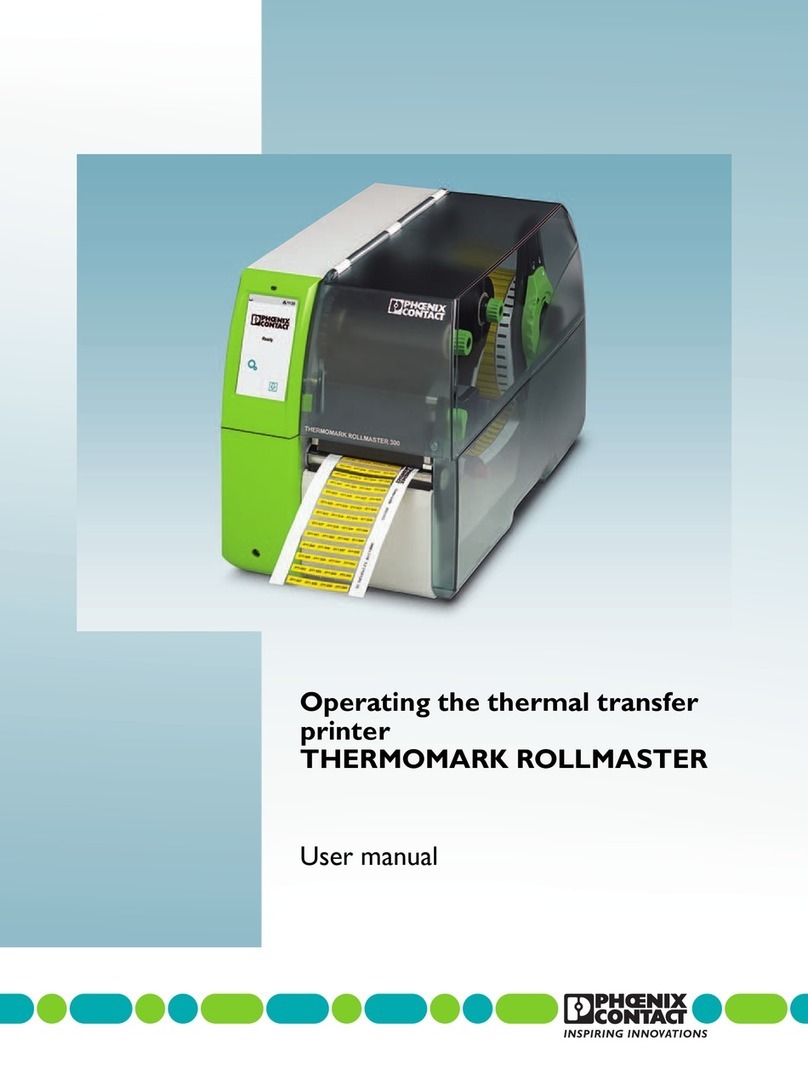
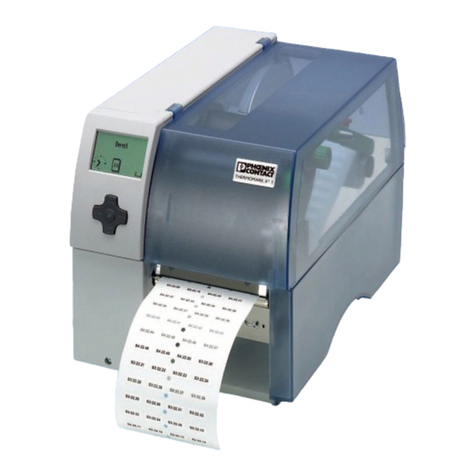
Phoenix Contact THERMOMARK ROLL User manual

User manual
Thermal Transfer Printer for Labels and
Continuous Media
UM EN THERMOMARK ROLL

104611_en_02 PHOENIX CONTACT i
This user manual is valid for:
2012-01-30
Designation:
Version:
Order No.:
Thermal Transfer Printer for Labels and Continuous Media
User manual
UM EN THERMOMARK ROLL
02
–
Designation Order no.
THERMOMARK ROLL 5146477
THERMOMARK ROLL AR 5146749

104611_en_02 PHOENIX CONTACT ii
General terms and conditions of use for technical documentation
Phoenix Contact reserves the right to alter, correct, and/or improve the
technical documentation and the products described in the technical docu-
mentationatitsowndiscretionandwithoutgivingpriornotice,insofarasthis
is reasonable for the user. The same applies to any technical changes that
serve the purpose of technical progress.
The receipt of technical documentation (in particular user documentation)
does not constitute any further duty on the part of Phoenix Contact to fur-
nish information on modifications to products and/or technical documenta-
tion. You are responsible to verify the suitability and intended use of the
products in your specific application, in particular with regard to observing
the applicable standards and regulations. All information made available in
the technical data is supplied without any accompanying guarantee,
whether expressly mentioned, implied or tacitly assumed.
In general, the provisions of the current standard Terms and Conditions of
Phoenix Contact apply exclusively, in particular as concerns any warranty
liability.
This manual, including all illustrations contained herein, is copyright pro-
tected. Any changes to the contents or the publication of extracts of this
document is prohibited.
Phoenix Contact reserves the right to register its own intellectual property
rights for the product identifications of Phoenix Contact products that are
usedhere.Registrationofsuchintellectualpropertyrightsbythirdpartiesis
prohibited.
Other product identifications may be afforded legal protection, even where
they may not be indicated as such.

THERMOMARK ROLL
iii PHOENIX CONTACT 104611_en_02
How to contact us
Internet Up-to-date information on Phoenix Contact products and our Terms and
Conditions can be found on the Internet at:
www.phoenixcontact.com
Make sure you always use the latest documentation.
It can be downloaded at:
www.phoenixcontact.net/catalog
Subsidiaries If there are any problems that cannot be solved using the documentation,
please contact your Phoenix Contact subsidiary.
Subsidiary contact information is available at www.phoenixcontact.com.
Published by PHOENIX CONTACT GmbH & Co. KG
Flachsmarktstraße 8
32825 Blomberg
GERMANY
Should you have any suggestions or recommendations for improvement of
the contents and layout of our manuals, please send your comments to:

104611_en_02 PHOENIX CONTACT iv
Note on the print media
The result of the print depends essentially on the suitable combination of
material and print ribbon.
You can find suitable print media in the Phoenix Contact catalog.
Change language of Touch Screen
The language of the Touch Screen is set to English by default. To select
a different language, proceed as follows:
•Touch to open the menu.
•Select then for the settings.
•With , you access the regional settings.
•Touch the symbol.
•Use the horizontal arrows to select your language.
•Confirm your selection with .
•Touch to return to the menu.
NOTE: Use suitable print media
A low-quality ink ribbon can lead to premature wear on the printhead and
result in a poor print image. Use only print media from Phoenix Contact.

THERMOMARK ROLL
vPHOENIX CONTACT 104611_en_02
Technical data
Resolution 300 dpi x 300 dpi (12 points/mm x 12 points/mm)
Print mode Thermal transfer
CPU 32 bit/400 MHz
Material sensor
Position
Type
Detection
Center
Gap sensor
Label gap, black mark and punch-hole mark
Print speed 30 mm/s … 125 mm/s
Print length At least 5 mm, maximum 1000 mm
Print width Maximum 104 mm
Print medium
Outside diameter of the roll of labels:
Internal core diameter Maximum 152 mm
38.1 mm … 76 mm
Ink ribbon
Length
Outside diameter of the ink ribbon reel:
Internal core diameter
Ink side
Maximum 300 m
Maximum 68 mm
25.4 mm
Outside
Interfaces USB 2.0, Full speed slave, Ethernet 10/100Base-T
Display and Operation Touch display with 160 x 255 pixels, 96.31 mm diagonal
Voltage 100 V AC … 240 V AC, 50/60 Hz, PFC
Power Maximum 100 W
Temperature
Operation
Bearings
Transport
+5 °C … +35 °C
0 °C … +60 °C
-25 °C … +60 °C
Humidity
Operation
Bearings
Transport
10% … 85%, not condensing
20% … 80%, not condensing
Approvals 5146477: CE, FCC class A, UL, CB
5146749: CE, FCC class A, UL, CB, S-Mark
Dimensions (H x D x W) 189 mm x 320 mm x 253 mm
Weight 3.5 kg
Optional extensions
Cutter
Perforation cutter
Media hub
THERMOMARK ROLL-CUTTER
THERMOMARK ROLL-CUTTER/P
THERMOMARK ROLL-ERH

7Table of Contents
1 Introduction ................................................................................................. 8
1.1 ProductDescription........................................................................................................ 8
1.2 Instructions..................................................................................................................... 8
1.3 IntendedUse.................................................................................................................. 9
1.4 SafetyInstructions.......................................................................................................... 9
1.5 Environment................................................................................................................. 10
2 Installation ................................................................................................. 11
2.1 DeviceOverview.......................................................................................................... 11
2.2 UnpackingandSetting-upthePrinter.......................................................................... 13
2.3 ConnectingtheDevice................................................................................................. 14
2.3.1 ConnectingtothePowerSupply.............................................................................. 14
2.3.2 ConnectingtoaComputerviaUSB......................................................................... 15
2.3.3 ConnectingtoaNetworkviaEthernet..................................................................... 15
2.4 SwitchingontheDevice............................................................................................... 16
3 Touchscreen Display ................................................................................ 17
3.1 StructureoftheTouchscreenDisplay........................................................................... 17
3.2 OperatingtheTouchscreenDisplay............................................................................. 17
3.3 SymbolsontheStartDisplay....................................................................................... 17
3.4 PrinterStates................................................................................................................ 18
3.5 CongureEthernetInterface........................................................................................ 19
3.6 PerformTestPrint......................................................................................................... 19
4 Loading Material ....................................................................................... 20
4.1 LoadingContinuousMediafromRoll........................................................................... 20
4.2LoadingFanfoldLabels................................................................................................ 21
4.3 LoadingTransferRibbon.............................................................................................. 22
5 Option ........................................................................................................ 24
5.1 Cutter/PerforationCutter.............................................................................................. 24
5.2 ExternalSupplyHub.................................................................................................... 25
6 Printing Operation .................................................................................... 26
6.1 PrintinginTear-offMode.............................................................................................. 26
6.2 PrintinginCuttingMode............................................................................................... 26
7 Cleaning ..................................................................................................... 27
7.1 CleaningInstructions.................................................................................................... 27
7.2 CleaningthePrinthead................................................................................................. 28
7.3 CleaningorReplacingthePrintRoller......................................................................... 29
7.4 CleaningCutter/PerforationCutterandReplaceBlades.............................................. 30
8 Fault Correction ........................................................................................ 32
8.1 ProblemSolution.......................................................................................................... 32
8.2 ErrorMessagesandFaultCorrection.......................................................................... 33
9 Licences ..................................................................................................... 35
9.1 ECDeclarationofConformity....................................................................................... 35
9.2 FCC.............................................................................................................................. 37
9.3 GPLCodeStatement................................................................................................... 37
10 Index ........................................................................................................... 38

8
1.1 Product Description
Thedeviceisanindustrialthermaltransferprinterforprintinglabelsand
continuousmedia.
1.2 Instructions
Importantinformationandinstructionsinthisdocumentationaredesignated
asfollows:
Danger!
Draws your attention to an exceptionally grave, impending danger
to your health or life.
!
Warning!
Indicates a hazardous situation that could lead to injuries or
material damage.
!
Attention!
Draws attention to possible dangers, material damage or loss of
quality.
i
Notice!
Gives you tips. They make a working sequence easier or draw
attention to important working processes.
Environment!
Givesyoutipsonprotectingtheenvironment.
Handlinginstruction
Referencetosection,position,illustrationnumberordocument.
Option(accessories,peripheralequipment,specialttings).
Zeit Informationinthedisplay.
1 Introduction

9
1.3 Intended Use
• Thedeviceismanufacturedinaccordancewiththecurrenttechnological
statusandtherecognizedsafetyrules.However,dangertothelifeand
limboftheuserorthirdpartiesand/ordamagetothedeviceandother
tangibleassetscanariseduringuse.
• Thedevicemayonlybeusedforitsintendedpurposeandifitisinperfect
workingorder,anditmustbeusedwithregardtosafetyanddangersas
statedintheoperatingmanual.
• Thedeviceprinterisintendedexclusivelyforprintingsuitablematerials.
Anyotheruseorusegoingbeyondthisshallberegardedasimproperuse.
Themanufacturer/suppliershallnotbeliablefordamageresultingfrom
unauthorizeduse;theusershallbeartheriskalone.
• Usagefortheintendedpurposealsoincludescomplyingwiththeoperating
manual,includingthemanufacturer‘smaintenancerecommendationsand
specications.
i
Notice!
The complete documentation is included in the scope of delivery on
DVD, and can also currently be found in the Internet.
1.4 Safety Instructions
• Thedeviceisconguredforvoltagesof100to240VAC.Itonlyhastobe
pluggedintoagroundedsocket.
• Onlyconnectthedevicetootherdeviceswhichhaveaprotectivelow
voltage.
• Switchoffallaffecteddevices(computer,printer,accessories)before
connectingordisconnecting.
• Thedevicemayonlybeusedinadryenvironment,donotexposeitto
moisture(spraysofwater,mists,etc.).
• Donotusethedeviceinanexplosiveatmosphere.
• Donotusethedeviceclosetohigh-voltagepowerlines.
• Ifthedeviceisoperatedwiththecoveropen,ensurethatpeople‘s
clothing,hair,jewelryetc.donotcomeintocontactwiththeexposed
rotatingparts.
• Thedeviceorpartsofitcanbecomehotwhileprinting.Donottouch
duringoperation,andallowtocooldownbeforechangingmaterialand
beforedisassembly.
• Riskofcrushingwhenclosingthecover.Touchthecoverattheoutside
only.Donotreachintotheswivelrangeofthecover.
• Performonlythoseactionsdescribedinthisoperatingmanual.
Workgoingbeyondthismayonlybeperformedbytrainedpersonnelor
servicetechnicians.
1 Introduction

10
• Unauthorizedinterferencewithelectronicmodulesortheirsoftwarecan
causemalfunctions.
• Otherunauthorizedworkonormodicationstothedevicecanalso
endangeroperationalsafety.
• Alwayshaveserviceworkdoneinaqualiedworkshop,wherethe
personnelhavethetechnicalknowledgeandtoolsrequiredtodothe
necessarywork.
• Therearevariouswarningstickersonthedevice.Theydrawyourattention
todangers.
Warningstickersmustthereforenotberemoved,asthenyouandother
peoplecannotbeawareofdangersandmaybeinjured.
• Themaximumsoundpressurelevelislessthan70dB(A).
Danger!
Danger to life and limb from power supply.
Do not open the device casing.
1.5 Environment
Obsoletedevicescontainvaluablerecyclablematerialsthatshouldbesent
forrecycling.
Sendtosuitablecollectionpoints,separatelyfromresidualwaste.
Themodularconstructionoftheprinterenablesittobeeasilydisas-
sembledintoitscomponentparts.
Sendthepartsforrecycling.
Theelectroniccircuitboardofthedeviceisequippedwithalithiumbattery.
Takeoldbatteriestocollectionboxesinshopsorpublicwastedisposal
centers..
1 Introduction

11
2.1 Device Overview
1
2
3
4
5
6
7
8
1 Cover
2 Marginstops
3 Rollretainer
4 Ribbonsupplyhub
5 Ribbontake-uphub
6 Beltroller
7 Printmechanics
8 Touchscreendisplay
Fig.1 DevicewithTear-offPlate
9
9 CutterorPerforation
Cutter
Fig.2 DevicewithCutterorPerforationCutter
2 Installation

12
14
15
13
12
10 11
16
10 Labelsensor
11 Printheadretainerwith
printhead
12 Printroller
13 Guides
14 Knobforadjustingtheguides
15 Leverforlockingthe
printhead
16 Tear-offplate
Fig.3 PrintMechanics
2 Installation

132 Installation
2.2 Unpacking and Setting-up the Printer
Liftthelabelprinteroutoftheboxandsetituponalevelsurface.
Checklabelprinterfordamagewhichmayhaveoccurredduringtransport.
Checkdeliveryforcompleteness.
ContentsofDelivery:
• LabelPrinter
• PowerCableTypeE+F
• USBCable
• Operator'sManual
• DVDwithapplicationsoftwareCLIPPROJECT,driveranddocumentation
• Transferribbon
• Continuouslabelsonroll
i
Notice!
Please keep the original packaging in case the printer must be
returned.
i
Notice!
When transporting the printer remove the transfer ribbon and media.
!
Attention!
The device and printing materials will be damaged by moisture and
wetness.
Set up label printers only in dry locations protected from splash
water.

14
2.3 Connecting the Device
2
3
4
5
1
1 Powerswitch
2 USBmasterportsfor
keyboard,scanner,or
memorystick
3 USBhigh-speedslaveport
4 Ethernet10/100Base-T
5 Powerconnectionjack
Fig.4 Connections
2.3.1 Connecting to the Power Supply
Theprinterisequippedwithawideareapowerunitforasupplyvoltageof
100Vto240V.
1. Checkthatthedeviceisswitchedoff.
2. Plugthepowercableintothepowerconnectionjack(5).
3. Plugthepowercableintoagroundedsocket.
2 Installation

15
2.3.2 Connecting to a Computer via USB
!
Attention!
Inadequate or no grounding can cause malfunctions during
operations.
Ensure that all computers and cables connected to the label
printer are grounded.
InordertoconnecttheprintertoaUSBinterfaceaprinterdrivermustbe
installed.TheadequatedriverforyourdevicecanbefoundontheDVD
includedinthecontentsofdeliveryorontheinternetat
www.phoenixcontact.net/catalog.
Switchoncomputer.
Terminateallrunningtasks.
SwitchonTHERMOMARKROLL.
ConnectcomputerwithTHERMOMARKROLLusingtheincludedUSB
cable.
InsertDVDwiththedriversoftwareintotheDVDdrive.
TheWindowsinstallationwizardisstartedautomatically.
Followtheinstructionsonthescreen.
Whentheerrormessage"Windowslogotestfailed"appears,still
continuetheinstallation.
AfterasuccessfulinstallationaniconfortheTHERMOMARKROLLappears
inthewindowssystemdirectory"Printer".
CLIP PROJECT
Afterwards,conguretheTHERMOMARKROLLintheplanningandmarking
softwareCLIPPROJECTinthemodule"Marking".
AddtheTHERMOMARKROLLasanewprinterinCLIPPROJECT
"Marking"under„File...congureoutputdevice...“.
2.3.3 Connecting to a Network via Ethernet
TheintegratedEthernetinterfaceallowstheoperationoftheprinterina
network.ToconnecttheprintertoanetworkoutletapatchcablewithaRJ45
plugfor10Baseor100Base-Tisnecessary.
!
Attention!
When connecting the printer to the network a shielded cable must
necessarily be used.
Connectcomputertoaprinterbyasuitablecable.
2 Installation

16 2 Installation
2.4 Switching on the Device
Whenallconnectionshavebeen
made:
Switchtheprinteronatthe
powerswitch(1).
Theprinterperformsasystem
test,andthenshowsthesystem
statusREADY inthetouch-
screendisplay.
Ifanerroroccursduringthesystem
test,thesymbol ,Critical
fault andtypeoferrorare
displayed.
1
Fig.5 PowerSwitch

173 Touchscreen Display
3.1 Structure of the Touchscreen Display
1
READY
Thetouchscreendisplay(1)indicatesthe
currentstatusoftheprinterandtheprintjob,
indicatesfaultsandshowstheprintersettings
inthemenu.
Byselectingthebuttonsonthetouchscreen
display(1)settingscanbemade.
Fig.6 TouchscreenDisplay
3.2 Operating the Touchscreen Display
Thetouchscreendisplayisoperateddirectlybytouch:
• Toopenamenuorselectamenuitemlightlytouchthecorresponding
symbol.
• Toscrollinlistsslidengerupordownonthedisplay.
3.3 Symbols on the Start Display
Symbol Status Function
Ready Toofinemenu
Error
Ready Feedsablanklabel
Ready Aftertheendofaprintjob,
reprintthelastlabel
Printing
label
Interruptprintjob,
printergoesinto"Pause"state
Pause Continuetheprintjob,
printergoesinto"Printinglabel"state
Error
Ready Deleteinternalmemory,
thelastlabelcannolongerbereprinted.
Printing
label
Cancelcurrentprintjobanddeleteallprintjobs.
Pause
Error
Table1 SymbolsontheStartDisplay

18
3.4 Printer States
State Display Description
Ready Ready andthesymbols
and
Theprinterisinthereadystateand
canreceivedataorprintlabels.
Ready (after
rst print)
Ready andthesymbols
, and
Theprinterisinthereadystateand
canreceivedata.
Printing Label Labeldescriptionand
thenumberoftheprinted
labelintheprintjoband
thesymbols
and
Theprinteriscurrentlyprocessingan
activeprintjob.
Datacanbetransmittedforanew
printjob.
Thenewprintjobwillstartwhenthe
previousonehasnished.
Pause Pause
andthesymbol
Theprintingprocesshasbeeninter-
ruptedbytheoperator.
Error
Error
andandthetypeoferror,
thelabeldescriptionand
thenumberoflabelsstill
tobeprinted
Anerrorhasoccurred.
Critical error
Critical fault
andthetypeoferror
Displayashesred
Anerroroccursduringthesystem
test.
Switchtheprinteroffandthenon
againatthepowerswitch.
CallServiceifthefaultoccurs
persistently.
Power Save
Mode
Iftheprinterisnotusedforalengthy
period,itautomaticallyswitchesto
powersavemode.
Toexitpowersavemode:Touch
touchscreendisplay.
Table2 PrinterStates
3 Touchscreen Display

19
3.5 Congure Ethernet Interface
TheEthernetinterfacecanbeconguredundermenuitem Setup >
Interfaces.
Thefollowingparametersarenecessaryforoperatingtheprinterinanetwork.
Contactyournetworkadministratorifrequired.
• IPaddress
• Subnetmask
• ifnecessarygateway
Alternatively,theEthernetcongurationisalsoavailableviaDHCPserver.In
thiscase,makesurethatthetransmittedcongurationisalwaysthesame.
Congure Ethernet interface at the printer
Select .
SelectSetup.
SelectInterfaces.
SelectEthernet.
Selectsettingoptions.
Selectdesiredsettingwith}|.
Conrmselectionwith orcancelselectionwith .
Returntostartscreenwith .
3.6 Perform Test Print
Select .
SelectTest.
SelectEML.
Testprintstarts.
3 Touchscreen Display

20 4 Loading Material
4.1 Loading Continuous Media from Roll
5
7
8
6
9
2
1
3
4
Fig.7 LoadingContinuousMediafromRoll
1. Turnring(2)counterclockwise,sothatthearrowspointstothesymbol
andthusreleasethemarginstop(1)fromtherollretainer(4).
2. Loadlabelroll(3)ontherollretainer(4)insuchawaythattheprinting
sideofthelabelsisvisiblefromabove.
3. Re-mountthemarginstop(1)andpushagainstthelabelrollasfaras
possible.
4. Turnring(2)clockwise,sothatthearrowpointstothesymbol ,and
thusxthemarginstop(1)ontherollretainer(4).
5. Turnlever(8)counterclockwisetoopenprinthead.
6. Iftheprinterisequippedwithacutterorperforationcutter,folditdown.
7. Positionguides(5)byturningtheknob(7)sothattheyareseveralmilli-
meterswiderthanthematerial.
8. Positionmaterialbelowthebeltroller(6)andguideitthroughtheprintunit.
!
Attention!
Guide material through the print unit below the label sensor (9).
9. Moveguides(3)closelytotheedgesofthematerialwithoutclampingthe
material.
10.Iftheprinterisequippedwithacutter/perforationcutter,guidematerial
throughthecutterandfoldcutterbacktotheprintingunit.
11.Pressprintheadretainerdownandturnlever(8)clockwisetolockthe
printhead.
Table of contents
Other Phoenix Contact Printer manuals

Phoenix Contact
Phoenix Contact THERMOMARK GO User manual

Phoenix Contact
Phoenix Contact THERMOMARK CARD Series User manual

Phoenix Contact
Phoenix Contact THERMOMARK PRIME User manual

Phoenix Contact
Phoenix Contact THERMOFOX User manual

Phoenix Contact
Phoenix Contact Clipline Thermomark S1 Quick start guide

Phoenix Contact
Phoenix Contact THERMOMARK ROLLMASTER 600 User manual

Phoenix Contact
Phoenix Contact THERMOMARK ROLL 2.0 User manual

Phoenix Contact
Phoenix Contact UM IA THERMOMARK X1.1 User manual

Phoenix Contact
Phoenix Contact THERMOMARK CARD 2.0 User manual

Phoenix Contact
Phoenix Contact THERMOMARK GO.K User manual