manuals.online logo
Brands
  1. Home
  2. •
  3. Brands
  4. •
  5. Phoenix
  6. •
  7. Lock
  8. •
  9. Phoenix FS0352C Product information sheet

Phoenix FS0352C Product information sheet

INSTRUCTIONS POUR LA FIXATION AU SOL
DU FS0352C & GARANTIE
INSTRUCCIONES DE ANCLAJE DE LA CAJA
FUERTE FS0352C & GARANTÍA
GARANTIE
Pour une meilleure sécurité, nous vous recommandons d’enregistrer votre
garantie en ligne par notre site: www.phoenixsafe.com et en cliquant sur
enregistrement de garantie.
19 RUE DES HALLES, 16510 VERTEUIL SUR CHARENTE,
FRANCE | 00 33 (0) 5 45 89 68 80
GARANTÍA
Para mayor seguridad, le recomendamos que cuando acceda a nuestra página
web www.phoenixsafe.com, haga clic en Registro de garantía e introduzca su
registro de garantía.
AVDA, DE LA INDUSTRIA, 52 POLÍGONO INDUSTRIAL, 28820 COSLADA,
MADRID, ESPAÑA | 0034 (91) 6736411
1. Panel
2. Rueda de combinación
3. Pulsador
4. Cierre
5. Palanca de reposición
6. Cerrojo de resorte
1. CÓDIGO PREDETERMINADO DE FÁBRICA 000
2. PARA DESBLOQUEAR POR PRIMERA VEZ
1. Gire las ruedas de combinación para alinear el código predeterminado 000. Ver Fig. 1.
2. Para desbloquear, pulse el botón situado debajo de las ruedas de código. Ver Fig. 2.
3. PARA BLOQUEAR
1. Localice la sección de cierre sobre la barra de retención en la parte superior del asa.
2. Presione el cierre hasta que quede bloqueado (se oirá un clic).
3. Gire las ruedas de combinación para bloquear y deshaga la combinación.
4. PARA AJUSTAR UN NUEVO CÓDIGO
1. Desbloquee según las indicaciones del punto 2 anterior.
2. En la parte inferior de la cerradura, mueva la palanca de reposición hacia la derecha. Gire las
ruedas de combinación para ajustar el nuevo código X X X.
3. Libere la palanca de reposición para bloquear el nuevo código.
4. Por favor, compruebe su nuevo código después del reajuste y antes de bloquear la tapa.
1. Panneau
2. Roue à combinaison
3. Bouton poussoir
4. Fermoir
5. Levier de redémarrage
6. Verrou à ressort
1. CODE USINE 000
2. DÉVERROUILLER POUR LA PREMIÈRE FOIS
1. Faire tourner les roues à combinaison pour aligner le code usine 000 Voir Schéma 1.
2. Appuyez sur le bouton situé dessous de la roue à combinaison pour ouvrir Voir Schéma 2.
3. POUR VERROUILLER
1. Repérez le fermoir au dessus de la barre de maintien dans la section supérieure de la poignée.
2. Appuyez sur le fermoir jusqu’à ce qu’il se verrouille avec bruit sonore “click”.
3. Tournez la roue à combinaison pour verrouiller et pour brouiller la combinaison.
4. POUR ENTRER UN NOUVEAU CODE
1. Déverrouillez en suivant les instructions du paragraphe 2. ci-dessus.
2. Sur le dessous de la serrure déplacez le levier de redémarrage vers la droite. Tournez les
roues à combinaison pour installer votre nouveau code X X X.
3. Relâchez le levier de redémarrage pour la confirmation du nouveau code.
4. Veuillez vérifier votre nouveau code après avoir entré votre nouveau code et avant de
verrouiller le couvercle.
FS0352C INSTRUCTIONS &
GUARANTEE REGISTRATION
INSTRUCTIONS POUR LA FIXATION AU SOL
DU FS0352C & GARANTÍA
ANLEITUNG FÜR DIE BODENMONTAGE SERIE
FS0352C & GARANTIEKARTE
ISTRUZIONI DI FISSAGGIO ALLA BASE
FS0352C & GARANZIA
INSTRUCCIONES DE ANCLAJE DE LA CAJA
FUERTE FS0352C & GARANTIE
Phoenix Safe Company: Where peace  mind is guaranteed
FS0352C INSTRUCTIONS &
GUARANTEE REGISTRATION
ISTRUZIONI PER L’USO & REGISTRAZIONE
DELLA GARANZIA
ANLEITUNG FÜR DIE BODENMONTAGE SERIE
FS0352C & GARANTIEKARTE
Version 1/PB/JAN 16
REGISTRAZIONE DELLA GARANZIA
Per una maggiore sicurezza vi raccomandiamo di inoltrare la vostra
registrazione della garanzia visitando il nostro sito web: www.phoenixsafe.com
e cliccando su registrazione della garanzia.
VIA MONTE ROSA 28, 20049, CONCOREZZO, MILAN, ITALY | 39 039 5965844
GUARANTEE REGISTRATION
Please submit your guarantee registration by visiting our website
www.phoenixsafe.com and clicking on guarantee registration.
For further assistance or information please contact us on 0151 944 6444.
APEX HOUSE, 1 ORRELL MOUNT, LIVERPOOL, L20 6NS,
UNITED KINGDOM | +44 (0)151 944 6444
GARANTIEKARTE
Aus Sicherheitsgründen empfehlen wir Ihnen, Ihre Garantiekarte online auf
unserer Website www.phoenixsafe.com per Mausklick auf der Schaltfläche
„Garantieanmeldung“ auszufüllen.
DEUTSCHLAND GMBH, BAHNSTR. 23, D-42327 WUPPERTAL
0049-202-69519-0
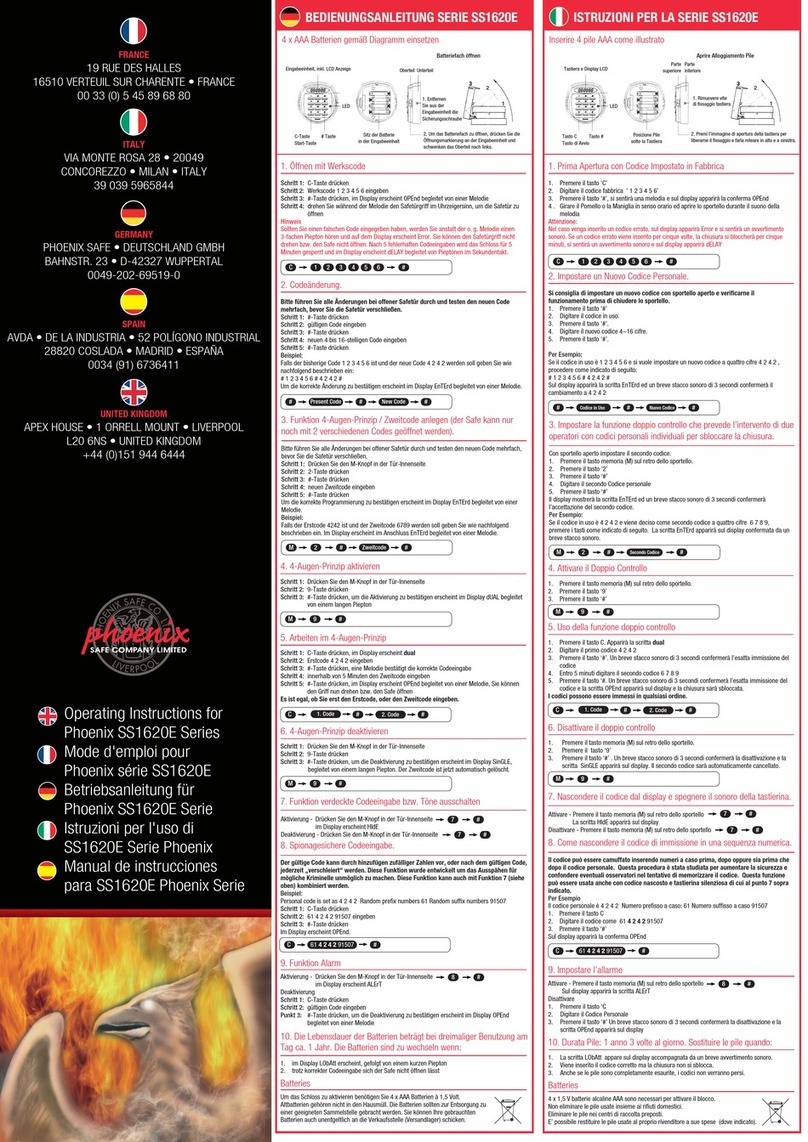
1. Panel
2. Combination Wheel
3. Press Button
4. Clasp
5. Reset Lever
6. Spring Bolt
1. FACTORY DEFAULT CODE 000
2. UNLOCKING FOR THE FIRST TIME
1. Rotate the combination wheels to align the default code 000. See Fig. 1
2. Press the release button located below the code wheels, to unlock. See Fig. 2
3. TO LOCK
1. Locate the clasp section over the retaining bar in the top section of the handle.
2. Press the clasp down until it locks in place with a ‘click’ sound.
3. Turn the combination wheels to lock and scramble the combination.
4. TO SET A NEW CODE
1. Unlock as instructed at 2. above.
2. On the underside of the lock move the Reset Lever to the right. Turn the combination wheels to
set the desired new code X X X.
3. Release the Reset Lever to lock the new code in.
4. Please test your new code after reset and before locking the lid.
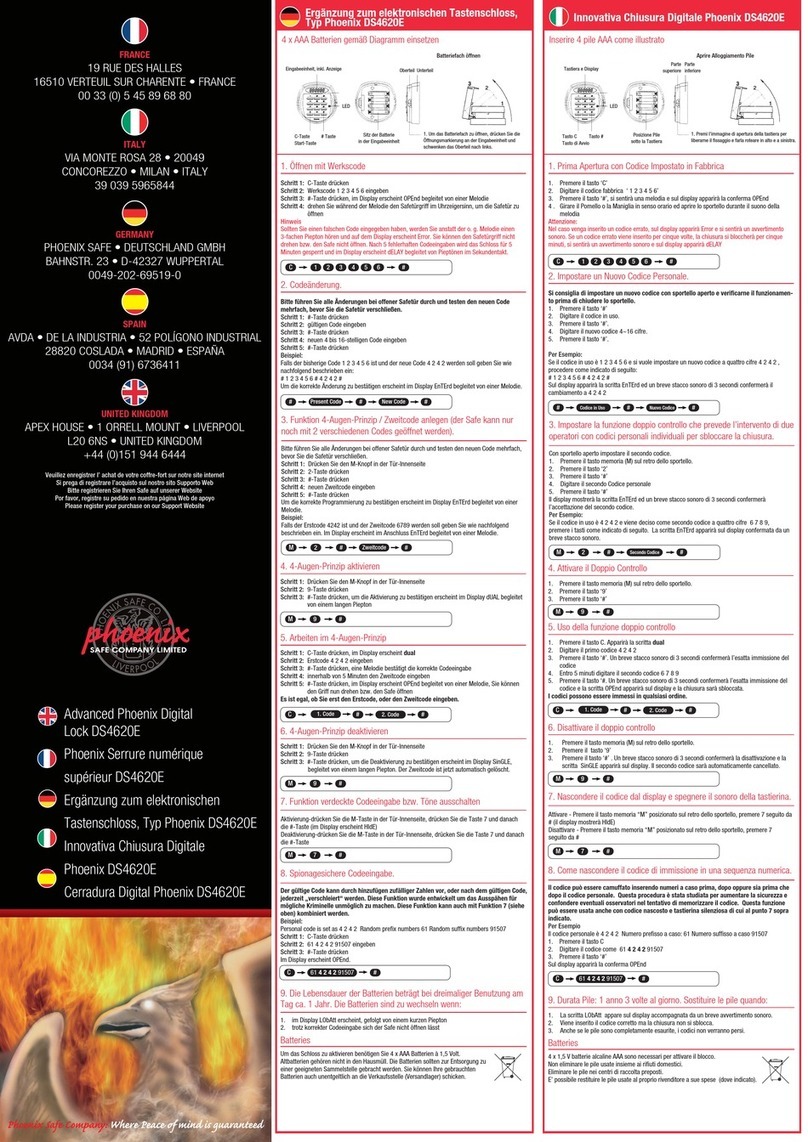
1. Eingabefeld
2. Zahlenrad
3. Druckknopf
4. Schließe
5. Rückstellhebel
6. Riegel
1. WERKSEINSTELLUNG 000
2. ERSTMALIGES ÖFFNEN
1. Stellen Sie durch drehen der Zahlenräder den Werkscode 000 ein, siehe Abbildung 1
2. Drücken Sie unterhalb der Zahlenräder den Entriegelungsknopf, siehe Abbildung 2
3. VERSCHLIESSEN
1. Nehmen Sie den Verschlussmechanismus und stecken Sie diesen in die Vertiefung
oberhalb des Handgriffes.
2. Drücken Sie die Schließe bis zum “click” in das Zahlenschloss.
3. Um das Zahlenschloss zu verschließen verdrehen Sie die Zahlenräder.
4. CODEÄNDERUNG
1. Entriegeln Sie wie unter 2.0 beschrieben
2. Auf der Unterseite des Schlosses bewegen Sie bitte den Rückstellhebel nach rechts. Drehen
Sie die Zahlenräder auf Ihren gewünschten Zahlencode.
3. Um den Zahlencode zu übernehmen schieben Sie den Rückstellhebel wieder in seine
Ursprungsposition zurück.
4. Bevor Sie den Deckel verschließen, probieren Sie bitte erst mehrfach die einwandfreie
Funktion des Zahlenschlosses aus.
1. Pannello
2. Rotella Combinazione
3. Tasto Sblocco
4. Aggancio
5. Leva Reset
6. Vite a molla
1. CODICE DEFAULT PRE-IMPOSTATO 000
2. PER APRIRE LA PRIMA VOLTA
1. Ruotare le rotelle della combinazione fino ad allineare il codice default 000. Vedi Fig. 1.
2. Premere il tasto di sblocco localizzato sotto le rotelle del codice, per aprire. Vedi Fig. 2.
3. PER CHIUDERE
1. Localizzare la sezione di aggancio sulla sbarra nella parte superiore della maniglia.
2. Abbassare la maniglia fino a quando un ‘click’ non confermerà il corretto posizionamento,
3. Girare le rotelle per chiudere e mischiare la combinazione.
4. PER IMPOSTARE UN NUOVO CODICE
1. Aprire come indicato al punto 2.
2. Sulla parte sottostante la chiusura spostare la Leva Reset sulla destra. Girare le rotelle della
combinazione per impostare il nuovo codice X X X.
3. Rilasciare la Leva Reset per bloccare il nuovo codice.
4. Provare il nuovo codice dopo l’operazione di reset e prima di chiudere il
coperchio.

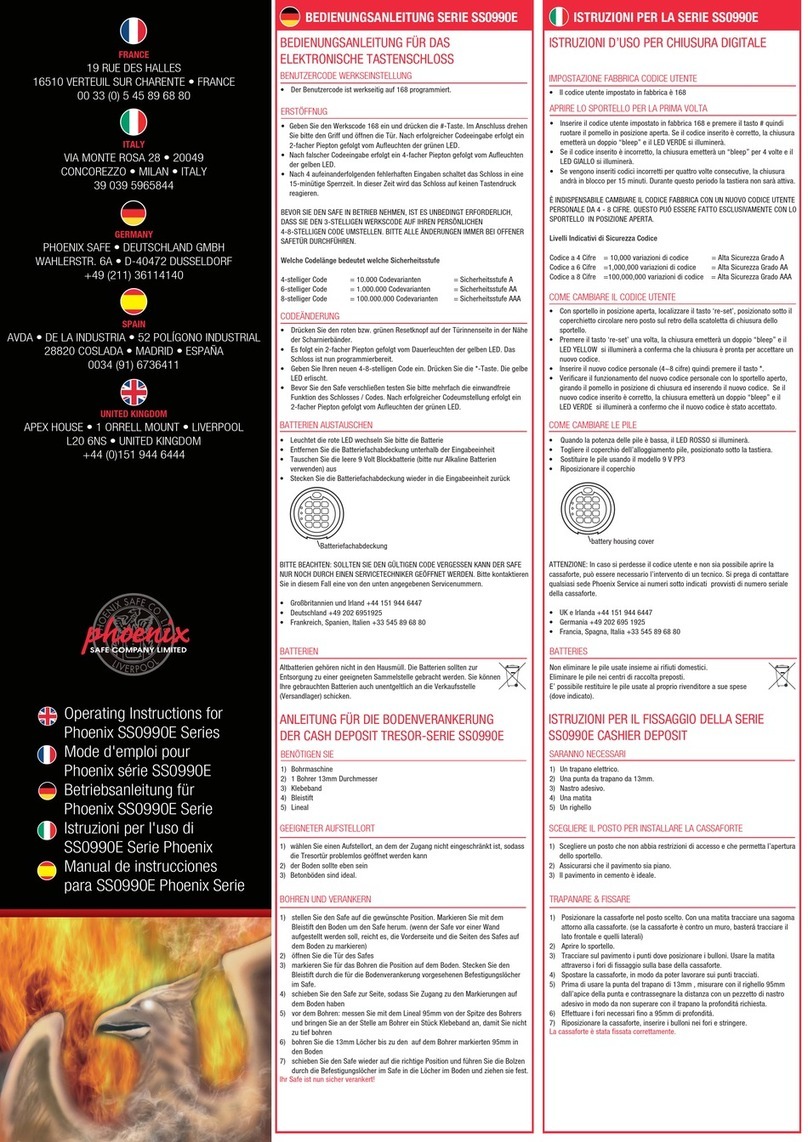
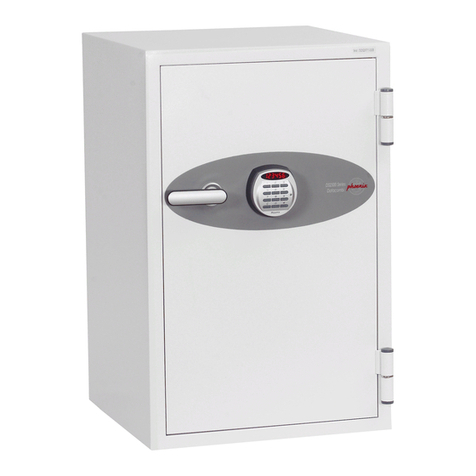
Other Phoenix Lock manuals

Phoenix SS0990E Series User manual

Phoenix

Phoenix SS0990E Series User manual

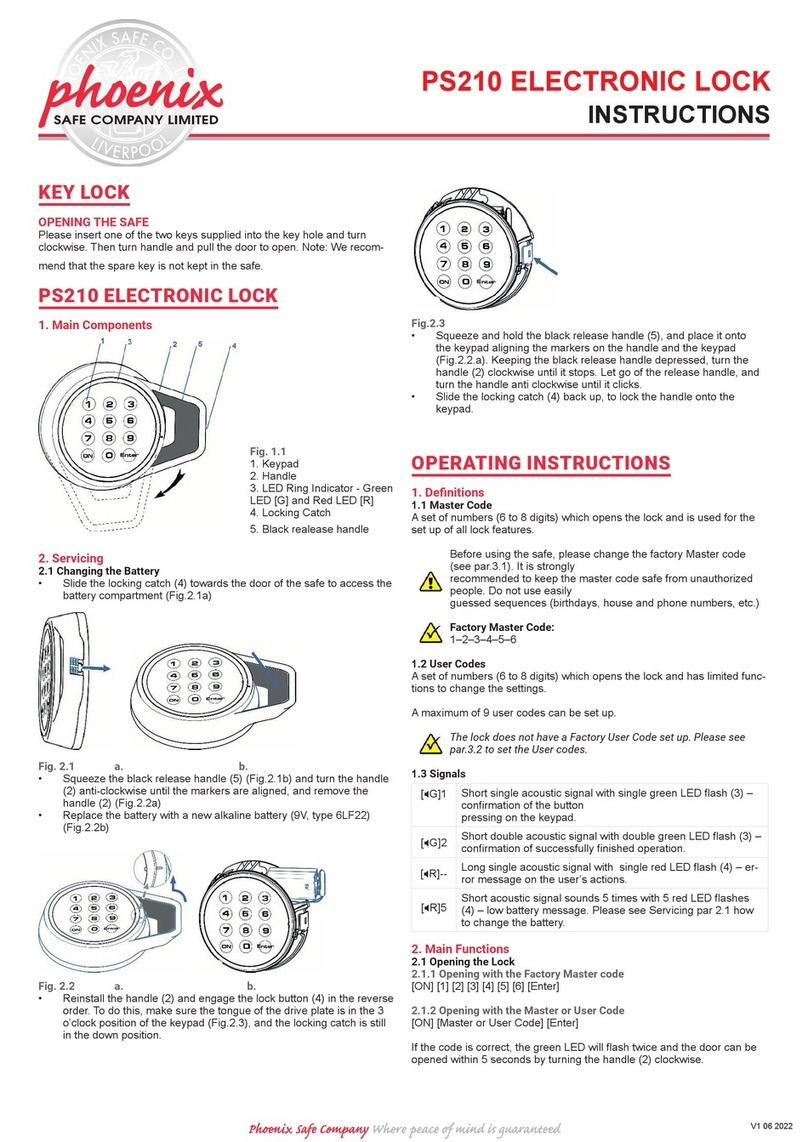
Phoenix PS210 User manual

Phoenix

Phoenix PS210 User manual

Phoenix Titan Aqua FS1290 Series User manual

Phoenix

Phoenix Titan Aqua FS1290 Series User manual

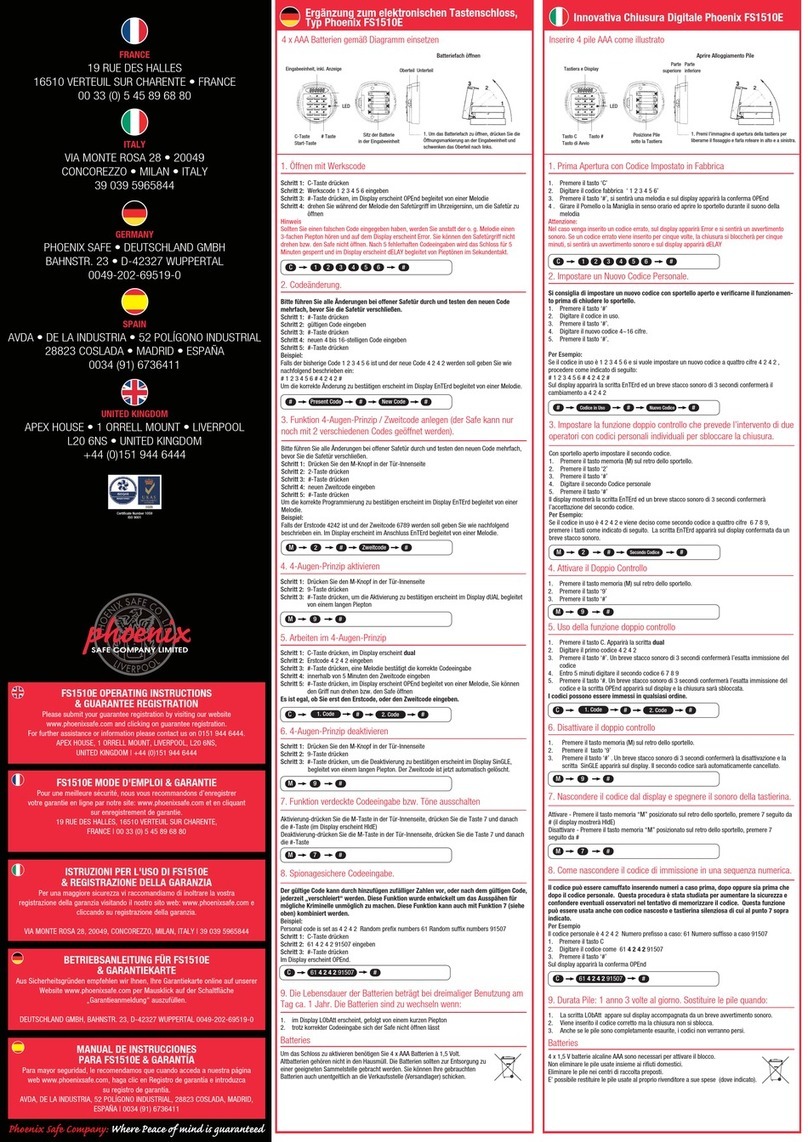
Phoenix FS1510E Series User manual

Phoenix

Phoenix FS1510E Series User manual

Phoenix SS1180 User manual

Phoenix

Phoenix SS1180 User manual

Phoenix SS1620E Series User manual

Phoenix

Phoenix SS1620E Series User manual

Phoenix DS4620E User manual

Phoenix

Phoenix DS4620E User manual

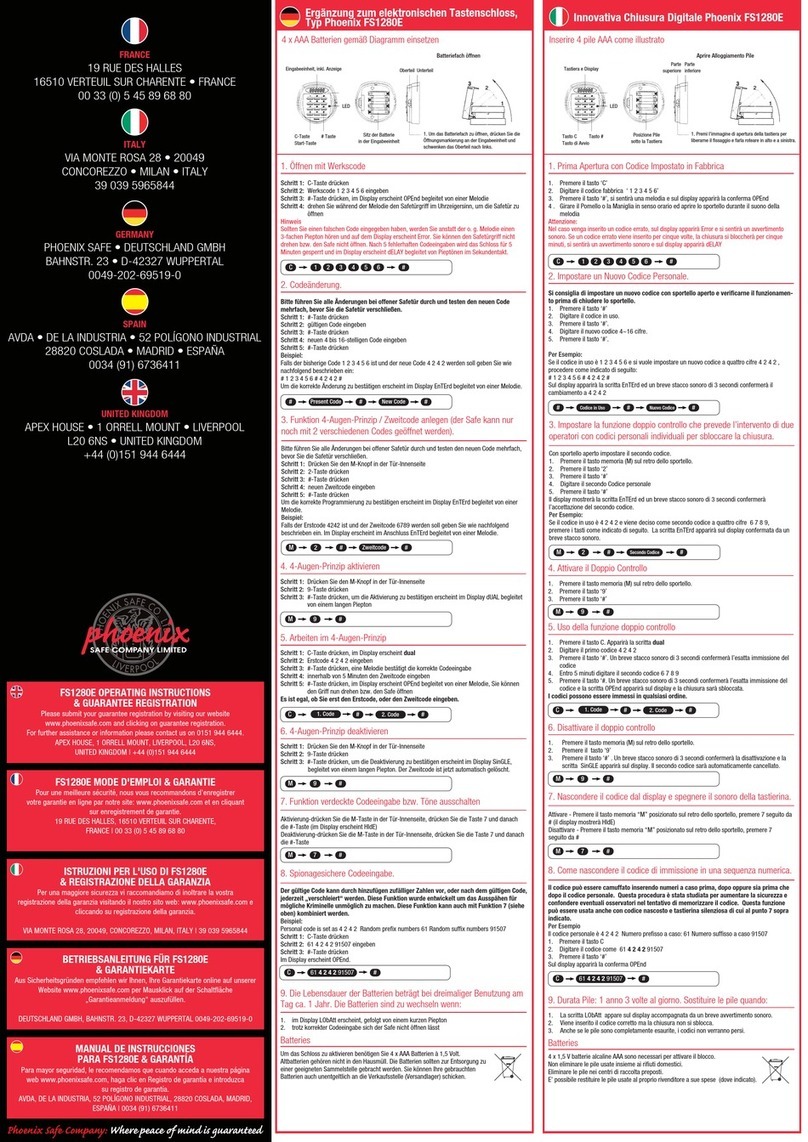
Phoenix FS1280E User manual

Phoenix

Phoenix FS1280E User manual

Phoenix FS1900E Series User manual

Phoenix

Phoenix FS1900E Series User manual

Phoenix FS 2250E User manual

Phoenix

Phoenix FS 2250E User manual

Phoenix FS1510E User manual

Phoenix

Phoenix FS1510E User manual

Phoenix KS0002C Series User manual

Phoenix

Phoenix KS0002C Series User manual

Phoenix Solar User manual

Phoenix

Phoenix Solar User manual

Phoenix FS1300 Product information sheet

Phoenix

Phoenix FS1300 Product information sheet

Phoenix PS310 User manual

Phoenix

Phoenix PS310 User manual

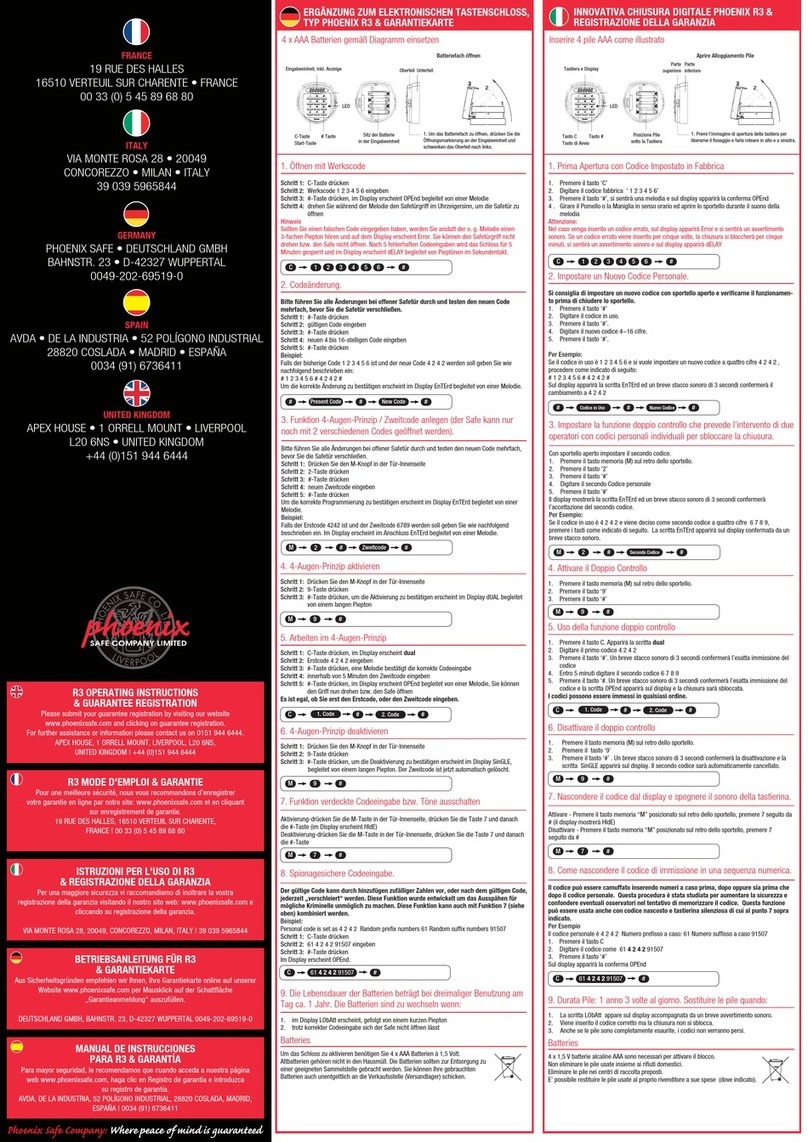
Phoenix R3 User manual

Phoenix

Phoenix R3 User manual

Phoenix R3 User manual

Phoenix

Phoenix R3 User manual

Phoenix SELO-A User manual

Phoenix

Phoenix SELO-A User manual

Phoenix SELO-B User manual

Phoenix

Phoenix SELO-B User manual

Phoenix DS2500E Series User manual

Phoenix

Phoenix DS2500E Series User manual

Phoenix FS0440E Series User manual

Phoenix

Phoenix FS0440E Series User manual

Phoenix FS1290 Series User manual

Phoenix

Phoenix FS1290 Series User manual

Popular Lock manuals by other brands

Homematic IP HmIP-eTRV-C-TP Mounting instruction

Homematic IP

Homematic IP HmIP-eTRV-C-TP Mounting instruction

steute Ex STM 515 3G/D Series Mounting and wiring instructions

steute

steute Ex STM 515 3G/D Series Mounting and wiring instructions

Geeklink Homelock V200 manual

Geeklink

Geeklink Homelock V200 manual

Panduit smartzone G5 installation guide

Panduit

Panduit smartzone G5 installation guide

Sentrilock REALTOR NXT Series owner's guide

Sentrilock

Sentrilock REALTOR NXT Series owner's guide

Unicor UN-6500 Series user manual

Unicor

Unicor UN-6500 Series user manual

Assa Abloy 8037...UL-91E91 Series installation instructions

Assa Abloy

Assa Abloy 8037...UL-91E91 Series installation instructions

PURE 2800 installation instructions

PURE

PURE 2800 installation instructions

Orion Halo Series manual

Orion

Orion Halo Series manual

Eminent PL369 manual

Eminent

Eminent PL369 manual

Bolt JL HOOD quick start guide

Bolt

Bolt JL HOOD quick start guide

steute EX STM 515 Mounting and wiring instructions

steute

steute EX STM 515 Mounting and wiring instructions

Carl Wittkopp FinKey VdS Class 1 quick start

Carl Wittkopp

Carl Wittkopp FinKey VdS Class 1 quick start

Schlage CO-100 installation instructions

Schlage

Schlage CO-100 installation instructions

Assa Abloy EL580 manual

Assa Abloy

Assa Abloy EL580 manual

Maco MULTI-MATIC Maintenance and adjustment instructions

Maco

Maco MULTI-MATIC Maintenance and adjustment instructions

Abus FO500N manual

Abus

Abus FO500N manual

Abus E360 user manual

Abus

Abus E360 user manual

manuals.online logo
manuals.online logoBrands
  • About & Mission
  • Contact us
  • Privacy Policy
  • Terms and Conditions

Copyright 2025 Manuals.Online. All Rights Reserved.