manuals.online logo
Brands
  1. Home
  2. •
  3. Brands
  4. •
  5. Physio Control
  6. •
  7. Medical Equipment
  8. •
  9. Physio Control LIFEPAK 15 User manual

Physio Control LIFEPAK 15 User manual

Title
LIFEPAK 15 Monitor Defibrillator CO2 Upgrade
Page
1 of 33
Doc Type
Service Process Document
Doc ID
3308217
Doc Rev
A
Doc State
Released
State Date
09/08/2011
Owner
Corporate
Attachments (Optional):
Qty
Pages
Page
Sequencing
Change Description
Create field service update of the LIFEPAK 15 Monitor/Defibrillator to add CO2 monitoring capability
This document is electronically signed in the Physio-Control, Inc. Product Lifecycle Management (PLM) System. Approvals can be
obtained from the PLM system which displays the selected approvers, their approval roles, and approval dates.
PROPRIETARY AND CONFIDENTIAL DOCUMENT FOR PHYSIO-CONTROL, INC. USE ONLY. This document is property of Physio-
Control and may not be used, reproduced, published or disclosed to others without authorization from Physio-Control.
Title
LIFEPAK 15 Monitor Defibrillator CO2 Upgrade
Page
2 of 33
Doc Type
Service Process Document
Doc ID
3308217
Doc Rev
A
Doc State
Released
State Date
09/08/2011
Purpose:
This instruction guides the Field Service Representative through the update process to add the CO2 feature to a LIFEPAK® 15
monitor/defibrillator.
Scope:
This upgrade is for 3206720-All (Version 1) and 3306272-All (Version 2) LIFEPAK 15 monitor/defibrillators that do not have the End-Tidal
Carbon Dioxide (CO2) monitoring feature installed.
These instructions are intended for authorized field service personnel who have reviewed the upgrade procedure and who are familiar with
the LIFEPAK 15 device.
Training:
As a prerequisite, only personnel that have completed LIFEPAK 15 monitor/defibrillator repair training are allowed to perform this upgrade
on a LIFEPAK 15 device. An individual will be considered fully trained when they meet the prerequisite, and read and understand this
document. Once this task is performed the individual has completed training. A documented training record will be retained.
Tools Required: (substitute of equivalent or better equipment allowed)
Computer –XP operating system
LIFEPAK 15 To PC Interconnect Cable 3009817-00 or 3009817-002
Torque Driver –Hand Operation, with an adjustable range of 5–12 in-lb.
Torque Driver –Hand Operation, with an adjustable range of 32–64 in-oz.
Driver Bits –P0 (2” minimum shaft), P1 (2” minimum shaft), P2 (5” minimum shaft), Torx, T-15 (2” minimum shaft)
Tools called out in the PIP - TCP sections of LIFEPAK 15 Monitor/Defibrillator PIP Test Procedure
All tools requiring calibration should be calibrated and within their calibration cycle dates.
Torque Driver conversions –2 lb-in = 32 in-oz = 22.5 cNm, 4 lb-in = 64 in-oz = 45 cNm, 6.8 lb-in = 77cNm, 10 lb-in = 113 cNm
Documentation Required:
Instructions –Installation, Software, Combined Loader P/N 3206073 revision N or greater
LIFEPAK 15 PIP/TCP Procedure P/N 3207841 revision D or greater
LIFEPAK 15 Service Manual, CD P/N 3208091-000 (V1) or 3309059-000 (V1/V2)
Work Instructions –CAPIP Test P/N 3301593.C or greater
Title
LIFEPAK 15 Monitor Defibrillator CO2 Upgrade
Page
3 of 33
Doc Type
Service Process Document
Doc ID
3308217
Doc Rev
A
Doc State
Released
State Date
09/08/2011
Materials Required:
Part Number
Description
Qty
3207813-XXX
Or
3305642-XXX
(V1) LABEL SET-(configured per kit)
(V2) LABEL SET-(configured per kit)
1
3012121-002
RETAINER-CO2 CONN
1
3012140-006
MODULE, CO2, MINI
1
202253-760
SCREW-M,PH,NYLOK,CS,4-40,.250L
4
3012397-01
CABLE ASSY-CO2, ADAPTER
1
3007997-01
SEAL-CO2 CONNECTOR
1
3012119-02
ADAPTER-CO2 CONNECTOR
1
3012140-008
FRS ASSEMBLY-CO2, MINI-MODULE, LP15
1
3206998-002
CABLE ASSY-CO2 MODULE, OEM PCB
1
3012140-002
EXHAUST TUBING-CO2
1
202253-732
SCREW-MACH,NYLOK,PNH,PHH,2-56X0.500,CS,ZN
4
3207337-312
SCREW-MACH,PNH,PHH,NYLOCK,4-40,0.312L,WSHR,CS,ZN
4
201407-069
SCREW,SELF-SEAL,SELF-LOCK,6-32 X 0.375
14
202253-760
SCREW-M,PH,NYLOK,CS,4-40,.250L
8
202253-761
SCREW-M,CS,Z,PH, NYLOCK, 4-40 X .312L 12
13
202253-763
SCREW,MACHINE,PANHEAD,NYLOK,4-40 X .437
2
3207361-375
SCREW-CAP,SCH,REC 15IP TORX PLUS,6-32,0.375L,SS
8
Warnings and Cautions:
LETHAL VOLTAGES MAY BE PRESENT INSIDE THIS DEVICE. THE STORAGE CAPACITOR MUST BE
DISCHARGED PRIOR TO PERFORMING ANY WORK WITHIN THE REAR CASE ASSEMBLY.
FAILURE TO DISCHARGE THE STORAGE CAPACITOR MAY RESULT IN INJURY OR DEATH.
General Requirements:
Unless specifically noted, all removed fasteners are to be discarded and new fasteners used for reassembly.
All removed parts with adhesive backing are to be discarded and new parts used for reassembly.
Unless specifically noted, all removed parts, except fasteners and adhesive backed parts, are to be kept with the device being
upgraded and re-used to reassemble the device.
Inspect all removed components for damage during disassembly and replace all damaged parts with new parts.
Title
LIFEPAK 15 Monitor Defibrillator CO2 Upgrade
Page
4 of 33
Doc Type
Service Process Document
Doc ID
3308217
Doc Rev
A
Doc State
Released
State Date
09/08/2011
Work Instruction Icon Definitions:
Work
Content
1
1st Person
Verify
Torque
!
Caution
Shock
Hazard
E
N
S
W
Orient
Clean
Work Content: The value add activity being done at the operation. Create a text box in this color to highlight the parts being
added.
1st Person Verify: Checking a person’s own work. This can be added as part of a pair of verifications driven from risk
assessment or can be called out by itself based upon some business need. Good verification practice
involves multiple senses (usually touch and look).
Torque: Use with any fastener that has a specific torque specification. Call out the specific torque requirement in
association with this symbol (measure and units). A fastener can be screws, bolts, nuts, or another
mechanical fastening device.
Caution: When a specific operation requires extra attention. It can be something that is challenging to perform, has a
higher likelihood of being performed incorrectly, or could present some level of risk to the person performing
the process.
Shock Hazard: When a person is exposed to something that contains electrical energy. Most likely during disassembly after
a unit has been energized.
Orient: When the orientation of the part matters and it could be assembled multiple ways. Making sure that labeling is
readable is the most common example.
Clean: For cosmetics or for adhesive preparation. The default cleaning material is chem-wipes. Call out if any
additional materials are to be used (such as alcohol) and the purpose of the cleaning.
1. Verify the Device Serial Number
Verify that device’s serial number label matches the serial number listed in the upgrade kit documentation.
2. Initial Power-Up Check
Install a fully charged battery onto the LIFEPAK 15 Monitor/Defibrillator. Press the ON key. Verify that the
device powers up with no service indicator light. If the service indicator light is illuminated, do not proceed
with this upgrade, and repair per the appropriate LIFEPAK 15 Monitor/Defibrillator repair process. If the
service indicator light is not illuminated, power off the device, remove the battery and continue with upgrade.
3. Downloading Device Data (Pre-Service Report Download)
FOR INTERNATIONAL, Use your normal service reporting process to document the service activity.
Open a service report and download the device data to the service report before proceeding with disassembly
of the device.
TORQUE
TORQUE
TORQUE
XX.X In-Lb
Title
LIFEPAK 15 Monitor Defibrillator CO2 Upgrade
Page
5 of 33
Doc Type
Service Process Document
Doc ID
3308217
Doc Rev
A
Doc State
Released
State Date
09/08/2011
4. Disassembling the Case
4.1 If applicable, remove carrying case.
4.2 Remove all cables and patient connections,
and then remove the batteries.
4.3 Remove the four front mounting screws
(3207361-375) from the bumpers. (Torx-15)
4.4 Remove the four rear mounting screws
(3207361-375) from the bumpers. (Torx-15)
4.5 Remove the bumpers (3207307-001 and
3206968-000) from the case and set aside.
Remove Screws
(4 places)
Remove Screws
(4 places)
Title
LIFEPAK 15 Monitor Defibrillator CO2 Upgrade
Page
6 of 33
Doc Type
Service Process Document
Doc ID
3308217
Doc Rev
A
Doc State
Released
State Date
09/08/2011
4. Disassembling the Case (continued)
4.6 Lay the defibrillator face down on a protective
surface to prevent damage, and then remove
the 14 case screws (201407-069). Discard the
screws.
4.7 Holding the case halves together, position the
device face-up on your work surface. Lift the
front case assembly slightly above the rear to
access the connecting cables.
DANGER
SHOCK HAZARD Lethal voltages may be present even
without operator action. Always discharge the energy
storage capacitor prior to servicing. See the service
manual “Capacitor Discharging Procedure”
for detailed instructions
Remove Screws
(7 places)
Remove Screws
(2 places)
Remove Screws
(5 places)
Title
LIFEPAK 15 Monitor Defibrillator CO2 Upgrade
Page
7 of 33
Doc Type
Service Process Document
Doc ID
3308217
Doc Rev
A
Doc State
Released
State Date
09/08/2011
4. Disassembling the Case (continued)
4.8 Disconnect the P2 system/interface flex cable
connector (W04) from the system PCB in the
rear case.
4.9 Disconnect the P23 therapy ribbon cable
connector (W11) in the front case from the
therapy PCB.
4.10 Disconnect the J24 therapy cable connector
(W11) from the P24 transfer relay connector
(A13).
4.11 Separate the front and rear cases halves.
Disconnect
P30 –System/
Interface Flex
Disconnect P2 –
System/Interface
Flex (W04). Lift
connector tab to
disconnect cable.
Disconnect
J24 - Therapy
Cable (W11)
Disconnect
P23 - Therapy
Ribbon Cable
(W11)
Title
LIFEPAK 15 Monitor Defibrillator CO2 Upgrade
Page
8 of 33
Doc Type
Service Process Document
Doc ID
3308217
Doc Rev
A
Doc State
Released
State Date
09/08/2011
4. Disassembling the Case (continued)
DANGER
SHOCK HAZARD: Lethal voltages may be present even
without operator action. Always discharge the energy
storage capacitor prior to servicing.
4.12 Before continuing any further, discharge the
energy storage capacitor using the discharge
tool (see LIFEPAK 15 service manual section
‘Capacitor Discharging Procedure’).
NOTE: You may need to disconnect the P51
connector of W20 from the therapy PCB to
gain access to discharge points.
4.12.1 Place one probe on a discharge point and
hold it steady.
4.12.2 Place the other probe on the remaining
discharge point and hold both probes
steady.
4.12.3 Observe the neon lamp inside the
capacitor discharge tool. If a charge of
approximately 90 volts is present, the neon
lamp will light.
4.12.4 Continue holding the probes on the points
indicated for at least 30 seconds after the
neon lamp is no longer lit.
DISCHARGE
STORAGE
CAPACITOR
Title
LIFEPAK 15 Monitor Defibrillator CO2 Upgrade
Page
9 of 33
Doc Type
Service Process Document
Doc ID
3308217
Doc Rev
A
Doc State
Released
State Date
09/08/2011
5. Removing the System (A01)/Therapy (A04) PCB
Assembly
5.1 Disconnect the connectors on the system PCB
as follows:
5.1.1 J1 - Press the connector locking tabs and
disconnect the power/system PCB cable
(W01).
5.1.2 (The system/interface PCB cable was
disconnected during case disassembly).
5.1.3 J4 - Disconnect the USB flex connector
(W14).
5.1.4 J6 –Disconnect the ECG connector cable
(W7).
5.1.5 J7 - Disconnect the IP/Temp connector cable
of the IP/Temp wire harness (W33 or W35) (if
present).
5.1.6 J106 (on A22 biphasic module) - Disconnect
the biphasic to therapy cable from the
biphasic PCB (W20).
Disconnect J4
USB Flex
Connector (W14)
Disconnect J6 ECG
and J7 IP/ Temp (if
present) connectors.
(W7 & W33)
Disconnect J1
PWR/ SYS Cable
(W01)
Disconnect J106
BTE cable
connector (W20)
Title
LIFEPAK 15 Monitor Defibrillator CO2 Upgrade
Page
10 of 33
Doc Type
Service Process Document
Doc ID
3308217
Doc Rev
A
Doc State
Released
State Date
09/08/2011
5. Removing the System (A01)/Therapy (A04) PCB
Assembly (continued)
5.2 Remove the seven screws (202253-761) and
one screw with washer (3207337-312) that
secured the system PCB to the rear case.
Discard the screws.
NOTE: The screw that is in the ECG shield
can easily be missed as part of screw
removal. Ensure that all screws are removed
prior to lifting the system/therapy PCB
assembly.
5.3 Set the rear case upright and move the
system/therapy PCB assembly towards the
front of the case to gain access to the rear
therapy PCB connectors.
5.4 Disconnect the J22 transfer relay from the
therapy board.
5.5 Disconnect the J21 transfer relay from the
therapy board.
Disconnect
J22 Red &
Black Cable
(A13)
Disconnect J21
Transfer Relay
(A13)
Remove
screw with
cap. washer
(1 place)
Remove
screws
(7 places)
Title
LIFEPAK 15 Monitor Defibrillator CO2 Upgrade
Page
11 of 33
Doc Type
Service Process Document
Doc ID
3308217
Doc Rev
A
Doc State
Released
State Date
09/08/2011
5. Removing the System (A01)/Therapy (A04) PCB
Assembly (continued)
5.6 Continue lifting the assembly. Disconnect the
following connectors on the therapy PCB in the
following order:
5.6.1 J18 –Disconnect transfer relay assembly
connector (A13).
5.6.2 J19 –Disconnect energy storage capacitor
connector (A15).
5.6.3 J20 –Disconnect Power/PCB therapy cable
(W02).
5.7 Lift the system/therapy board assembly out
from the rear case. Turn the system/therapy
board assembly over to expose the therapy
board.
5.8 Immediately discharge the pacing capacitor as
described in LIFEPAK 15 Service Manual
section, ‘Discharging the C15 Pacing
Capacitor’. The discharge points are located at
resistors R5 and R20 on the therapy board.
Disconnect
J19 Capacitor
(A15)
Disconnect
J18 Transfer
Relay (A13)
Disconnect
J20 Pwr/
Therapy (W02)
Title
LIFEPAK 15 Monitor Defibrillator CO2 Upgrade
Page
12 of 33
Doc Type
Service Process Document
Doc ID
3308217
Doc Rev
A
Doc State
Released
State Date
09/08/2011
6. Removing the OEM PCB (A06)
6.1 Disconnect Power Therapy Cable (W02) from
J8 on the power PCB.
6.2 Remove the OEM shield (3208298).
6.3 Remove the nylon standoff (3010569-02) from
the OEM PCB.
6.4 If present, disconnect the SpO2/OEM cable
(W21).
6.5 If present, remove the NIBP connector retainer
clip (3010805-000) and disconnect the
NIBP/OEM cable (W27).
6.6 Remove the four mounting screws. Discard the
screws.
6.7 Lift the right edge of the OEM PCB upward
slightly, and then slide the PCB to the right
(toward the capacitor) to disengage the direct
connection between the OEM PCB at J25 and
the power PCB at J16.
6.8 Lift the OEM board from the rear case.
Disconnect J8
Power/ Therapy
Cable (W02)
Remove
OEM Shield
Disconnect J28 NIBP/
OEM Cable (W27)
Remove nylon
standoff
Disconnect J26 SpO2/
OEM Cable (W21)
Disconnect J27 CO2/
OEM Cable (W27)
Remove Screws
(4 places)
Title
LIFEPAK 15 Monitor Defibrillator CO2 Upgrade
Page
13 of 33
Doc Type
Service Process Document
Doc ID
3308217
Doc Rev
A
Doc State
Released
State Date
09/08/2011
7. Removing the Transfer Relay Assembly (A13)
7.1 Remove the two mounting screws from the
capacitor bracket and remove the bracket
(3207031). Discard the screws.
7.2 Lift the high voltage relay out of the rear case.
Lift relay up and out of the way; do not
disconnect it.
Remove Cap
Bracket
Remove
Screws
(2 places)
Lift Relay
up & out of
the way
Move Relay
out of way
Title
LIFEPAK 15 Monitor Defibrillator CO2 Upgrade
Page
14 of 33
Doc Type
Service Process Document
Doc ID
3308217
Doc Rev
A
Doc State
Released
State Date
09/08/2011
8. Removing the OEM Modules bracket assembly
8.1 Remove the three mounting bracket screws.
Discard the screws.
8.2 If present, disconnect the NIBP inlet tube. Lift
the assembly as needed.
8.3 Lift the mounting bracket and cover from the
rear case.
8.4 For the NIBP option disassembly, remove the
NIBP cable (W27) from cable guide on bracket
cover.
8.5 Remove the four screws from the bracket cover
(3206965) and lift off the cover. Discard the
screws.
Remove
Screws
(3 places)
NIBP Tubing
disconnected
Remove NIBP
cable from
cable guide
Remove
screws
(4 places)
Title
LIFEPAK 15 Monitor Defibrillator CO2 Upgrade
Page
15 of 33
Doc Type
Service Process Document
Doc ID
3308217
Doc Rev
A
Doc State
Released
State Date
09/08/2011
9. Removing the Parameter Bezel
9.1 Disconnect the power/contact PCB (W05) from
the power board J12.
9.2 Remove the power/system cable (W01) from
the power board J17.
9.3 If present, carefully disconnect the SpO2
connector flex cable (W22) (3206995-004) from
J1 of the SpO2 PCB.
CAUTION
POSSIBLE COMPONENT DAMAGE The SpO2
connector flex cable can be damaged during
disassembly. If SpO2 connector is damaged, replace
the SpO2 flex cable using the MASIMO Sp02 Panel
Mount Cable Repair Kit (MIN 3305431-026) kit.
9.4 Remove the parameter bezel label from the
bezel.
9.5 Remove without CO2 spacer label (3207407-
000) from bezel.
9.6 Remove the two bezel mounting screws.
Discard the screws.
9.7 Lift out the parameter bezel (3206723-005)
from the rear case.
Remove
Screws
(2 places)
Disconnect J12
PWR/Contact
cable (W05)
Disconnect J17
PWR/System
cable (W01)
Remove
Parameter
Bezel Label
Remove W/O
CO2 Spacer
Label
Title
LIFEPAK 15 Monitor Defibrillator CO2 Upgrade
Page
16 of 33
Doc Type
Service Process Document
Doc ID
3308217
Doc Rev
A
Doc State
Released
State Date
09/08/2011
10. Installing the CO2 Inlet Connector Cable (W28)
10.1 Set the CO2 connector adapter (3012119) in
place on the face of the bezel.
10.2 Place the new CO2 connector retainer
(3012121) and new seal (3007997-01) in place
on the underside of the bezel and tighten
together with four new screws (202253-732),
torque to 32 in-oz using a P0 bit.
CAUTION
POSSIBLE MOISTURE LEAKAGE - When installing
the W28 cable, apply 32 in-oz of torque when
installing the screw retaining the W28 cable to help
prevent ingress of fluids.
10.3 Slide the CO2 inlet connector cable (W28)
(3012140-008) into the new CO2 connector
retainer.
CO2 Connector
Adapter 3012119
Screw
202253-732
(4 places)
CO2 Connector
Retainer 3012121
CO2 Seal
3007997
CO2 Inlet Connector
Location
FRS Assembly
3012140-008
T
O
R
Q
U
E
T
O
R
Q
U
E
T
O
R
Q
U
E
32 In-Oz
Title
LIFEPAK 15 Monitor Defibrillator CO2 Upgrade
Page
17 of 33
Doc Type
Service Process Document
Doc ID
3308217
Doc Rev
A
Doc State
Released
State Date
09/08/2011
Title
LIFEPAK 15 Monitor Defibrillator CO2 Upgrade
Page
18 of 33
Doc Type
Service Process Document
Doc ID
3308217
Doc Rev
A
Doc State
Released
State Date
09/08/2011
11. Installing the Parameter Bezel
Observe the following:
Clean away any adhesive residue on the
parameter bezel with isopropyl alcohol.
CAUTION
POSSIBLE MOISTURE LEAKAGE - Visually inspect
the mating surfaces between the parameter bezel and
the rear case before and after fastening to ensure that
they are even.
11.1 Place the parameter bezel above the rear case
to make the cable connections.
11.2 If present, route NIBP tube through opening in
power PCB bracket next to the J9 connector,
power PCB.
11.3 If present, connect the SpO2 connector cable
(W22) to SpO2 PCB (A16) at JP1.
11.4 Route W28 CO2 inlet tube and cable around
end of Power PCB and above SpO2 cable.
11.5 Reinstall the parameter bezel onto rear case
with two new screws (202253-763), torque to
6.8 in-lb.
CAUTION
Ensure the NIBP hose isn't pinched by the ECG
Brackets or rear case standoff. NIBP hose movement
should be unrestricted in bezel cavity.
Screw
202253-763
(2 places)
Route CO2 Inlet Cable
and Tubing around
edge of Power PCB
and above SpO2 cable
T
O
R
Q
U
E
T
O
R
Q
U
E
T
O
R
Q
U
E
6.8 In-Lb
NIBP hose
routing
Title
LIFEPAK 15 Monitor Defibrillator CO2 Upgrade
Page
19 of 33
Doc Type
Service Process Document
Doc ID
3308217
Doc Rev
A
Doc State
Released
State Date
09/08/2011
12. Installing the CO2 (A23) Modules
To install the CO2 option:
12.1 Attach the CO2 module (3012140) to the
mounting bracket with four new screws
(202253-760), torque to 64 in-oz.
12.2 Connect the OEM PCB/CO2 module cable
(3206998) to the A23 CO2 PCB at J4.
12.3 Connect the CO2 adapter cable (3012397) to
the A23 CO2 PCB at J1.
Note: shown with
NIBP Module
installed
T
O
R
Q
U
E
T
O
R
Q
U
E
T
O
R
Q
U
E
64 In-Oz
Screw
202253-760
(4 places)
CO2 Module
3012140
OEM/CO2
Cable
3206998
CO2 Adapter
Cable
3012397
Title
LIFEPAK 15 Monitor Defibrillator CO2 Upgrade
Page
20 of 33
Doc Type
Service Process Document
Doc ID
3308217
Doc Rev
A
Doc State
Released
State Date
09/08/2011
12. Installing the CO2 (A23) Modules (continued)
12.4 Route the CO2 tubing and CO2 adapter cable
as shown. Ensure that the cable and tubing are
not pinched when installing the bracket cover.
12.5 Attach the bracket cover to the OEM bracket
with four new screws (202253-760), torque to
64 in-oz.
12.6 If Present, route the NIBP cable through the
cable mount on side on bracket cover.
CO2 Option
Screws
202253-760
(4 places)
T
O
R
Q
U
E
T
O
R
Q
U
E
T
O
R
Q
U
E
64 In-Oz
NIBP Option

Other manuals for LIFEPAK 15

8

This manual suits for next models

2

Other Physio Control Medical Equipment manuals
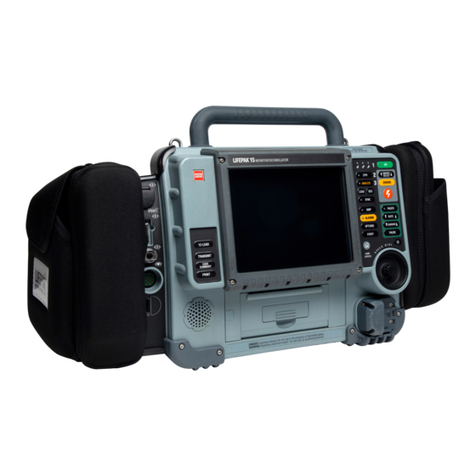
Physio Control TrueCPR Reference guide

Physio Control

Physio Control TrueCPR Reference guide

Physio Control LIFEPAK 20 User manual

Physio Control

Physio Control LIFEPAK 20 User manual

Physio Control LIFEPAK 15 User manual

Physio Control

Physio Control LIFEPAK 15 User manual

Physio Control LIFEPAK CR PLus User manual

Physio Control

Physio Control LIFEPAK CR PLus User manual

Physio Control LIFEPAK CR PLus User manual

Physio Control

Physio Control LIFEPAK CR PLus User manual

Physio Control LIFEPAK 20 User manual

Physio Control

Physio Control LIFEPAK 20 User manual

Physio Control Lifepak CR2 LIFELINKcentral User manual

Physio Control

Physio Control Lifepak CR2 LIFELINKcentral User manual

Physio Control Lifepak CR2 LIFELINKcentral User manual

Physio Control

Physio Control Lifepak CR2 LIFELINKcentral User manual

Physio Control LIFEPAK 500 User manual

Physio Control

Physio Control LIFEPAK 500 User manual

Physio Control LIFEPAK 15 User manual

Physio Control

Physio Control LIFEPAK 15 User manual

Physio Control HeartStart MRx User manual

Physio Control

Physio Control HeartStart MRx User manual

Physio Control LIFEPAK 20 User manual

Physio Control

Physio Control LIFEPAK 20 User manual

Physio Control LIFEPAK 15 V2 User manual

Physio Control

Physio Control LIFEPAK 15 V2 User manual

Physio Control LIFEPAK 15 User manual

Physio Control

Physio Control LIFEPAK 15 User manual

Physio Control LIFEPAK 15 Quick start guide

Physio Control

Physio Control LIFEPAK 15 Quick start guide

Physio Control lucas 2 User manual

Physio Control

Physio Control lucas 2 User manual

Physio Control LIFEPAK 15 V4 User manual
Physio Control

Physio Control LIFEPAK 15 V4 User manual

Physio Control LUCAS 3 User manual

Physio Control

Physio Control LUCAS 3 User manual

Physio Control LIFEPAK 12 User manual

Physio Control

Physio Control LIFEPAK 12 User manual

Physio Control LIFEPAK 20 User manual

Physio Control

Physio Control LIFEPAK 20 User manual

Physio Control LIFEPAK CR PLus User manual

Physio Control

Physio Control LIFEPAK CR PLus User manual
Physio Control LPCR2 User manual

Physio Control

Physio Control LPCR2 User manual
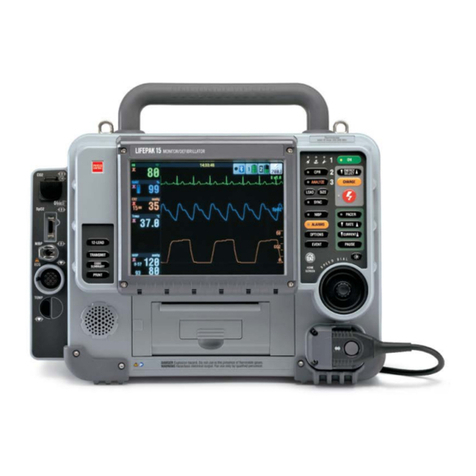
Physio Control LIFEPAK 15 Technical manual

Physio Control

Physio Control LIFEPAK 15 Technical manual

Physio Control LIFEPAK 9 User manual

Physio Control

Physio Control LIFEPAK 9 User manual

Popular Medical Equipment manuals by other brands

Beurer IH 26 Kids Instructions for use

Beurer

Beurer IH 26 Kids Instructions for use

Matco Tools FixAdvisor Pro MD80 Quick reference guide

Matco Tools

Matco Tools FixAdvisor Pro MD80 Quick reference guide

3M Bair Hugger 675 Service manual

3M

3M Bair Hugger 675 Service manual

BIO-MED DEVICES Crossvent-2i+ Operation & service manual

BIO-MED DEVICES

BIO-MED DEVICES Crossvent-2i+ Operation & service manual

ANCEL AD310 user manual

ANCEL

ANCEL AD310 user manual

3RAY Electronics ECG-2301G Operation manual

3RAY Electronics

3RAY Electronics ECG-2301G Operation manual

Moller Medical LiquoGuard 7 manual

Moller Medical

Moller Medical LiquoGuard 7 manual

Halyard CO LIEF PMG-Basic user manual

Halyard

Halyard CO LIEF PMG-Basic user manual

Otto Bock 3B1-3 Instructions for use

Otto Bock

Otto Bock 3B1-3 Instructions for use

Hitachi EUP-C516 instruction manual

Hitachi

Hitachi EUP-C516 instruction manual

Buffalo filter PlumeSafe Wisper 602 Service manual

Buffalo filter

Buffalo filter PlumeSafe Wisper 602 Service manual

FLAEM NUOVA Primo.Neb Instructions for use manual

FLAEM NUOVA

FLAEM NUOVA Primo.Neb Instructions for use manual

Sunrise Medical DeVilbiss RPM 9055 Series Instruction guide

Sunrise Medical

Sunrise Medical DeVilbiss RPM 9055 Series Instruction guide

Masimo Radical-7R Operator's manual

Masimo

Masimo Radical-7R Operator's manual

OCULUS Easygraph 70620 instruction manual

OCULUS

OCULUS Easygraph 70620 instruction manual

Jorvet J1060Q user manual

Jorvet

Jorvet J1060Q user manual

baxter artis Operator's manual

baxter

baxter artis Operator's manual

Vatech EzSensor HD Installation & user manual

Vatech

Vatech EzSensor HD Installation & user manual

manuals.online logo
manuals.online logoBrands
  • About & Mission
  • Contact us
  • Privacy Policy
  • Terms and Conditions

Copyright 2025 Manuals.Online. All Rights Reserved.