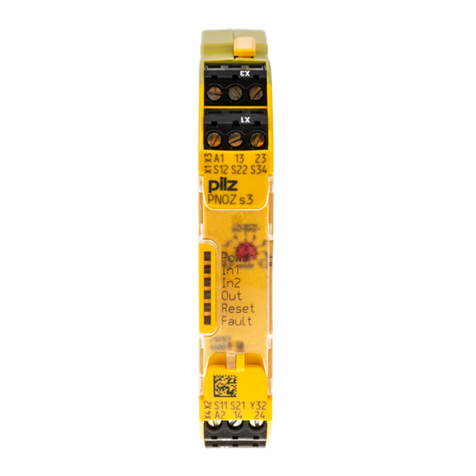
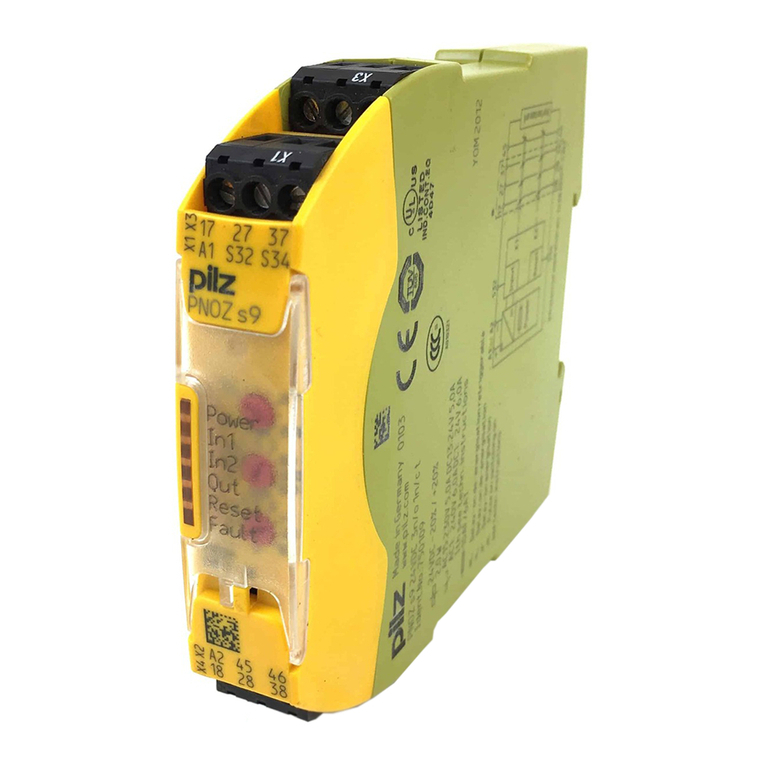
Pilz PNOZ s3 User manual

21395-6NL-09
PNOZ s3
- 1 -
4D Betriebsanleitung
4GB Operating instructions
4F Manuel d'utilisation
4E Instrucciones de uso
4I Istruzioni per l`uso
4NL Gebruiksaan ijzing
21395-6NL-09PNOZ s3
Sicherheitsschaltgerät PNOZ s3
582400011
Das Sicherheitsschaltgerät dient dem sicher-
heitsgerichteten Unterbrechen eines Sicher-
heitsstromkreises.
114371211
Das Sicherheitsschaltgerät erfüllt Forderungen
der EN 60947-5-1, EN 60204-1 und
VDE 0113-1 und darf eingesetzt werden in An-
wendungen mit
Not-Halt-Tastern
Schutztüren
Lichtschranken
PNOZ s3 safety relay
The safety relay provides a safety-related inter-
ruption of a safety circuit.
The safety relay meets the requirements of
EN 60947-5-1, EN 60204-1 and VDE 0113-1
and may be used in applications with
E-STOP pushbuttons
Safety gates
Light beam devices
Bloc logique de sécurité PNOZ s3
Le bloc logique de sécurité sert à interrompre
en toute sécurité un circuit de sécurité.
Le bloc logique de sécurité satisfait aux exigen-
ces des normes EN 60947-5-1, EN 60204-1 et
VDE 0113-1 et peut être utilisé dans des appli-
cations avec des
boutons-poussoirs de arrêt d'urgence
protecteurs mobiles
barrières immatérielles
Zu Ihrer Sicherheit
547263243
Installieren und nehmen Sie das Gerät nur
dann in Betrieb, wenn Sie diese Betriebsan-
leitung gelesen und verstanden haben und
Sie mit den geltenden Vorschriften über Ar-
beitssicherheit und Unfallverhütung vertraut
sind.
Beachten Sie die VDE- sowie die örtlichen
Vorschriften, insbesondere hinsichtlich
Schutzmaßnahmen
Durch Öffnen des Gehäuses oder eigen-
mächtige Umbauten erlischt jegliche Ge-
währleistung.
For your safety
Only install and commission the unit if you
have read and understood these operating
instructions and are familiar with the applica-
ble regulations for health and safety at work
and accident prevention.
Ensure VDE and local regulations are met,
especially those relating to safety.
Any guarantee is rendered invalid if the hous-
ing is opened or unauthorised modifications
are carried out.
Pour votre sécurité
Vous n'installerez l'appareil et ne le mettrez
en service qu'après avoir lu et compris le
présent manuel d'utilisation et vous être fa-
miliarisé avec les prescriptions en vigueur
sur la sécurité du travail et la prévention des
accidents.
Respectez les normes locales ou VDE, parti-
culièrement en ce qui concerne la sécurité.
L'ouverture de l'appareil ou sa modification
annule automatiquement la garantie.
Gerätemerkmale
463556747
Relaisausgänge zwangsgeführt:
– 2 Sicherheitskontakte (S) unverzögert
1 Halbleiterausgang
Anschlussmöglichkeiten für:
– Not-Halt-Taster
– Schutztürgrenztaster
– Starttaster
– Lichtschranken
– PSEN
1 Kontakterweiterungsblock PNOZsigma
über Verbindungsstecker anschließbar
Betriebsarten mit Drehschalter einstellbar
LED-Anzeige für:
– Versorgungsspannung
– Eingangszustand Kanal 1
– Eingangszustand Kanal 2
– Schaltzustand Kanal 1/2
–Startkreis
–Fehler
steckbare Anschlussklemmen (wahlweise
Federkraftklemme oder Schraubklemme)
Unit features
Positive-guided relay outputs:
– 2 safety contacts (N/O), instantaneous
1 semiconductor output
Connection options for:
– E-STOP pushbutton
– Safety gate limit switch
– Reset button
– Light barriers
–PSEN
A connector can be used to connect 1
PNOZsigma contact expander module
Operating modes can be set via rotary switch
LED indicator for:
– Supply voltage
– Input status, channel 1
– Input status, channel 2
– Switch status channel 1/2
– Reset circuit
–Error
Plug-in connection terminals (either spring-
loaded terminal or screw terminal)
Caractéristiques de l'appareil
Sorties de relais à contact lié :
– 2 contacts de sécurité (F) instantanés
1 sortie statique
Raccordements possibles pour :
– poussoir d'arrêt d'urgence
– interrupteur de position
– poussoir de réarmement
– barrières immatérielles
–PSEN
1 bloc d'extension de contacts PNOZsigma
raccordable par connecteur
Modes de fonctionnement réglables par sé-
lecteur
LED de visualisation pour :
– tension d'alimentation
– Etat d'entrée canal 1
– Etat d'entrée canal 2
– état de commutation des canaux 1/2
– circuit de réarmement
– Erreur
Borniers de raccordement débrochables (au
choix bornier à ressort ou bornier à vis)
Sicherheitseigenschaften
117575307
Das Schaltgerät erfüllt folgende Sicherheitsan-
forderungen:
Die Schaltung ist redundant mit Selbstüber-
wachung aufgebaut.
Die Sicherheitseinrichtung bleibt auch bei
Ausfall eines Bauteils wirksam.
Bei jedem Ein-Aus-Zyklus der Maschine wird
automatisch überprüft, ob die Relais der Si-
cherheitseinrichtung richtig öffnen und
schließen.
114378891
Das Gerät hat eine elektronische Sicherung.
Safety features
The relay meets the following safety require-
ments:
The circuit is redundant with built-in self-
monitoring.
The safety function remains effective in the
case of a component failure.
The correct opening and closing of the safety
function relays is tested automatically in
each on-off cycle.
The unit has an electronic fuse.
Caractéristiques de sécurité
Le relais satisfait aux exigences de sécurité
suivantes :
La conception interne est redondante avec
une autosurveillance.
Le dispositif de sécurité reste actif, même en
cas de défaillance d'un composant.
L'ouverture et la fermeture correctes des re-
lais internes sont contrôlées automatique-
ment à chaque cycle marche/arrêt de la
machine.
L'appareil est équipé d'une sécurité électro-
nique.

- 2 -
Blockschaltbild/Klemmenbelegung Block diagram/terminal configuration Schéma de principe/affectation des
bornes
1354888075
*Isolation zum nicht markierten Bereich und der
Relaiskontakte zueinander: Basisisolierung
(Überspannungskategorie III), sichere Tren-
nung (Überspannungskategorie II)
*Insulation between the non-marked area and
the relay contacts: Basic insulation (overvolt-
age category III), safe separation (overvoltage
category II)
*Isolation de la partie non sélectionnée par rap-
port aux contacts relais : isolation basique (ca-
tégorie de surtensions III), isolation galvanique
(catégorie de surtensions II)
566336011
Mitte: Frontansicht mit Abdeckung
Rechts: Frontansicht ohne Abdeckung
Centre: Front view with cover
Right: Front view without cover
Schéma du milieu : vue frontale avec capot de
protection
A droite : vue frontale sans capot de protection
Funktionsbeschreibung
547279627
Einkanaliger Betrieb: keine Redundanz
im Eingangskreis, Erdschlüsse im Start-
kreis und Eingangskreis werden erkannt.
Zweikanaliger Betrieb ohne Quer-
schlusserkennung: redundanter Ein-
gangskreis, erkennt
– Erdschlüsse im Start- und Eingangs-
kreis,
– Kurzschlüsse im Eingangskreis und
bei überwachtem Start auch im Start-
kreis.
550687755
Zweikanaliger Betrieb mit Querschlus-
serkennung: redundanter Eingangskreis,
erkennt
– Erdschlüsse im Start- und Eingangs-
kreis,
– Kurzschlüsse im Eingangskreis und
bei überwachtem Start auch im Start-
kreis,
– Querschlüsse im Eingangskreis.
550690059
Automatischer Start: Gerät wird aktiv,
nachdem Eingangskreis geschlossen
wurde.
Manueller Start: Gerät wird aktiv, wenn
der Eingangskreis geschlossen ist und
danach der Startkreis geschlossen wird.
463145099
Überwachter Start mit steigender Flanke:
Gerät wird aktiv, wenn der Eingangskreis
geschlossen ist und nach Ablauf der
Wartezeit (s. techn. Daten) der Startkreis
geschlossen wird.
457338123
Überwachter Start mit fallender Flanke:
Gerät wird aktiv, wenn
– der Eingangskreis geschlossen ist und
danach der Startkreis geschlossen
und wieder geöffnet wird.
–derStartkreisgeschlossen und nach
Schließen des Eingangskreises wieder
geöffnet wird.
419458699
Start mit Anlauftest: Das Gerät prüft, ob
nach Anlegen der Versorgungsspannung
geschlossene Schutztüren geöffnet und
wieder geschlossen werden.
Function description
Single-channel operation: no redundan-
cy in the input circuit, earth faults in the
reset circuit and input circuit are detect-
ed.
Dual-channel operation without detec-
tion of shorts across contacts: redun-
dant input circuit, detects
– earth faults in the reset and input cir-
cuit,
– short circuits in the input circuit and,
with a monitored reset, in the reset cir-
cuit too.
Dual-channel operation with detection of
shorts across contacts: redundant input
circuit, detects
– earth faults in the reset and input cir-
cuit,
– short circuits in the input circuit and,
with a monitored reset, in the reset cir-
cuit too,
– shorts between contacts in the input
circuit.
Automatic reset: Unit is active once the
input circuit has been closed.
Manual reset: Unit is active once the in-
put circuit is closed and then the reset
circuit is closed.
Monitored reset with rising edge: Unit is
active once the input circuit is closed and
once the reset circuit is closed after the
waiting period has elapsed
(see technical details).
Monitored reset with falling edge: Unit is
active once
– the input circuit is closed and then the
reset circuit is closed and opened
again.
– the reset circuit is closed and then
opened again once the input circuit is
closed.
Reset with start-up test: The unit checks
whether safety gates that are closed are
opened and then closed again when
supply voltage is applied.
Description du fonctionnement
Commande par 1 canal : pas de redon-
dance dans le circuit d'entrée, les mises
à la terre dans les circuits de réarmement
et d'entrée sont détectés
2 canaux d'entrée sans détection des
court-circuits : circuit d'entrée redon-
dant; sont détecté
– les mises à la terre dans le circuit de
réarmement et le circuit d'entrée;
– les courts-circuits dans le circuit d'en-
trée ainsi que dans le circuit de réar-
mement lors d'un réarmement auto-
contrôlé.
2 canaux d'entrée avec détection des
court-circuits : circuit d'entrée redon-
dant; sont détectés
– les mises à la terre dans le circuit de
réarmement et le circuit d'entrée;
– les courts-circuits dans le circuit d'en-
trée ainsi que dans le circuit de réar-
mement lors d'un réarmement auto-
contrôlé;
– les courts-circuits entre les circuits
d'entrée.
Réarmement automatique : l'appareil est
activé une fois que le circuit d'entrée est
fermé.
Réarmement manuel : l'appareil est acti-
vé lorsque le circuit d'entrée est fermé et
après que le circuit de réarmement se
soit fermé.
Réarmement auto-contrôlé avec front
montant : l'appareil est activé lorsque le
circuit d'entrée est fermé et lorsque le
circuit de réarmement se ferme après
l'écoulement du temps d'attente (voir les
caractéristiques techniques).
Réarmement auto-contrôlé avec front
descendant : l'appareil est actif si
– le circuit d'entrée est fermé puis le cir-
cuit de réarmement fermé et réouvert.
– le circuit de réarmement est fermé
puis réouvert après la fermeture du cir-
cuit d'entrée.
InputInput
A1 A2 S21 S22
=
Po er
Reset/
Start
S34
S11 S12
=
Y32
K1
K2
13 23
24
14
Interface
expansion
unit
*
In2+
In2-
In2+
In2-
In2+
In2-

- 3 -
457341963
Kontaktvervielfältigung und –verstärkung der
unverzögerten Sicherheitskontakte durch
Verdrahtung von Kontakterweiterungs-
blöcken oder externen Schützen möglich;
1 Kontakterweiterungsblock PNOZsigma
über Verbindungsstecker anschließbar.
Increase in the number of available instanta-
neous safety contacts by connecting contact
expander modules or external contactors/re-
lays;
A connector can be used to connect 1
PNOZsigma contact expander module.
Réarmement avec test des conditions
initiales : l'appareil contrôle, après l'ap-
plication de la tension d'alimentation, si
les protecteurs mobiles fermés sont
ouverts puis refermés.
Augmentation et renforcement possibles du
nombre de contacts de sécurité instantanés
par le câblage des blocs d'extension des
contacts ou de contacteurs externes ;
1 bloc d'extension de contacts PNOZsigma
raccordable par connecteur.
Montage
419461003
Grundgerät ohne Kontakterweiterungs-
block montieren:
Stellen Sie sicher, dass der Abschluss-
stecker seitlich am Gerät gesteckt ist.
Grundgerät und Kontakterweiterungsblock
PNOZsigma verbinden:
Entfernen Sie den Abschlussstecker seitlich
am Grundgerät und am Kontakterweite-
rungsblock.
Verbinden Sie das Grundgerät und den Kon-
takterweiterungsblock mit dem mitgeliefer-
ten Verbindungsstecker bevor Sie die Geräte
auf der Normschiene montieren.
Montage im Schaltschrank
Montieren Sie das Sicherheitsschaltgerät in
einen Schaltschrank mit einer Schutzart von
mindestens IP54.
Befestigen Sie das Gerät mit Hilfe des Rast-
elements auf der Rückseite auf einer Norm-
schiene (35 mm).
Bei senkrechter Einbaulage: Sichern Sie das
Gerät durch ein Halteelement (z. B. Endhalter
oder Endwinkel).
Vor dem Abheben von der Normschiene das
Gerät nach oben oder unten schieben.
Installation
Install base unit without contact expander
module:
Ensure that the plug terminator is inserted at
the side of the unit.
Connect base unit and PNOZsigma contact
expander module:
Remove the plug terminator at the side of the
base unit and at the contact expander mod-
ule.
Connect the base unit and the contact ex-
pander module to the supplied connector
before mounting the units to the DIN rail.
Installation in control cabinet
The safety relay should be installed in a con-
trol cabinet with a protection type of at least
IP54.
Use the notch on the rear of the unit to attach
it to a DIN rail (35 mm).
When installed vertically: Secure the unit by
using a fixing element (e.g. retaining bracket
or end angle).
Push the unit upwards or downwards before
lifting it from the DIN rail.
Montage
Installer l'appareil de base sans bloc d'ex-
tension de contacts :
Assurez-vous que la fiche de terminaison est
insérée sur le côté de l'appareil.
Raccorder l'appareil de base et le bloc d'ex-
tension de contacts PNOZsigma :
Retirez la fiche de terminaison sur le côté de
l'appareil de base et sur le bloc d'extension
de contacts.
Avant de monter les appareils sur le rail DIN,
reliez l'appareil de base et le bloc d'extension
de contacts à l'aide du connecteur fourni.
Montage dans une armoire
Montez le bloc logique de sécurité dans une
armoire électrique ayant un indice de protec-
tion d'au moins IP54.
Montez l'appareil sur un rail DIN à l'aide du
système de fixation situé sur la face arrière
(35 mm).
Si l'appareil est monté à la verticale : sécuri-
sez-le à l'aide d'un élément de maintien
(exemple : support terminal ou équerre termi-
nale).
Avant de retirer l'appareil du rail DIN, poussez
l'appareil vers le haut ou vers le bas.
Verdrahtung
117583371
Beachten Sie:
Angaben im Abschnitt "Technische Daten"
unbedingt einhalten.
Die Ausgänge 13-14, 23-24 sind Sicherheits-
kontakte.
Vor die Ausgangskontakte eine Sicherung
(s. techn. Daten) schalten, um das Ver-
schweißen der Kontakte zu verhindern.
Berechnung der max. Leitungslänge Imax im
Eingangskreis:
Rlmax = max. Gesamtleitungswiderstand
(s. techn. Daten)
Rl/ km = Leitungswiderstand/km
Leitungsmaterial aus Kupferdraht mit einer
Temperaturbeständigkeit von 60/75 °C ver-
wenden.
Sorgen Sie an allen Ausgangskontakten bei
kapazitiven und induktiven Lasten für eine
ausreichende Schutzbeschaltung.
1232919051
Sorgen Sie beim Anschluss von magnetisch
wirkenden, auf Reedkontakten basierenden
Näherungsschaltern dafür, dass der max.
Einschaltspitzenstrom (am Eingangskreis)
den Näherungsschalter nicht überlastet.
Wiring
Please note:
Information given in the “Technical details”
must be followed.
Outputs 13-14, 23-24 are safety contacts.
To prevent contact welding, a fuse should be
connected before the output contacts (see
technical details).
Calculation of the max. cable runs lmax in the
input circuit:
Rlmax = max. overall cable resistance (see
technical details)
Rl/km = cable resistance/km
Use copper wire that can withstand
60/75 °C.
Sufficient fuse protection must be provided
on all output contacts with capacitive and in-
ductive loads.
When connecting magnetically operated,
reed proximity switches, ensure that the
max. peak inrush current (on the input circuit)
does not overload the proximity switch.
Raccordement
Important :
Respectez impérativement les données indi-
quées dans le chapitre « Caractéristiques
techniques ».
Les sorties 13-14, 23-24 sont des contacts
de sécurité.
Protection des contacts de sortie par des fu-
sibles (voir les caractéristiques techniques)
pour éviter leur soudage.
Calcul de la longueur de câble max. Imax sur
le circuit d'entrée :
Rlmax = résistance max. de l'ensemble du
câblage (voir les caractéristiques techni-
ques)
Rl/km = résistance du câblage/km
Utilisez uniquement des fils de câblage en cui-
vre résistant à des températures de 60/75 °C.
Assurez-vous du pouvoir de coupure des
contacts de sortie en cas de charges capaci-
tives ou inductives.
Lors du raccordement de détecteurs de
proximité magnétiques, basés sur des con-
tacts Reed, veuillez vous assurer que le cou-
rant de crête max. à la mise sous tension (sur
le circuit d'entrée) ne surcharge pas les dé-
tecteurs de proximité.
Betriebsbereitschaft herstellen Preparing for operation Mettre l'appareil en mode de marche
Betriebsarten
547495307
Die Betriebsart wird an dem Drehschalter am
Gerät eingestellt. Öffnen Sie dazu die
Abdeckung auf der Frontseite des Geräts.
WICHTIG
Verstellen Sie die Drehschalter nicht wäh-
rend des Betriebs. Ansonsten erscheint
eine Fehlermeldung, die Sicherheitskon-
takte öffnen und das Gerät ist erst wieder
betriebsbereit, nachdem die Versorgungs-
spannung aus- und wieder eingeschaltet
wurde.
Operating modes
The operating mode is set via the rotary switch
on the unit. You can do this by opening the cov-
er on the front of the unit.
NOTICE
Do not adjust the rotary switch during oper-
ation, otherwise an error message will ap-
pear, the safety contacts will open and the
unit will not be ready for operation until the
supply voltage has been switched off and
then on again.
modes de fonctionnement
Le mode de fonctionnement se règle sur le sé-
lecteur de l'appareil. Ouvrez le capot de protec-
tion sur la face avant de l'appareil.
IMPORTANT
Ne modifiez pas le sélecteur en cours de
fonctionnement. Sinon, l'appareil signale
un défaut et les contacts de sécurité
s'ouvrent. L'appareil n'est alors prêt à re-
fonctionner qu'après avoir coupé puis re-
mis en marche la tension d'alimentation.
Rlmax
Rl / km
Imax =
Rlmax
Rl / km
Imax =
Rlmax
Rl / km
Imax =

- 4 -
Betriebsarten einstellen
568192395
Versorgungsspannung ausschalten.
Betriebsart mit dem Betriebsartenwahlschal-
ter "mode" wählen.
Wenn der Betriebsartenwahlschalter "mode"
auf der Grundstellung ist (senkrechte Positi-
on), erscheint eine Fehlermeldung.
Set operating modes
Switch off supply voltage.
Select operating mode via the operating
mode selector switch "mode".
If the operating mode selector switch
"mode" is in its start position (vertical posi-
tion), an error message will appear.
Régler les modes de fonctionnement
Couper la tension d'alimentation.
Sélectionner le mode de fonctionnement à l'aide
du sélecteur de mode de marche « mode ».
Si le sélecteur de mode de marche « mode »
est positionné sur sa position de base (posi-
tion verticale), l'appareil signale une erreur.
Betriebsartenwahlschalter
"mode"/
Operating mode selector
switch "mode"/
sélecteur de mode de mar-
che "mode"
automatischer, manueller
Start/
automatic, manual reset/
réarmement automatique,
manuel
überwachter Start steigen-
de Flanke/
monitored reset rising
edge/
réarmement auto-contrôlé
avec front montant
überwachter Start fallende
Flanke/
monitored reset falling
edge/
réarmement auto-contrôlé
avec front descendant
automatischer Start mit
Anlauftest/
automatic reset with start-
up test/
réarmement manuel avec
test des conditions initiales
ohne Querschlusserken-
nung/
without detection of shorts
across contacts/
sans détection des courts-
circuits
mit Querschlusserken-
nung/
with detection of shorts
across contacts/
avec détection des courts-
circuits
Anschluss Connection Raccordement
Versorgungsspannung Supply voltage Tension d'alimentation
Versorgungsspannung/power supply/tension
d'alimentation
AC DC
Eingangskreis Input circuit Circuit d'entrée
Eingangskreis/input circuit/circuit d'entrée einkanalig/single-channel /monocanal zweikanalig/dual-channel/à deux canaux
Not-Halt
ohne Querschlusserkennung/
E-STOP
without detection of shorts across contacts/
arrêt d'urgence
sans détection des courts-circuits entre les
canaux
Not-Halt
mit Querschlusserkennung/
E-STOP
with detection of shorts across contacts/
arrêt d'urgence
avec détection des courts-circuits entre les
canaux
Schutztür
ohne Querschlusserkennung/
safety gate without detection of shorts across
contacts/
protecteur mobile sans détection des courts-
circuits entre les canaux
Schutztür
mit Querschlusserkennung/
safety gate
with detection of shorts across contacts/
protecteur mobile
avec détection des courts-circuits entre les
canaux
Lichtschranke oder Sicherheitsschalter mit
Querschlusserkennung durch BWS/
light barrier or safety switch with detection of
shorts across contacts via ESPE/
barrière immatérielle ou capteur de sécurité
avec détection des courts-circuits par EPES
1017347979
*Die Spannung (24 V DC) an den Eingängen
verhindert das Öffnen der Sicherheitskontakte,
wenn die Versorgungsspannung an A1-A2 un-
terbrochen wird.
*The voltage (24 VDC) at the inputs prevents the
safety contacts from opening if the supply volt-
age at A1-A2 is interrupted.
*La tension (24 VDC) sur les entrées empêche
l'ouverture des contacts de sécurité lorsque la
tension d'alimentation est coupée sur A1-A2.
In2-
In2+
In2-
In2+
In2-
In2+
In2-
In2+
In2-
In2+
In2-
In2+
In2-
In2+
In2-
In2+
A1 L+
A2 L-
S1
S11
S22
S12
S1
S11
S12
S22
S1
S22
S21
S12
S11
S1
S22
S11
S12
S1 S2
S11
S12
S22
S1 S2
S12
S11
S22
S21
S12
S22
24 V DC *
A2
GND

- 5 -
Startkreis/Rückführkreis Reset circuit/feedback loop Circuit de réarmement/boucle de retour
Startkreis/Rückführkreis/
reset circuit/feedback loop/
circuit de réarmement/boucle de retour
Startkreis/reset circuit/circuit de réarmement Rückführkreis/feedback loop/ boucle de re-
tour
automatischer Start/
automatic reset/
réarmement automatique
manueller/überwachter Start/
manual/monitored reset/
réarmement manuel/réarmement auto-con-
trôlé
Halbleiterausgang Semiconductor output Sortie statique
584276491
*Verbinden Sie die 0-V-Anschlüsse aller exter-
nen Netzteile miteinander.
*Connect together the 0V connections on all
the external power supplies.
* Reliez ensemble les 0 V de toutes les alimen-
tations externes.
Betrieb
557883787
Das Gerät ist betriebsbereit, wenn die LED Po-
wer permanent leuchtet.
LEDs zeigen den Status und Fehler während
des Betriebs an:
LED leuchtet
LED blinkt
552061195
INFO
Statusanzeigen und Fehleranzeigen kön-
nen unabhängig voneinander auftreten. Bei
einer Fehleranzeige leuchtet oder blinkt die
LED "Fault" (Ausnahme: "Versorgungs-
spannung zu gering"). Eine zusätzlich blin-
kende LED weist auf eine mögliche
Fehlerursache hin. Eine zusätzlich statisch
leuchtende LED weist auf einen normalen
Betriebszustand hin. Es können mehrere
Statusanzeigen und Fehleranzeigen gleich-
zeitig auftreten.
Operation
The unit is ready for operation when the Power
LED is permanently lit.
LEDs indicate the status and errors during op-
eration:
LED on
LED flashes
INFORMATION
Status indicators and error indicators may
occur independently. In the case of an error
display, the "Fault" LED will light or flash
(exception: "Supply voltage too low"). An
LED that is also flashing indicates the po-
tential cause of the error. An LED that is lit
and is static indicates a normal operating
status. Several status indicators and error
indicators may occur simultaneously.
Exploitation
L'appareil est prêt à fonctionner lorsque la LED
Power reste allumée en permanence.
Les LEDs indiquent l'état et les erreurs lors du
fonctionnement:
LED allumée
LED clignotante
INFORMATION
L'affichage de l'état et des erreurs peut sur-
venir indépendamment. Lors de l'affichage
d'une erreur, la LED "Fault" s'allume ou cli-
gnote (exception : "Tension d'alimentation
trop faible"). Une LED clignotante supplé-
mentaire informe sur une cause possible
d'erreur. Une LED supplémentaire qui s'al-
lume de façon permanente informe de l'état
normal de fonctionnement. Plusieurs affi-
chages de l'état et des erreurs peuvent sur-
venir en même temps.
Statusanzeigen Status indicators Affichages d'état
551604875
Power
Versorgungsspannung liegt an. Power
Supply voltage is present.
Power
la tension d'alimentation est présente.
551607179
In1
Eingangskreis an S12 ist geschlossen. In1
Input circuit at S12 is closed.
In1
Le circuit d'entrée S12 est fermé.
551609483
In2
Eingangskreis an S22 ist geschlossen. In2
Input circuit at S22 is closed.
In2
Le circuit d'entrée S22 est fermé.
551611787
Out
Sicherheitskontakte sind geschlossen und
Halbleiterausgang Y32 führt High-Signal.
Out
Safety contacts are closed and semicon-
ductor output Y32 carries a high signal.
Out
Les contacts de sécurité sont fermés et la
sortie statique Y32 délivre un niveau haut.
551614091
Reset
An S34 liegt 24 V DC an. Reset
24 VDC is present at S34.
Réarmement
24 V DC sur S34.
Fehleranzeigen Error indicators Affichage des erreurs
551771659
Alle LEDs aus
Diagnose: Querschluss/Erdschluss; Gerät
ausgeschaltet
Abhilfe: Querschluss/Erdschluss behe-
ben, Versorgungsspannung für 1 Min.
ausschalten.
All LEDs off
Diagnostics: Short across contacts/earth
fault; unit switched off
Remedy: Rectify short across contacts/
earth fault, switch off supply voltage for 1
min.
Toutes les LEDs sont éteintes
Diagnostic : court-circuit/mise à la terre ;
appareil éteint
Remède : supprimer le court-circuit/la
mise à la terre, couper la tension d'ali-
mentation pendant 1 min.
551773963
Fault
Diagnose: Abschlussstecker nicht gesteckt
Abhilfe: Abschlussstecker stecken, Ver-
sorgungsspannung aus- und wieder ein-
schalten.
Fault
Diagnostics: Plug terminator not connected
Remedy: Insert plug terminator, switch
supply voltage off and then on again.
Fault
Diagnostic : fiche de terminaison non bran-
chée
Remède : brancher la fiche de terminai-
son, couper puis remettre en marche la
tension d'alimentation
551776267
Fault
Diagnose: Interner Fehler, Gerät defekt
Abhilfe: Versorgungsspannung aus- und
wieder einschalten, gegebenenfalls Ge-
rät tauschen.
Fault
Diagnostics: Internal error, unit defective
Remedy: Switch supply voltage off and
then on again, change unit if necessary.
Fault
Diagnostic : erreur interne, appareil défec-
tueux
Remède : couper puis remettre en mar-
che la tension d'alimentation, si besoin
échanger l'appareil
S12
S34
K5 K6
K5 L1
N
K6
S12
13 (23)
S34
14 (24)
S12
S34
S3
K5 K6
K5 L1
K6
S12
S34
S3
N
13 (23)
14 (24)
Y32 PLC Input
*

- 6 -
551778571
Power
Diagnose: Versorgungsspannung zu gering
Abhilfe: Versorgungsspannung überprü-
fen.
Power
Diagnostics: Supply voltage too low
Remedy: Check the supply voltage.
Power
Diagnostic : tension d'alimentation trop fai-
ble
Remède : vérifier la tension d'alimenta-
tion
551780875
In1, In2 wechselweise
Fault
Diagnose: Querschluss zwischen S12 und
S22 erkannt
Abhilfe: Querschluss beheben, Versor-
gungsspannung aus- und wieder ein-
schalten.
In1, In2 alternately
Fault
Diagnostics: Short detected between S12
and S22
Remedy: Rectify short across contacts,
switch supply voltage off and then on
again.
In1, In2 alternativement
Fault
Diagnostic : court-circuit entre S12 et S22
détecté
Remède : Supprimer le court-circuit,
couper puis remettre en marche la ten-
sion d'alimentation
552051979
In1
Fault
Diagnose: Einschaltblockade wegen Kurz-
zeitunterbrechung an S12; Eingangskreise
nicht gleichzeitig betätigt
Abhilfe: Beide Eingangskreise, S12 und
S22 gleichzeitig öffnen und wieder
schließen.
In1
Fault
Diagnostics: Power-up blocked due to
short-term interruption at S12; input cir-
cuits not operated simultaneously
Remedy: Open both input circuits, S12
and S22, simultaneously and then close
again.
In1
Fault
Diagnostic : blocage du relais à cause
d'une coupure aléatoire sur S12 ; les ca-
naux d'entrée n'ont pas commuté ensem-
ble
Remède : ouvrir ensemble les canaux
d'entrée S12 et S22 puis les refermer.
552054283
In2
Fault
Diagnose: Einschaltblockade wegen Kurz-
zeitunterbrechung an S22; Eingangskreise
nicht gleichzeitig betätigt
Abhilfe: Beide Eingangskreise, S12 und
S22 gleichzeitig öffnen und wieder
schließen.
In2
Fault
Diagnostics: Power-up blocked due to
short-term interruption at S22; input cir-
cuits not operated simultaneously
Remedy: Open both input circuits, S12
and S22, simultaneously and then close
again.
In2
Fault
Diagnostic : blocage du relais à cause
d'une coupure aléatoire sur S12 ; les ca-
naux d'entrée n'ont pas commuté ensem-
ble
Remède : ouvrir ensemble les canaux
d'entrée S12 et S22 puis les refermer.
552056587
Reset
Fault
Diagnose: Unerlaubte Stellung eines Dreh-
schalters oder ein Drehschalter wurde wäh-
rend des Betriebs verstellt.
Abhilfe: Versorgungsspannung aus- und
wieder einschalten.
Reset
Fault
Diagnostics: Position of rotary switch is not
permitted or rotary switch was adjusted
during operation.
Remedy: Switch supply voltage off and
then on again.
Réarmement
Fault
Diagnostic : sélecteur rotatif dans une posi-
tion incorrecte ou un sélecteur rotatif à été
déréglé durant le fonctionnement.
Remède : couper puis remettre en mar-
che la tension d'alimentation.
552058891
Power, In1, In2, Out, Reset, Fault
Diagnose: Der Betriebsartenwahlschalter
"mode" steht in Grundstellung (senkrechte
Position)
Abhilfe: Versorgungsspannung aus-
schalten und am Betriebsartenwahl-
schalter "mode" gewünschte Betriebsart
einstellen.
Power, In1, In2, Out, Reset, Fault
Diagnostics: The operating mode selector
switch "mode" is in its start position (verti-
cal position)
Remedy: Switch off the supply voltage
and set the required operating mode on
operating mode selector switch "mode".
Power, In1, In2, Out, Reset, Fault
Diagnostic : le sélecteur de mode de mar-
che « mode » est positionné sur la position
de base (position verticale)
Remède : coupez la tension d'alimenta-
tion et régler le mode de fonctionnement
souhaité sur le sélecteur de mode de
marche « mode ».
Fehler - Störungen
551266315
Fehlfunktionen der Kontakte: Bei ver-
schweißten Kontakten ist nach Öffnen des
Eingangskreises keine neue Aktivierung
möglich.
Faults - malfunctions
Contact malfunctions: If the contacts have
welded, reactivation will not be possible after
the input circuit has opened.
Erreurs - défaillances
Défaut de fonctionnement des contacts de
sortie : si les contacts sont soudés, un réar-
mement est impossible après ouverture du
circuit d'entrée.
Technische Daten Technical details Caractéristiques techniques
Elektrische Daten Electrical data Données électriques
Versorgungsspannung Supply voltage tension d'alimentation
Versorgungsspannung UBDC Supply voltage UBDC Tension d'alimentation UBDC 24 V
Spannungstoleranz Voltage tolerance Plage de la tension d'alimentation -15 %/+10 %
Leistungsaufnahme bei UBDC Power consumption at UBDC Consommation UBDC 2,5 W
Restwelligkeit DC Residual ripple DC Ondulation résiduelle DC 20 %
Spannung und Strom an Voltage and current at Tension et courant sur
Eingangskreis DC: 24,0 V Input circuit DC: 24,0 V circuit d'entrée DC : 24,0 V 50,0 mA
Startkreis DC: 24,0 V Reset circuit DC: 24,0 V circuit de réarmement DC : 24,0 V 50,0 mA
Rückführkreis DC: 24,0 V Feedback loop DC: 24,0 V boucle de retour DC : 24,0 V 50,0 mA
Anzahl der Ausgangskontakte Number of output contacts Nombre de contacts de sortie
Sicherheitskontakte (S)
unverzögert:
Safety contacts (S) instantaneous: Contacts de sécurité (F)
instantanés :
2
Gebrauchskategorie nach
EN 60947-4-1 Utilisation category in accordance
with EN 60947-4-1 Catégorie d'utilisation selon
EN 60947-4-1
Sicherheitskontakte: AC1 bei 240 V Safety contacts: AC1 at 240 V Contacts de sécurité : AC1
pour 240 V Imin:0,01 A , Imax:6,0 A
Pmax: 1500 VA
Sicherheitskontakte: DC1 bei 24 V Safety contacts: DC1 at 24 V Contacts de sécurité : DC1 pour
24 V Imin: 0,01 A , Imax: 6,0 A
Pmax: 150 W
Gebrauchskategorie nach
EN 60947-5-1 Utilisation category in accordance
with EN 60947-5-1 Catégorie d'utilisation selon
EN 60947-5-1
Sicherheitskontakte: AC15 bei
230 V Safety contacts: AC15 at 230 V Contacts de sécurité : AC15
pour 230 V Imax: 5,0 A
Sicherheitskontakte: DC13 bei 24 V
(6 Schaltspiele/min)
Safety contacts: DC13 at 24 V
(6 cycles/min)
Contacts de sécurité : DC13
pour 24 V (6 manœuvres/min)
Imax: 5,0 A

- 7 -
Konventioneller thermischer Strom Conventional thermal current Courant thermique conventionnel 6,0 A
Kontaktmaterial Contact material Matériau des contacts AgCuNi + 0,2 µm Au
Kontaktabsicherung, extern
(IK= 1 kA) nach EN 60947-5-1 External contact fuse protection
(IK= 1 kA) to EN 60947-5-1 Protection des contacts en externe
(IK= 1 kA) selon EN 60947-5-1
Schmelzsicherung flink Blow-out fuse, quick Fusible rapide
Sicherheitskontakte: Safety contacts: Contacts de sécurité : 10 A
Schmelzsicherung träge Blow-out fuse, slow Fusible normal
Sicherheitskontakte: Safety contacts: Contacts de sécurité : 6 A
Sicherungsautomat 24V AC/DC,
Charakteristik B/C
Circuit breaker 24 VAC/DC, charac-
teristic B/C
Disjoncteur 24 V AC/DC, caractéris-
tique B/C
Sicherheitskontakte: Safety contacts: Contacts de sécurité : 6 A
Halbleiterausgänge (kurz-
schlussfest)
Semiconductor outputs (short cir-
cuit proof)
Sorties statiques (protégées contre
les courts-circuits)
24,0 V DC, 20 mA
Max. Gesamtleitungswiderstand
Rlmax
Eingangskreise, Startkreise
Max. overall cable resistance
Rlmax
input circuits, reset circuits
Résistance max. de l'ensemble du
câblage Rlmax
circuits d'entrée, circuits de réar-
mement
einkanalig bei UBDC single-channel at UBDC monocanal pour UBDC 30 Ohm
zweikanalig ohne Querschlusser-
kennung bei UBDC
dual-channel without detect. of
shorts across contacts at UBDC
à deux canaux sans détection des
courts-circuits pour UBDC
60 Ohm
zweikanalig mit Querschlusserken-
nung bei UBDC
dual-channel with detect. of shorts
across contacts at UBDC
à deux canaux avec détection des
courts-circuits pour UBDC
30 Ohm
Min. Eingangswiderstand im Ein-
schaltmoment
Min. input resistance when switch-
ing on
Résistance d'entrée min. au mo-
ment de la mise en marche
110 Ohm
Sicherheitstechnische Kennda-
ten Safety-related characteristic
data Caractéristiques techniques de
sécurité
PL nach EN ISO 13849-1: 2006 PL in accordance with
EN ISO 13849-1: 2006 PL selon EN ISO 13849-1: 2006 PL e (Cat. 4)
Kategorie nach EN 954-1 Category in accordance with
EN 954-1 Catégorie selon EN 954-1 Cat. 4
SIL CL nach EN IEC 62061 SIL CL in accordance with
EN IEC 62061 SIL CL selon EN IEC 62061 SIL CL 3
PFH nach EN IEC 62061 PFH in accordance with
EN IEC 62061 PFH selon EN IEC 62061 2,31E-09
SIL nach IEC 61511 SIL in accordance with IEC 61511 SIL selon IEC 61511 SIL 3
PFD nach IEC 61511 PFD in accordance with IEC 61511 PFD selon IEC 61511 2,03E-06
TM[Jahr] nach EN ISO 13849-1:
2006 TM[year] in accordance with
EN ISO 13849-1: 2006 TM[année] selon EN ISO 13849-1:
2006 20
Zeiten Times Temporisations
Einschaltverzögerung Switch-on delay Temps de montée
bei automatischem Start typ. with automatic reset typ. pour un réarmement automatique
env.
170 ms
bei automatischem Start max. with automatic reset max. pour un réarmement automatique
max.
300 ms
bei automatischem Start nach
Netz-Ein typ.
with automatic reset after power on
typ.
pour un réarmement automatique
après mise sous tension env.
350 ms
bei automatischem Start nach
Netz-Ein max.
with automatic reset after power on
max.
pour un réarmement automatique
après mise sous tension max.
600 ms
bei manuellem Start typ. with manual reset typ. pour un réarmement manuel env. 40 ms
bei überwachtem Start mit steigen-
der Flanke typ.
on monitored reset with rising edge
typ.
pour un réarmement auto-contrôlé
avec front montant env.
35 ms
bei überwachtem Start mit steigen-
der Flanke max.
on monitored reset with rising edge
max.
pour un réarmement auto-contrôlé
avec front montant max.
50 ms
bei überwachtem Start mit fallender
Flanke typ.
on monitored reset with falling edge
typ.
pour un réarmement auto-contrôlé
avec front descendant env.
55 ms
bei überwachtem Start mit fallender
Flanke max.
on monitored reset with falling edge
max.
pour un réarmement auto-contrôlé
avec front descendant max.
70 ms
Rückfallverzögerung Delay-on de-energisation Temps de retombée
bei Not-Halt typ. with E-STOP typ. sur un arrêt d'urgence env. 10 ms
bei Not-Halt max. with E-STOP max. sur un arrêt d'urgence max. 20 ms
bei Netzausfall typ. with power failure typ. sur coupure d'alimentation env. 40 ms
bei Netzausfall max. with power failure max. sur coupure d'alimentation max. 60 ms
Wiederbereitschaftszeit bei max.
Schaltfrequenz 1/s
Recovery time at max. switching
frequency 1/s
Temps de remise en service pour
une fréquence de commutation
max. de 1/s
nach Not-Halt after E-STOP après un arrêt d'urgence 100 ms
nach Netzausfall after power failure après une coupure d'alimentation 100 ms
Wartezeit bei überwachtem Start Waiting period with a monitored re-
set
Délai d'attente lors d'un réarme-
ment auto-contrôlé
mit steigender Flanke with rising edge avec front montant 120 ms
mit fallender Flanke with falling edge avec front descendant 250 ms
Elektrische Daten Electrical data Données électriques

- 8 -
Min. Startimpulsdauer bei über-
wachtem Start
Min. start pulse duration with a
monitored reset
Durée min. de l'impulsion de réar-
mement lors d'un réarmement
auto-contrôlé
mit steigender Flanke with rising edge avec front montant 30 ms
mit fallender Flanke with falling edge avec front descendant 100 ms
Gleichzeitigkeit Kanal 1 und 2 Simultaneity, channel 1 and 2 Simultanéité des canaux 1 et 2 ∞
Überbrückung bei Spannungsein-
brüchen der Versorgungsspannung
Supply interruption before de-ener-
gisation
Inhibition en cas de micro-coupures
de la tension d'alimentation
20 ms
Umweltdaten Environmental data Données sur l'environnement
EMV EMC CEM EN 60947-5-1, EN 61000-6-2,
EN 61000-6-4
Schwingungen nach EN 60068-2-6 Vibration to EN 60068-2-6 Vibrations selon EN 60068-2-6
Frequenz Frequency Fréquence 10 - 55 Hz
Amplitude Amplitude Amplitude 0,35 mm
Klimabeanspruchung Climatic suitability Sollicitations climatiques EN 60068-2-78
Luft- und Kriechstrecken nach
EN 60947-1 Airgap creepage in accordance
with EN 60947-1 Cheminement et claquage
selon EN 60947-1
Verschmutzungsgrad Pollution degree Niveau d'encrassement 2
Überspannungskategorie Overvoltage category Catégorie de surtensions III / II
Bemessungsisolationsspannung Rated insulation voltage Tension assignée d'isolement 250 V
Bemessungsstoßspannungsfestig-
keit
Rated impulse withstand voltage Tension assignée de tenue aux
chocs
4,00 kV
Umgebungstemperatur Ambient temperature Température d'utilisation -10 - 55 °C
Lagertemperatur Storage temperature Température de stockage -40 - 85 °C
Schutzart Protection type Indice de protection
Einbauraum (z. B. Schaltschrank) Mounting (e.g. cabinet) Lieu d'implantation (par exemple :
armoire électrique)
IP54
Gehäuse Housing Boîtier IP40
Klemmenbereich Terminals Borniers IP20
Mechanische Daten Mechanical data Données mécaniques
Gehäusematerial Housing material Matériau du boîtier
Gehäuse Housing Boîtier PC
Front Front Face avant PC
Querschnitt des Außenleiters bei
Schraubklemmen
Cross section of external conduc-
tors with screw terminals
Capacité de raccordement des bor-
niers à vis
1 Leiter flexibel 1 core flexible 1 câble flexible 0,25 - 2,50 mm² , 24 - 12 AWG
No. 750103
2 Leiter gleichen Querschnitts, flexi-
bel:
2 core, same cross section, flexible: 2 câbles flexibles de même
section :
mit Aderendhülse, ohne Kunststoff-
hülse
with crimp connectors, without in-
sulating sleeve
avec embout, sans cosse plastique 0,25 - 1,00 mm² , 24 - 16 AWG
No. 750103
ohne Aderendhülse oder mit TWIN
Aderendhülse
without crimp connectors or with
TWIN crimp connectors
sans embout ou avec embout TWIN 0,20 - 1,50 mm² , 24 - 16 AWG
No. 750103
Anzugsdrehmoment bei Schraub-
klemmen
Torque setting with screw terminals Couple de serrage des borniers à
vis
0,50 Nm No. 750103
Querschnitt des Außenleiters bei
Federkraftklemmen: flexibel mit/
ohne Aderendhülse
Cross section of external conduc-
tors with spring-loaded terminals:
Flexible with/without crimp connec-
tors
Capacité de raccordement des bor-
niers à ressort : flexible avec/sans
embout
0,20 - 2,50 mm² , 24 - 12 AWG
No. 751103
Federkraftklemmen: Klemmstellen
pro Anschluss
Spring-loaded terminals: Terminal
points per connection
Borniers à ressort : points de rac-
cordement pour chaque borne
2No. 751103
Abisolierlänge Stripping length Longueur dénudation 9 mm No. 751103
Abmessungen Dimensions Dimensions
Höhe Height Hauteur 102,0 mm No. 751103
96,0 mm No. 750103
Breite Width Largeur 17,5 mm
Tiefe Depth Profondeur 120,0 mm
Gewicht Weight Poids 140 g
No. ist gleichbedeutend mit Bestell-Nr. No. stands for order number. No. correspond à la référence du produit.
Zeiten Times Temporisations

- 9 -
1176133131
ACHTUNG!
Beachten Sie unbedingt die Lebensdauer-
kurven der Relais. Die sicherheitstechni-
schen Kennzahlen der Relaisausgänge
gelten nur, solange die Werte der Lebens-
dauerkurven eingehalten werden.
Der PFH-Wert ist abhängig von der Schaltfre-
quenz und der Belastung des Relaisausgan-
ges.
Solange die Lebensdauerkurven nicht erreicht
werden, kann der angegebene PFH-Wert unab-
hängig von der Schaltfrequenz und der Bela-
stung verwendet werden, da der PFH-Wert den
B10d-Wert der Relais sowie die Ausfallraten
der anderen Bauteile bereits berücksichtigt.
1077650443
Alle in einer Sicherheitsfunktion verwendeten
Einheiten müssen bei der Berechnung der Si-
cherheitskennwerte berücksichtigt werden.
1312356363
INFO
Die SIL-/PL-Werte einer Sicherheitsfunkti-
on sind nicht identisch mit den SIL-/PL-
Werten der verwendeten Geräte und kön-
nen von diesen abweichen. Wir empfehlen
zur Berechnung der SIL-/PL-Werte der Si-
cherheitsfunktion das Software-Tool
PAScal.
585241611
Es gelten die 2006-04 aktuellen Ausgaben der
Normen.
CAUTION!
It is essential to consider the relay's service
life graphs. The relay outputs' safety-relat-
ed characteristic data is only valid if the val-
ues in the service life graphs are met.
The PFH value depends on the switching fre-
quency and the load on the relay output. If the
service life graphs are not accessible, the stat-
ed PFH value can be used irrespective of the
switching frequency and the load, as the PFH
value already considers the relay's B10d value
as well as the failure rates of the other compo-
nents.
All the units used within a safety function must
be considered when calculating the safety
characteristic data.
INFORMATION
A safety function's SIL/PL values are not
identical to the SIL/PL values of the units
that are used and may be different. We rec-
ommend that you use the PAScal software
tool to calculate the safety function's SIL/
PL values.
The standards current on 2006-04 apply.
ATTENTION !
Veuillez absolument tenir compte des cour-
bes de durée de vie des relais. Les caracté-
ristiques de sécurité des sorties relais sont
uniquement valables tant que les valeurs
des courbes de durée de vie sont respec-
tées.
La valeur PFH dépend de la fréquence de com-
mutation et de la charge de la sortie relais. Tant
que les courbes de durée de vie ne sont pas at-
teintes, la valeur PFH indiquée peut être utilisée
indépendamment de la fréquence de commu-
tation et de la charge car la valeur PFH prend
déjà en compte la valeur B10d des relais ainsi
que les taux de défaillance des autres compo-
sants.
Toutes les unités utilisées dans une fonction de
sécurité doivent être prises en compte dans le
calcul des caractéristiques de sécurité.
INFORMATION
Les valeurs SIL / PL d'une fonction de sé-
curité ne sont identiques aux valeurs SIL /
PL des appareils utilisés et peuvent varier
par rapport à celles-ci. Pour le calcul des
valeurs SIL / PL de la fonction de sécurité,
nous recommandons l'outil logiciel PAScal.
Les versions actuelles 2006-04 des normes
s'appliquent.
Lebensdauerkurve der Ausgangsrelais
1196936075
Die Lebensdauerkurven geben an, ab welcher
Schaltspielzahl mit verschleißbedingten Ausfäl-
len gerechnet werden muss. Der Verschleiß
wird vor allem durch die elektrische Belastung
verursacht, der mechanische Verschleiß ist ver-
nachlässigbar.
Service life graph of output relays
The service life graphs indicate the number of
cycles from which failures due to wear must be
expected. The wear is mainly caused by the
electrical load; the mechanical load is negligi-
ble.
Courbe de durée de vie du relais de sortie
Les courbes de durée de vie indiquent à partir
de quel nombre de manœuvres il faut s'atten-
dre à des défaillances liées à l'usure. La charge
électrique est la cause principale de l'usure,
l'usure mécanique étant négligeable.
1221417611
Beispiel
Induktive Last: 0,2 A
Gebrauchskategorie: AC15
Lebensdauer der Kontakte: 2 000 000
Schaltspiele
Solange die zu realisierende Applikation eine
Schaltspielzahl von weniger als 2 000 000
Schaltspiele erfordert, kann mit dem PFH-Wert
(s. technische Daten) gerechnet werden.
Um die Lebensdauer zu erhöhen, an allen Aus-
gangskontakten für eine ausreichende Funken-
löschung sorgen. Bei kapazitiven Lasten sind
eventuell auftretende Stromspitzen zu beach-
ten. Bei DC-Schützen Freilaufdioden zur Fun-
kenlöschung einsetzen.
Example
Inductive load: 0,2 A
Utilisation category: AC15
Contact service life: 2,000,000 cycles
Provided the application requires fewer than
2,000,000 cycles, the PFH value (see technical
details) can be used in the calculation.
To increase the service life, sufficient spark
suppression must be provided on all output
contacts. With capacitive loads, any power
surges that occur must be noted. With contac-
tors, use freewheel diodes for spark suppres-
sion.
Exemple
Charge inductive : 0,2 A
Catégorie d'utilisation : AC15
Durée de vie des contacts : 2 000 000
manœuvres
Tant que l'application à réaliser requière un
nombre de manœuvres inférieur à 2 000 000,
on peut se fier à la valeur PFH (voir les caracté-
ristiques techniques).
Assurez-vous qu'il y ait une extinction d'arc
suffisante sur tous les contacts de sortie afin
d'augmenter la durée de vie. Faites attention à
l'apparition de pointes de courant en cas de
charges capacitatives. En cas de contacteurs
DC, utilisez des diodes de roue libre pour l'ex-
tinction des étincelles.

Originalbetriebsanleitung/Original instructions/Notice originale
21395-6NL-09, 2011-09 Printed in Germany Printed in Germany
21395-6NL-092011-09Printed in Germany
Bestelldaten Order reference Caractéristiques
Typ/
Type/
Type
Merkmale/
Features/
Caractéristiques
Klemmen/
Terminals/
Borniers
Bestell-Nr./
Order no./
Référence
PNOZ s3 24 V DC mit Schraubklemmen/
with screw terminals/
avec borniers à vis
750 103
PNOZ s3 C 24 V DC mit Federkraftklemmen/
with spring-loaded terminals/
avec borniers à ressort
751 103
EG-Konformitätserklärung
1139424011
Diese(s) Produkt(e) erfüllen die Anforderungen
der Richtlinie 2006/42/EG über Maschinen des
europäischen Parlaments und des Rates. Die
vollständige EG-Konformitätserklärung finden
Sie im Internet unter www.pilz.com.
Bevollmächtigter: Norbert Fröhlich, Pilz GmbH
& Co. KG, Felix-Wankel-Str. 2, 73760 Ostfil-
dern, Deutschland
EC Declaration of Conformity
This (these) product(s) comply with the require-
ments of Directive 2006/42/EC of the European
Parliament and of the Council on machinery.
The complete EC Declaration of Conformity is
available on the Internet at www.pilz.com.
Authorised representative: Norbert Fröhlich,
Pilz GmbH & Co. KG, Felix-Wankel-Str. 2,
73760 Ostfildern, Germany
Déclaration de conformité CE
Ce(s) produit(s) satisfait (satisfont) aux exigen-
ces de la directive 2006/42/CE relative aux ma-
chines du Parlement Européen et du Conseil.
Vous trouverez la déclaration de conformité CE
complète sur notre site internet www.pilz.com.
Représentant : Norbert Fröhlich, Pilz GmbH &
Co. KG, Felix-Wankel-Str. 2, 73760 Ostfildern,
Allemagne

21395-6NL-09
PNOZ s3
- 11 -
4E Instrucciones de uso
4I Istruzioni per l`uso
4NL Gebruiksaanwijzing
21395-6NL-09PNOZ s3
Dispositivo de seguridad PNOZ s3
582400011
El dispositivo sirve para la interrupción orienta-
da a la seguridad de un circuito de corriente de
seguridad.
114371211
El dispositivo de seguridad cumple los requisi-
tos de las normas EN 60947-5-1, EN 60204-1 y
VDE 0113-1 y puede utilizarse en aplicaciones
con
Pulsadores de parada de emergencia
Puertas protectoras
Barreras fotoeléctricas de seguridad
Modulo di sicurezza PNOZ s3
Il modulo di sicurezza consente l'interruzione
sicura di un circuito di sicurezza.
Il modulo di sicurezza risponde ai requisiti se-
condo EN 60947-5-1, EN 60204-1 e
VDE 0113-1 e può essere utilizzato in applica-
zioni con
pulsanti di arresto di emergenza
ripari mobili
barriere fotoelettriche
Veiligheidsrelais PNOZ s3
Het veiligheidsrelais dient om een veiligheids-
circuit veilig te onderbreken.
Het veiligheidsrelais voldoet aan de eisen van
EN 60947-5-1, EN 60204-1 en VDE 0113-1 en
mag worden gebruikt in toepassingen met
noodstopknoppen
Hekken
Lichtschermen
Para su propia seguridad
547263243
No instalar y poner en marcha el dispositivo
hasta que se hayan leído y comprendido
estas instrucciones de uso y se está familia-
rizado con la normativa vigente en materia
de seguridad en el trabajo y prevención de
accidentes.
Respetar la normativa VDE y la normativa lo-
cal, especialmente en lo que se refiere a las
medidas de protección.
La garantía se pierde en caso de que se abra
la carcasa o se lleven a cabo remodelaciones
por cuenta propia.
Per la vostra sicurezza
Installare il dispositivo dopo aver letto atten-
tamente le presenti istruzioni per l'uso, e aver
preso conoscenza delle disposizioni vigenti
relative alla sicurezza sul lavoro e sull'antin-
fortunistica.
Osservare le disposizioni delle norme appli-
cabili, soprattutto per quanto riguarda le mi-
sure preventive di protezione.
Se la custodia viene aperta oppure se vengo-
no apportate modifiche in proprio, il diritto di
garanzia decade.
Voor uw veiligheid
Installeer en neem het apparaat alleen in ge-
bruik, als u deze gebruiksaanwijzing gelezen
en begrepen hebt en vertrouwd bent met de
geldende voorschriften op het gebied van ar-
beidsveiligheid en ongevallenpreventie.
Neemt u de van toepassing zijnde Europese
richtlijnen en de plaatselijke voorschriften in
acht, in het bijzonder m.b.t. veiligheidsmaat-
regelen.
Het openen van de behuizing of het eigen-
machtig veranderen van de schakeling heeft
verlies van de garantie tot gevolg.
Características del dispositivo
463556747
Salidas de relé de guía forzada:
– 2 contactos de seguridad (NA), sin retardo
1 salida por semiconductor
Posibilidades de conexión para:
– Pulsador de parada de emergencia
– Interruptor limitador de puerta protectora
– Pulsador de rearme
– barreras fotoeléctricas
– PSEN
1 bloque de ampliación de contactos
PNOZsigma enchufable mediante conector
Modos de funcionamiento ajustables medi-
ante mando giratorio
Indicador LED para:
– Tensión de alimentación
– Estado de las entradas canal 1
– Estado de las entradas canal 2
– estado de conmutación canal 1/2
–Circuitoderearme
–Errores
Bornes de conexión enchufables (borne de
muelle o de tornillo)
Caratteristiche del dispositivo
Uscite a relé a conduzione forzata:
– 2 contatti di sicurezza (NA) istantanei
1 uscita a semiconduttore
Possibilità di collegamento per:
– pulsante di arresto di emergenza
– finecorsa riparo mobile
– pulsante di start
– barriere fotoelettriche
–PSEN
1 modulo di espansione contatti PNOZsigma
collegabile mediante connettore
modalità operative impostabili tramite selet-
tore
Indicatori LED per:
– Tensione di alimentazione
– stato dell'ingresso del canale 1
– stato dell'ingresso del canale 2
– stato di commutazione canale 1/2
–circuitodistart
–errore
morsetti innestabili (a scelta a vite o a molla)
Apparaatkenmerken
Relaisuitgangen, mechanisch gedwongen:
– 2 veiligheidscontacten (M), niet-vertraagd
1 halfgeleideruitgang
Aansluitmogelijkheiden voor:
– Noodstopknoppen
–Hekschakelaars
–Startknop
–Lichtschermen
–PSEN
1 contactuitbreidingsrelais PNOZsigma via
verbindingsstekkers aan te sluiten
Bedrijfsmodi met draaischakelaar in te stel-
len
LED voor:
– Voedingsspanning
– Ingangstoestand kanaal 1
– Ingangstoestand kanaal 2
– Schakeltoestand kanaal 1/2
– Startcircuit
–Fout
Steekbare aansluitklemmen (naar keuze
veerkracht- of schroefklemmen)
Características de seguridad
117575307
El dispositivo cumple los requerimientos de se-
guridad siguientes:
El cableado está estructurado de forma red-
undante con autocontrol.
La instalación de seguridad permanece acti-
va aún cuando falle uno de los componen-
tes.
Con cada ciclo de conexión/desconexión de
la máquina se comprueba automáticamente
si los relés del dispositivo de seguridad ab-
ren y cierran correctamente.
114378891
El dispositivo lleva un fusible electrónico.
Caratteristiche di sicurezza
Il dispositivo risponde ai seguenti requisiti di si-
curezza:
Il circuito è strutturato in modo ridondante
con autocontrollo.
Il dispositivo mantiene la sua funzione di si-
curezza anche in caso di guasto a un compo-
nente.
Ad ogni ciclo On-Off della macchina viene
verificata la corretta apertura e chiusura dei
relé del dispositivo di sicurezza.
Il dispositivo è dotato di un fusibile elettroni-
co.
Veiligheidseigenschappen
Het relais voldoet aan de volgende veiligheids-
eisen:
De schakeling is redundant met zelfbewa-
king opgebouwd.
Ook bij uitvallen van een component blijft de
veiligheidsschakeling werken.
Bij elke aan/uit-cyclus van de machine wordt
automatisch getest of de relaiscontacten van
de veiligheidsvoorziening correct openen en
sluiten.
Het apparaat heeft een elektronische zeke-
ring.

- 12 -
Diagrama de bloques/Asignación de
bornes Schema a blocchi/schema di collega-
mento dei morsetti Blokschema/klembezetting
1354888075
*Aislamiento respecto del área no marcada y
de los contactos de relé entre sí: aislamiento
básico (categoría de sobretensión III), separa-
ción segura (categoría de sobretensión II)
*Isolamento del settore non contrassegnato e
dei contatti a relè tra loro: isolamento base (ca-
tegoria di sovratensione III), separazione sicura
(categoria di sovratensione II)
*Isolatie tot het niet-gemarkeerde bereik en de
relaiscontacten samen: basisisolatie (over-
spanningscategorie III), veilige scheiding (over-
spanningscategorie II)
566336011
Centro: Vista frontal con cubierta
Derecha: Vista frontal sin cubierta
Al centro: vista frontale con copertura
A destra: vista frontale senza copertura
Midden: Vooraanzicht met afscherming
Rechts: Vooraanzicht zonder afscherming
Descripción de funciones
547279627
Funcionamiento monocanal: sin redun-
dancia en el circuito de entrada, detec-
ción de defectos a tierra en circuito de
rearme y circuito de entrada.
Funcionamiento bicanal sin detección de
derivación: circuito de entrada redun-
dante, detecta
– defectos a tierra en circuito de rearme
y de entrada,
– cortocircuitos en circuito de entrada y,
con rearme supervisado, también en
el circuito de rearme.
550687755
Funcionamiento bicanal con detección
de derivación: circuito de entrada redun-
dante, detecta
– defectos a tierra en circuito de rearme
y de entrada,
– cortocircuitos en circuito de entrada y,
con rearme supervisado, también en
el circuito de rearme,
– derivaciones en el circuito de entrada.
550690059
rearme automático: el dispositivo se ac-
tiva después de cerrarse el circuito de
entrada.
Rearme manual: el dispositivo se activa
cuando está cerrado el circuito de ali-
mentación y después se cierra el circuito
de rearme.
463145099
Rearme supervisado con flanco ascen-
dente: el dispositivo se activa cuando el
circuito de entrada está cerrado y el cir-
cuito de rearme se cierra después de
transcurrir el tiempo de espera (ver datos
técnicos).
457338123
Rearme supervisado con flanco descen-
dente: el dispositivo se activa cuando
– el circuito de entrada está cerrado y
después se cierra y se abre el circuito
de rearme.
– el circuito de rearme se cierra y se
abre nuevamente después de cerrarse
el circuito de entrada.
419458699
Rearme con test de arranque: El disposi-
tivo comprueba si, después de aplicar la
tensión de alimentación, las puertas pro-
tectoras cerradas se abren y vuelven a
cerrar.
Descrizione del funzionamento
Funzionamento a canale singolo: nessu-
na ridondanza nel circuito di ingresso, i
guasti a terra nei circuiti di start e di in-
gresso vengono riconosciuti.
Funzionamento bicanale senza ricono-
scimento di cortocircuito: circuito di in-
gresso ridondante, riconosce
– i guasti di terra nei circuiti di start e di
ingresso,
– i cortocircuiti nel circuito di ingresso e
- con start controllato - anche nel cir-
cuito di start.
Funzionamento bicanale con riconosci-
mento di cortocircuito: circuito di ingres-
so ridondante, riconosce
– i guasti di terra nei circuiti di start e di
ingresso,
– i cortocircuiti nel circuito di ingresso e
- con start controllato - anche nel cir-
cuito di start,
– i cortocircuiti nel circuito di ingresso.
Start automatico: il dispositivo si attiva
dopo che è stato chiuso il circuito di in-
gresso.
Start manuale: il dispositivo si attiva
dopo che è stato chiuso il circuito di in-
gresso e poi anche il circuito di start.
Start controllato con fronte in salita: il di-
spositivo si attiva quando il circuito di in-
gresso è chiuso e, dopo che è trascorso
il tempo di attesa (v. Dati Tecnici), viene
chiuso il circuito di start.
Start controllato con fronte in discesa: Il
dispositivo si attiva dopo
– che è stato chiuso il circuito di ingres-
so, e dopo che il circuito di start è sta-
to chiuso e riaperto.
– che il circuito di start è stato chiuso e
viene riaperto solo dopo aver chiuso il
circuito di ingresso.
Start con test di avvio: il dispositivo con-
trolla se, dopo aver applicato la tensione
di alimentazione, i ripari mobili chiusi
vengono aperti e richiusi.
Functiebeschrijving
Eenkanalig bedrijf: geen redundantie in
het ingangscircuit, aardsluitingen in het
start- en ingangscircuit worden gedetec-
teerd.
Tweekanalig bedrijf zonder detectie van
onderlinge sluiting: redundant ingangs-
circuit, detecteert
– aardsluitingen in het start- en ingangs-
circuit,
– kortsluitingen in het ingangscircuit en
bij bewaakte start ook in het startcir-
cuit.
Tweekanalig bedrijf met detectie van on-
derlinge sluiting: redundant ingangscir-
cuit, detecteert
– aardsluitingen in het start- en ingangs-
circuit,
– kortsluitingen in het ingangscircuit en
bij bewaakte start ook in het startcir-
cuit,
– onderlinge sluitingen in ingangscircuit.
Automatische start: Apparaat wordt ac-
tief nadat het ingangscircuit gesloten
wordt.
Handmatige start: Apparaat wordt actief,
wanneer het ingangscircuit gesloten is
en vervolgens het startcircuit gesloten
wordt.
Bewaakte start met stijgende flank: Ap-
paraat wordt actief, wanneer het ingang-
scircuit gesloten is en na afloop van de
wachttijd (zie techn. gegevens) het start-
circuit gesloten wordt.
Bewaakte start met dalende flank: Appa-
raat wordt actief, wanneer
– het ingangscircuit gesloten is en ver-
volgens het startcircuit gesloten en
weer geopend wordt.
– het startcircuit gesloten en na het slui-
ten van het ingangscircuit weer geo-
pend wordt.
Start met aanlooptest: Het apparaat con-
troleert of na het inschakelen van de vo-
edingsspanning gesloten hekken
worden geopend en weer gesloten.
InputInput
A1 A2 S21 S22
=
ower
Reset/
Start
S34
S11 S12
=
Y32
K1
K2
13 23
24
14
Interface
expansion
unit
*
In2+
In2-
In2+
In2-
In2+
In2-

- 13 -
457341963
Posibilidad de multiplicidad y refuerzo de los
contactos de seguridad sin retardo mediante
cableado de bloques de ampliación de con-
tactos o contactores externos;
1 bloque de ampliación de contactos
PNOZsigma enchufable mediante conector.
Aumento del numero e della portata dei con-
tatti di sicurezza istantanei tramite il cablag-
gio di moduli di espansione contatti o relé
esterni;
1 modulo di espansione contatti PNOZsigma
collegabile mediante connettore.
Contactvermeerdering en -versterking mo-
gelijk door aansluiten van contactuitbrei-
dingsrelais of externe magneetschakelaars;
1 contactuitbreidingsrelais PNOZsigma via
verbindingsstekkers aan te sluiten.
Montaje
419461003
Montaje del dispositivo base sin bloque de
ampliación de contactos:
Asegúrese de que la clavija de terminación
se ha enchufado en el lateral del dispositivo.
Conexión de dispositivo base y bloque de
ampliación de contactos PNOZsigma:
Desenchufar la clavija de terminación del la-
teral del dispositivo y del bloque de amplia-
ción de contactos.
Conectar el dispositivo base y el bloque de
ampliación de contactos mediante el conec-
tor suministrado antes de montar los
equipos en la guía normalizada.
Montaje en el armario de distribución
Montar el dispositivo dentro de un armario
de distribución con un grado de protección
de IP54 como mínimo.
Fijar el dispositivo a una guía normalizada
con ayuda del elemento de encaje de la parte
trasera (35 mm).
Con posición de montaje vertical: fije el dis-
positivo mediante un elemento de sujeción
(por ejemplo un soporte o un ángulo final).
Deslizar el dispositivo hacia arriba o abajo
antes de separarlo de la guía.
Montaggio
Montaggio dispositivo base senza modulo di
espansione contatti:
accertarsi che sia inserito il connettore termi-
nale sul lato del dispositivo.
Collegamento dispositivo base e modulo di
espansione contatti PNOZsigma:
rimuovere il connettore terminale sul lato del
dispositivo base e sul modulo di espansione
contatti.
Collegare il dispositivo base e il modulo di
espansione contatti con il connettore in do-
tazione prima di montare i dispositivi sulla
guida DIN.
Montaggio nell'armadio elettrico
Il modulo di sicurezza deve essere montato
in un armadio elettrico con un tipo di prote-
zione corrispondente almeno al grado IP54.
Fissare il dispositivo su una guida DIN con
l'aiuto dell'elemento a scatto situato sul retro
(35 mm).
In caso di montaggio verticale: fissare il di-
spositivo per mezzo di un apposito elemento
(ad es. staffe di fissaggio o angoli terminali).
Prima di estrarlo dalla guida DIN, spingere il
dispositivo verso l'alto o verso il basso.
Montage
Basisrelais zonder contactuitbreidingsrelais
monteren:
Zorg dat de afsluitconnector op de zijkant
van het apparaat is geplaatst.
Basisrelais en contactuitbreidingsrelais
PNOZsigma verbinden:
Verwijder de afsluitstekker van de zijkant van
het basisrelais en het contactuitbreidingsre-
lais.
Verbind het basisrelais en het contactuitbrei-
dingsrelais met de meegeleverde verbin-
dingsstekker voordat u de apparaten op de
DIN-rail monteert.
Montage in schakelkast
Monteer het veiligheidsrelais in een schakel-
kast met een beschermingsgraad van mini-
maal IP54.
Bevestig het apparaat met behulp van de re-
laisvoet op de achterzijde op een DIN-rail (35
mm).
Bij verticale inbouwpositie: zet het apparaat
vast met een bevestigingselement (bijv. een
eindsteun).
Schuif voordat u de DIN-rail opheft het appa-
raat omhoog of omlaag.
Cableado
117583371
Téngase en cuenta:
Respetar a rajatabla las especificaciones del
capítulo "Datos técnicos".
Las salidas 13-14, 23-24 son contactos de
seguridad.
Conectar un fusible (ver datos técnicos) an-
tes de los contactos de salida para evitar que
se suelden los contactos.
Cálculo de la longitud de línea máxima Imáx.
en el circuito de entrada:
Rlmáx. = resistencia total máxima de la línea
(ver datos técnicos)
Rl/ km = resistencia de la línea/km
Utilizar material de alambre de cobre con una
resistencia a la temperatura de 60/75 °C para
las líneas.
Asegure un conexionado de seguridad
suficiente para cargas capacitivas e inducti-
vas en todos los contactos de salida.
1232919051
A la hora de conectar interruptores de proxi-
midad magnetosensibles basados en con-
tactos Reed, prestar atención a que el pico
máx. de corriente de conexión (en el circuito
de entrada) no sobrecargue el interruptor de
proximidad.
Cablaggio
Prestare attenzione:
attenersi assolutamente alle indicazioni ri-
portate al capitolo "Dati Tecnici".
Le uscite 13-14, 23-24 sono contatti di sicu-
rezza.
Per evitare la saldatura dei contatti, collegare
un fusibile (v. Dati Tecnici) a monte dei con-
tatti di uscita.
Calcolo della lunghezza max. del conduttore
Imaxnel circuito di ingresso:
Rlmax = resistenza max. conduttore (v. Dati
Tecnici)
Rl/ km = resistenza del conduttore/km
Per i cavi utilizzare fili di rame con una resi-
stenza termica di 60/75° C.
Per i carichi capacitivi e induttivi occorre do-
tare tutti i contatti di uscita di un circuito pro-
tezione adeguato.
Durante il collegamento di sensori di prossi-
mità magnetici con contatti Reed evitare il
sovraccarico del picco massimo di corrente
di inserzione (sul circuito di ingresso) dei sen-
sori stessi.
Bedrading
Let u op het volgende:
Volg altijd de aanwijzingen in de paragraaf
"Technische gegevens".
De uitgangen 13-14, 23-24 zijn veiligheids-
contacten.
Zeker de uitgangscontacten af (zie techni-
sche gegevens) om verkleving van de con-
tacten te voorkomen.
Berekening van de max. kabellengte Imax in
het ingangscircuit:
Rlmax = max. weerstand totale kabel (zie
techn. gegevens)
Rl/km = kabelweerstand/km
Kabelmateriaal uit koperdraad met een tem-
peratuurbestendigheid van 60/75 °C gebrui-
ken.
Zorg bij capacitieve of inductieve belasting
van de uitgangscontacten voor adequate
contactbeschermingsmaatregelen.
Zorg er voor, dat bij het aansluiten van mag-
netische, op basis van Reed-contacten ge-
baseerde naderingsschakelaars deze niet
wordt overbelast door de maximale inscha-
kel piekstroom (op ingangscircuit).
Disposición para el funcionamiento Selezione del funzionamento Bedrijfsklaar maken
Modos de funcionamiento
547495307
El modo de funcionamiento se ajusta mediante
el mando del dispositivo. Abrir la cubierta fron-
tal del dispositivo.
IMPORTANTE
No cambiar la posición del mando durante
el funcionamiento. De lo contrario apare-
cerá un mensaje de error, se abrirán los
contactos de seguridad y el dispositivo no
reanudará el funcionamiento hasta que se
haya desconectado y conectado la tensión
de alimentación.
Modalità operative
La modalità operativa del dispositivo viene im-
postata mediante selettore. A questo scopo
aprire la copertura sulla parte frontale del di-
spositivo.
IMPORTANTE
Non spostare il selettore durante il funzio-
namento. In caso contrario appare una se-
gnalazione di errore, i contatti di sicurezza
si aprono e il dispositivo è nuovamente
pronto all'uso solo dopo aver disinserito e
quindi riattivato la tensione di alimentazio-
ne.
Bedrijfsmodi
De bedrijfsmodus wordt met de draaischake-
laar op het apparaat ingesteld. Open hiertoe de
afscherming aan de frontzijde van het appa-
raat.
BELANGRIJK
Verstel de draaischakelaar niet tijdens het
werken. Doet u dit toch, dan verschijnt een
foutmelding, worden de veiligheidscontac-
ten verbroken en wordt het apparaat pas
weer bedrijfsklaar na het uit- en weer aan-
schakelen van de voedingsspanning.
Rlmax
Rl / km
Imax =
Rlmax
Rl / km
Imax =
Rlmax
Rl / km
Imax =

- 14 -
Ajuste de modos de funcionamiento
568192395
Desconectar la tensión de alimentación.
Seleccionar el modo de funcionamiento me-
diante el selector "mode".
Si el selector "mode" está en posición inicial
(posición vertical), aparece un mensaje de
error
Impostazione delle modalità operative
Disattivare la tensione di alimentazione.
Selezionare la modalità operativa tramite il
selettore di modalità "mode".
Quando il selettore di modalità "mode" si tro-
va in posizione base (posizione verticale) vie-
ne visualizzato un avviso di errore.
Bedrijfsmodi instellen
Voedingsspanning uitschakelen.
Bedrijfsmodus kiezen met de bedrijfsmodus-
keuzeschakelaar "mode".
Wanneer de bedrijfsmoduskeuzeschakelaar
"mode" zich in de basisstand bevindt (lood-
rechte positie), verschijnt een foutmelding.
selector de modos de
funcionamiento "mode"/
selettore modalità
operative "mode"/
bedrijfsmoduskeuzescha-
kelaar "mode"
rearme automático,
manual/
start automatico, manuale/
automatische,
handmatige start
rearme supervisado, flanco
ascendente/
start controllato fronte in
salita/
bewaakte start met
stijgende flank
rearme supervisado, flanco
descendente/
start controllato fronte in
discesa/
bewaakte start met
dalende flank
rearme automático con
test de arranque/
start automatico con test di
avvio/
automatische start met
aanlooptest
sin detección de
derivación/
senza riconoscimento del
cortocircuito/
zonder detectie van onder-
linge sluiting
con detección de derivación/
con riconoscimento del
cortocircuito/
met detectie van
onderlinge sluiting
Conexión Collegamento Aansluiting
Tensión de alimentación Tensione di alimentazione Voedingsspanning
tensión de alimentación/
tensione di alimentazione/
voedingsspanning
AC DC
Circuito de entrada Circuito di ingresso Ingangscircuit
circuito de entrada/circuito di ingresso/
ingangscircuit
monocanal/monocanale/eenkanalig bicanal/bicanale/tweekanalig
parada de emergencia
sin detección de derivación/
arresto di emergenza
senza riconoscimento del cortocircuito/
noodstop
zonder detectie van onderlinge sluiting
parada de emergencia
con detección de derivación/
arresto di emergenza
con riconoscimento del cortocircuito/
noodstop
met detectie van onderlinge sluiting
puerta protectora
sin detección de derivación/
riparo mobile
senza riconoscimento del cortocircuito/
hek
zonder detectie van onderlinge sluiting
puerta protectora
con detección de derivación/
riparo mobile
con riconoscimento del cortocircuito/
hek
met detectie van onderlinge sluiting
barrera fotoeléctrica de seguridad o
interruptor de seguridad
con detección de derivación mediante BWS/
barriere fotoelettriche o interruttori di sicurezza
con riconoscimento del cortocircuito tramite
barriere fotoelettriche/
lichtscherm of veiligheidsschakelaar met
detectie van onderlinge sluiting door CWB
1017347979
*La tensión (24 V DC) en las entradas impide
que se abran los contactos de seguridad si se
interrumpe la tensión de alimentación en A1-
A2.
*La tensione (24 V DC) sugli ingressi impedisce
l'apertura dei contatti di sicurezza in caso di in-
terruzione della tensione di alimentazione su
A1-A2.
*De 24 VDC spanning op de ingangen voor-
komt het openen van de veiligheidscontacten
indien de voedingsspanning op A1-A2 onder-
broken wordt.
In2-
In2+
In2-
In2+
In2-
In2+
In2-
In2+
In2-
In2+
In2-
In2+
In2-
In2+
In2-
In2+
A1 L+
A2 L-
S1
S11
S22
S12
S1
S11
S12
S22
S1
S22
S21
S12
S11
S1
S22
S11
S12
S1 S2
S11
S12
S22
S1 S2
S12
S11
S22
S21
S12
S22
24 V DC *
A2
GND

- 15 -
Circuito de rearme/circuito de realimenta-
ción
Circuito di start/circuito di retroazione Startcircuit/terugkoppelcircuit
circuito de rearme/circuito de realimentación/
circuito di start/circuito di retroazione/
startcircuit/terugkoppelcircuit
circuito de rearme/
circuito di start/
startcircuit
circuito de realimentación/
circuito di retroazione/
terugkoppelcircuit
rearme automático/
start automatico/
automatische start
rearme manual/supervisado/
start manuale/controllato/
handmatige/bewaakte start
Salida por semiconductor Uscita a semiconduttore Halfgeleideruitgang
584276491
*Interconectar las conexiones de 0 V de todas
las fuentes de alimentación externas.
*Collegare tra loro tutti i collegamenti 0 V di tutti
gli alimentatori esterni.
*Verbind de 0-V-aansluitingen van alle externe
voedingsmodulen met elkaar.
Funcionamiento
557883787
El dispositivo está listo para el servicio cuando
el LED "POWER" permanece encendid
Los LED indican el estado y los errores durante
el funcionamiento:
LED encendido
LED parpadea
552061195
INFORMACIÓN
Las indicaciones de estado y de error pue-
den producirse independientemente unas
de otras. Cuando se indica un error, se
enciende o parpadea el LED "Fault" (ex-
cepción: "Tensión de alimentación de-
masiado baja"). Un LED parpadeante
adicional señala una posible causa del er-
ror. Un LED adicional encendido perma-
nentemente señala condiciones de
funcionamiento normales. Puede ocurrir
que se produzcan varias indicaciones de
estado y de error al mismo tiempo.
Funzionamento
Il dispositivo è pronto all'uso quando il LED
Power resta sempre illuminato.
I LED indicano lo stato e gli eventuali guasti/er-
rori durante il funzionamento:
LED illuminato
LED lampeggiante
INFO
Gli indicatori di stato e di errore/guasto
possono accendersi indipendentemente gli
uni dagli altri. In caso di indicazione di erro-
re/guasto il LED "Fault" si illumina o lam-
peggia (eccezione: "tensione di
alimentazione troppo bassa"). Un ulteriore
LED lampeggiante rimanda ad una possibi-
le causa di guasto. Un LED illuminato fisso
indica un normale stato di funzionamento.
Possono accendersi più indicatori di stato
e di errore/guasto contemporaneamente.
Bedrijf
Het apparaat is bedrijfsklaar, als de LED "Po-
wer" permanent oplicht.
LED's geven de status en fouten tijdens het be-
drijf aan:
LED licht op
LED knippert
INFO
Status-LED's en fout-LED's kunnen onaf-
hankelijk van elkaar geactiveerd worden.
Bij een foutmelding licht de LED "Fault"
continu of knipperend op (uitzondering:
"Voedingsspanning te klein"). Een daar-
naast knipperende LED wijst op een moge-
lijke foutoorzaak. Een daarnaast continu
oplichtende LED wijst op een normale be-
drijfstoestand. Er kunnen meerdere status-
LED's en fout-LED's tegelijk geactiveerd
worden.
Indicación de estado Indicazioni di stato Status-LED's
551604875
Alimentación
Hay tensión de alimentación. Power
tensione di alimentazione presente.
Power
Voedingsspanning aanwezig.
551607179
In1
Circuito de entrada a S12 está cerrado. In1
circuito di ingresso su S12 chiuso.
In1
Ingangscircuit op S12 is gesloten
551609483
In2
Circuito de entrada a S22 está cerrado. In2
circuito di ingresso su S22 chiuso.
In2
Ingangscircuit op S22 is gesloten
551611787
Out
Los contactos de seguridad están cerrados
y la salida por semiconductor Y32 lleva
señal "High".
Out
i contatti di sicurezza sono chiusi e
sull'uscita a semiconduttore Y32 è presen-
te un segnale High.
Out
Veiligheidscontacten zijn gesloten en half-
geleideruitgang Y32 voert een hoog sig-
naal.
551614091
Reset
S34 recibe 24 V DC. Reset
Su S34 sono applicati 24 V DC.
Reset
Op S34 staat 24 V DC.
Indicaciones de error Indicazioni di guasto/errore Foutweergaven
551771659
Todos los LED apagados
Diagnóstico: derivación/defecto a tierra;
dispositivo desconectado
Solución: eliminar derivación/defecto a
tierra, desconectar durante 1 min. la ten-
sión de alimentación.
Tutti i LED spenti
Diagnosi: cortocircuito/guasto a terra; di-
spositivo spento
Risoluzione: eliminare il cortocircuito/
guasto a terra, interrompere la tensione
di alimentazione per 1 min.
Alle LED's uit
Diagnose: Onderlinge sluiting/aardsluiting;
apparaat uitgeschakeld
Oplossing: Onderlinge sluiting/aardslui-
ting herstellen, voedingsspanning gedu-
rende 1 min. uitschakelen.
551773963
Fault
Diagnóstico: clavija de terminación no
enchufada
Solución: enchufar la clavija de termina-
ción, desconectar y conectar la tensión
de alimentación.
Fault
Diagnosi: connettore terminale non inserito
Risoluzione: inserire il connettore termi-
nale, disinserire e reinserire la tensione di
alimentazione.
Fault
Diagnose: Afsluitconnector niet geplaatst
Oplossing: Plaats afsluitconnector,
schakel voedingsspanning uit en weer in.
551776267
Fault
Diagnóstico: Error interno, dispositivo de-
fectuoso
Solución: Desconectar y conectar la ten-
sión de alimentación, en su caso, cambi-
ar el equipo.
Fault
Diagnosi: errore interno, dispositivo guasto
Risoluzione: disinserire e reinserire la
tensione di alimentazione, se necessario
sostituire il dispositivo.
Fault
Diagnose: Interne fout, apparaat defect
Oplossing: Schakel voedingsspanning
uit en weer in; vervang eventueel het ap-
paraat.
S12
S34
K5 K6
K5 L1
N
K6
S12
13 (23)
S34
14 (24)
S12
S34
S3
K5 K6
K5 L1
K6
S12
S34
S3
N
13 (23)
14 (24)
Y32 LC Input
*

- 16 -
551778571
Power
Diagnóstico: Tensión de alimentación de-
masiado baja
Solución: Verificar tensión de alimenta-
ción.
Power
Diagnosi: tensione di alimentazione troppo
bassa
Risoluzione: controllare la tensione di ali-
mentazione.
Power
Diagnose: Voedingsspanning te klein
Oplossing: Voedingsspanning controle-
ren.
551780875
In1, In2 alternativamente
Fault
Diagnóstico: detectada derivación entre
S12 y S22
Solución: eliminar derivación, desconec-
tar y conectar la tensión de alimentación.
In1, In2 alternativamente
Fault
Diagnosi: cortocircuito rilevato tra S12 ed
S22
Risoluzione: eliminare la causa del corto-
circuito, disattivare e quindi riattivare la
tensione di alimentazione.
In1, In2 afwisselend
Fault
Diagnose: Onderlinge sluiting tussen S12
en S22 gedetecteerd
Oplossing: Verhelp onderlinge sluiting,
schakel voedingsspanning uit en weer in
552051979
In1
Fault
Diagnóstico: bloqueo de conexión debido
a interrupción momentánea en S12; circui-
tos de entrada no accionados simultánea-
mente
Solución: abrir y cerrar simultáneamente
ambos circuitos de entrada S12 y S22.
In1
Fault
Diagnostica: blocco al riavvio per breve in-
terruzione su S12; i circuiti di ingresso non
sono attivati contemporaneamente
Risoluzione: aprire e richiudere contem-
poraneamente entrambi i circuiti di in-
gresso S12 ed S22.
In1
Fault
Diagnose: Inschakelblokkade wegens kort-
durende onderbreking op S12; ingangscir-
cuits niet gelijktijdig bediend
Oplossing: Beide ingangscircuits, S12 en
S22 gelijktijdig openen en weer sluiten
552054283
In2
Fault
Diagnóstico: bloqueo de conexión debido
a interrupción momentánea en S22; circui-
tos de entrada no accionados simultánea-
mente
Solución: abrir y cerrar simultáneamente
ambos circuitos de entrada S12 y S22.
In2
Fault
Diagnostica: blocco al riavvio per breve in-
terruzione su S22; i circuiti di ingresso non
sono attivati contemporaneamente
Risoluzione: aprire e richiudere contem-
poraneamente entrambi i circuiti di in-
gresso S12 ed S22.
In2
Fault
Diagnose: Inschakelblokkade wegens kort-
durende onderbreking op S22; ingangscir-
cuits niet gelijktijdig bediend
Oplossing: Beide ingangscircuits, S12 en
S22 gelijktijdig openen en weer sluiten
552056587
Reset
Fault
Diagnóstico: conmutador o interruptor gi-
ratorio se ha situado en una posición no au-
torizada durante el funcionamiento.
Solución: desconectar y conectar la ten-
sión de alimentación.
Reset
Fault
Diagnosi: posizione non consentita di un
selettore o un selettore è stato spostato du-
rante il funzionamento.
Risoluzione: disinserire e reinserire la
tensione di alimentazione.
Reset
Fault
Diagnose: Niet toegestane stand van een
draaischakelaar of er is tijdens het bedrijf
een draaischakelaar verzet.
Oplossing: Voedingsspanning uit- en
weer inschakelen.
552058891
Power, In1, In2, Out, Reset, Fault
Diagnóstico: el selector de modos de
funcionamiento "mode" está situado en
posición inicial (posición vertical)
Solución: desconectar la tensión de ali-
mentación y situar el selector "mode" en
el modo de funcionamiento elegido.
Power, In1, In2, Out, Reset, Fault
Diagnosi: il selettore di modalità operativa
"mode" è in posizione base (posizione ver-
ticale)
Risoluzione: disinserire la tensione di ali-
mentazione ed impostare la modalità
operativa desiderata mediante il seletto-
re "mode".
Power, In1, In2, Out, Reset, Fault
Diagnose: De bedrijfsmoduskeuzeschake-
laar "mode" staat in de basisstand (lood-
rechte positie)
Oplossing: Voedingsspanning uitscha-
kelen en met bedrijfsmoduskeuzescha-
kelaar "mode" de gewenste
bedrijfsmodus instellen.
Errores - Fallos
551266315
Funcionamiento defectuoso de los contac-
tos: En caso de contactos soldados,
después de abrir el circuito de entrada no es
posible ninguna nueva activación.
Errori - Guasti
Gausto dei contatti: in caso di saldatura dei
contatti, dopo l'apertura dei circuiti di ingres-
so non è possibile nessuna nuova attivazio-
ne.
Fouten - Storingen
Contactfout: Bij verkleefde contacten is na
openen van het ingangscircuit geen nieuwe
activering mogelijk.
Datos técnicos Dati tecnici Technische gegevens
Datos eléctricos Dati elettrici Elektrische gegevens
Tensión de alimentación Tensione di alimentazione Voedingsspanning
Tensión de alimentación UBDC Tensione di alimentazione UBDC Voedingsspanning UBDC 24 V
Tolerancia de tensión Tolleranza di tensione Spanningstolerantie -15 %/+10 %
Consumo de energía con UBDC Potenza assorbita con UBDC Opgenomen vermogen bij UBDC 2,5 W
Ondulación residual DC Ondulazione residua DC Rimpelspanning DC 20 %
Tensión y corriente en Tensione e corrente on
Circuito de entrada DC: 24,0 V Circuito di ingresso DC: 24,0 V Ingangscircuit DC: 24,0 V 50,0 mA
Circuito de rearme DC: 24,0 V Circuito di start DC: 24,0 V Startcircuit DC: 24,0 V 50,0 mA
Circuito de realimentación DC:
24,0 V Circuito di retroazione DC: 24,0 V Terugkoppelcircuit DC: 24,0 V 50,0 mA
Número de contactos de salida Numero dei contatti di uscita Aantal uitgangscontacten
Contactos de seguridad (NA) sin
retardo:
Contatti di sicurezza (NA)
istantanei:
Veiligheidscontacten (M) niet-
vertraagd:
2

- 17 -
Categoría de uso según
EN 60947-4-1 Categoria d'uso secondo
EN 60947-4-1 Gebruikscategorie volgens EN
60947-4-1
Contactos de seguridad: AC1
con 240 V Contatti di sicurezza: AC1 con
240 V Veiligheidscontacten: AC1 bij 240 V Imín.:0,01 A , Imáx:6,0 A
Pmáx.: 1500 VA
Contactos de seguridad: DC1
con 24 V Contatti di sicurezza: DC1 con 24 V Veiligheidscontacten: DC1 bij 24 V Imín.: 0,01 A , Imáx: 6,0 A
Pmáx.: 150 W
Categoría de uso según
EN 60947-5-1 Categoria d'uso secondo
EN 60947-5-1 Gebruikscategorie volgens
EN 60947-5-1
Contactos de seguridad: AC15
con 230 V Contatti di sicurezza: AC15 con
230 V Veiligheidscontacten: AC15 bij
230 V Imáx.: 5,0 A
Contactos de seguridad: DC13
con 24 V (6 ciclos/min.)
Contatti di sicurezza: DC13 con
24 V(6 cicli di commutazione/min)
Veiligheidscontacten: DC13 bij 24 V
(6 schakelingen/min)
Imáx.: 5,0 A
Corriente térmica convencional Corrente termica convenzionale Conventionele thermische stroom 6,0 A
Material de los contactos Materiale di contatto Contactmateriaal AgCuNi + 0,2 µm Au
Protección externa de los contac-
tos (IK= 1 kA) según EN 60947-5-1 Fusibile dei contatti, esterno
(IK= 1 kA) secondo EN 60947-5-1 Contactafzekering, extern
(IK= 1 kA) volgens EN 60947-5-1
Fusible de acción rápida Fusibile rapido Smeltzekering snel
Contactos de seguridad: Contatti di sicurezza: Veiligheidscontacten: 10 A
Fusible de acción lenta Fusibile ritardato Smeltzekering traag
Contactos de seguridad: Contatti di sicurezza: Veiligheidscontacten: 6 A
Fusible automático 24 V AC/DC,
característica B/C
Interruttore automatico 24V AC/DC,
caratteristica B/C
Zekeringautomaat 24V AC/DC, ka-
rakteristiek B/C
Contactos de seguridad: Contatti di sicurezza: Veiligheidscontacten: 6 A
Salidas por semiconductor (a prue-
ba de cortocircuitos)
Uscite a semiconduttore (protette
da cortocircuiti)
Halfgeleideruitgangen (kortsluit-
vast)
24,0 V DC, 20 mA
Resistencia de línea total máx.
Rlmáx.
circuitos de entrada, circuitos de re-
arme
Max. resistenza totale del cavo
Rlmax
circuiti di ingresso, circuiti di start
Max. weerstand totale kabel
Rlmax
ingangscircuits, startcircuit
monocanal para UBDC Monocanale con UBDC Eenkanalig bij UB DC 30 Ohm
bicanal sin detección de derivación
para UBDC
Bicanale senza riconoscimento del
cortocircuito con UBDC
Tweekanalig zonder detectie van
onderlinge sluiting bij UBDC
60 Ohm
bicanal con detección de deriva-
ción para UBDC
Bicanale con riconoscimento del
cortocircuito con UBDC
Tweekanalig met detectie van on-
derlinge sluiting bij UBDC
30 Ohm
Resistencia de entrada mín. en el
instante de la conexión
Resistenza di inserzione min. nella
coppia di avvio
Min. ingangsweerstand tijdens het
inschakelmoment
110 Ohm
Datos característicos de técnica
de seguridad Dati tecnici di sicurezza Veiligheidstechnische kengege-
vens
PL según EN ISO 13849-1: 2006 PL secondo EN ISO 13849-1: 2006 PL volgens EN ISO 13849-1: 2006 PL e (Cat. 4)
Categoría según EN 954-1 Categoria secondo EN 954-1 Categorie volgens EN 954-1 Cat. 4
SIL CL según EN IEC 62061 SIL CL secondo EN IEC 62061 SIL CL volgens EN IEC 62061 SIL CL 3
PFH según EN IEC 62061 PFH secondo EN IEC 62061 PFH volgens EN IEC 62061 2,31E-09
SIL según IEC 61511 SIL secondo IEC 61511 SIL volgens IEC 61511 SIL 3
PFD según IEC 61511 PFD secondo IEC 61511 PFD volgens IEC 61511 2,03E-06
TM[años] según EN ISO 13849-1:
2006 TM[anni] secondo EN ISO 13849-1:
2006 TM[jaren] volgens EN ISO 13849-1:
2006 20
Tiempos Tempi Tijden
Retardo a la conexión Ritardo all'eccitazione Inschakelvertraging
con rearme automático típ. con start automatico tipo Bij automatische start ca. 170 ms
con rearme automático máx. con start automatico max. Bij automatische start max. 300 ms
con rearme automático después de
Red "On", típ.
con start automatico secondo ali-
mentazione-on tipo
Bij automatische start na netinscha-
keling ca.
350 ms
para rearme automático después
de Red "On", máx.
con start automatico secondo ali-
mentazione-on max.
Bij automatische start na netinscha-
keling max.
600 ms
con rearme manual, típ. con start manuale tipo Bij handmatige start ca. 40 ms
para rearme supervisado con flanco
ascendente típ.
con start controllato con fronte in
salita tip.
Bij bewaakte start met stijgende
flank ca.
35 ms
para rearme supervisado con flanco
ascendente máx.
con start controllato con fronte in
salita max.
Bij bewaakte start met stijgende
flank max.
50 ms
para rearme supervisado con flanco
descendente típ.
con start controllato con fronte in
discesa tip.
Bij bewaakte start met dalende
flank ca.
55 ms
para rearme supervisado con flanco
descendente máx.
con start controllato con fronte in
discesa max.
Bij bewaakte start met dalende
flank max.
70 ms
Retardo de desconexión Ritardo allo sgancio Afvalvertraging
para parada de emergencia típ. con arresto di emergenza tip. Bij noodstop ca. 10 ms
para parada de emergencia máx. con arresto di emergenza max. Bij noodstop max. 20 ms
en una caída de tensión típ. con mancanza di alimentazione tip. Bij uitvallen spanning ca. 40 ms
en una caída de tensión máx. con mancanza di alimentazione
max.
Bij uitvallen spanning max. 60 ms
Datos eléctricos Dati elettrici Elektrische gegevens

- 18 -
Recuperación para frecuencia de
conmutación máx. 1/s
Tempo di ripristino con frequenza di
commutazione max. 1/s
Resettijd bij max. schakelfrequentie
1/s
después de una parada de emer-
gencia
dopo arresto di emergenza Na noodstop 100 ms
tras una caída de tensión dopo mancanza di alimentazione Na uitvallen van de spanning 100 ms
Tiempo de espera con rearme su-
pervisado
Tempo di attesa con start controlla-
to
Wachttijd bij bewaakte start
con flanco ascendente con fronte in salita Met stijgende flank 120 ms
con flanco descendente con fronte in discesa Met dalende flank 250 ms
Duración mín. impulso de rearme
con rearme supervisado
Durata minima dell'impulso di start
con start controllato
Min. startpulsduur bij bewaakte
start
con flanco ascendente con fronte in salita Met stijgende flank 30 ms
con flanco descendente con fronte in discesa Met dalende flank 100 ms
Simultaneidad canal 1 y 2 Simultaneità canale 1 e 2 Gelijktijdigheid kanaal 1 en 2 ∞
A prueba de cortes de la tensión de
alimentación
Ininfluenza mancanza tensione di
alimentazione
Maximale onderbreking van de voe-
dingsspanning
20 ms
Medio ambiente Dati ambientali Omgevingscondities
CEM Compatibilità elettromagnetica EMC EN 60947-5-1, EN 61000-6-2,
EN 61000-6-4
Vibraciones según EN 60068-2-6 Oscillazioni secondo EN 60068-2-6 Trillingen volgens EN 60068-2-6
Frecuencia Frequenza Frequentie 10 - 55 Hz
Amplitud Ampiezza Amplitude 0,35 mm
Condiciones climáticas Sollecitazioni climatiche Klimaatcondities EN 60068-2-78
Distancias de fuga y dispersión su-
perficial según EN 60947-1 Caratteristiche dielettriche
secondo EN 60947-1 Lucht- en kruipwegen volgens
EN 60947-1
Grado de suciedad Grado di contaminazione Vervuilingsgraad 2
Categoría de sobretensión Categoria di sovratensione Oversturingscategorie III / II
Tensión de aislamiento de dimen-
sionado
Tensione nominale di isolamento Nominale isolatiespanning 250 V
Resistencia tensión transitoria de
dimensionado
Tensione di tenuta agli urti Nominale stootspanningbestendig-
heid
4,00 kV
Temperatura ambiente Temperatura ambiente Omgevingstemperatuur -10 - 55 °C
Temperatura de almacenaje Temperatura di immagazzinamento Opslagtemperatuur -40 - 85 °C
Tipo de protección Grado di protezione Beschermingsgraad
Lugar de montaje (por ejemplo, ar-
mario de distribución)
Vano di montaggio (ad es. quadro
elettrico)
Inbouwruimte (b.v. schakelkast) IP54
Carcasa Custodia Behuizing IP40
Zona de bornes Zona morsetti Aansluitklemmen IP20
Datos mecánicos Dati meccanici Mechanische gegevens
Material de la carcasa Materiale custodia Behuizingsmateriaal
Carcasa Custodia Behuizing PC
Frontal Parte frontale Front PC
Sección del conductor externo con
bornes de tornillo
Sezione dei cavi con morsetti a vite Doorsnede van de aansluitkabels
bij schroefklemmen
1 conductor flexible 1 cavo flessibile 1 draad flexibel 0,25 - 2,50 mm² , 24 - 12 AWG
No. 750103
2 conductores de igual sección, fle-
xibles:
2 cavi di uguale sezione, flessibili: 2 draden met dezelfde doorsnede,
flexibel:
con terminal, sin revestimiento de
plástico
con capocorda, senza manicotto in
plastica
Met adereindhuls, zonder kunst-
stofhuls
0,25 - 1,00 mm² , 24 - 16 AWG
No. 750103
sin terminal o con terminal TWIN senza capocorda o con capocorda
TWIN
Zonder adereindhuls of met TWIN-
adereindhuls
0,20 - 1,50 mm² , 24 - 16 AWG
No. 750103
Par de apriete para bornes de tor-
nillo
Coppia di serraggio con morsetti a
vite
Aanhaalmoment bij schroefklem-
men
0,50 Nm No. 750103
Sección del conductor externo con
bornes de muelle: flexible con/sin
terminal
Sezione dei cavi con morsetti a
molla: flessibile con/senza capo-
corda
Doorsnede van de aansluitkabels
bij veerkrachtklemmen: Flexibel
met/zonder adereindhuls
0,20 - 2,50 mm² , 24 - 12 AWG
No. 751103
Bornes de muelle: Número de bor-
nes por conexión
Morsetti a molla: slot morsetti per
collegamento
Veerkrachtklemmen: Klemmen per
aansluiting
2No. 751103
Longitud de desguarnecimiento Lunghezza isolamento Afstriplengte 9 mm No. 751103
Medidas Dimensioni Afmetingen
Altura Altezza Hoogte 102,0 mm No. 751103
96,0 mm No. 750103
Ancho Larghezza Breedte 17,5 mm
Profundidad Profondità Diepte 120,0 mm
Peso Peso Gewicht 140 g
No. es idéntico al Número de Pedido „No.“ sta per „numero d'ordine” No. is gelijk aan bestelnummer
Tiempos Tempi Tijden

- 19 -
1176133131
ATENCIÓN
Respetar al pie de la letra las curvas de vida
útil de los relés. Las cifras características
de seguridad de las salidas de relé valen
solo si se observan los valores de las cur-
vas de vida útil.
El valor PFH depende de la frecuencia de con-
mutación y la carga de las salida de relé. Mien-
tras no se alcancen las curvas de vida útil, el
valor PFH especificado puede utilizarse inde-
pendientemente de la frecuencia de conmuta-
ción y de la carga porque el valor PFH tiene en
cuenta el valor B10d del relé y las tasas de fal-
los de los demás componentes.
1077650443
En el cálculo de las cifras características de se-
guridad deben tenerse en cuenta todas las uni-
dades que intervienen en una función de
seguridad.
1312356363
INFORMACIÓN
Los valores SIL/PL de una función de segu-
ridad
no
son idénticos a los valores SIL/PL
de los dispositivos utilizados y pueden difer-
ir de estos. Recomendamos la herramienta
de software PAScal para calcular los valores
SIL/PL de la función de seguridad.
585241611
Se aplican las versiones actuales 2006-04 de
las normas.
ATTENZIONE!
Rispettare le curve di durata dei relè. I dati
tecnici di sicurezza delle uscite a relè sono
valide soltanto se vengono rispettati i valori
delle curve di durata.
Il valore PFH dipende dalla frequenza di com-
mutazione e dal carico dell'uscita a relè. Se non
si superano i valori delle curve di durata, il valo-
re PFH può essere utilizzato indipendentemen-
te dalla frequenza di commutazione e dal
carico, poiché tale valore rispetta il valore B10d
dei relè e le percentuali di guasto degli altri
componenti.
Tutte le unità impiegate in una funzione di sicu-
rezza devono essere tenute in considerazione
in fase di calcolo dei valori nominali relativi al si-
stema di sicurezza.
INFO
I valori SIL/PL di una funzione di sicurezza
non sono identici ai valori SIL/PL dei dispo-
sitivi utilizzati e possono quindi variare ri-
spetto a questi. Per il calcolo dei valori SIL
e PL della funzione di sicurezza si consiglia
l'utilizzo dello strumento software PAScal.
Per le norme citate, sono applicate le 2006-04
versioni in vigore al momento.
LET OP!
Let altijd op de levensduurkrommen van de
relais. De veiligheidstechnische nummers
van de relaisuitgangen gelden slechts zo-
lang de waarden van de levensduurkrom-
men aangehouden worden.
De PFH-waarde is afhankelijk van de schakelf-
requentie en de belasting van de relaisuitgang.
Zolang de levensduurkrommen niet bereikt
worden, kan de aangegeven PFH-waarde onaf-
hankelijk van de schakelfrequentie en de belas-
ting worden gebruikt, omdat de PFH-waarde al
uitgaat van de B10d-waarde van de relais en de
uitvalsnelheden van de andere componenten.
Alle onderdelen van een veiligheidsfunctie die-
nen bij berekening van de veiligheidskengege-
vens in acht te worden genomen.
INFO
De SIL-/PL-waarden van een veiligheids-
functie zijnnietgelijk aan de SIL-/PL-waar-
den van de gebruikte apparaten en kunnen
hiervan afwijken. Voor de berekening van
de SIL-/PL-waarden van de veiligheids-
functie raden wij het gebruik van de soft-
waretool PAScal aan.
Van toepassing zijn de 2006-04 actuele versies
van de normen.
Curva de vida útil de los relés de salida
1196936075
Las curvas de vida útil indican el número de ci-
clos a partir del cual pueden producirse fallos
debidos al desgaste. El desgaste es producto
sobre todo de la carga eléctrica; el desgaste
mecánico es insignificante.
Curva del ciclo di vita dei relè di uscita
Le curve di durata indicano da quale ciclo di
commutazione è possibile che si verifichino
guasti correlati all'usura. L'usura è causata
principalmente dal carico elettrico, mentre
l'usura meccanica è trascurabile.
Levensduurkromme van de uitgangsrelais
De levensduurkrommen geven aan, vanaf welk
aantal schakelingen met uitvallen door slijtage
rekening moet worden gehouden. De slijtage
wordt vooral veroorzaakt door de elektrische
belasting; de mechanische slijtage is verwaar-
loosbaar.
1221417611
Ejemplo
Carga inductiva: 0,2 A
Categoría de uso: AC15
Vida útil de los contactos: 2.000.000 ciclos
de conmutación
Mientras la aplicación para realizar necesite
menos de 2.000.000 ciclos, puede utilizarse el
valor PFH (ver "Datos técnicos") para calcular.
Prever una extinción de chispas suficiente en
todos los contactos de salida para prolongar la
vida útil. En caso de cargas capacitivas, con-
trolar las puntas de tensión que puedan crear-
se. Utilizar diodos volantes para la extinción de
chispas de contactores DC.
Esempio
Carico induttivo: 0,2 A
Categoria di utilizzo: AC15
Durata dei contatti: 2.000.000 cicli di com-
mutazione
Se l'applicazione da realizzare non richiede più
di 2.000.000 di cicli di commutazione è possibi-
le utilizzare il valore PFH (v. dati tecnici).
Per aumentarne la durata, tutti i contatti di usci-
ta devono essere adeguatamente protetti me-
diante soppressori. Per carichi capacitivi
considerare eventuali picchi di corrente. Con i
relè DC utilizzare diodi unidirezionali per la sop-
pressione delle scariche.
Voorbeeld
Inductieve belasting: 0,2 A
Gebruikscategorie: AC15
Levensduur van de contacten: 2.000.000
schakelingen
Zolang de te realiseren toepassing een aantal
schakelingen van minder dan 2.000.000 ver-
eist, kan met de PFH-waarde (z. Technische
gegevens) worden gerekend.
Om de levensduur te verhogen, moet aan alle
uitgangscontacten voor een adequate vonk-
blussing gezorgd worden. Bij capacitieve be-
lasting dienen eventueel optredende
stroompieken vermeden te worden. Bij DC-
magneetschakelaars vrijloopdioden voor vonk-
blussing gebruiken.

Manual de Instrucciones original/Istruzioni originali/Originele bedrijfshandleiding
21395-6NL-09, 2011-09 Printed in Germany Printed in Germany
21395-6NL-092011-09Printed in Germany
Datos de pedido Dati di ordinazione Bestelgegevens
Tipo/
Tipo/
Type
Características/
Caratteristiche/
Kenmerken
Bornes/
Morsetti/
Klemmen
N.º pedido/
N. Ord./
Bestelnr.
PNOZ s3 24 V DC con bornes de tornillo/
con morsetti a vite/
met schroefklemmen
750 103
PNOZ s3 C 24 V DC con bornes de muelle/
con morsetti a molla/
met veerkrachtklemmen
751 103
Declaración CE de conformidad
1139424011
Estos productos cumplen los requisitos de la
Directiva de Máquinas 2006/42/CE del Parla-
mento Europeo y del Consejo. La declaración
CE de conformidad completa pueden encon-
trarla en la página web de Internet
www.pilz.com.
Apoderado: Norbert Fröhlich, Pilz GmbH & Co.
KG, Felix-Wankel-Str. 2, 73760 Ostfildern, Ale-
mania
Dichiarazione di conformità CE
Questo(i) prodotto(i) soddisfa i requisiti della Di-
rettiva 2006/42/CE del Parlamento e del Consi-
glio Europeo sulle macchine. Il testo integrale
della Dichiarazione di conformità CE è disponi-
bile in Internet all'indirizzo www.pilz.com
Mandatario: Norbert Fröhlich, Pilz GmbH & Co.
KG, Felix-Wankel-Str. 2, 73760 Ostfildern, Ger-
mania
EG-conformiteitsverklaring
Deze produkten voldoen aan de eisen van de
Europese Machinerichtlijn 2006/42/EG. De vol-
ledige EG-conformiteitsverklaring vindt u op
wwww.pilz.com.
Gevolmachtige: Norbert Fröhlich, Pilz GmbH &
Co. KG, Felix-Wankel-Str. 2, 73760 Ostfildern,
Duitsland
Other manuals for PNOZ s3
1
Table of contents
Other Pilz Relay manuals

Pilz
Pilz P1HZ 2 User manual

Pilz
Pilz PNOZSIGMA Series User manual

Pilz
Pilz PNOZ X2.7P User manual

Pilz
Pilz PNOZ XV3.1P User manual

Pilz
Pilz PNOZ 1 Owner's manual

Pilz
Pilz PNOZ e3.1p User manual

Pilz
Pilz PNOZ pps1p User manual

Pilz
Pilz P1HZ X1 User manual

Pilz
Pilz PNOZ X3 User manual

Pilz
Pilz PNOZ s30 User manual