Pixsys CNV510-PBUS-RTU-A User manual

pag. 1
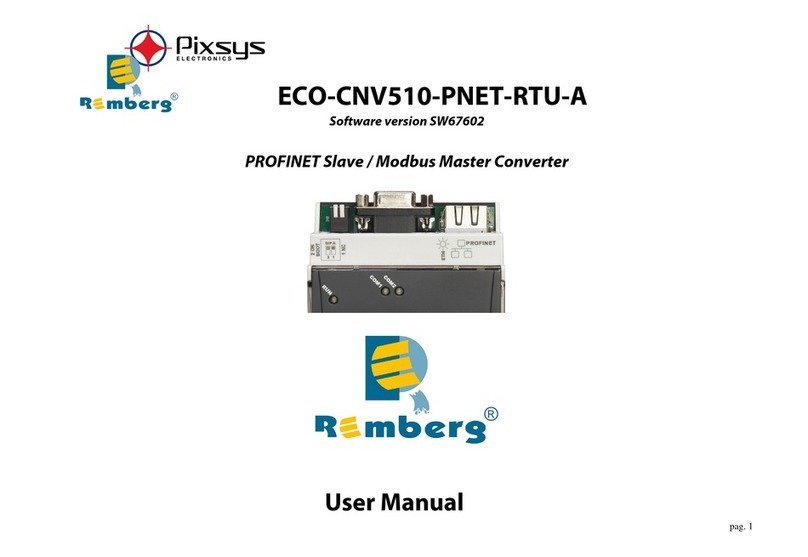
CNV510-PBUS-RTU-A
Software version SW67561
Profibus Slave / Modbus Master Converter
User Manual

pag. 2
WARNING:
Pixsys srl reserves the right to change information in this manual about our product without warning.
Pixsys srl is not responsible for any error this manual may contain.
TRADEMARKS:
All trademarks mentioned in this document belong to their respective owners.
SECURITY A ERT:
GENERA INFORMATION
To ensure safe operation, the device must be operated according to the instructions in the manual. When using the device, legal and safety regulation are re uired for
each individual application. The same applies also when using accessories.
INTENDED USE
Machines and systems must be designed so the faulty conditions do not lead to a dangerous situation for the operator (i.e. independent limit switches, mechanical
interlocks, etc.).
QUA IFIED PERSONNE
The device can be used only by ualified personnel, strictly in accordance with the specifications.
Qualified personnel are persons who are familiar with the installation, assembly, commissioning and operation of this e uipment and who have appropriate ualifications
for their job.
RESIDUA RISKS
The device is state-of-the-art and is safe. The instruments can represent a potential hazard if they are inappropriately installed and operated by untrained personnel.
These instructions refer to residual risks with the following symbol:
This symbol indicates that non-observance of the safety instructions is a danger for people that could lead to serious injury or death and / or the possibility of
damage.
CE CONFORMITY
The declaration is made by our company. You can send an email to support@pixsys.net or give us a call if you need it.

pag. 3
CHARACTERISTICS:
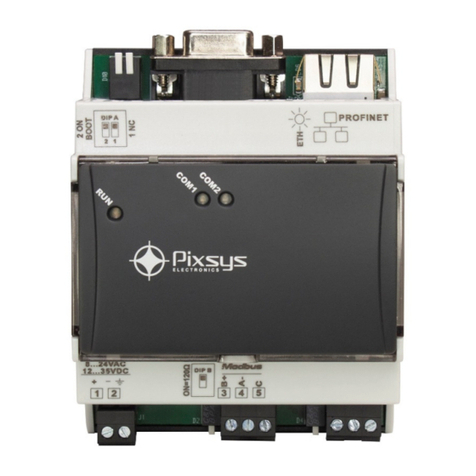
The CNV510-PBUS-RTU-A is a PROFIBUS Slave Modbus Master Converter.
It allows the following characteristics:
Up to 512 bytes in reading and 512 bytes in writing;
Triple isolation between Modbus - Power Supply, Modbus - Ethernet, Power Supply – Ethernet;
Two-directional information between Modbus bus and PROFIBUS bus;
Mountable on 35mm Rail DIN;
Wide power supply input range: 8..19V AC or 8..35V DC (Maximum consumption at 24V: 4 W / VA);
Wide environment conditions: 0..45°C, humidity 35..95 uR%;
Serials Protocols supported:
o Simple ASCII Protocol;
o Simple Binary Protocol;
o Modbus;
o JBUS.
CONFIGURATION:
You need Software SW67561 on your PC in order to perform the following:
Define the parameter of the Profibus line;
Define the parameter of the Modbus line;
Define the data to Read in Modbus and where to map these information in the Profibus array;
Define the data to Write in Modbus and where to take the information in the Profibus array;
Update the device.

pag. 4
MECHANICA DIMENSIONS:

pag. 5
EXAMP E OF CONNECTION:

pag. 6
CONNECTION SCHEME:

pag. 7
POWER SUPP Y:

pag. 8
FUNCTION MODES:
The device has got two functions mode depending of the position of the ‘Dip2 of Dip-Switch A’:
The first, with ‘Dip2 of Dip-Switch A’ at “OFF” position, is used for the normal working of the device.
The second, with ‘Dip2 of Dip-Switch A’ at “ON” position, is used for upload the Project and/or Firmware.
For the operations to follow for the updating, see ‘UPDATE DEVICE’ section.
According to the functioning mode, the LEDs will have specifics functions, see ‘LEDS’ section.
Warning:
Dip1 of ‘Dip-Switch A’ must be always at ON position!

pag. 9
EDS:
LEDs that are used to give information of the functioning status.
The various meanings of the LEDs are described in the table below.
ED Normal Mode Boot Mode
1: ON [supply voltage] (green) ON: Device powered
OFF: Device not powered
ON: Device powered
OFF: Device not powered
2: PT [Profibus state] (yellow) F ASHING: Profibus transmissions present
OFF: No Profibus transmissions present OFF
3: MT [Modbus state] (yellow) F ASHING: MODBUS-RTU transmissions present
OFF: No MODBUS-RTU transmissions present OFF
4: Ethernet1 Tx (green) Blinks when is transmitting Ethernet frames Blinks quickly: Boot state
Blinks very slowly (~0.5Hz): Update in progress
Internal LED (green) Blinks very slowly (~0.5Hz): Device is working in normal mode

pag. 10
PROFIBUS:
The PROFIBUS uses a 9-pin D-SUB connector. The pin assignment is defined like in the right figure.
Here some codes of cables:
Belden: p/n 183079A - Continuous Armor DataBus® ISA/SP-50 PROFIBUS Cable.

pag. 11
RS485:
For terminate the RS485 line with a 120Ω resistor it is necessary to put ON dip 2, like in figure. The maximum length of the cable should be 1200m (4000 feet).
Here some codes of cables:
Belden: p/n 8132 - 2x 28AWG stranded twisted pairs conductor + foil shield + braid shield;
Belden p/n 82842 - 2x 24AWG stranded twisted pairs conductor + foil shield + braid shield;
Tasker: p/n C521 - 1x 24AWG twisted pair conductor + foil shield + braid shield;
Tasker: p/n C522 - 2x 24AWG twisted pairs conductor + foil shield + braid shield.

pag. 12
USE OF CONFIGURATION SOFTWARE SW67561:
To configure the Converter, use the available software that runs with Windows called SW67561. It is downloadable on the Pixsys download are ( https://cloud.pixsys.net/ ) and
its operation is described in this document. (This manual is referenced to the last version of the software present on our web site). The software works only on Microsoft Windows
(XP, Vista, Seven, 8, 10; 32/64bit architectures).
When launching the SW67561, the window below appears (Fig. 2).
Note:
It is necessary to have installed .Net Framework 4.
Figure 2: Main window for SW67561

pag. 13
NEW CONFIGURATION / OPEN CONFIGURATION:
The “New Configuration” button creates the folder which contains the entire device’s configuration.
A device’s configuration can also be imported or exported:
To clone the configurations of a Programmable “Profibus Slave / Modbus Master - Converter” in order to
configure another device in the same manner, it is necessary to maintain the folder and all its contents;
To clone a project in order to obtain a different version of the project, it is sufficient to duplicate the project
folder with another name and open the new folder with the button “Open Configuration”.

pag. 14
SOFTWARE OPTIONS:
By pressing the “Settings” ( ) button there is the possibility to change the language and check
the updatings of the software.
In the section “Language” it is possible to change the language of the software.
In the section “Connection Options”, it is possible to check if there are some updatings of the
software in Pixsys srl website.
Checking the option “Check Software Update at Start of Program”, the SW67607 checks
automatically if there are updatings when it is launched.

pag. 15
SET COMMUNICATION:
This section defines the fundamental communication parameter of two buses, Serial and PROFIBUS.
By Pressing the “Set Communication” button from the main window of SW67561 (Fig. 2) the window “Set Communication” appears (Fig. 3).
The Window is divided in three sections, one for the hardware type, one for the Modbus Master and the other for PROFIBUS.
In the “Hardware Type” sections, please select “Hardware With Ethernet”.

pag. 16
The means of the fields for “Modbus Master” are:
In the field “Serial” is possible to select the serial line used for Modbus. Please select “RS485”;
In the field “Baudrate” pease define the baudrate for the serial line;
In the field “Parity” pease select the parity of the serial line;
In the field “Stop Bits” pease select the Stop Bits of the RS485;
In the field “TimeOut (ms)” insert the maximum time that the converter attends for the answer from the
slave interrogated (1000mS is the default value);
In the field “Cyclic Delay (ms)” insert the delay between two re uests (10mS is the default value);
If the field “Enable Modbus ony if PROFIBUS is Active” is checked, the converter do the Modbus
re uests only if PROFIBUS connection is established; otherwise the re uests are made also if PROFIBUS is
not operational. (disabled is is the default value);
The means of the fields for “PROFIBUS” are:
In the field "ID Device" insert the address of the PROFIBUS side;
In the field "Baudrate" the baudrate for the PROFIBUS is defined, please leave it as AUTO;
In the field "Number Byte IN" the number of byte from the slave PROFIBUS to the converter is defined;
In the field "Number Byte OUT" the number of byte from the converter to the slave PROFIBUS is defined.
If the field “Enable Error/Diagnosis for Modbus Slaves” is checked, the converter can advice a problem
with one or more devices in Modbus network. In the field on right is necessary to insert the start byte
address of array OUT where is saved the Diagnosis;
If the field “Enable PROFIBUS Diagosis” is checked, the converter use the Diagnosis to show an error of
one or more Modbus device. (The “Enable Error/Diagnosis for Modbus Slaves” must be selected for enable
this option);
If the field “Enable Modbus Asynchronous Requests” is checked, is possible to send a Modbus Re uest
using some bytes of the PROFIBUS to controll the re uests;
In the field “Start Address Byte IN” the starting address where the gateway send to the PROFIBUS master
the state of Modbus re uest (for more info see the chapter “Async Remote Re uest”). Remember, there are
4 bytes of state of the modbus re uest;
In the field “Start Address Byte OUT” the starting address where the PROFIBUS master send to the
gateway the parameters of the Modbus Re uest (for more info see the chapter “Async Remote Re uest”).
Remember, there are 8 bytes of parameters for the modbus re uest.

pag. 17
The meaning of the fields of “Ethernet” are:
In the field “IP Address” please insert the IP address to assign to the converter;
In the field “SubNet Mask” please insert the SubNet Mask of the converter;
In the field “Gateway” the default gateway of the network is defined. This feature can be enabled or disabled pressing the Check Box field. This feature is used for
going out of the net.
MODBUS SET ACCESS (for Hardware with Ethernet):
By pressing the “Modbus Set Access” button from the main window for SW67561 (Fig. 2) the window “Set Modbus Access” appears.
This window is divided in two parts, the "PROFIBUS In --> Serial Read" (Fig. 6) and the "Serial Write --> PROFIBUS Out" (Fig. 7).
The first part ("PROFIBUS IN --> Serial Read") is used to read the data that arrived from the Slave PROFIBUS.
The second part ("Serial Write --> PROFIBUS OUT") is used to write the data that will be sent to the Slave PROFIBUS.

pag. 18
PROFIBUS IN
Serial Read
The means of the fields are:
In the field “Slave ID” the address of the Modbus device you have to read is defined;
In the field “Type” insert the data type of the Register you would like to read. You can choose between “Coil Status”, “Input Status”, “Holding Register” and
“Input Register”.
In the field “Address” the start address of the register to be read is defined;
In the field “NPoint” insert the number of consecutive registers to be read;
In the field “Poll Time” insert the cyclic time to make this re uest;
In the field “Max Error” the number of consecutive errors that the Master waits before discarding the row from the cycle of re uests is defined;
In the field “Position” the address for the PROFIBUS array is defined;
The field “Start Bit” is used for the “Coil and Input Status” and it allows to select which bit of the selected Position using;
If the field “SWAP” is checked, the data read is swapped;
In the field “Mnemonic” the description for the re uest is defined.
Figure 6: “Set Modbus Access / PR FIBUS In --> Serial Read” window

pag. 19
Serial Write
PROFIBUS OUT
The means of the fields are:
In the field “Slave ID” the address of the Modbus device that you must write is defined;
In the field “Type” insert the data type of the Register you would like to write. You can choose between “Coil Status” and “Holding Register”.
In the field “Address” the start address of the register to be written is defined;
In the field “NPoint” insert the number of consecutive registers to be written;
In the field “Poll Time” insert the cyclic time to make this re uest;
If the field “On Change” is checked, the Modbus writing re uest is made only if PROFIBUS data are changed; otherwise it is sent cyclically, using the “Poll Time”;
In the field “Max Error” the number of consecutive errors that the Master waits before discarding the row from the cycle of re uests is defined;
In the field “Position” the address for the PROFIBUS array is defined;
The field “Start Bit” is used for the “Coil Status” and it allows to select which bit of the selected Position using;
If the field “SWAP” is checked, the data written is swapped
In the field “Mnemonic” the description for the re uest is defined.
Figure 7: “Set Modbus Access / Modbus Write --> PR FIBUS ut” window

pag. 20
ERROR/DIAGNOSIS
By pressing the “Error/Diagnosis” button from the main window for SW67561 (Fig. 2) the window “Error/Diagnosis” appears.
In this window is possible to insert all the Modbus devices checked by the converter.
The table give the position of the bit that are set if the device is in error in the Diagnosis array in PROFIBUS.
The Diagnosis has always 6 byte fixed, then if there is some problem with some Modbus devices it increase the number of
byte.
If there a problem in Modbus side, after the first 6 byte, there is a byte with a fix part (0x40) plus the number of follow bytes
plus 1. For example if you want to monitor 10 Modbus devices you fond the first byte to the value 0x43 followed from 2
other byte that contain the status of each devices. If the bit is to 1 there is a problem on it device. Each byte can contain at
maximum 8 Modbus devices.
For enable this feature you have to checked the “Enable check Modbus Error” option in the Set Communication section.
GSD FI E:
By pressing the “GSD File” button it is possible to save the GSD file for the PROFIBUS side.
With this feature you can save the configuration of the gateway of the PROFIBUS side.
Note:
When you import the .gsd file on your Master PROFIBUS you have to add all the modules that are present inside it.
Figure 8: “Error/Diagnosis” window
Table of contents
Other Pixsys Media Converter manuals
Popular Media Converter manuals by other brands

Musical Fidelity
Musical Fidelity MX-DAC manual

Audio international
Audio international MSM2912-02-x installation manual

Foxun
Foxun SX-SP148E operating instructions

Sony
Sony HCD-LF10 - Cd/dvd Component For Home Theater... Service manual

Patton electronics
Patton electronics 2030 user manual

Aus Electronics Direct
Aus Electronics Direct AA6000 user manual