manuals.online logo
Brands
  1. Home
  2. •
  3. Brands
  4. •
  5. PMV Mounts
  6. •
  7. Projector Accessories
  8. •
  9. PMV Mounts PMVMOUNT5 User manual

PMV Mounts PMVMOUNT5 User manual

Attach mount to ceiling
Attach pole
1
2
ŸRead these instructions carefully before installing your equipment..
ŸInstall the mount in a suitable location using fixings which are appropriate for the ceiling material and
structure. Consult a qualified builder if you are in any doubt as to the structural integrity of the ceiling.
ŸDo not attempt to alter or modify any part of the ceiling mount or it's attachments.
ŸDo not use if any parts are broken or appear to be damaged.
Ÿ Tighten all bolts and fixings securely. Only use fixings provided with this bracket.
Ÿ Do not mount your projector near to sources of heat or moisture.
Ÿ Always have a minimum of two persons to install the projector onto the mount.
MOUNTING INSTRUCTIONS FOR
PROJECTOR CEILING MOUNT
MODEL No.
PMVMOUNT5
SV-PM0002
Max Weight Loading 50Kgs
Projector Fixing Kit
Mount Assembly Kit
NOTE:
ŸIf in any doubt of the suitability of the
ceiling, it's construction or what type of
fixings to use, consult a qualified builder or
installer.
NOTE:
ŸDo not over-tighten bolt 'A' shown in Stage 2b above.
ŸWhen inserting Grub Screws 'F' as shown in Stage 2c above, insert finger-
tight so all screws are at an equal depth against inner pole. Then tighten
with allen key. Do not over-tighten these Grub Screws.
Ceiling plate
assembly
Projector
mounting plate
Tilt / Swivel
Assembly
1m Pole
G - M3 x 10mm
I - M4 x 10mm
K - M5 x 10mm
M - M6 x 10mm
O - M3 Washer
Q - M4 Washer
H - M3 x 25mm
J - M4 x 25mm
L - M5 x 25mm
N - M6 x 25mm
P - M5 Washer
R - M6 Washer
A - M8 x 75mm Bolt
B - M8 Nut
C - M8 washer
D - M6 x 12mm Bolt
E - M6 washer
F - M6 Grub Screw
S - M5 x 10mm
T - M5 x 5mm
U - M6 x 15mm
Also Required
x2
x2
x4
x2
x2
x8
x4
x4
x4
ab c
A
B
F
C
x4
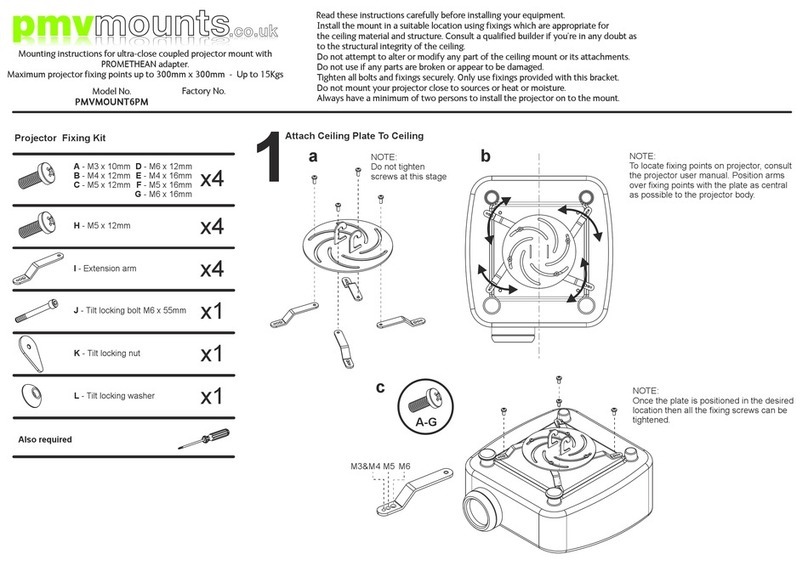
NOTE:
To locate fixing points on projector, consult the
projector user manual.
Attach all parts loosely and then position the
plate so it is central to the projector.
Once the plate is positioned in the desired
location then you can tighten all the mounting
screws.
Use spacers 'S', 'T' or 'U' if the projector needs
spacing away from the plate due to uneven
design or protruding feet.
Attach projector to
Mounting plate
Attach projector
Mount tilt assembly
Attach projector
Assembly to pole
3 4 5
~
~
See Note!
aa
b
b
c
Note:
Follow notes as in Stage 2.
G
S
R
U
D
x4
B
C
A
F
x4
Fine adjustment of
level and position
Shortening main
pole
6 7
To adjust the forwards/backwards tilt of the projector loosen bolts 'a' and 'b' on both sides of
mount. Re-position projector to desired position and then re-tighten bolts 'a' and 'b on both
sides of mount'.
To adjust sideways tilt loosen bolts 'c' on both sides of tilt plate, re-position projector to desired
position and then re-tighten bolts 'c' on both sides of tilt plate.
To adjust lateral direction rotate the tilt plate assembly as required.
a
b
c
a
b
c
Cut pole
from top
Re-drill 9mm hole
through approx
30mm from pole top
Assemble pole as described
in Stage 2.

This manual suits for next models

1

Other PMV Mounts Projector Accessories manuals

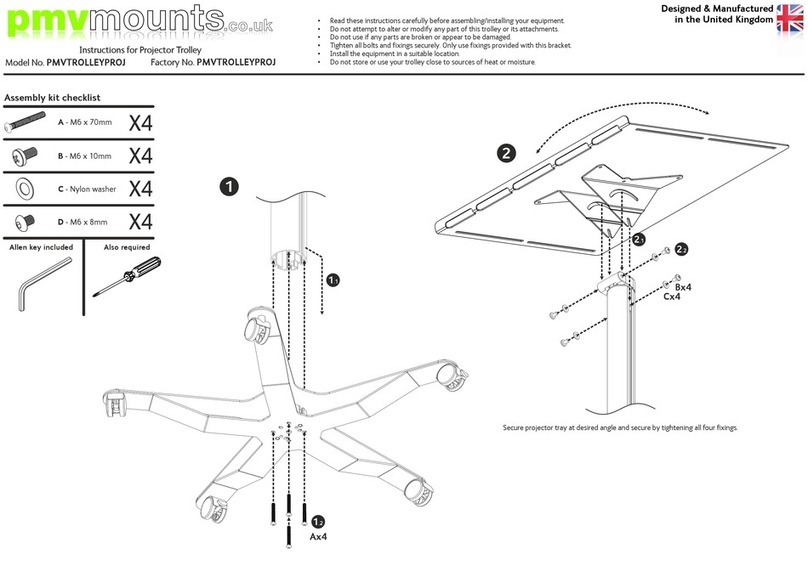
PMV Mounts PMVTROLLEYPROJ User manual

PMV Mounts

PMV Mounts PMVTROLLEYPROJ User manual

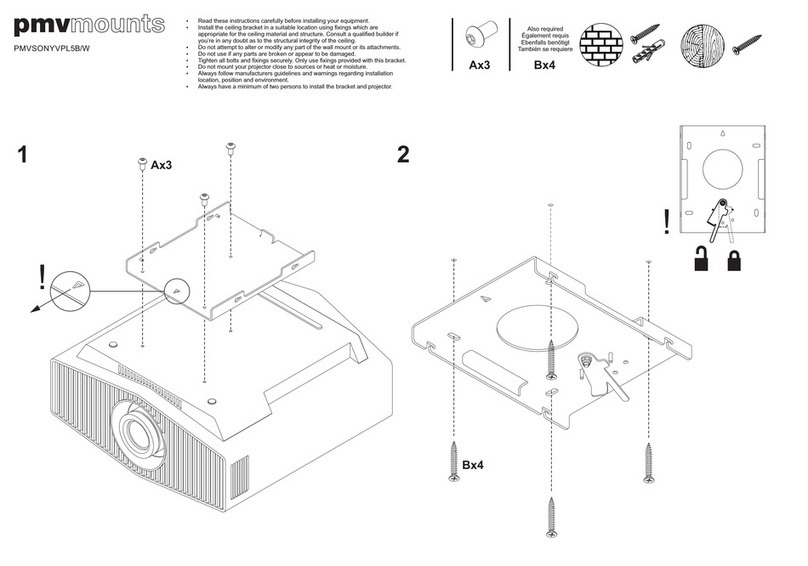
PMV Mounts PMVSONYVPL5B/W User manual

PMV Mounts

PMV Mounts PMVSONYVPL5B/W User manual

PMV Mounts PMVULTRASHORT User manual

PMV Mounts

PMV Mounts PMVULTRASHORT User manual

PMV Mounts PMVMOUNT6PM User manual

PMV Mounts

PMV Mounts PMVMOUNT6PM User manual

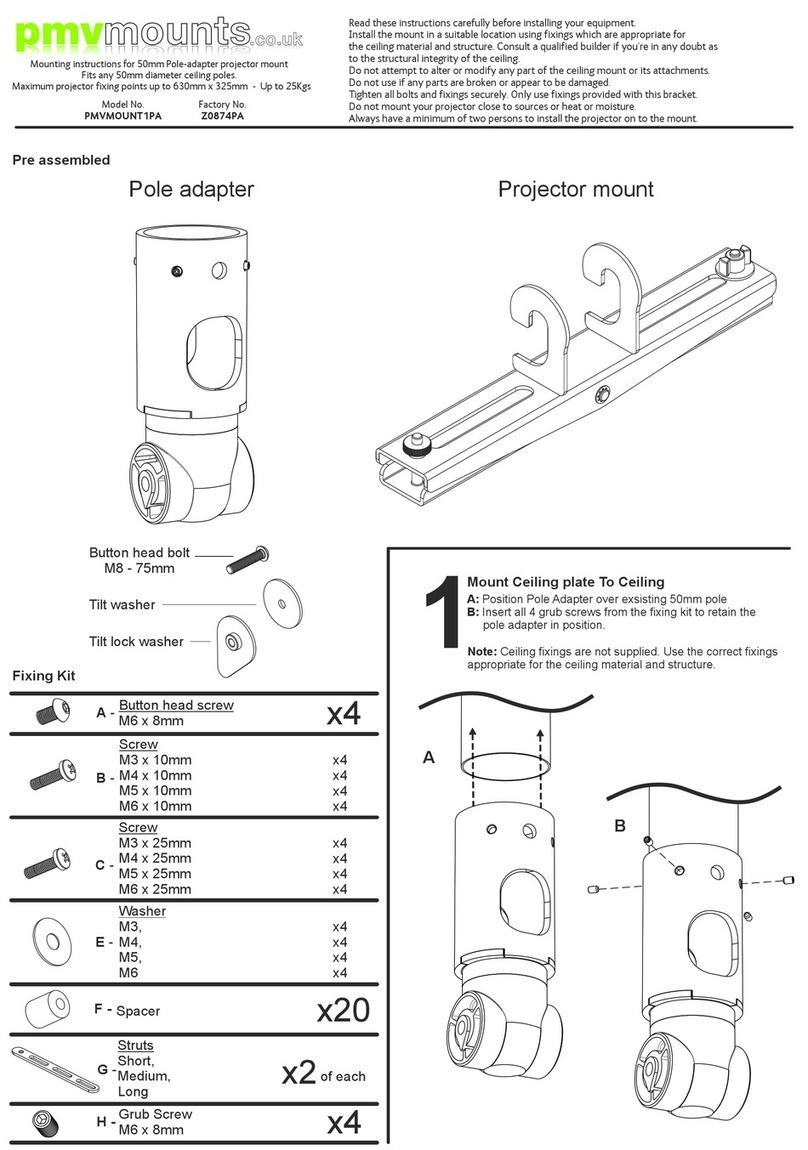
PMV Mounts PMVMOUNT1PA User manual

PMV Mounts

PMV Mounts PMVMOUNT1PA User manual

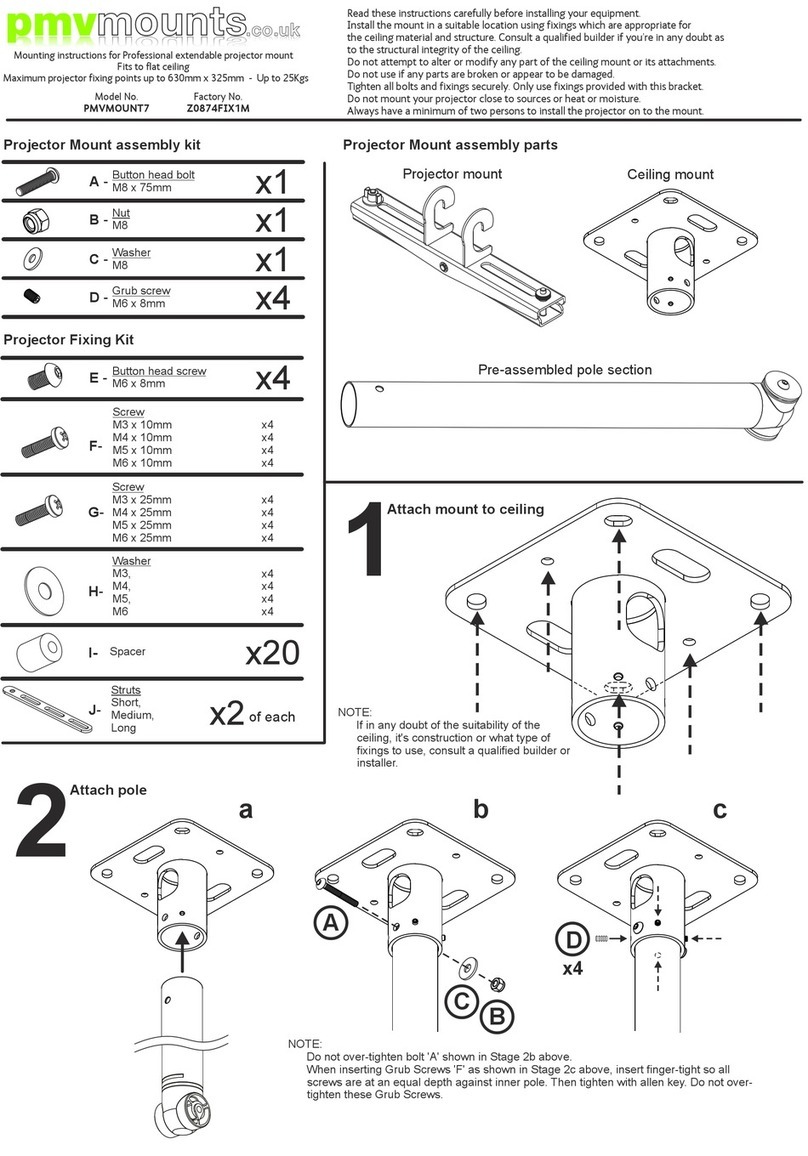
PMV Mounts PMVMOUNT7 User manual

PMV Mounts

PMV Mounts PMVMOUNT7 User manual

PMV Mounts PMVSHORTTHROW User manual

PMV Mounts

PMV Mounts PMVSHORTTHROW User manual

Popular Projector Accessories manuals by other brands

Panasonic ET-LAV100 operating instructions

Panasonic

Panasonic ET-LAV100 operating instructions

Premier Mounts PDS-URPM installation guide

Premier Mounts

Premier Mounts PDS-URPM installation guide

Grandview GPCM-J Series instruction manual

Grandview

Grandview GPCM-J Series instruction manual

Da-Lite Advance 26P Pivoting Da-Lift 26P manual

Da-Lite

Da-Lite Advance 26P Pivoting Da-Lift 26P manual

Navitar 356MCL012 installation instructions

Navitar

Navitar 356MCL012 installation instructions

Panasonic PressIT TY-WPSC1 operating instructions

Panasonic

Panasonic PressIT TY-WPSC1 operating instructions

Hitachi CPX885 - XGA LCD Projector user manual

Hitachi

Hitachi CPX885 - XGA LCD Projector user manual

Epson EpiqVision Ultra LS500 quick start guide

Epson

Epson EpiqVision Ultra LS500 quick start guide

peerless-AV PJR125 installation instructions

peerless-AV

peerless-AV PJR125 installation instructions

Navitar 683MCL012 installation instructions

Navitar

Navitar 683MCL012 installation instructions

Navitar PSD-1 installation instructions

Navitar

Navitar PSD-1 installation instructions

Remaco PSB-10A installation guide

Remaco

Remaco PSB-10A installation guide

Barco ClickShare CS-100 installation manual

Barco

Barco ClickShare CS-100 installation manual

Sony PSS-H10 Installation manual for Dealers

Sony

Sony PSS-H10 Installation manual for Dealers

Kramer VIA Connect2 quick start guide

Kramer

Kramer VIA Connect2 quick start guide

Sharp AN-PH818EZ Operation manual

Sharp

Sharp AN-PH818EZ Operation manual

Premier Mounts FTP installation instructions

Premier Mounts

Premier Mounts FTP installation instructions

Navitar 567MC500 installation instructions

Navitar

Navitar 567MC500 installation instructions

manuals.online logo
manuals.online logoBrands
  • About & Mission
  • Contact us
  • Privacy Policy
  • Terms and Conditions

Copyright 2025 Manuals.Online. All Rights Reserved.