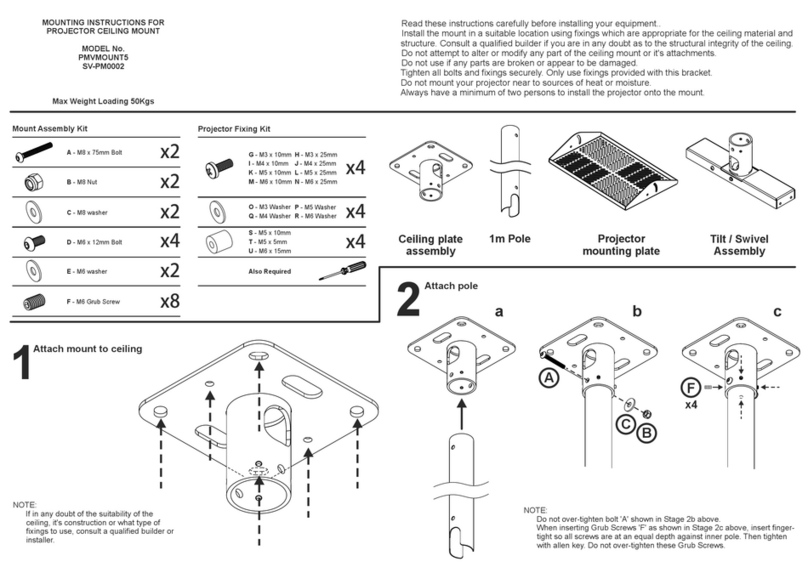
Attach Ceiling Plate To Ceiling
1
Projector Fixing Kit
B - M4 x 12mm
C - M5 x 12mm
D - M6 x 12mmA - M3 x 10mm
E - M4 x 16mm
F - M5 x 16mm
G - M6 x 16mm
H - M5 x 12mm
J - Tilt locking bolt M6 x 55mm
I - Extension arm
K - Tilt locking nut
L - Tilt locking washer
Also required
x4
x4
x1
x4
x1
x1
pmvmounts.co.uk
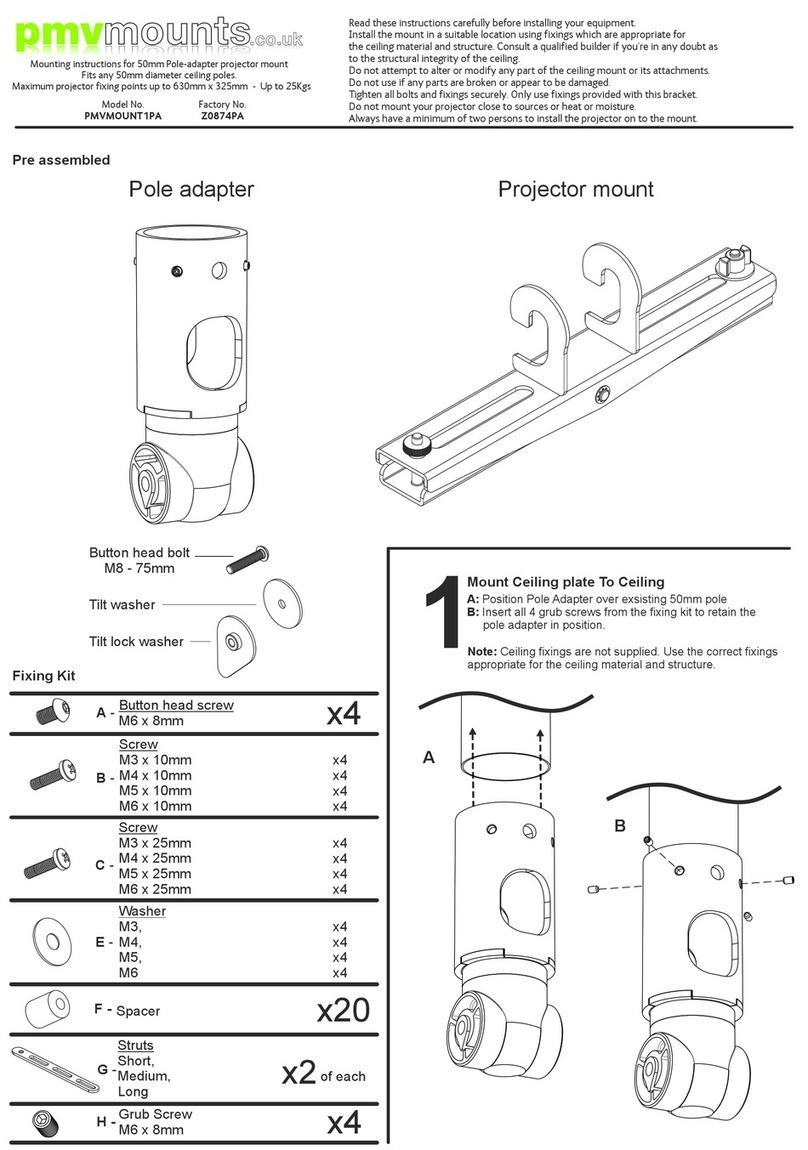
Mounting instructions for ultra-close coupled projector mount with
PROMETHEAN adapter.
Maximum projector fixing points up to 300mm x 300mm - Up to 15Kgs
Model No.
PMVMOUNT6PM
Factory No.
Z0874BGT
ŸRead these instructions carefully before installing your equipment.
ŸInstall the mount in a suitable location using fixings which are appropriate for
the ceiling material and structure. Consult a qualified builder if you’re in any doubt as
to the structural integrity of the ceiling.
ŸDo not attempt to alter or modify any part of the ceiling mount or its attachments.
ŸDo not use if any parts are broken or appear to be damaged.
ŸTighten all bolts and fixings securely. Only use fixings provided with this bracket.
ŸDo not mount your projector close to sources or heat or moisture.
ŸAlways have a minimum of two persons to install the projector on to the mount.
A-G
NOTE:
Do not tighten
screws at this stage
NOTE:
To locate fixing points on projector, consult
the projector user manual. Position arms
over fixing points with the plate as central
as possible to the projector body.
NOTE:
Once the plate is positioned in the desired
location then all the fixing screws can be
tightened.
ab
c
M3&M4 M5 M6
