Projector Fixing Kit
Projector Mount assembly partsProjector Mount assembly kit
I- Spacer x20
J- of each
Struts
Short,
Medium,
Long x2
H-
Washer
M3,
M4,
M5,
M6
x4
x4
x4
x4
G-
Screw
M3 x 25mm
M4 x 25mm
M5 x 25mm
M6 x 25mm
x4
x4
x4
x4
F-
Screw
M3 x 10mm
M4 x 10mm
M5 x 10mm
M6 x 10mm
x4
x4
x4
x4
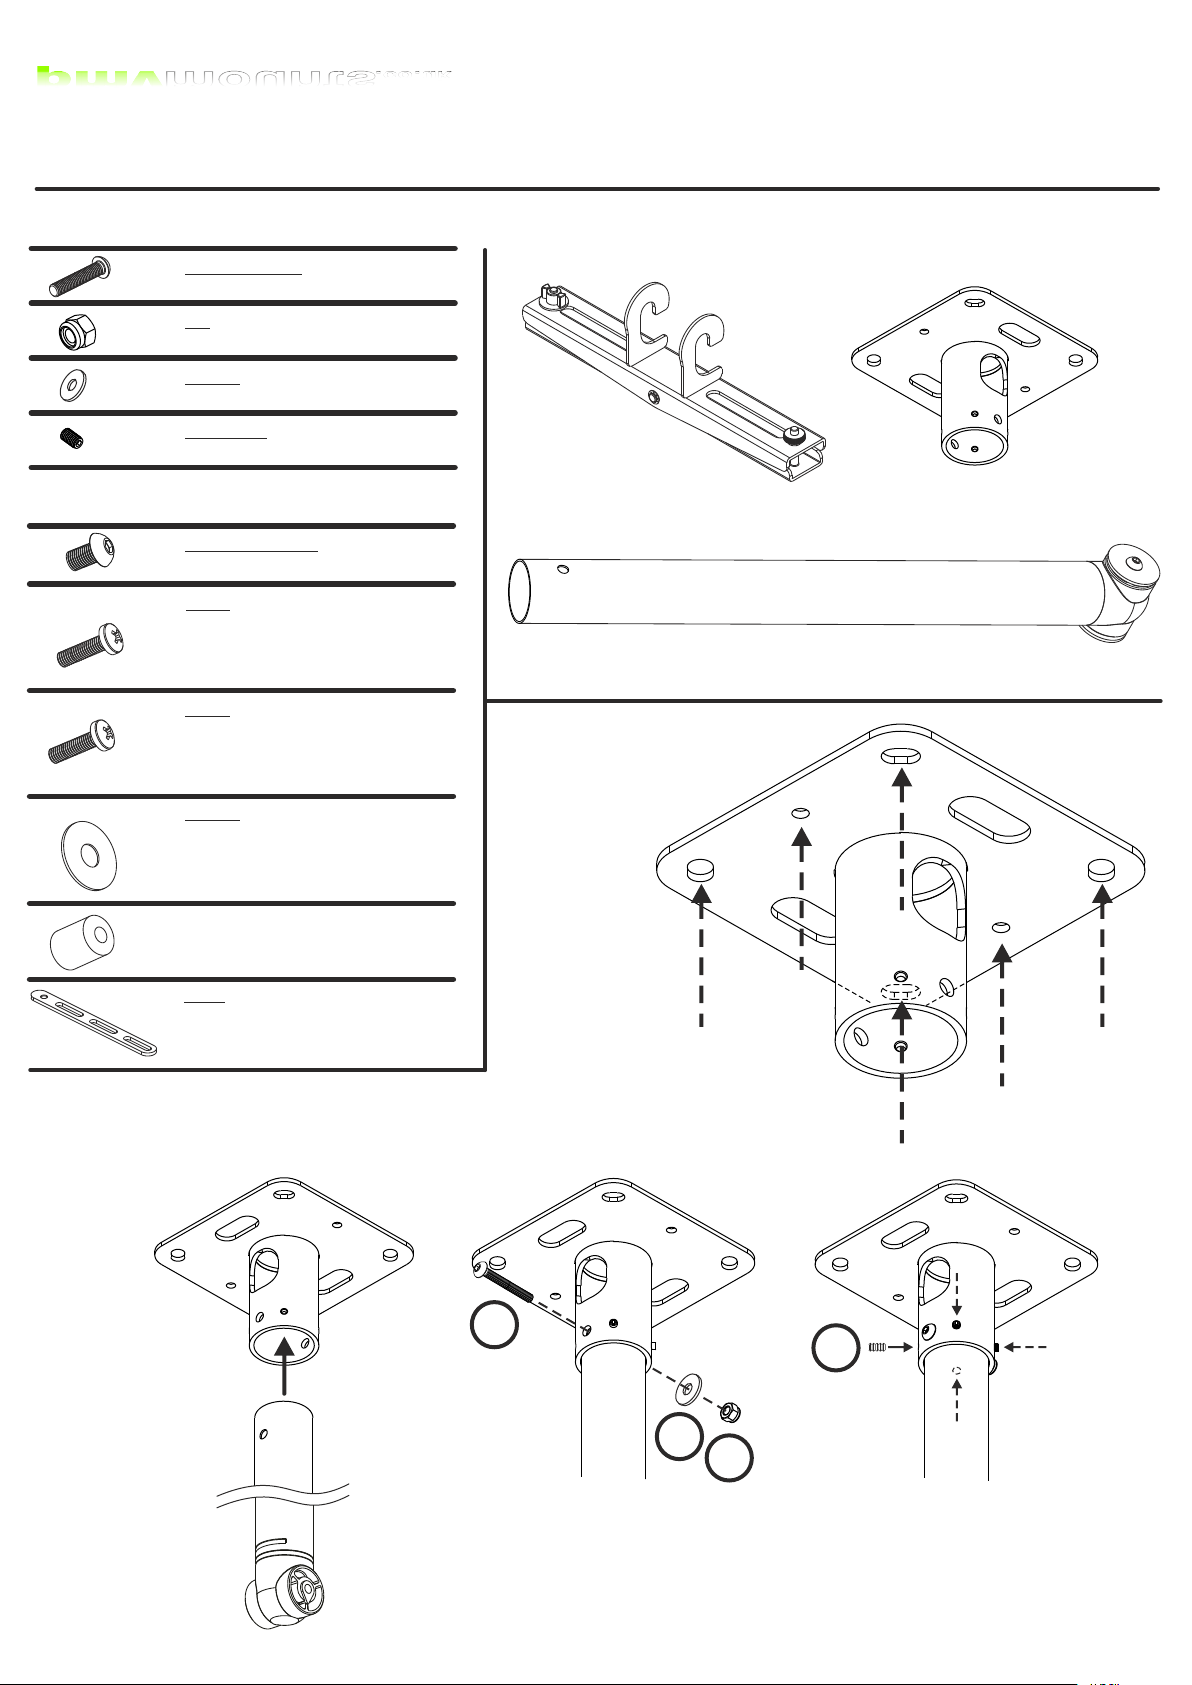
Pre-assembled pole section
Ceiling mount
Projector mount
pmvmounts.co.uk
ŸRead these instructions carefully before installing your equipment.
ŸInstall the mount in a suitable location using fixings which are appropriate for
the ceiling material and structure. Consult a qualified builder if you’re in any doubt as
to the structural integrity of the ceiling.
ŸDo not attempt to alter or modify any part of the ceiling mount or its attachments.
ŸDo not use if any parts are broken or appear to be damaged.
ŸTighten all bolts and fixings securely. Only use fixings provided with this bracket.
ŸDo not mount your projector close to sources or heat or moisture.
ŸAlways have a minimum of two persons to install the projector on to the mount.
Mounting instructions for Professional extendable projector mount
Fits to flat ceiling
Maximum projector fixing points up to 630mm x 325mm - Up to 25Kgs
Model No.
PMVMOUNT7
Factory No.
Z0874FIX1M
E - Button head screw
M6 x 8mm x4
C - Washer
M8 x1
D - Grub screw
M6 x 8mm x4
A - Button head bolt
M8 x 75mm x1
B - Nut
M8 x1
Attach pole
2
NOTE:
ŸDo not over-tighten bolt 'A' shown in Stage 2b above.
ŸWhen inserting Grub Screws 'F' as shown in Stage 2c above, insert finger-tight so all
screws are at an equal depth against inner pole. Then tighten with allen key. Do not over-
tighten these Grub Screws.
ab c
A
B
D
C
x4
Attach mount to ceiling
1
NOTE:
ŸIf in any doubt of the suitability of the
ceiling, it's construction or what type of
fixings to use, consult a qualified builder or
installer.


