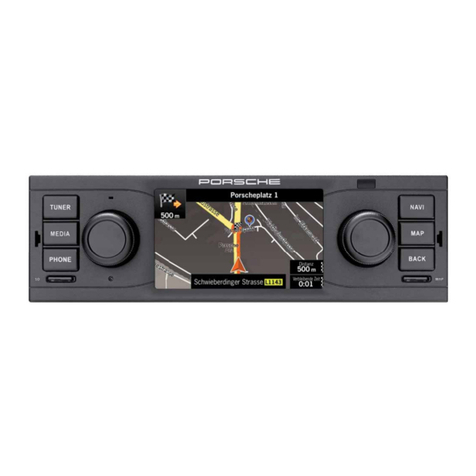
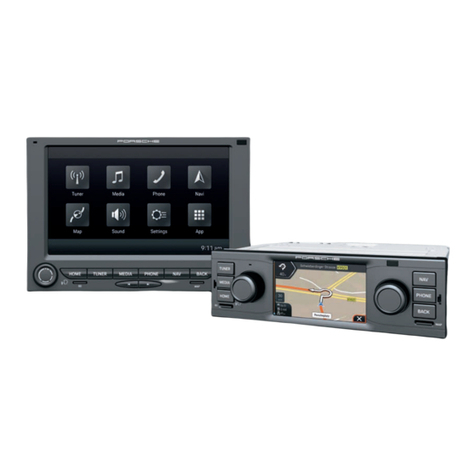
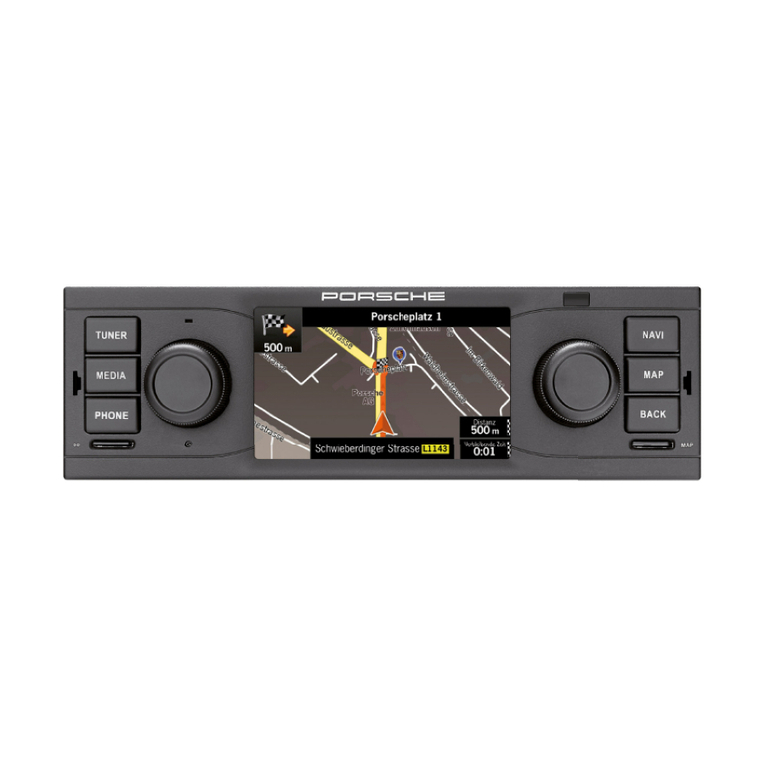
Porsche PCM User manual

InstallationandConversionInstructions Cayman(981)
24/13 ENU 9110 9
PCM incl. Navigation Module with Standard AudioInterface + DVD Autochanger
Revision: ThisbulletinreplacesbulletinGroup924/13,dated September12, 2013.
ModelYear: As of 2013
Information: Retrofitting
Restriction • Only togetherwithSoundPackagePlus (I-no. 490)orBose® SurroundSoundSystem(I-no. 680)or
Burmester®High-End SurroundSoundSystem (I-no. 682).
Note: The PCM3.1Navigation/DVD Auto Changer retrofitiscurrentlynotfor carswith XM Satellite Radio. If the
PCM3.1Navigation/DVDAutoChangerisretrofittedinthesecases,thecustomerwillpermanentlylose
theirXMSatelliteRadio functionality. In addition, whenthePCM3.1 Navigation/DVDAutoChangerretrofit
isinstalledin aCayenne whichpreviouslydidnothavethe navigationoption(either CDR31or PCM3.1
withoutnavigation),themap displayscreenwillnotbeshown on thecluster TFT,ascomparedtoPCM3.1
Navigationunitsconfiguredfromthefactory. This isdue to adifferenceininstrument clustersbetween
factorynavigation andnon-navigationvehicles.
Information: PCMincl. navigationmodule with standardaudiointerface+DVD autochangerhasthefollowing
equipmentandfunctions:
• Centralmultimedia system with7-inch TFTcolordisplay (touchscreen).
• RadiowithRDS diversity function.
• Integrated6-slotCD/DVD autochanger foraudio playback of audio/videoDVDsandMP3music.
Tequipment Mar31, 2022
Page1 of 30

Cayman(981)
99110 ENU 24/13 InstallationandConversionInstructions
• Navigationmodulewithharddriveand map datafortherespectivecountries,map displaywith
greaterperspective,automaticroutetracingand subsequentreverseroutenavigationaswell as
navigationinnon-digitalizedregionsusing a compass and GPS.
• USBconnectionfor various iPod®and iPhone® models,USB memorysticks withMP3musicand
MP3 players. Functions can beoperated via PCM,theoptional multi-functionsteeringwheel or
optionalvoice control.
• AUXinterface forconnecting otherexternal audiosources,allowingoperation directlyon the
connecteddevice.
• MP3 filescanbe storedand played on the PCM-internalharddrive "Jukebox".
• DigitalAudio Broadcasting(DAB) receptionisretainedfollowingretrofitting(only vehicleswith audio
systemCDR Plus).
Formoreinformation onoperationand thevariousfunctionsavailable,refertothe“PCM 3.1”operating
instructions.
Important: Limitations of retrofittingPCM incl. navigationmodule withstandardaudiointerface +DVD autochanger:
• Nonavigation maps displayedin themulti-function display(instrument cluster).
• Theoperatinginstructionsarenot included andmust beorderedseparately in therequired
language.
Onlyfor vehicles withCDR 31:
• Reducedantenna diversity.
• Themobile phone preparationoption(I-no. 619)can onlybeused afterretrofittingPCM incl.
navigationmodulewithstandardaudiointerface+ DVDautochangeriftwo microphonesandthe
microphonewireharness arealsoinstalled. Fordetailsofrequiredparts,see “Part Nos.”. For
installationinstructions,see
Installationand ConversionInstructions'918700 PCM3.1 -Mobile
phonepreparation'.
Ifthe vehicle isequipped withtheaudio system CDRPlus, itisonlya matterof routingtheGPS antenna
line,installingthe GPS antenna, coding PCM andloadingthenavigationdata(Steps1 –3 and 6–9).
Thefollowingstepsarenot required:
• Convertingaudiointerface
• Installingantennacontrolunit
Enablingcode: Variousenabling codes arerequiredfor retrofitting the system.
1EnablingcodesforPCM Navigation and PCM UAS (standard audio interface), PCM
Bluetooth, PCM Sport Chrono MMI and DAB
Thesecomponents requirea VIN-specificenabling code andwill not functionwithout it. Togetthe
enablingcode, orderthe applicable kitviayour normal parts channels(POLARIS).Youmust then
submita Parts Technical AssistanceRequest(PTAR)inthe PTECsystem with the correctVIN, Part
Numberand PCNA ordernumber to PCNAPartsSupport. ThePTAR willbe returnedto youin 1+
working days, advising you that the code is now displayed in the PIWIS System. Consult Parts
BulletinGR13D90 foradditionalorderingdetails.
Mar31,2022
Page2 of 30 Tequipment
InstallationandConversionInstructions Cayman(981)
24/13 ENU 9110 9
2 Enablingcodefor PCM navigation map material
Youcangenerate the enablingcodein the PIWISinformationsystemyourself using thesupplied
licensekey (seesection 1.1).
Youcan then loadthecountry database (PCM3.0/PCM 3.1 navigationdatabase .......) and the
relevantworkshopDVD onto thePCM 3.1harddrive.
Part Nos.: 991.044.901.91 PCMincl. navigation module withstandardaudio interface +
DVDautochanger,set, America
Alsoorderthe PCM3.1 operatinginstructionsintherequiredlanguage.
WKD 952 021 13 USEnglish
WKD 952 031 13 French-Canadian
Alsoorderonly forvehicleswithmobilephone preparation(I-no. 619).
991.044.900.37 1x Microphonewireharness
991.646.309.01 1x Hands-freemicrophone/soundmicrophone
991.646.313.01 1x Hands-freemicrophone
Parts List:
Figure3
——— 1x PCM3.1
Figure3 -1-
7PP.035.504.A 1x GPSantenna
Figure3 -2-
991.612.022.50 1x GPSantennaline
Figure3 -3-
991.044.900.98 1x Antennaconnector, white
Figure3-4-
991.044.900.99 1x Antennaconnector, grey
Figure3 -5-
991.612.016.00 1x Antennaline(PCM3.1to antennacontrolunit)
Figure3 -6-
Tequipment Mar31, 2022
Page3 of 30

Cayman(981)
99110 ENU 24/13 InstallationandConversionInstructions
——— 1x Powersupplywireharness (antennacontrolunit)
Figure3-7-
991.642.122.01 1x USBline
Figure3 -8-
991.612.033.00 1x Antennalines(antennacontrolunittoantenna amplifier)
Figure
3-9-
991.618.122.00 1x Antennacontrolunit
Figure3 -10-
991.647.318.00 2x Fasteningparts(antennacontrolunit)
Figure3-11-
7PP.035.724.D 1x Adapter
Figure3 -12-
999.513.076.40 20x Tie-wrap (not shown)
955.606.838.00 5x Tie-wrapwithfixingclip (not shown)
999.507.195.40 1x Expandingspring,10.7 x 26.4(not shown)
999.591.143.40 2x Clamp,12.0 x 2.0(not shown)
955.612.931.00 1x Cableclip(notshown)
———11x Licensekey,America/South America(not shown)
1Onlycontained inrespectiveparts kit.
Tools: 9818-PIWISTesterII
T10118 - Assembly tool
Blockdiagram: Information
Fora better understandingofthe system layout,see systemdiagram ,Figure3.
Figure4
1–PCM
2– GPS antenna line
Mar31,2022
Page4 of 30 Tequipment

InstallationandConversionInstructions Cayman(981)
24/13 ENU 9110 9
3– GPS antenna
4– Antennacontrolunit
5– Powersupplywireharness(antennacontrolunit)
6– Antennaline(antennacontrolunittoPCM)
7– Antennaconnector, grey
8– Antennaconnector, white
9– Antennalines(antennacontrolunit toantennaamplifier)
10 –Antennaamplifier
11 – PCMcentral connector
12 – 3-pinconnector
13 – BCMcontrolunit,front
WorkProcedure:1 Preparatorywork.
1.1 GeneratethePCM navigation map material enabling codein the PIWISinformation
system. Select the followingwindowsone afterthe other:
1.1.1 Vehicleidentification→Identificationvia VIN
Enterthechassis number intheIdentification via VIN fieldand then selectVehicle
codeinformation.
1.1.2 Enterthelicensekey.
Tequipment Mar31, 2022
Page5 of 30

InstallationandConversionInstructions Cayman(981)
24/13 ENU 9110 9
Figure6
Afterchecking thelicense key, the relatedmap material/standard part
number/TEQ part number
Figure6 -3- will appear.
Amessage also appearsinformingyou thatthe licencekeycanonly be usedonce
andis then unusable
Figure6 -4-.
ActivatethefieldGenerate PCM code
Figure6 -5- byclickingwith themouse.
1.1.4 Takenoteof the displayedenabling code
Figure7 -6-.
Tequipment Mar31, 2022
Page7 of 30

Cayman(981)
99110 ENU 24/13 InstallationandConversionInstructions
Figure7
1.1.5 Selectandtakenote oftheenabling codes forPCM Navigation, PCM UAS
(standard audio interface) and PCM Bluetooth, PCM Sport Chrono MMI
and DAB if necessary.
1.2 Connect a battery charger.
WorkshopManual '2X00IN Battery tricklecharging'
1.3 Removeaudio systemCDR31/CDRPlus.
WorkshopManual '912419Removing and
installing“CD player” carradio'
1.4 Removeglovecompartment.
WorkshopManual'681519 Removingand installingglove
compartment'
Mar31,2022
Page8 of 30 Tequipment

InstallationandConversionInstructions Cayman(981)
24/13 ENU 9110 9
Figure8
1.5 Remove covers
Figure8 -B- overthe
interiorrear-viewmirror.
WorkshopManual
'682719Removingand installinginterior
rear-view mirror'
1.6 Remove right sunvisor.
WorkshopManual
'682319Removingand installingsun visor'
1.7 Remove holder for sunvisor at theleft and
right.
Figure9
1.7.1 Opencover forsunvisor holder
Figure9 -arrow-.
Tequipment Mar31, 2022
Page9 of 30

Cayman(981)
99110 ENU 24/13 InstallationandConversionInstructions
Figure10
1.7.2 Unscrewfastening screwsecuring
sunvisorholder
Figure10
-arrow-.
1.8 Remove centrerooftrim panel.
Workshop
Manual'708319Removing andinstalling
frontrooftrim panel'
1.9 Remove A-pillar trimpanel on the right.
WorkshopManual '705719Removingand
installing A-pillar trim panel'
Information
Makesurethatthe roofcoverdoesnot
buckle.
1.10 Detachtheheadliner.
Figure11
1.10.1 Unscrewandremovefastening
screwscloseto theroofconsole
Figure11-arrows-.
Mar31,2022
Page10 of 30 Tequipment

InstallationandConversionInstructions Cayman(981)
24/13 ENU 9110 9
Figure12
1.10.2 Carefullypull the headliner
Figure
12-1- down
Figure12-arrow-.
2 InstallGPSantenna.
Figure13
2.1 Attachangledantennaconnector
Figure
13-1- to the GPS antenna
Figure13
-2- untilthe antennaconnectorengages
securely.
Figure14
2.2 InsertGPSantenna
Figure14-1- into the
mounting
Figure14-arrow a- andclipitin
Figure14-arrowsb-.
3 RouteGPSantenna lineas follows:
Frontrooftrim panel→alongwireharnessforsun
visor→A-pillar→along wireharness fordashboard
(glovecompartment)→PCMinstallationslot
Tequipment Mar31, 2022
Page11 of 30

Cayman(981)
99110 ENU 24/13 InstallationandConversionInstructions
Information
Makesurethat the roofcoverdoes notbuckle.
Figure15
3.1 Carefullypulldown theheadlinerand route
antennaline
Figure15-1- along the
standardwireharnessfor thesun visorand
A-pillar.
Figure16
Ifthereis nostandardwireharness, secure
theantennaline
Figure16-1- to the roof
usingatie-wrap and punched-holeclip
Figure16-2-.
Figure17
3.2 RouteGPSantennaline
Figure17-1-
alongthewireharnessfor the dashboard
(glovecompartment).
Mar31,2022
Page12 of 30 Tequipment

InstallationandConversionInstructions Cayman(981)
24/13 ENU 9110 9
Figure18
3.3 RouteGPSantennaline
Figure18-1- to
thePCM centralconnector.
Figure19
TheGPSantenna line
Figure19-1- must
protrudeapprox. 7cm beyond the PCM
centralconnector
Figure19-2-.
X–7cm
Figure20
3.4 Clipthreeclip-on tie-wraps
Figure20-2-
intotheA-pillar.
3.5 PullGPSantenna line
Figure20-1- back
andfoldit to forma loop closetothe A-pillar.
SecureGPS antennaline with the twoupper
tie-wraps.
4Only forvehicleswithCDR 31:
Convert audio interface.
Tequipment Mar31, 2022
Page13 of 30

Cayman(981)
99110 ENU 24/13 InstallationandConversionInstructions
Figure21
4.1 RouteUSBline
Figure21-1- along the
standardAUX line
Figure21-2- andsecure
itwith a tie-wrap.
4.2 Convert adapter foraudiointerface.
Figure22
4.2.1 Releaseadapterclose tothe
catches
Figure22-1- and
remove adapter.
Figure23
4.2.2 Clipadapter
Figure23-1- into
audiointerface
Figure23-2-.
5Only forvehicleswithCDR 31:
Installantennacontrolunit.
Mar31,2022
Page14 of 30 Tequipment

InstallationandConversionInstructions Cayman(981)
24/13 ENU 9110 9
Figure24
5.1 Fitfasteningpart
Figure24-1- on short
baroftheantenna controlunit
Figure24
-2-.
Figure25
5.2 Convert antenna lines(antennacontrolunitto
antennaamplifier).
Figure26
5.2.1 Releasesecondary lock
Figure
26-1- on both sides of theantenna
connector
Figure26-2- and
pushit up.
Tequipment Mar31, 2022
Page15 of 30

Cayman(981)
99110 ENU 24/13 InstallationandConversionInstructions
Figure27
5.2.2 Liftupthe lockingmechanism
Figure27-1- andcarefully pull
theantennaline (thinner line) out
ofchamber 2
Figure27-arrow-.
Figure28
5.2.3 Insert theantennalineyou pulled
outintothegreyantenna connector
andpressdownthe locking
mechanism
Figure28-1-.
Figure29
5.2.4 Liftupthe lockingmechanism
Figure29-1- andcarefully pull the
antennalineout ofchamber 1
Figure29-arrow-.
Mar31,2022
Page16 of 30 Tequipment

InstallationandConversionInstructions Cayman(981)
24/13 ENU 9110 9
Figure30
5.2.5 Insert theantennaline you
pulledout intothewhiteantenna
connector
Figure30-1- and
pressdown the lockingmechanism.
Figure31
5.3 Connectantenna lines (accordingtocolour
coding)andpower supply linetothe antenna
controlunit.
1– Antennalines(antennacontrolunit to
antennaamplifier)
2– Antennaline(PCM to antenna control
unit)
3– Powersupply line
4– 3-pin connector
5– Antennaconnector, curry
6– Antennaconnector, white
7– Antennaconnector, grey
5.4 Disconnectbattery groundstrap.
WorkshopManual'2X00INWorkinstructions
afterdisconnectingthe battery'
WARNING
Risk of short circuit and fire
• due to work on the vehicle electrical system.
When working on the electrical system, the battery must always be disconnected and covered.
Always route the electrical wires without tension and so that no chafing occurs and secure to
existing wires/components with tie-wraps/electrical tape.
5.5 Loosenrightfuse box holder.
5.5.1 Disconnectplug connectionsonloudspeaker amplifier.
WorkshopManual
'914419Removingand installingadditional amplifierfor loudspeaker'
Tequipment Mar31, 2022
Page17 of 30

Cayman(981)
99110 ENU 24/13 InstallationandConversionInstructions
Figure32
5.5.2 Disconnectplug connectionsfor
doorconnectionpoint
Figure32
-1- andplugconnectionsforwire
harnessfordashboard
Figure32
-2-.
Figure33
Releaseplugconnection
Figure
33-arrow a- andpull offconnector
Figure33-arrow C-.
Releaseplugconnectionholder
Figure33-arrow A- andpullit out
ofthefuse box holder
Figure33
-arrow B-.
Figure34
5.5.3 Unscrewandremovefastening nut
Figure34-1-.
Remove fuse boxholder
Figure
34-arrow- andset itaside.
NOTICE
Incorrect line routing
• Risk of damage to lines and hoses
• Malfunctionand fault memory entry on control unit
Mar31,2022
Page18 of 30 Tequipment

InstallationandConversionInstructions Cayman(981)
24/13 ENU 9110 9
Avoid small bending radii when routing lines.
File down edges and burrs in the routing area or mask them with adhesive tape.
Maintain a sufficient distance from components exposed to high temperatures while driving.
5.6 Install antenna controlunit.
5.6.1 Pullfixing clip
Figure36-arrow-for the standardwireharness off the threaded
bolts.
Figure35
5.6.2 Positionantennacontrolunit
Figure35-1- at the bottom of
theA-pillar(threadedbolts) and fit
fasteningpart
Figure35-2-.
Figure36
Fitfixingclip
Figure36-arrow-
forthestandardwireharness onthe
threadedbolts.
5.7 Securethefuse box holder.
5.7.1 Guideinthefuse boxholder.
5.7.2 Tightenfasteningnut. Tightening
torque 9.7 Nm (7.5 ftlb.)
5.8 Routeantennalinesand powersupplyline.
Tequipment Mar31, 2022
Page19 of 30

Cayman(981)
99110 ENU 24/13 InstallationandConversionInstructions
Figure37
5.8.1 Releasethefuse box
Figure
37-arrows- andpullitforward
Figure37-arrow a- toremove it.
Figure38
5.8.2 Routeantennaline (antenna control
unittoPCM) and power supply wire
harness(antennacontrolunit)
Figure38-1- to thePCM installation
slot.
Antennacontrolunit→fusebox →
wireharnessfor dashboard(glove
compartment)→PCMinstallation
slot
Figure39
Routeantennaline/powersupply
wireharness
Figure39-1- along
wireharnessfor dashboard(glove
compartment).
Mar31,2022
Page20 of 30 Tequipment
Other manuals for PCM
3
This manual suits for next models
1
Table of contents
Other Porsche Car Navigation System manuals

Porsche
Porsche PCM 997 CARRERA User manual

Porsche
Porsche Porsche Classic Quick start guide

Porsche
Porsche Connect User manual

Porsche
Porsche Connect Installation and operation manual

Porsche
Porsche Cayman 982 User manual

Porsche
Porsche Porsche Classic User manual

Porsche
Porsche 911.642.002.00 User manual

Porsche
Porsche SiriusXM User manual

Porsche
Porsche Porsche Classic User manual

Porsche
Porsche Porsche Classic User manual