manuals.online logo
Brands
  1. Home
  2. •
  3. Brands
  4. •
  5. Portfolio
  6. •
  7. Lighting Equipment
  8. •
  9. Portfolio 00752 User manual

Portfolio 00752 User manual

Portfolio®
is
a registered trademark of
LF,LLC. All Rights Reserved.
Portfolio®
es
una marca registrada de
LF,
LLC. Todos los derechos reservados.
®Questions?/
tPreguntas?
Call customer service at 1-800-643-0067,
8
a.m.-
6 p.m.,
EST,
Monday-
Thursday,
8
a.m.-
5 p.m.,
EST,
Friday.
Llame a Servicio
al
Cliente al1-800-643-0067, de
lunes a jueves de 8 a.m. a 6 p.m., y los viernes de
8 a.m. a 5 p.m., hora estandar del Este.
PACKAGE CONTENTS/CONTENIDO DEL PAQUETE
•
x1
Fixture
Lampara
.----------=
x1
Connector (preassembled to
Fixture (A))
Conector (preensamblado a
Ia
lampara (A))
HARDWARE CONTENTS/QUINCAILLERIE INCLUSE
ITEM/ARTICULO #0688508
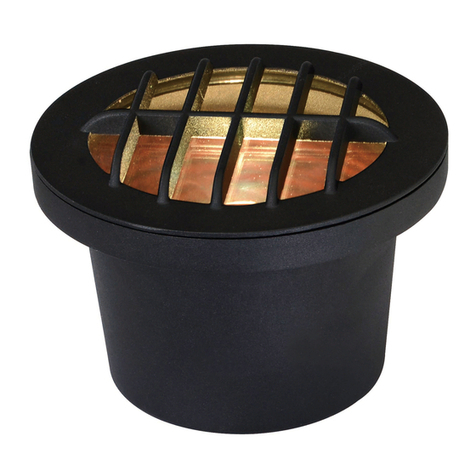
DECK LIGHT
LUZ PARA TERRAZA
MODELIMODELO #00752
ETL MODEL #0688508
ATTACH YOUR RECEIPT HERE
ADJUNTE SU RECIBO AQUi
Serial Number/Numero de serie
Purchase DateFecha de compra
•
x1
Cleat
Liston
Note: Hardware shown actual size./Nota: Los aditamentos se muestran
en
tamaf\o real.
•
c:::::::
u
x2
Anchor
Ancla de expansion
EB15297
x2
Screw
Tornillo
1
x1
Template
Plantilla
T
x2
Short Screw
Tornillo corto
Lowes.
co
m/portfol
io
A SAFETY INFORMATION/INFORMACION
DE
SEGURIDAD
Please read and understand this entire manual before attempting to assemble,or install the product.
Lea y comprenda completamente este manual antes de intentar ensamblar, usar o instalar
el
producto.
A WARNING/ADVERTENCIA
• For use with low-voltage landscape lighting systems only./Convient uniquement aux systemes d'eclairage pour
amenagement paysager abasse tension.
·The
wire
is
intended for shallow burial, less than 6
in.
deep./Le cable est
conc;u
pour
un
enfouissement superficiel, amoins
de 15,24
em
de profondeur.
• Install all luminaires
10ft.
or more from a pool, spa orfountain./N'installez jamais
un
luminaire amoins de 3,05 m d'une
piscine, d'un spa
ou
d'une fontaine.
• Keep lamp away from materials that may burn./Gardez tout materiau inflammable adistance de !'ampoule.
• DO NOT touch hot lens, guard or hot fixture housing./Ne touchez
PAS
a
Ia
lentille,
au
protecteur
ni
au
boltier
du
luminaire
lorsqu'ils sont chauds.
• DO NOT operate or install a fixture with missing or damaged parts./N'utilisez
PAS
et n'installez
PAS
le
luminaire s'il y a des
pieces manquantes
ou
endommagees.
• DO NOT touch the LED at any time as this may cause damage to the fixture./Ne touchez JAMAIS
Ia
DEL; vous risqueriez
d'endommager
le
luminaire.
CAUTION/PRECAUCION
·This
product
is
not a toy and must not
be
operated by children.ICe produit n'est pas
un
jouet et
ne
doit pas etre utilise par
des enfants.
•
Do
not connect this fixture to
an
electrical system that does not provide a means for equipment grounding./Ne branchez pas
ce
luminaire sur
un
systeme electrique sans mise a
Ia
terre.
•
Do
not submerge
in
water. The product can
be
damaged./N'immergez pas
le
produit dans de l'eau; vous risqueriez de
l'endommager.
PREPARATION/PREPARACION
Before beginning assembly
of
product, make sure all parts are present. Compare parts with package contents list and hardware
contents list. If any part
is
missing or damaged, do not attempt to assemble the product.
Estimated Assembly Time: 15-20 minutes
Tools Required forAssembly (not included): Screwdriver, Drill and 1/4
in.
bit.
Antes de comenzar a ensamblar
el
producto, asegurese de tener todas las piezas. Compare las piezas con
Ia
lista del
contenido del paquete y los aditamentos mencionados anteriormente.
No
intente ensamblar, instalar o usar
el
producto si falta
alguna pieza o si las piezas estan daf\adas.
Tiempo estimado de ensamblaje: 15-20 minutos
Herramientas necesarias para ensamblar y realizar
Ia
prueba de fugas (no se incluyen):
Destornillador, taladro y
brocade
1/4 pulg
Lowes.com/portfolio
2
ASSEMBLY INSTRUCTIONS/INSTRUCCIONES DE ENSAMBLAJE
1
a.
To
install the fixture (A) to a wood
installation site WITHOUT the cleat (C).
Simply mount the fixture (A) where desired
using screws (BB).
Note: If installation requires routing the
fixture lead wire (a1) through wood post or
a tight space, you must disassemble the
connector (B) and remove the fixture lead
wire
(a1
).
Remove the top cover
(b1
),
press plate (b2) and contact plate (b3)
from the wire guide (b4) by unscrewing the
top cover
(b1
).
Then, unsnap the top
cover (b1) from the contact plate (b3).
~·/
This will allow for the removal
of
the press
plate (b2) and the fixture lead wire (a1).
~--
pa,.
lnstala• Ia 13mpa,.(A)
sob•e
una
~~'I
madera SIN
el
Iiston (C): solo monte
Ia
•
lampara (A) donde desee, con los tornillos
W_.........
(BB).
I========;
Nota:
Si
Ia
instalacion requiere que se ff:
pase
el
cable conductor de
Ia
lampara (a1) l1Q
a traves de
un
paste de madera o
un
T
espacio estrecho, debera desensamblar
el
conector (B) y retirar
el
cable conductor de
Ia
lampara
(a1
).
Retire
Ia
cubierta superior
L----------'
(b1
),
Ia
placa de presion (b2) y
Ia
placa de contacto (b3) de
Ia
gufa
para cables (b4
).
Para ella, desatornille
Ia
cubierta superior
(b1
).
Luego, retire
Ia
cubierta superior (b1) de
Ia
placa de contacto (b3).
Esto
le
permitira retirar
Ia
placa de presion (b2) y
el
cable
conductor de
Ia
lampara
(a1
).
1
b.
To
install the fixture (A) to a masonry
installation site WITHOUT the cleat (C).
Use a 1/4
in.
drill bit (not included) to drill
two pilot holes where noted
on
the
template (CC). Install anchors (AA) into
the holes, then mount the fixture (A)
using screws (BB) into anchors (AA).
Note: The screws should
be
approximately 5.12 inches apart.
Para instalar una lampara (A) en mamposterfa SIN el
Iiston (C): use una broca para taladro de 1/4"
(nose
incluye)
para taladrar dos orificios gufa donde
lo
seriale
Ia
plantilla (CC).
lnstale las anclas de expansion (AA)
en
los orificios, luego monte
el
ensamble (A) con ayuda de los tornillos (BB)
en
las anclas (AA).
Nota: Los tornillos deben estar aproximadamente a 13
em
de
distancia entre
sf.
1
c.
To
install the fixture (A) to landscape
hardscape WITH the cleat (C). First determine
the desired location for fixture (A) -- prior to
starting any construction
of
the installation wall.
Then, attach the fixture (A) to the cleat (C) with
screws (DO).
Note: Insert the assembly fixture
in
between
layers
of
hardscape material and route the
fixture lead wire to the main low-voltage supply
cable. The use of adhesive or mortar (not
included) to secure the fixture
in
place
is
optional. • 3
Para instalar
Ia
lampara (A) en
superficies duras del jardfn CON el
Iiston (C): primero determine
Ia
ubicacion
deseada para
Ia
lampara (A) (antes
de
comenzar
Ia
construccion de
Ia
pared de
instalacion). Luego, fije
Ia
lampara (A)
al
Iiston (C) con los tornillos (DO).
Nota: lnserte
el
ensamble
de
Ia
lampara
entre las capas de material duro y pase
el
cable conductor
de
Ia
lampara hasta
el
cable
de
suministro principal
de
bajo
voltaje.
El
uso
de
adhesivo o mortero
(no
se
incluyen) para asegurar
Ia
lampara
en
su
Iugar
es
opcional.
2.
Insert wire from low-voltage transformer
(sold separately) into the wire guide (b4)
by
twisting the wire into each
end
ofthe
wire guide. Ensure the wire lays flat
and
straight
in
the wire guide (b4).
lnserte
el
cable
del
transformador de
bajo voltaje (se vende por separado)
en
Ia
gufa para cables (b4). Para
ella,
gire
el
cable
en
cada extrema
de
Ia
gufa para
cables. Asegurese
de
que
el
cable quede plano y recto
en
Ia
gufa
para cables (b4).
3.
Replace top cover (b1) and press
plate (b2).
Note: For proper function, make
sure the top cover (b1)
of
connector
(B) has been snapped into place using
the locking tabs
on
contact plate (b3).
Top
cover (b1) should turn freely.
Reemplace
Ia
cubierta superior (b1) y presione
Ia
placa (b2).
Nota: Para lograr
un
funcionamiento adecuado,verifique que
Ia
cubierta superior (b1)
en
el
conector (B) haya sido colocada a
presion
en
su
Iugar con ayuda de las lenguetas de empalme
en
Ia
placa de contacto (b3).
La
cubierta superior (b1) debe girar sin
problemas.
4.
Screw the top cover (b1) and the wire
guide (b4) together tightly until the
contact pins completely pierce the
plastic shield
of
the wire.
Atornille
Ia
gufa para cables (b1) y
Ia
base inferior (b4) con firmeza hasta que
las clavijas de contacto atraviesen por
completo
Ia
proteccion de plastico del
cable.
Lowes.
co
m/portfol
io
CARE AND MAINTENANCE/CUIDADO Y MANTENIMIENTO
• Before attempting to clean the fixture, disconnect the power to the fixture by turning the breaker off or removing the fuse
from the fuse box./Antes de intentar limpiar
Ia
lampara, desconecte
Ia
alimentaci6n de
Ia
lampara apagando
el
interruptor de
circuito o retirando
el
fusible de
Ia
caja de fusibles.
·To
clean the fixture, use a dry orslightly dampened clean cloth./Para limpiar
Ia
lampara, use
un
paf\o limpio seco o levemente
humedo.
• DO NOT use any cleaners with chemicals, solvents or harsh abrasives as damage to the fixture may occur./NO utilice
limpiadores con qufmicos, solventes
ni
abrasivos fuertes ya que pueden danar
Ia
lampara.
·Total
fixture wattage
is
2 watts; do not attempt to replace the LEDs./EI vataje total de
Ia
lampara
es
de 2 vatios;
no
intente
reemplazar las bombillas LED.
TROUBLESHOOTING/SOLUCION DE PROBLEMAS
PROBLEM POSSIBLE CAUSE CORRECTIVE ACTION
PROBLEMA CAUSA POSIBLE ACCION CORRECTIVA
The light does not
turn
on
at night./La
luz
no
se
enciende
al
anochecer.
1.
The transformer
is
not plugged
in
orturned
1.
Make sure the transformer
is
plugged
in
and turned on./
on
.lEI transformador
no
esta enchufado o Asegurese de que
el
transformador este enchufado y
encendido. encendido.
2.
Fixture connector
is
not properly installed
on
the low-voltage cable.lEI conector de
Ia
lampara
no
esta instalado correctamente
en
el
cable de bajo voltaje.
2.
Make sure the contact pins pierce the wire insulation
and make proper contact with the wire./Asegurese
de que las clavijas de contacto atraviesen
el
aislamiento del cable y esten
en
contacto con
el
cable de forma adecuada.
WARRANTY/GARANTiA
The manufacturerwarrants this lighting fixture against defects
in
materials and workmanship for a period
of
five years from
the date
of
purchase. Ifwithin this period the product
is
found to
be
defective
in
material or workmanship, the product must
be
returned, with a copy
of
the bill
of
sale
as
proof
of
purchase, to the original place
of
purchase. The manufacturerwill, at its
option, repair, replace or refund the purchase price to the original purchaser. This warranty does not cover light bulbs orthe
fixture becoming damaged due to misuse, accidental damage, improper handling and/or installation and specifically excludes
liability for direct, incidental or consequential damages. As some states do not allow exclusions or limitations
on
an
implied
warranty, the above exclusions and limitations may not apply. This warranty gives you specific rights and you may also have
other rights that vary from state to state.
El
fabricante garantiza
Ia
ausencia de defectos
en
los materiales o
en
Ia
fabricaci6n de todos sus accesorios de iluminaci6n
durante
un
perfodo de cinco anos a partir de
Ia
fecha de compra.
Si
dentro de este perfodo
el
producto presenta defectos
en
el
material o
Ia
mano de obra, se debe devolver
el
producto, junto con una copia del recibo de venta como prueba de
Ia
compra,
allugar
donde
se
compr6.
El
fabricante, a
su
elecci6n, reparara, reemplazara o devolvera
el
monto de
Ia
compra
al
comprador
original. Esta garantfa
no
cubre daf\os
en
el
ensamble debido a mal uso, daf\o accidental, manipulaci6n o instalaci6n
inadecuada y/o excluye especfficamente toda responsabilidad por daf\os directos, accidentales o resultantes. Debido a que
algunos estados
no
permiten exclusiones o limitaciones
en
una garantfa implfcita, las exclusiones y limitaciones anteriores
pueden
no
aplicarse. Esta garantfa
le
otorga derechos especfficos pero podrfa tener tambien otros derechos que varian segun
el
estado.
4
Printed
in
China
lmpreso
en
China
Portfolio~
is a registered trademark of
LF,
LLC. All rights reserved.
Portfolio®
es una marca registrada de
LF,
LLC. Todos los derechos reservados.
Lowes.com/portfolio

This manual suits for next models

1

Other Portfolio Lighting Equipment manuals

Portfolio LPC-11263/2 User manual

Portfolio

Portfolio LPC-11263/2 User manual

Portfolio 00734 User manual

Portfolio

Portfolio 00734 User manual

Portfolio C9142 User manual

Portfolio

Portfolio C9142 User manual

Portfolio 00749 User manual

Portfolio

Portfolio 00749 User manual

Portfolio 00738 User manual

Portfolio

Portfolio 00738 User manual

Portfolio DualBrite User manual

Portfolio

Portfolio DualBrite User manual

Portfolio 00990 User manual

Portfolio

Portfolio 00990 User manual

Portfolio VB13-4BNK User manual

Portfolio

Portfolio VB13-4BNK User manual

Portfolio UT1007-BR4-13CF1-P User manual

Portfolio

Portfolio UT1007-BR4-13CF1-P User manual

Portfolio MD620T4G65 User manual

Portfolio

Portfolio MD620T4G65 User manual

Portfolio MAP7 User manual

Portfolio

Portfolio MAP7 User manual

Portfolio DL6893RBS User manual

Portfolio

Portfolio DL6893RBS User manual

Portfolio LWS2495A User manual

Portfolio

Portfolio LWS2495A User manual

Portfolio 19530-000 User manual

Portfolio

Portfolio 19530-000 User manual

Portfolio LWS1204G User manual

Portfolio

Portfolio LWS1204G User manual

Portfolio LSR6B User manual

Portfolio

Portfolio LSR6B User manual

Portfolio 34623 User manual

Portfolio

Portfolio 34623 User manual

Portfolio HZA1601L-4 User manual

Portfolio

Portfolio HZA1601L-4 User manual

Portfolio 00990 User manual

Portfolio

Portfolio 00990 User manual

Portfolio M6022T User manual

Portfolio

Portfolio M6022T User manual

Portfolio 895 User manual

Portfolio

Portfolio 895 User manual

Popular Lighting Equipment manuals by other brands

Vision X XMITTER Series Installation instructions & user manual

Vision X

Vision X XMITTER Series Installation instructions & user manual

Home Decorators Collection 28116-HBU Use and care guide

Home Decorators Collection

Home Decorators Collection 28116-HBU Use and care guide

US Blaster USB 9640 instruction manual

US Blaster

US Blaster USB 9640 instruction manual

Welch Allyn 49500 manual

Welch Allyn

Welch Allyn 49500 manual

Honeywell Ex-Or MS1500PF Installation and commissioning instructions

Honeywell

Honeywell Ex-Or MS1500PF Installation and commissioning instructions

Heitronic 35378 Installation and operating instructions

Heitronic

Heitronic 35378 Installation and operating instructions

Traxon Allegro Dot S Direct View installation guide

Traxon

Traxon Allegro Dot S Direct View installation guide

ADJ Encore LP32IP user manual

ADJ

ADJ Encore LP32IP user manual

LumX LED P-50 instruction manual

LumX

LumX LED P-50 instruction manual

Ikan Mylo Mini quick start guide

Ikan

Ikan Mylo Mini quick start guide

ML Accessories BT ACTS Series Installation & maintenance manual

ML Accessories

ML Accessories BT ACTS Series Installation & maintenance manual

TKH 797 Installation and maintenance instructions

TKH

TKH 797 Installation and maintenance instructions

Wolf ATEX TURBOLITE Series Operation and maintenance instructions

Wolf

Wolf ATEX TURBOLITE Series Operation and maintenance instructions

Glos RETRO Series installation manual

Glos

Glos RETRO Series installation manual

DÖRR VL-26 instruction manual

DÖRR

DÖRR VL-26 instruction manual

Auping Aureo user manual

Auping

Auping Aureo user manual

Beamz 4-SOME instruction manual

Beamz

Beamz 4-SOME instruction manual

ProLights BEAMROLL8W user manual

ProLights

ProLights BEAMROLL8W user manual

manuals.online logo
manuals.online logoBrands
  • About & Mission
  • Contact us
  • Privacy Policy
  • Terms and Conditions

Copyright 2025 Manuals.Online. All Rights Reserved.