AA
AA
BB
CC
DD
FF
FF
EE
EE
BB
DD
FF
CC AA
4
PREPARATION
Before beginning assembly of product, make sure all parts are present. Compare parts with
package contents list and diagram above. If any part is missing or damaged, do not attempt to
assemble the product. Contact customer service for replacement parts.
Estimated Assembly Time: 10 - 15 minutes
Tool Required For Assembly (not included): Flathead screwdriver, Phillips screwdriver, Pliers,
Electrical tape, Wire cutters and two 60-watt max. medium-base bulbs or two 13-watt max.
medium-base CFL bulbs.
Helpful Tools (not included): Wire strippers, Ladder
ASSEMBLY INSTRUCTIONS
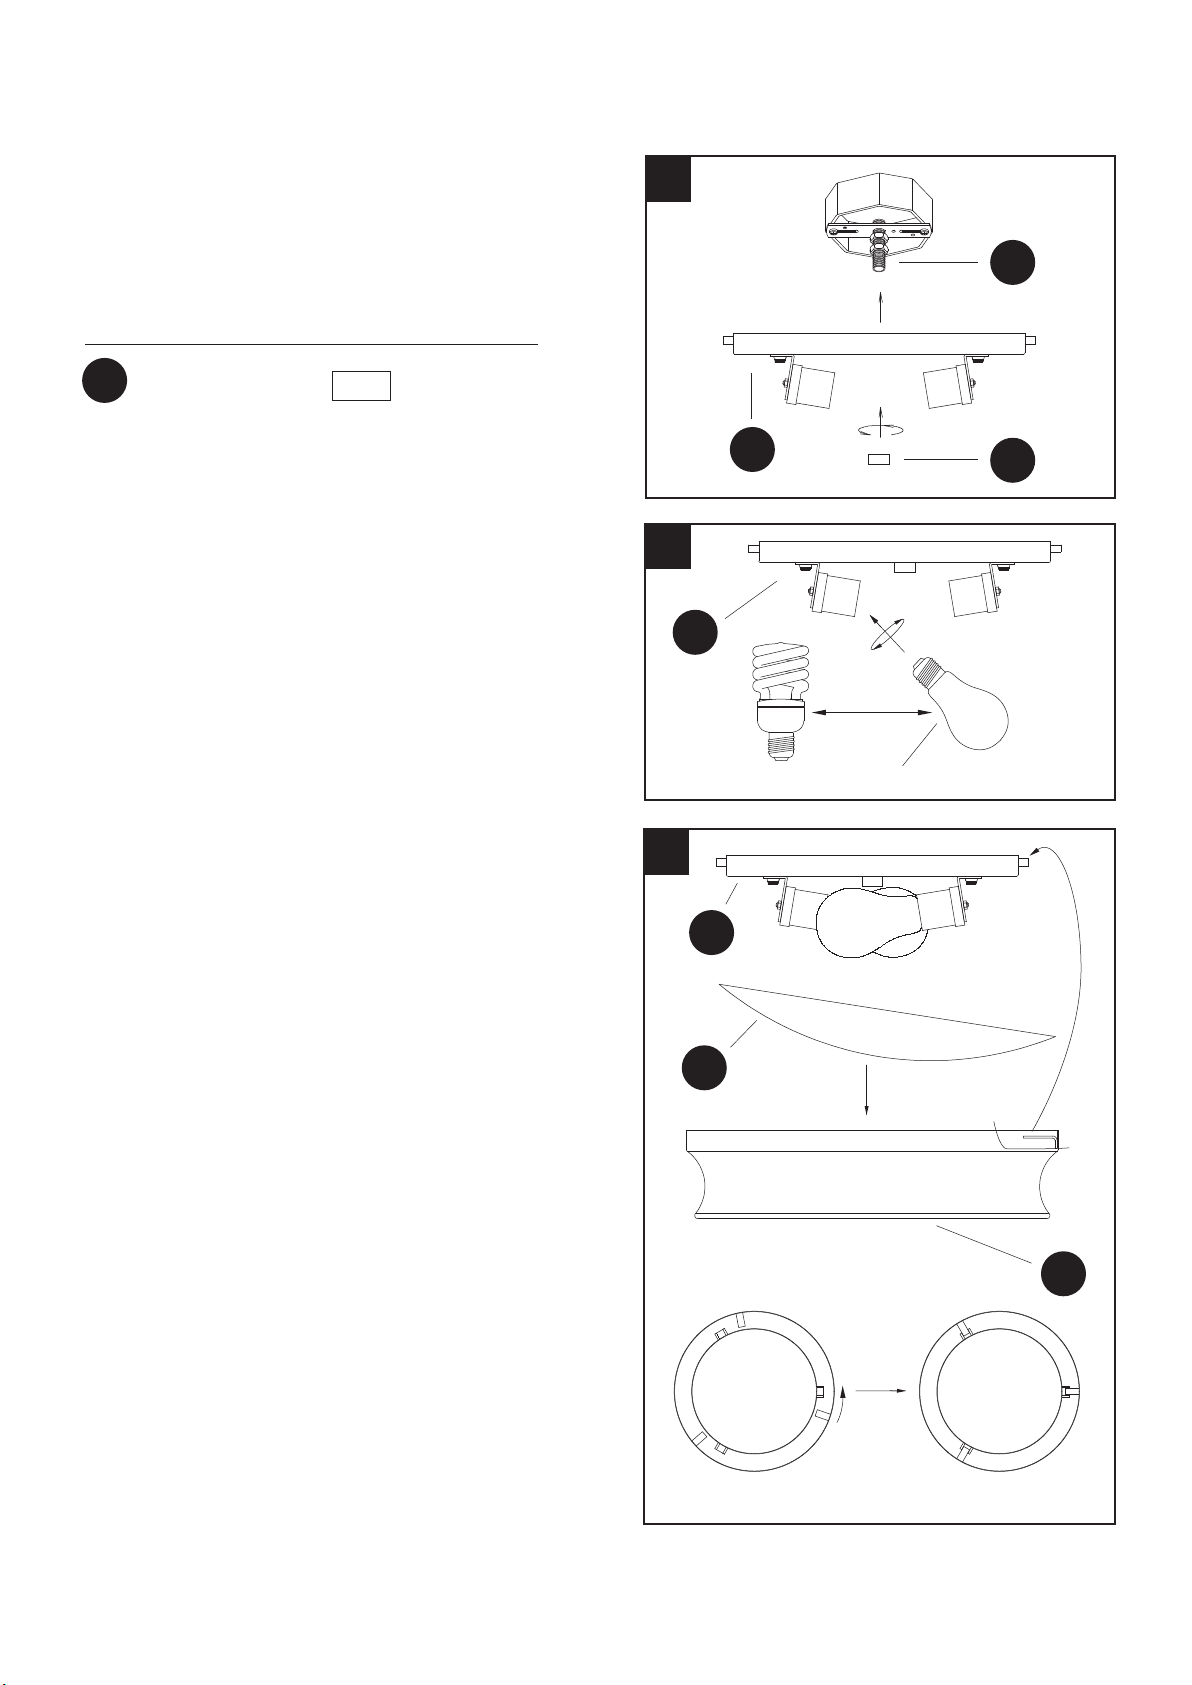
1
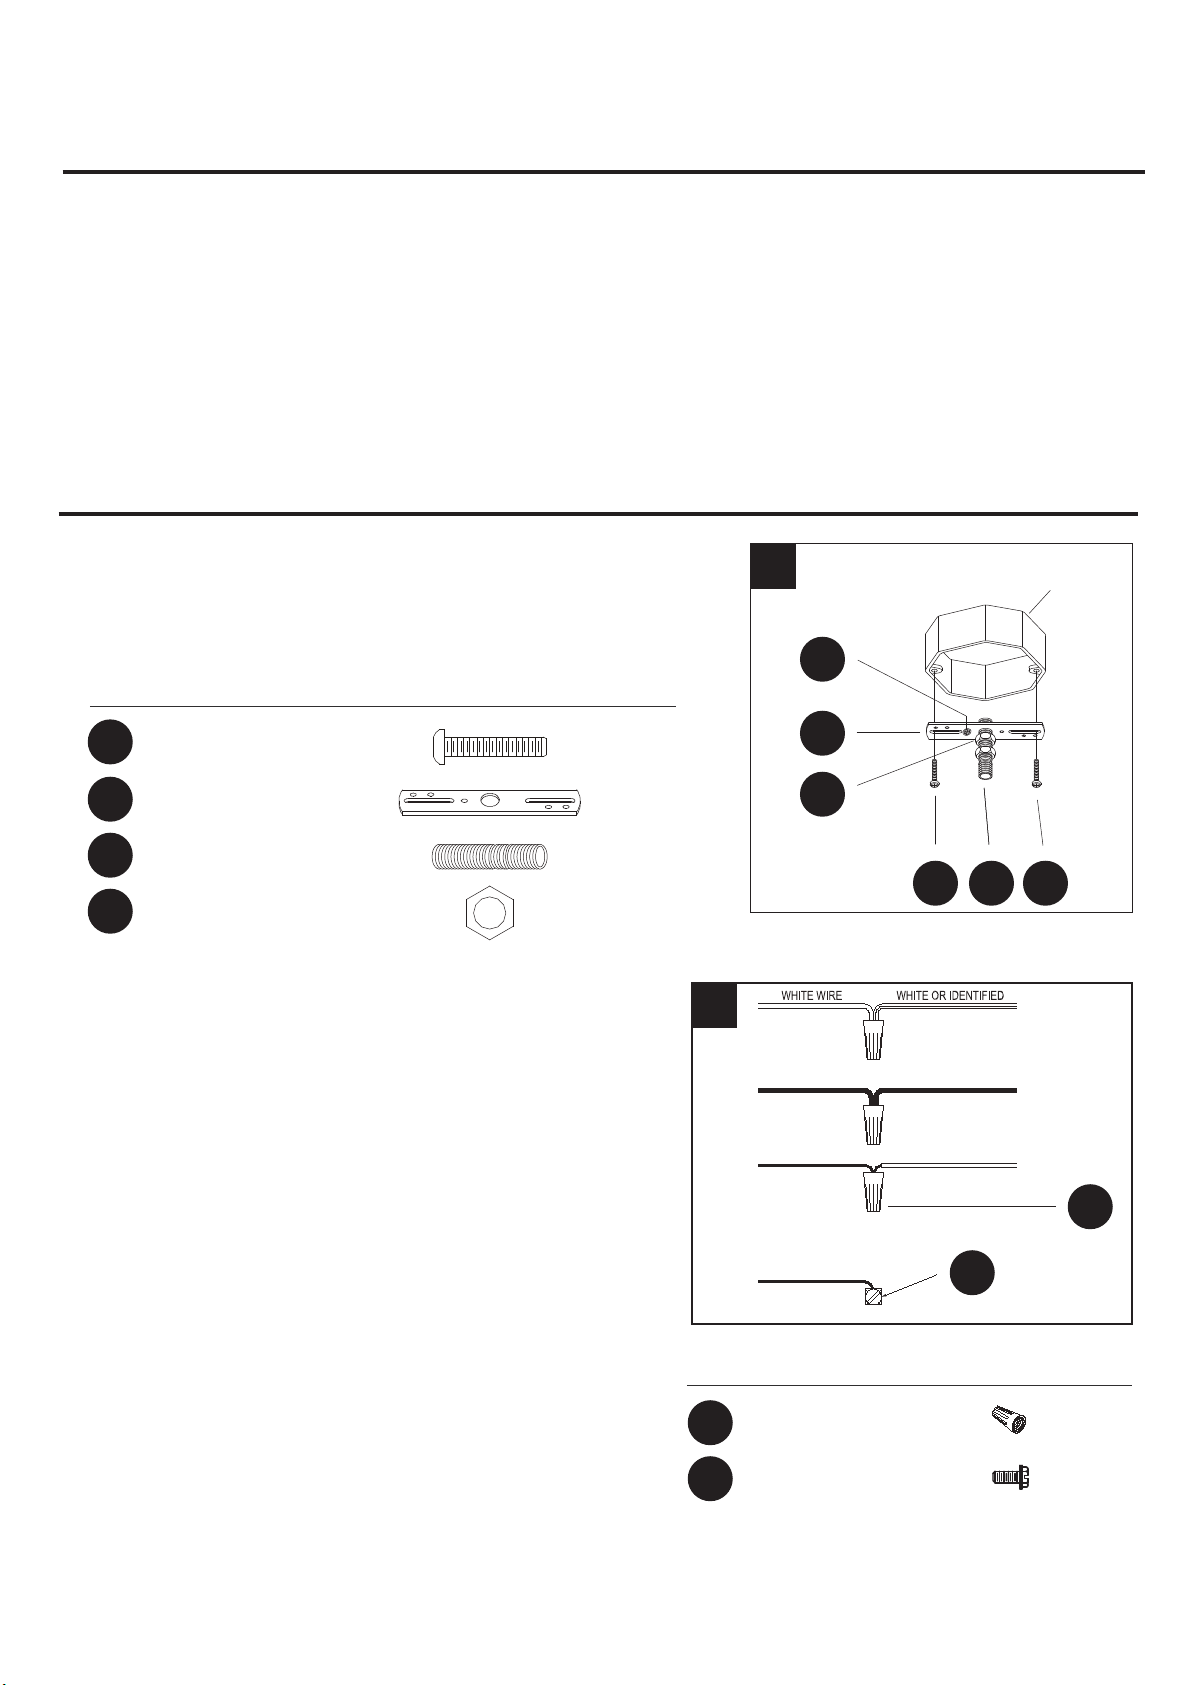
2. Attach ground fixture wire to either ground green
screw (FF) on crossbar (BB) or the ground wire in
the outlet box (usually GREEN or BARE). If
attaching to ground wire in the outlet box, fasten
together with a wire connector (EE) and tightly wrap
with electrical tape (not included). IT IS IMPORTANT
THE
OUTLET BOX IN YOUR HOME IS
PROPERLY
GROUNDED.
Connect the neutral (WHITE or IDENTIFIED side)
fixture wire to the neutral (usually WHITE) wire
from the outlet box. Fasten wires together with
a wire connector (EE) and tightly wrap wire
connector (EE) with electrical tape.
Connect the hot (BLACK or PLAIN side) fixture
wire to the hot (usually BLACK) wire from the
outlet box. Fasten wires together with a wire
connector (EE) and tightly wrap wire connector
(EE) with electrical tape.
FROM OUTLET BOX
GROUND WIRE
FROM OUTLET BOX
FROM OUTLET BOX
OR
BLACK WIRE
GROUND WIRE
FROM OUTLET BOX
BARE OR GREEN
BARE OR GREEN
FIXTURE WIRE
PLAIN OR BLACK
FIXTURE WIRE
FIXTURE GROUND
BARE OR GREEN
WIRE
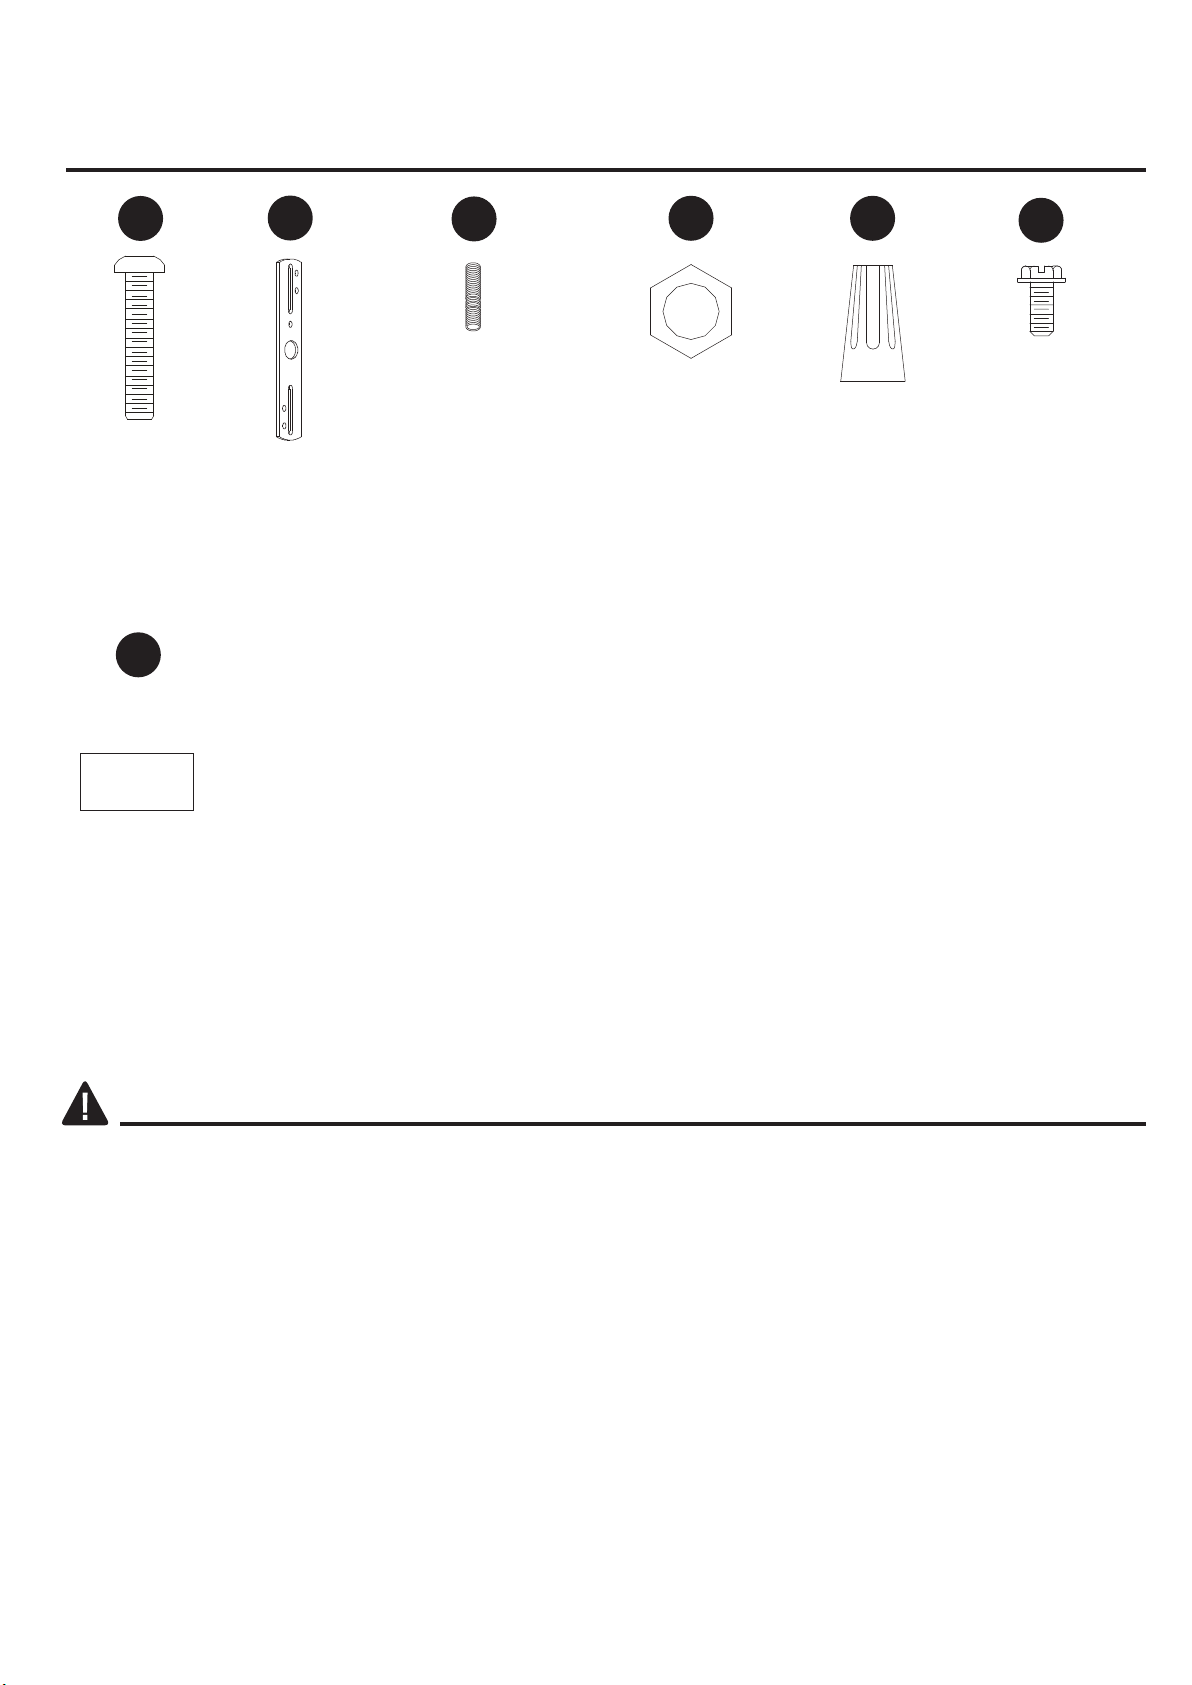
x 3
Wire connector
x 1
Ground green scew
Hardware Used
2
Hardware Used
x 2
Outlet box screw
1. Screw the mounting nipple (CC) into the crossbar (BB) and
lock in place with hex nut (DD). Fasten the crossbar (BB) to
the outlet box (not included) using the two outlet box
screws (AA).
Outlet box
x 1
Crossbar
x 1
Mounting nipple
x 2
Hex nut