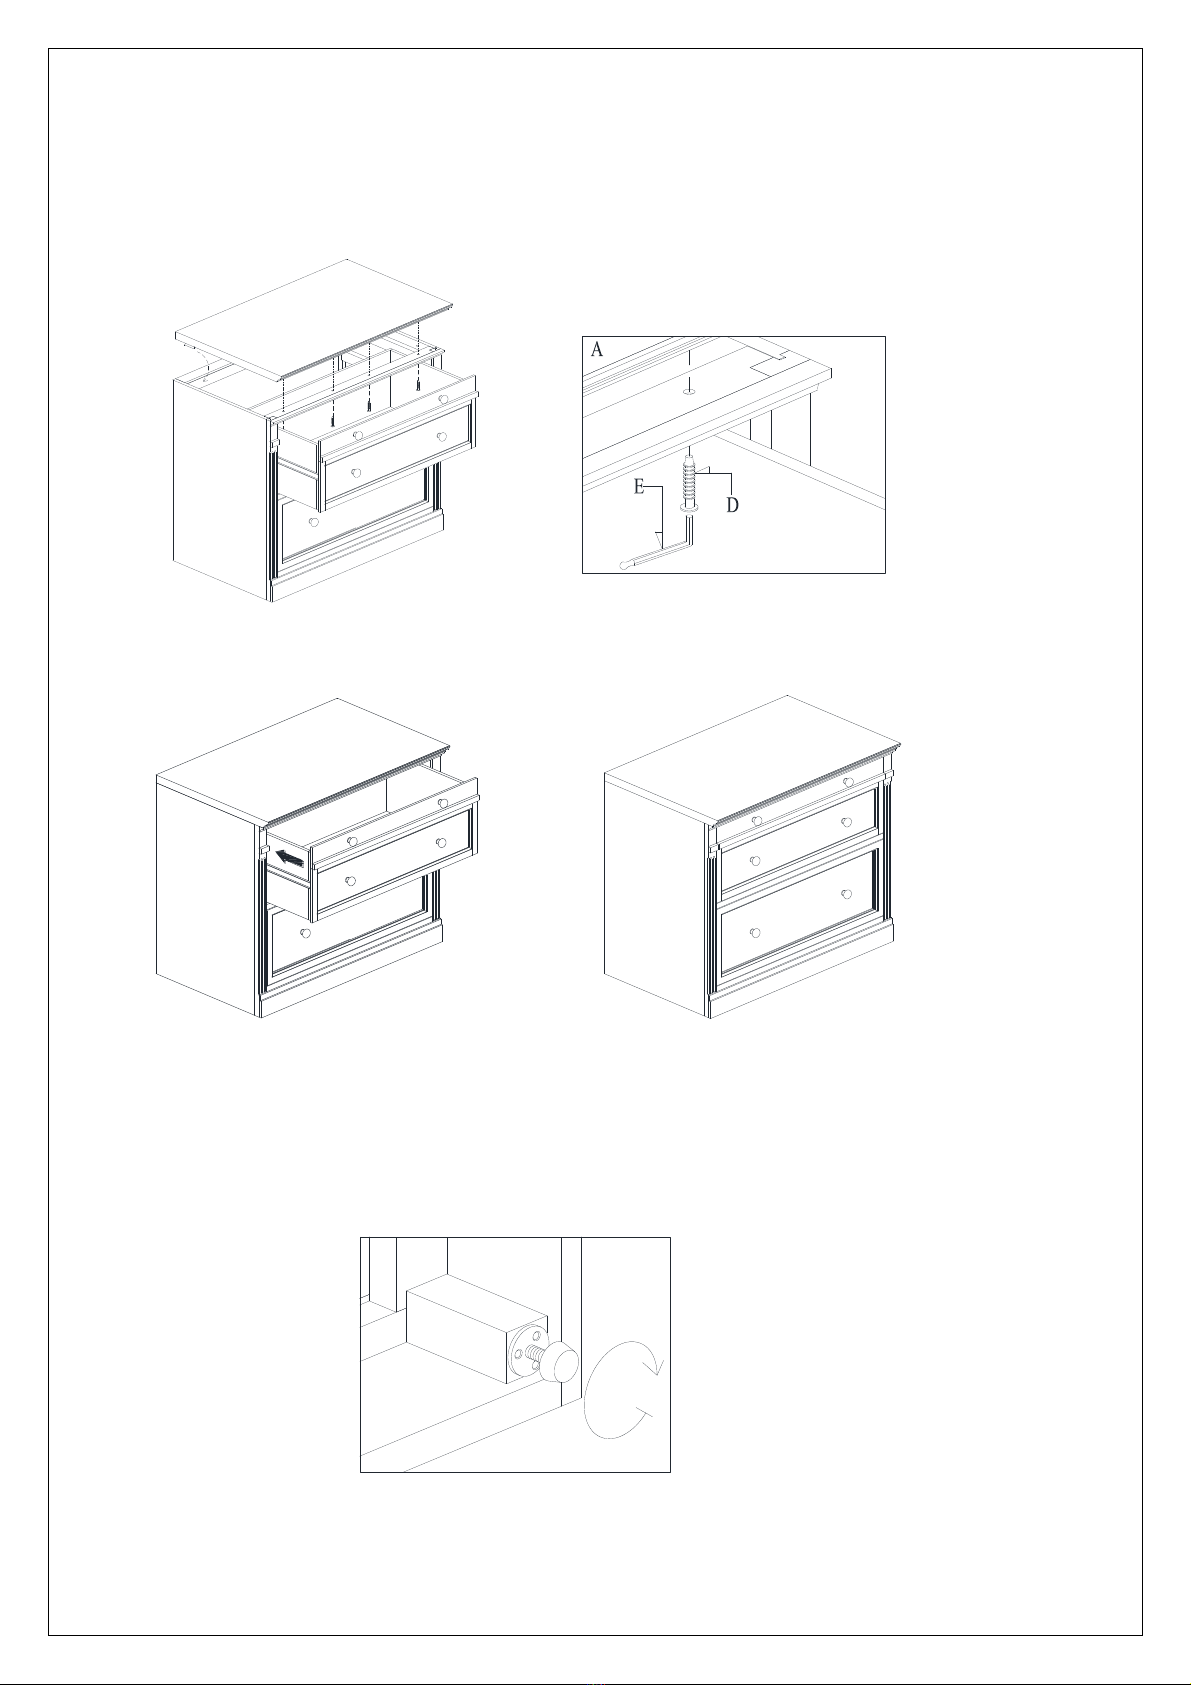
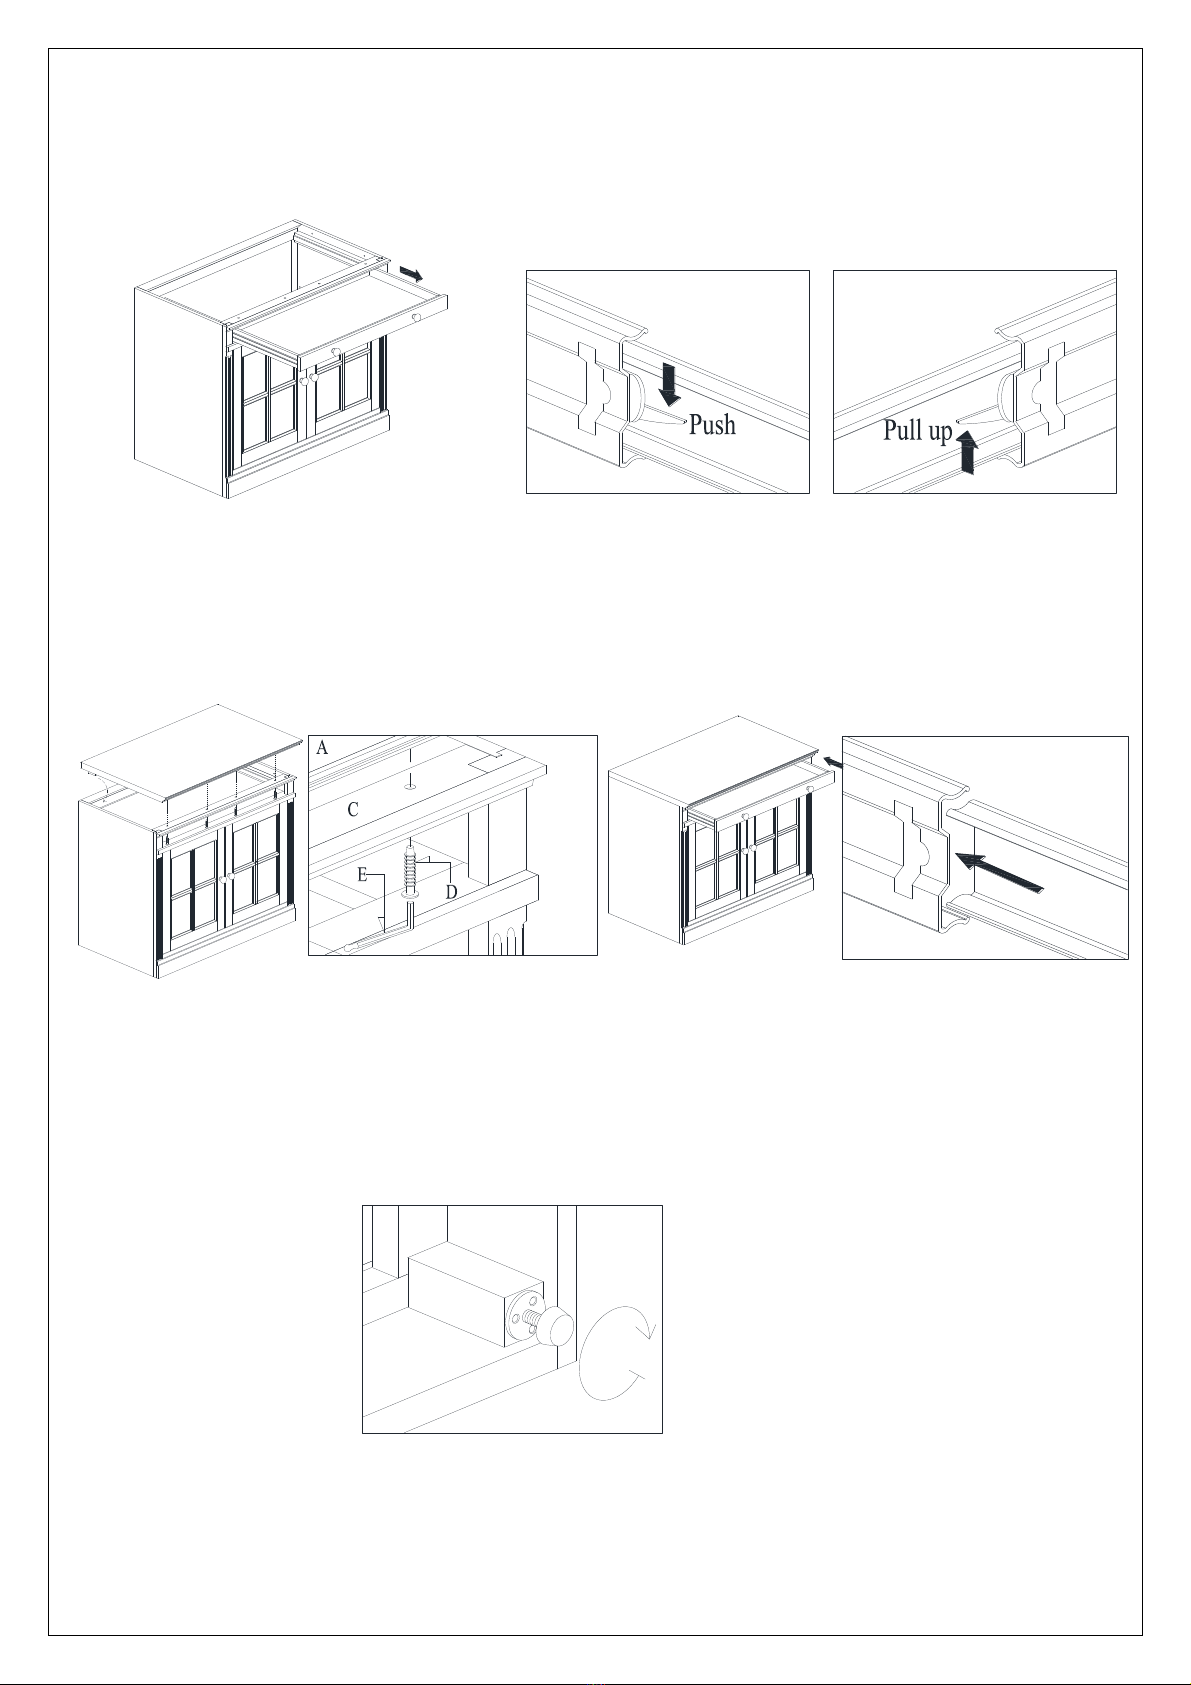
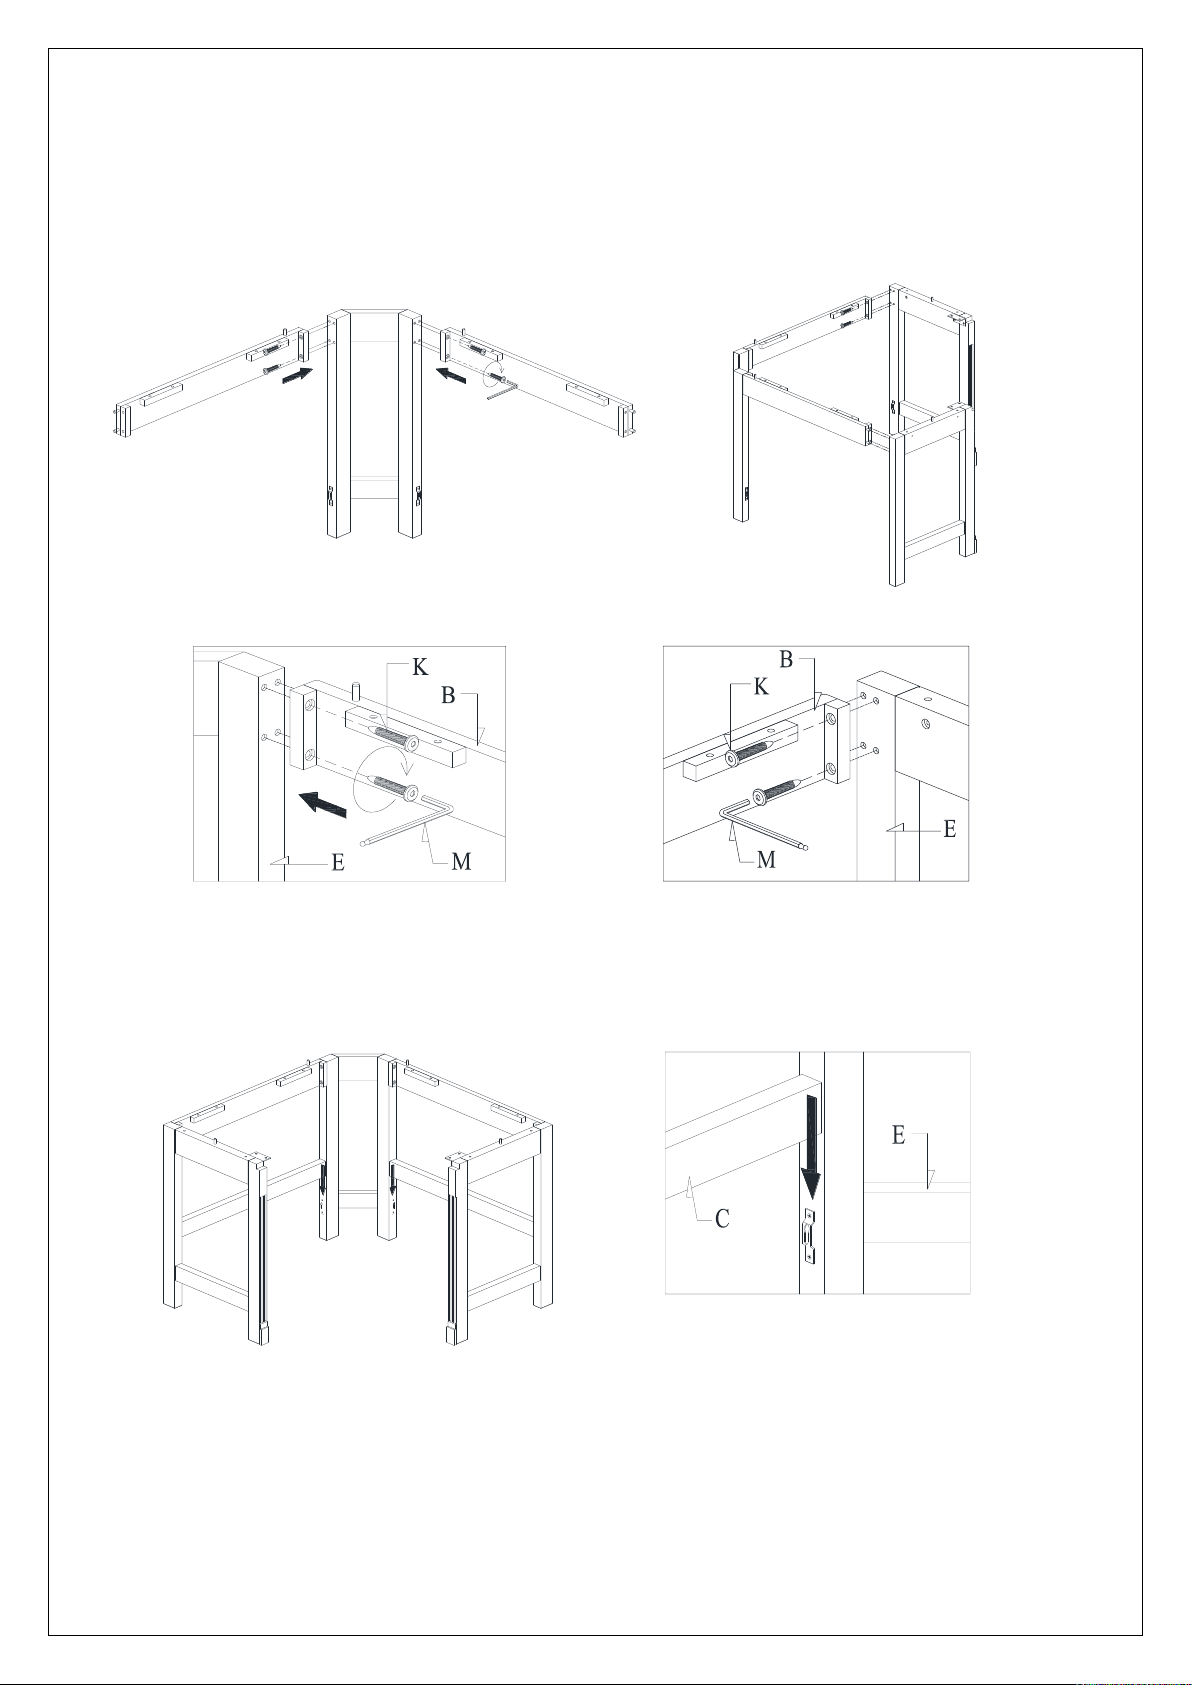
PotteryBarn LIVINGSTON CORNER DESK User manual
Other PotteryBarn Indoor Furnishing manuals

PotteryBarn
PotteryBarn CLASSIC RATTAN QUEEN User manual

PotteryBarn
PotteryBarn Savannah Daybed User manual

PotteryBarn
PotteryBarn Wall Mounted Wedding Shadow Box User guide

PotteryBarn
PotteryBarn Modular Wall Storage Open Cubby User manual

PotteryBarn
PotteryBarn LORRAINE User manual

PotteryBarn
PotteryBarn LOGAN HUTCH WITH SHELVES 36 inch User manual

PotteryBarn
PotteryBarn CLARA FULL BED User manual

PotteryBarn
PotteryBarn QUEEN User manual

PotteryBarn
PotteryBarn Display Shelf Galvi 52 In User manual

PotteryBarn
PotteryBarn HOTEL RECESSED MEDICINE CABINET User manual

PotteryBarn
PotteryBarn PIEDMONT SINGLE CONSOLE User manual

PotteryBarn
PotteryBarn LIVINGSTON LARGE DESK User manual

PotteryBarn
PotteryBarn Bamboo Metal Accent Table User manual

PotteryBarn
PotteryBarn Classic Bath Shelf User manual

PotteryBarn
PotteryBarn Devon Wall Mntd Pillar Holder User manual

PotteryBarn
PotteryBarn Floor Mirror with Clothing Rack User manual

PotteryBarn
PotteryBarn Benchwright Double Sink Console User manual

PotteryBarn
PotteryBarn SEVILLE COUNTERSTOOL User manual

PotteryBarn
PotteryBarn Equestrian Wall Mirror User guide

PotteryBarn
PotteryBarn HAYDEN PIVOT MIRROR User manual


Popular Indoor Furnishing manuals by other brands

Regency
Regency LWMS3015 Assembly instructions

Furniture of America
Furniture of America CM7751C Assembly instructions

Safavieh Furniture
Safavieh Furniture Estella CNS5731 manual

PLACES OF STYLE
PLACES OF STYLE Ovalfuss Assembly instruction

Trasman
Trasman 1138 Bo1 Assembly manual

Costway
Costway JV10856 manual