Power Fist 8625949 User manual

V 4.2 8625949
Please read and understand all instructions before use. Retain this manual for future reference.
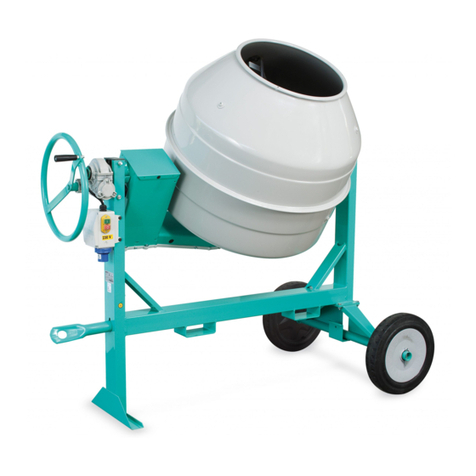
1/3HPElectric
CementMixer
User Manual

8625949 1/3 HP Electric Cement Mixer V 4.2
2 For technical questions call 1-800-665-8685
SPECIFICATIONS
Horsepower
1/3 HP
Voltage Rating
120 V AC
Current Rating
3.5 A
Motor Speed
1,975 RPM
Max. Weight Capacity
246 pounds
Empty Drum Volume
5 cubic feet
Wet Material Volume
3.5 cubic feet
Drum Speed
36 RPM
Drum Opening Diameter
15 in.
Wheel Diameter
9 in.
Wheel Width
1.9 in.
Feature(s)
The powder coated steel frame and drum provides
corrosion protection.
The 9 in. wheels make it easy to move over most surfaces.
The drum swivels up to 360° for pouring in any position.
Application(s)
This portable and durable cement mixer handles plaster,
stucco, mortar, concrete and more.
It is the ideal size for small to medium size projects.
Some project examples include building a backyard BBQ pit,
pouring a concrete slab for a shed, repairing an in-ground
pool, or to set fence posts just to name a few.
SAFETY
WARNING! Read and understand all instructions before using this tool. The operator must follow basic
precautions to reduce the risk of personal injury and/or damage to the equipment.
SAVE THESE INSTRUCTIONS
Keep this manual for safety warnings, precautions, operating or inspection and maintenance instructions.
1/3HPElectric
CementMixer

V 4.2 1/3 HP Electric Cement Mixer 8625949
Visit www.princessauto.com for more information 3
HAZARD DEFINITIONS
Please familiarize yourself with the hazard notices found in this manual. A notice is an alert that there is a
possibility of property damage, injury or death if certain instructions are not followed.
DANGER! This notice indicates an immediate and specific hazard that will result in severe personal
injury or death if the proper precautions are not taken.
WARNING! This notice indicates a specific hazard or unsafe practice that could result in severe personal
injury or death if the proper precautions are not taken.
CAUTION! This notice indicates a potentially hazardous situation that may result in minor or moderate
injury if proper practices are not taken.
NOTICE! This notice indicates that a specific hazard or unsafe practice will result in equipment or
property damage, but not personal injury.
WORK AREA
1. Operate in a safe work environment. Keep your work area clean, well lit and free of distractions.
2. Do not use in dangerous environments. Do not use power tools in damp or wet locations, or expose them
to rain.
3. Keep anyone not wearing the appropriate safety equipment away from the work area.
4. Always be aware of the operational area of your machine. Operators need to be careful to keep bystanders
and nearby objects at a safe distance from the machine.
5. Keep safe clearance around the mixer. Keep all persons (except the operator) at least six feet from the
mixer during operation.
6. Store unused tools properly in a safe and dry location to prevent rust or damage. Lock tools away and
keep out of the reach of children.
PERSONAL SAFETY
1. The proper machine operation includes training operators. Operators should clearly know the machine
safety and operation. Never allow a person who is not properly trained to operate the equipment.
2. Keep this machine in proper working condition. This includes keeping all safety labels on the machine
clean and visible.
3. Do not modify this machine. Doing so may cause improper operation and may not be safe. This may also
reduce the machine’s life.
WARNING! Wear personal protective equipment approved by the Canadian Standards Association (CSA) or
American National Standards Institute (ANSI).
PERSONAL PROTECTIVE EQUIPMENT
1. Always wear impact safety goggles that provide front and side protection for the eyes. Eye protection
equipment should comply with CSA Z94.3-07 or ANSI Z87.1 standards based on the type of
work performed.
2. Wear gloves that provide protection based on the work materials or to reduce the effects of tool vibration.
3. Wear protective clothing designed for the work environment and tool.
4. Wear proper apparel. Do not wear loose clothing, gloves, neckties or jewelry that may become caught in
the moving parts of the machine.
5. Non-skid footwear is recommended to maintain footing and balance in the work environment.
6. Wear steel toe footwear or steel toe caps to prevent a foot injury.

8625949 1/3 HP Electric Cement Mixer V 4.2
4 For technical questions call 1-800-665-8685
7. This tool can cause hearing damage. Wear hearing protection gear with an appropriate Noise Reduction
Rating to withstand the decibel levels.
PERSONAL PRECAUTIONS
Control the tool, personal movement and the work environment to avoid personal injury or damage to tool.
1. Do not operate any tool when tired or under the influence of drugs, alcohol or medications.
2. Avoid wearing clothes or jewelry that can become entangled with the moving parts of a tool. Keep long
hair covered or bound.
3. Do not overreach when operating a tool. Proper footing and balance enables better control in
unexpected situations.
4. Always use proper heavy lifting techniques when moving equipment.
5. Support the workpiece or clamp it to a stable platform. Holding the workpiece by hand or against your
body may lead to personal injury.
SPECIFIC SAFETY PRECAUTIONS
DANGER! DO NOT let comfort or familiarity with product (gained from repeated use) replace strict
adherence to the tool safety rules. If you use this tool unsafely or incorrectly, you can suffer serious
personal injury.
1. Use the correct tool for the job. This tool was designed for a specific function. Do not modify or alter this
tool or use it for an unintended purpose.
2. Always make sure that the machine is kept in proper operating condition. This mainly requires keeping the
machine clean and serviced. This will allow the machine to perform to its fullest potential and provide the
longest operational lifetime.
3. Do not overload the mixer. An overload can damage the machine.
4. Always keep clear of rotating parts when operating.
5. Never leave the machine unattended while running.
6. Do not move the mixer during operation. The mixer can tip over and damage the machine.
7. Avoid unintentional starts. Make sure the power switch is in the off position before plugging in
the machine.
8. Never stand on the machine. Serious injury could occur if the tool is tipped over.
POWER TOOL PRECAUTIONS
1. Do not allow the tool to run without load for an extended period of time, as this will shorten its life.
2. Do not cover the air vents. Proper cooling of the motor is necessary to ensure normal life of the tool.
3. Avoid unintentional starting. Ensure the switch is off when connecting to the power source.
4. Disconnect the power source before installing or servicing the tool.
5. After making adjustments, make sure that any adjustment devices are securely tightened.
6. Remove adjusting keys and wrenches before turning the tool on. A wrench or a key that is left attached to
a rotating part of the tool increases the risk of personal injury.
7. Never force the tool. Excessive pressure could break the tool, resulting in damage to your workpiece or
serious personal injury. If your tool runs smoothly under no load, but does not run smoothly under load,
then excessive pressure is being used.
8. Do not touch an operating motor. Motors can operate at high temperatures and can cause a burn injury.

V 4.2 1/3 HP Electric Cement Mixer 8625949
Visit www.princessauto.com for more information 5
9. Only use accessories that are specifically designed for use with the tool. Ensure the accessory is
tightly installed.
ELECTRICAL SAFETY
WARNING! To reduce risk of electric shock, be certain that the plug is connected to a properly
grounded receptacle.
WARNING! People with pacemakers should consult their physician(s) before using this product.
Operations of electrical equipment in close proximity to a heart pacemaker could cause interference or
failure of the pacemaker.
1. Disconnect tool from power source before cleaning, servicing, changing parts/accessories or when not
in use.
2. Protect yourself against electric shocks when working on electrical equipment. Avoid body contact with
grounded surfaces. There is an increased chance of electrical shock if your body is grounded.
3. Do not expose tool to rain or wet conditions. Water entering a power tool will increase the risk of
electric shock.
4. Do not disconnect the power cord in place of using the ON/OFF switch on the tool. This will prevent an
accidental startup when the power cord is plugged into the power supply.
a. In the event of a power failure, turn off the machine as soon as the power is interrupted.
The possibility of accidental injury could occur if the power returns and the unit is not switched off.
5. Do not alter any parts of the tool or accessories. All parts and accessories are designed with built-in safety
features that may be compromised if altered.
6. Make certain the power source conforms to requirements of your equipment (see Specifications).
7. When wiring an electrically driven device, follow all electrical and safety codes, as well as the most recent
Canadian Electrical Code (CE) and Canadian Centre for Occupational Health and Safety (CCOHS).
8 Grounded tools must be plugged into an outlet that is properly installed and grounded in accordance with
all codes and ordinances. Check with a qualified electrician if you are in doubt as to whether the outlet is
properly grounded. If the tool should electronically malfunction or break down, grounding provides a low
resistance path to carry electricity away from the user.
a. Never remove the grounding prong or modify the plug in any way, as this will render the tool unsafe.
b. Do not use any adapter plugs.
9. This device is only for use on 120 V (single phase) and is equipped with a 3-prong grounded power
supply cord and plug.
10. DO NOT use this device with a 2-prong wall receptacle.
a. Choose an available 3-prong power outlet.
b. Replace 2 prong outlet with a grounded 3-prong receptacle, installed in accordance with the CE Code
and local codes and ordinances.
WARNING! All wiring should be performed by a qualified electrician.

8625949 1/3 HP Electric Cement Mixer V 4.2
6 For technical questions call 1-800-665-8685
POWER CORD
1. Insert the power cord plug directly to the power supply whenever possible. Use extension cords or surge
protectors only when the tool's power cord cannot reach a power supply from the work area.
a. When operating a power tool outside, use an outdoor extension cord marked W-A or W. These cords
are rated for outdoor use and reduce the risk of electric shock.
b. Use in conjunction with a Ground Fault Circuit Interrupter (GFCI). If operating a power tool in a damp
location is unavoidable, the use of a GFCI reduces the risk of electric shock. It is recommended that
the GFCI should have a rated residual current of 30 mA or less.
2. Do not operate this tool if the power cord is frayed or damaged as an electric shock or surge may occur,
resulting in personal injury or property damage.
a. Inspect the tool's power cord for cracks, fraying or other faults in the insulation or plug before
each use.
b. Discontinue use if a power cord feels more than comfortably warm while operating the tool.
c. Have the power cord replaced by a qualified service technician.
3. Keep all connections dry and off the ground to reduce the risk of electric shock. Do not touch plug with
wet hands.
4. Prevent damage to the power cord by observing the following:
a. Do not pull on the cord to disconnect the plug from an outlet.
b. Keep cord away from heat, oil, sharp edges or moving parts.
c. Place the electrical cord in a position that prevents it from coming into contact with the tool and from
getting caught by the workpiece. The cord should always stay behind the tool.
5. Do not allow people, mobile equipment or vehicles to pass over unprotected power cords.
a. Position power cords away from traffic areas.
b. Place cords in reinforced conduits.
c. Place planks on either side of the power cord to create a protective trench.
6. Do not wrap cord around the tool as sharp edges may cut insulation or cause cracks if wound too tight.
Gently coil cord and either hang on a hook or fasten with a device to keep cord together during storage.
VIBRATION PRECAUTIONS
1. This tool vibrates during use. Repeated or long-term exposure to vibration may cause temporary or
permanent physical injury, particularly to the hands, arms and shoulders.
2. Anyone using vibrating tools regularly or for an extended period should first be examined by a doctor and
then have regular medical check-ups to ensure medical problems are not being caused by or worsened
from tool use.
3. If you feel any medical symptoms related to vibrations (such as tingling, numbness, and white or blue
fingers), seek medical attention as soon as possible.
4. DO NOT use this tool if one of the following applies:
a. Pregnant
b. Impaired blood circulation to the hands
c. Past hand injuries
d. Nervous system disorders
e. Diabetes
f. Raynaud's Disease

V 4.2 1/3 HP Electric Cement Mixer 8625949
Visit www.princessauto.com for more information 7
5. Do not smoke while operating the tool. Nicotine reduces the blood flow to the hands and fingers,
increasing the risk of vibration-related injury.
6. Wear suitable gloves to reduce the effects of vibration.
7. Use the tool with the least amount of vibration, when there is a choice between different processes.
8. Do not use for extended periods. Take frequent breaks when using this tool.
9. Let the tool do the work. Grip the tool as lightly as possible (while still keeping safe control of it).
10. To reduce vibrations, maintain the tool as explained in this manual. If abnormal vibrations occur, stop
using this tool immediately.
UNPACKING
WARNING! Do not operate the tool if any part is missing. Replace the missing part before operating.
Failure to do so could result in a malfunction and personal injury.
Remove the parts and accessories from the packaging and inspect for damage. Make sure that all items in the
parts list are included.
ASSEMBLY&INSTALLATION
Refer to the Parts Breakdown at the end of the manual for an exploded view of the machine.
When this manual refers to a part number, it refers to the included Parts List.
WARNING! To prevent serious injury from accidental operation, turn
the power switch of the tool to the off position and unplug the tool from
its electrical outlet before assembling or making any adjustments to
the machine.
1. Place the stand (27) into the triangular bracket (29) so that the bolt
holes line up. See figure 1.
NOTE: Set the stand on its side for easier assembly.
2. Fasten together using the hex bolts (61), flat washers (37) and hex
flange nut (34). Tighten with a wrench until secure.
3. Insert the support bracket (26) onto the stand so that the bolt
holes line up. See figure 2.
4. Fasten together using hex bolts (61), flat washers (37) and hex
flange nut (34). Tighten with a wrench until secure.
5. Place the stand upright.

8625949 1/3 HP Electric Cement Mixer V 4.2
8 For technical questions call 1-800-665-8685
6. To attach the wheels (65) to the wheel bracket (29), slide a flat
washer (64), wheel (65) and second flat washer onto the bracket’s
axle. Then insert a cotter pin (63) into the bracket’s axle holes and
split the end. Repeat for the opposite side wheel. See figure 3.
7. With assistance, connect the lower drum (3) to the arm
(22) and attach to the stand assembly (27). See figure 4.
8. Secure using hex bolts (54), flat washers (37), and hex
flange nuts (34). Tighten with a wrench until secure.
9. Use a hex bolt (31) to mount the handle control plate (9)
to the support bracket (10). Fasten together with a flat
washer (32) and two hex nuts (33).
10. Attach the control handle (7) to the support bracket
shaft (10) by inserting the coil spring into the lower hole
of the support bracket (10).
11. Press down on the arm until the holes align on the
pinion shaft (17).
12. Insert the hex bolt (31) and secure with hex nut (33).
13. Tighten to a point where the arm can still move.
14. Place a locking hex bolt next to the hex stud and secure.
See figure 5.
15. Use a gasket sealer (sold separately) to stick the rubber
gasket (2) to the upper drum (1), making sure the holes in
both align. The gasket must be flat on the upper drum to
ensure a proper seal. See figure 6.
16. Place the upper drum (1) onto the lower drum (3), making sure
the mounting holes align in both.
17. Insert the six screws (40) into each mounting hole. Fasten
the drums together using plastic washers (39) and hex
flange nuts (38).

V 4.2 1/3 HP Electric Cement Mixer 8625949
Visit www.princessauto.com for more information 9
18. Mount each paddle (6) inside the assembled drum with the pointed end
facing downward. The v-shaped bend in the paddles should point in the
direction of the drum rotation (clockwise).
19. Fasten the paddles (6) to the drums using the hex bolts (35), washers (5),
and hex flange nut (34).
20. Use the hex bolt (55), flat washer (37), and hex flange nut (34) to mount
the motor hood (20) to the support bracket (10). See figure 7.
21. Use the hex bolt (58), flat washer (48), hex nut (38), and clamp
(28) to attach the motor bracket (25) to the motor hood (20).
See figure 8. Tighten the connections until secure.
22. Remove all of the plastic protective material and other debris
from the pinion shaft (17). Also, clean out any debris from the
motor pulley’s (24) hub.
23. Smear a few drops of lubricating oil on the pinion shaft (17) and
squarely push the drum pulley (18) onto the shaft so that the groove in
the pulley engages the square key (47). The pulley should be flush with
the step on the pinion shaft. See figure 9.
24. Place the motor (30) onto the motor bracket (25).
25. Use the hex bolt (41), flat washer (37) and hex flange nut (34) to secure
the motor (30) to the motor bracket (25). Hand-tighten all four hex nuts
since motor will be adjust forward or backward later.
WARNING! Do not hammer the drum pulley (18) onto the pinion
shaft (17). Doing so can damage the unit and possibly lead to a
loose fitting belt.
26. Once the drum pulley (18) is pushed in all the way, use a hex key
wrench (not included) to tighten the screw (59) on the side of the
drum pulley’s (18) hub.
27. Attach the v-belt (60) by placing it around the motor pulley (24) and then over the drum pulley (18). Using
a flat-edge screwdriver (not included), push the motor (30) inward until the motor is directly under the
drum pulley (18). Tighten the bolts (41) securing the motor (30) to the motor bracket (25).
28. Push the motor downward until the belt tension is tight. When proper v-belt (60) tension is achieved (see
the section Belt Tensioning), tighten the hex bolt (58).
29. Check if the motor (30) and the belt (60) turns correctly. Hand turn the drum pulley (18) and verify that
the motor pulley (24) and drum pulley (18) do not rub against any other part. Adjust the motor (30)
location as needed.

8625949 1/3 HP Electric Cement Mixer V 4.2
10 For technical questions call 1-800-665-8685
30. Mount the motor cover (21) to the motor hood (20) using three screws (40), flat washers (48), and hex
flange nuts (38).
CAUTION! Make sure that the power cord (66) from the motor (30) to the switch (49) does not come in
contact with any moving parts.
31. Check that all screws, nuts, and bolts are securely tightened.
OPERATION
WARNING! To prevent serious injury, do not operate with any guard disabled, damaged, or removed.
WORK PIECE AND WORK AREA SET UP
1. Designate a work area that is clean and well-lit. The work area must not allow access by bystanders or
animals to prevent distraction and injury.
2. Route the power cord along a safe path to reach the work area without creating a tripping hazard or
exposing the power cord to possible damage. The power cord must reach the work area with enough
length to allow free movement while working.
3. There must be no objects, such as utility lines, nearby that will present a hazard while working.
GENERAL OPERATING INSTRUCTIONS
1. Place the concrete mixer on a solid, level surface.
2. Connect the power cord (66) to an electrical outlet (or properly rated grounded three prong
extension cord).
3. Add material to the drum. Typical maximum quantities include: 2 gallons of water with 3 shovels of
cement and 15 shovels of aggregate rock (using a size 3 shovel, not included).
4. Adjust the drum angle by pulling on the control handle (7). First, disengage the locking pins on the
arm (22) and push on the arm until the desired angle is reached. Re-insert the locking pins.
5. Flip the switch (49) to the ON (I) position.
6. Once the materials are mixed, tilt the drum and dump the materials where needed.
NOTE: Dump the materials while the drum is rotating.
7. When finished, flip the switch (49) to the OFF (O) position and disconnect the power cord from the
power source.
8. Tilt the drum angle as far down as possible to drain all fluids from the drum.
9. Clean, then store indoors out of the reach of children.

V 4.2 1/3 HP Electric Cement Mixer 8625949
Visit www.princessauto.com for more information 11
CARE&MAINTENANCE
WARNING! To prevent serious injury from accidental operation. Turn the power switch (49) to the OFF (O)
position and unplug the machine from its electrical power source before performing any maintenance or
any adjustments to the machine.
1. Maintain the tool with care. A tool in good condition is efficient, easier to control and will have
fewer problems.
2. Inspect the tool components periodically. Repair or replace damaged or worn components. Only use
identical replacement parts when servicing.
3. Only use accessories intended for use with this tool.
4. Keep the tool handles clean, dry and free from oil/grease at all times.
5. Maintain the tool’s labels and name plates. These carry important information. If unreadable or missing,
contact Princess Auto Ltd. for replacements.
WARNING! Only qualified service personnel should repair the tool. An improperly repaired tool may
present a hazard to the user and/or others.
BEFORE EACH USE
Inspect the general condition of the machine. Check for loose hardware, misalignment or binding of moving
parts, cracked or broken parts, damaged electrical wiring, damaged or cracked belts, and any other condition
that may affect its safe operation.
AFTER USE
Immediately wash out all debris from the inside and outside of the machine. Scrub the inside of the drum
with a stiff, long handled bristle brush for the best results. Wipe the external surfaces of the machine with
a clean cloth.
CAUTION! Do not apply water in or around the motor base cover.
WARNING! If the power cord (66) is damaged, it must be replaced only by a qualified service technician.
BELT INSPECTION
Retighten the belt after the first 25 hours of use. To test the tension, follow the steps below:
1. Remove the belt cover.
2. Examine the belt for cracks, tears in the backing, or other damage. Replace the belt if damaged.
REPLACING THE BELT
1. Loosen the motor bracket bolts and slide the bracket up as far as possible.
2. Slide the old belt off of the larger pulley first, then remove it from the motor pulley.
3. Put the new belt around the small pulley first, then around the large pulley.
4. Move the motor bracket down the belt until it is properly tensioned according to the
section Belt Tensioning.
5. Tighten the motor bracket bolts.
NOTE: Before use, make sure to replace the belt motor cover.

8625949 1/3 HP Electric Cement Mixer V 4.2
12 For technical questions call 1-800-665-8685
BELT TENSIONING
1. Press on the centre of the longest span on the belt with moderate finger
pressure. Then measure the deflection distance (the distance that the
belt moved). The belt should deflect anywhere from 1/2 in. to 3/4 in.
See figure 10.
2. If the belt deflects too much, tighten the belt by loosening the motor
mounting bolts and moving the motor away from the other pulley
slightly. Secure the motor mounting bolts and retest the tension. If the
belt is too long to be properly tensioned, it must be replaced.
3. If the belt deflects too little, loosen the motor bracket bolts and lift it upward. Secure the motor mounting
bracket and retest the tension.
NOTE: Before use, make sure to replace the belt motor cover.
CLEANING
Never allow concrete to harden on the machine.
Immediately after use, wash any concrete off of your machine with water. Be careful not to spray water on the
motor. An old paintbrush or broom may help loosen any concrete that has started to harden.
LUBRICATION
Inspect and lubricate the tool when required.
STORAGE
When not in use for an extended period, apply a thin coat of lubricant to the steel parts to avoid rust.
1. Store in a clean dry area.
2. Clean the debris from the machine’s surface.
DISPOSAL
Recycle a machine damaged beyond repair at the appropriate facility.

V 4.2 1/3 HP Electric Cement Mixer 8625949
Visit www.princessauto.com for more information 13
TROUBLESHOOTING
Contact Princess Auto Ltd. for a solution if the tool does not function properly or parts are missing. If unable
to do so, have a qualified technician service the tool.
Problem(s)
Possible Cause(s)
Suggested Solution(s)
Machine will not start.
1. The power cord is not connected.
1. Check that the power cord
is plugged into an electrical
power source.
2. No power at the outlet.
2. Check the power at the outlet. If
the outlet is unpowered, turn off the
machine and check the circuit
breaker. If the breaker is tripped,
make sure the circuit has no
other loads.
3. Internal damage or wear.
3. Have a technician service
the machine.
The tool operates slowly.
The extension cord is too long or the
wire size is too small.
Eliminate the use of an extension
cord. If an extension cord is needed,
use a short cord and/or a heavier
gauge cord.
Excessive noise
or rattling.
1. Belt is too loose (slipping) or too tight
(bearing damage).
1. Properly tension the belt.
2. Internal damage or wear.
2. Have a technician service the tool.
Overheating/Overloading.
1. Running at 100% load for an
extended amount of time.
1. Allow for lighter no-load intervals.
2. Blocked motor housing vents.
2. Wear ANSI approved safety
goggles and NIOSH approved
dust mask/respirator while
blowing dust out of the motor
using compressed air.
3. The motor may be strained by long or
small diameter extension cord.
3. Eliminate the use of an extension
cord. If an extension cord is needed,
use one with the proper diameter for
its length and load.

8625949 1/3 HP Electric Cement Mixer V 4.2
14 For technical questions call 1-800-665-8685
PARTSBREAKDOWN

V 4.2 1/3 HP Electric Cement Mixer 8625949
Visit www.princessauto.com for more information 15
PARTS LIST
PART#
DESCRIPTION
QTY.
1
Upper Drum
1
2
Rubber Gasket
1
3
Lower Drum
1
4
Washer
8
5
Aluminum Washer
10
6
Paddle
2
7
Control Handle
1
8
Spiral Spring
1
9
Handle Control Plate
1
10
Support Bracket
1
11
Adjusting Washer
3
12
Shaft
1
13
Upper Bearing Plate
1
14
Nest Bearing Plate
1
15
Gear
1
16
Washer
2
17
Pinion Shaft
1
18
Drum Pulley
1
19
Washer
1
20
Motor Hood
1
21
Motor Cover
1
22
Arm
2
23
Washer
1
24
Motor Pulley
1
25
Motor Bracket
1
26
Support Bracket
11
27
Stand
1
28
Clamp
1
29
Wheel Bracket
1
30
Motor
1
31
Hex Bolt (M10x70)
1
32
Flat Washer 10
2
33
Hex Nut (M10)
2
PART#
DESCRIPTION
QTY.
34
Hex Flange Nut (M8)
28
35
Hex Bolt (M8x20)
2
36
Set Screw (M8x16)
2
37
Flat Washer 8
18
38
Hex Flange Nut (M6)
11
39
Plastic Washer 6
7
40
Set Screw (M6x16)
10
41
Hex Bolt (M8x16)
12
42
C-clip 38
4
43
Elastic Pin (5x35)
1
44
Bearing (#60102)
2
45
Bearing (#60206)
2
46
C-clip 15
1
47
Square Key (5x28)
1
48
Flat Washer 6
5
49
Switch
5
50
Hex Nut (M4)
3
51
Toothed Elastic Washer 4
3
52
Flat Washer 4
3
53
Set Screw (M4x12)
3
54
Hex Bolt (M8x60)
4
55
Hex Bolt (M8x25)
4
56
Elastic Washer 14
1
57
Hex Bolt (M14x30)
1
58
Hex Bolt (M6x60)
2
59
Set Screw (5x12)
1
60
V-belt O-850
1
61
Hex Bolt (M8x65)
4
62
Hex Bolt (M8x55)
2
63
Cotter Pin (5x45)
2
64
Flat Washer 25
4
65
Rubber Wheel
2
66
Power Cord
1

V 4.2 8625949
Please read and understand all instructions before use. Retain this manual for future reference.

V4,2 8625949
Vous devez lire et comprendre toutes les instructions avant d'utiliser l'appareil.
Conservez ce manuel afin de pouvoir le consulter plus tard.
Bétonnière
électrique,1/3CV
Manuel d'utilisateur

8625949 Bétonnière électrique, 1/3 CV V4,2
2 En cas de questions techniques, appelez le 1-800-665-8685
SPÉCIFICATIONS
Puissance
1/3 CV
Tension nominale
120 V c.a.
Courant nominal
3,5 A
Vitesse du moteur
1 975 tr/min
Capacité de poids max.
246 livres
Volume du tambour vide
5 pi cubes
Volume de matériau humide
3,5 pi cubes
Vitesse du tambour
36 tr/min
Diamètre d'ouverture du tambour
15 po
Diamètre de roue
9 po
Largeur de roue
1,9 po
Caractéristique(s)
Le cadre et le tambour en acier à revêtement en poudre
protègent contre la corrosion.
Les rouses de 9 po facilitent le déplacement sur la plupart
des terrains.
Le tambour pivote sure 360°pour vider la benne dans toutes
les positions.
Application(s)
Cette bétonnière portative et durable peut s'utiliser avec du
plâtre, du stuc, du mortier, du ciment et plus encore.
Elle présente la taille idéale pour les petits à moyens projets.
On peut l'utiliser, par exemple, lors de projets de fabrication
d'un puits pour barbecue, pour couler une dalle en béton
destinée à recevoir une remise, pour réparer une piscine
creusée ou pour installer des poteaux de clôture.
SÉCURITÉ
AVERTISSEMENT ! Veuillez lire et comprendre toutes les instructions avant d'utiliser cet outil. L'utilisateur
doit respecter les précautions de base lorsqu'il utilise cet outil afin de réduire le risque de blessure ou de
dommage à l'équipement.
CONSERVER CES INSTRUCTIONS
Bétonniè
électrique,1/3CV

V4,2 Bétonnière électrique, 1/3 CV 8625949
Visitez www.princessauto.com pour plus d'informations 3
Conservez ce manuel qui contient les avertissements de sécurité, les précautions, les instructions de
fonctionnement ou d'inspection et d'entretien.
DÉFINITIONS DE DANGER
Veuillez-vous familiariser avec les avis de danger qui sont présentés dans ce manuel. Un avis est une alerte
indiquant qu'il existe un risque de dommage à la propriété, de blessure ou de décès si on ne respecte pas
certaines instructions.
DANGER ! Cet avis indique un risque immédiat et particulier qui entraînera des blessures
corporelles graves ou même la mort si on omet de prendre les précautions nécessaires.
AVERTISSEMENT ! Cet avis indique un risque particulier ou une pratique non sécuritaire qui pourrait
entraîner des blessures corporelles graves ou même la mort si on omet de prendre les
précautions nécessaires.
ATTENTION ! Cet avis indique une situation possiblement dangereuse qui peut entraîner des blessures
mineures ou modérées si on ne procède pas de la façon recommandée.
AVIS ! Cet avis indique un risque particulier ou une pratique non sécuritaire qui entraînera des
dommages au niveau de l'équipement ou des biens, mais non des blessures corporelles.
AIRE DE TRAVAIL
1. Travaillez dans un environnement de travail sécuritaire. Gardez votre aire de travail propre, bien éclairée et
exempte de toute distraction.
2. N'utilisez pas dans un environnement dangereux. N'utilisez pas d'outils électriques dans un lieu humide ou
mouillé et ne les exposez pas à la pluie.
3. Assurez-vous que les personnes qui ne portent pas l'équipement de sécurité approprié ne se trouvent pas
à proximité de l'aire de travail.
4. Soyez toujours conscient de la plage de fonctionnement de votre appareil. Les opérateurs doivent procéder
avec soin pour tenir les gens à l'écart et les objets rapprochés à une distance sécuritaire de l'appareil.
5. Assurez une distance sécuritaire autour de la bétonnière. Assurez-vous que personne (sauf l'opérateur) ne
se trouve à moins de six pieds de la bétonnière lorsque celle-ci est en marche.
6. Rangez les outils correctement dans un lieu sécurisé et sec. Gardez les outils hors de la portée
des enfants.
SÉCURITÉ PERSONNELLE
1. Le bon fonctionnement de l'appareil repose, entre autres, sur la formation des opérateurs. Les opérateurs
devraient bien connaître la façon d'utiliser l'appareil de manière sécuritaire. Ne confiez jamais l'équipement
à un individu qui n'a pas suivi la formation nécessaire.
2. Assurez-vous de maintenir cet appareil dans une condition de marche adéquate. Cela consiste, entre
autres, à voir à ce que toutes les étiquettes sur l'appareil soient propres et lisibles.
3. Ne modifiez pas cet appareil. Ce faisant, vous pourriez compromettre son bon fonctionnement, rendant
ainsi l'appareil non sécuritaire. De plus, vous pourriez réduire la durée utile de l'appareil.
AVERTISSEMENT ! Portez de l'équipement de protection personnelle homologué par l'Association
canadienne de normalisation (CSA) ou l'American National Standards Institute (ANSI).
ÉQUIPEMENT DE PROTECTION PERSONNELLE
1. Portez toujours des lunettes antiprojections qui offrent une protection frontale et latérale pour les yeux.
L'équipement de protection des yeux devrait être conforme à la norme CSA Z94.3-07 ou ANSI Z87.1
fonction du type de travail effectué.

8625949 Bétonnière électrique, 1/3 CV V4,2
4 En cas de questions techniques, appelez le 1-800-665-8685
2. Portez des gants qui protègent en fonction des matériaux de travail et pour réduire les effets des vibrations
de l'outil.
3. Portez des vêtements de protection conçus pour l'environnement de travail et pour l'outil.
4. Portez des vêtements appropriés. Ne portez pas de vêtements amples, de gants, de cravate ou de bijoux
qui pourraient rester coincés dans les pièces mobiles de l'appareil.
5. Les chaussures antidérapantes sont recommandées pour maintenir la stabilité et l'équilibre au sein de
l'environnement de travail.
6. Portez des chaussures à embout d'acier ou à coquilles d'acier pour éviter les blessures aux pieds dues à la
chute d'objets.
7. Cet outil peut causer des dommages à l'ouïe. Portez un dispositif de protection anti-bruit présentant une
cote de réduction du bruit adéquate en fonction du niveau de décibels.
PRÉCAUTIONS PERSONNELLES
Gardez le contrôle de l'outil, de vos mouvements et de l'environnement de travail pour éviter les blessures ou
le bris de l'outil.
1. N'utilisez pas l'outil si vous êtes fatigué ou sous l'effet de drogues, d'alcool ou de médicaments.
2. Évitez de porter des vêtements ou des bijoux pouvant se prendre dans les pièces mobiles d'un outil. Gardez les
cheveux longs recouverts ou attachés.
3. N'utilisez pas l'outil si vous devez étirer les bras pour vous en servir. Une stabilité et un équilibre
appropriés sont nécessaires afin d'avoir un meilleur contrôle en cas de situations inattendues.
4. Toujours utiliser des techniques appropriées de levage lourd lors du déplacement de l'équipement.
5. Soutenez la pièce à travailler ou fixez-la au moyen de pinces sur une plate-forme stable. Une pièce à
travailler tenue dans les mains ou appuyée contre votre corps peut entraîner des blessures corporelles.
CONSIGNES DE SÉCURITÉ SPÉCIFIQUES
AVERTISSEMENT ! Ne permettez PAS au confort ou à votre familiarisation avec l'outil (obtenus après un
emploi répété) de se substituer à une adhésion stricte aux règles de sécurité de l'outil. Si vous utilisez cet
outil de façon dangereuse ou incorrecte, vous pouvez subir des blessures corporelles graves.
1. Utilisez le bon outil pour la tâche à effectuer. Cet outil a été conçu pour une utilisation spécifique. Évitez de
modifier ou d'altérer cet outil ou de l'utiliser à une fin autre que celle pour laquelle il a été conçu.
2. Assurez-vous toujours que l'appareil est maintenu dans une condition de fonctionnement adéquate. Cela
consiste principalement à assurer la propreté et l'entretien de l'appareil. Vous permettrez ainsi à l'appareil
d'offrir son plein potentiel et la durée de vie utile la plus longue qui soit.
3. Évitez de trop charger la bétonnière. Une surcharge pourrait endommager l'appareil.
4. Tenez-vous toujours à l'écart des pièces rotatives lorsqu'elles sont en marche.
5. Ne laissez jamais l'appareil sans surveillance lorsqu'il est en marche.
6. Ne déplacez pas la bétonnière alors qu'elle est en marche. La bétonnière peut basculer et subir
des dommages.
7. Évitez les mises en marche involontaires. Assurez-vous que l'interrupteur d'alimentation est à la position
OFF (arrêt) avant de brancher l'appareil.
8. Ne montez jamais sur l'appareil. Des blessures graves peuvent se produire si l'outil est renversé.
PRÉCAUTIONS RELATIVES AUX OUTILS ÉLECTRIQUES
1. Évitez que l'outil ne tourne sans charge sur une période prolongée, puisque cela réduira sa durée de
vie utile.
2. Ne recouvrez pas les orifices d'aération. Pour assurer à l'outil sa durée de vie utile normale, le moteur doit
toujours être suffisamment refroidi.
Table of contents
Languages:
Other Power Fist Construction Equipment manuals
Power Fist
Power Fist 8536625 User manual

Power Fist
Power Fist 8924094 User manual

Power Fist
Power Fist 8732315 User manual

Power Fist
Power Fist 8901092 User manual
Power Fist
Power Fist 8536708 User manual

Power Fist
Power Fist 660 lb User manual

Power Fist
Power Fist 8668014 User manual
Power Fist
Power Fist 8712937 User manual

Power Fist
Power Fist 8622946 User manual
