manuals.online logo
Brands
  1. Home
  2. •
  3. Brands
  4. •
  5. Prince Castle
  6. •
  7. Dispenser
  8. •
  9. Prince Castle 398-CN User manual

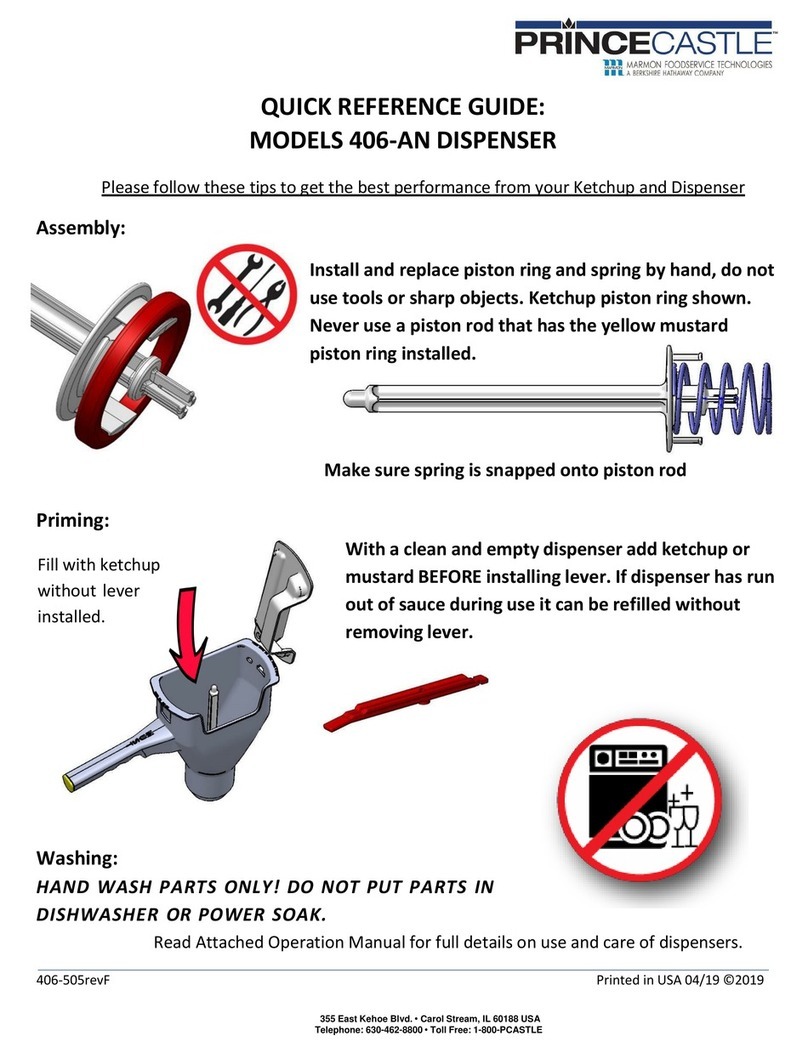
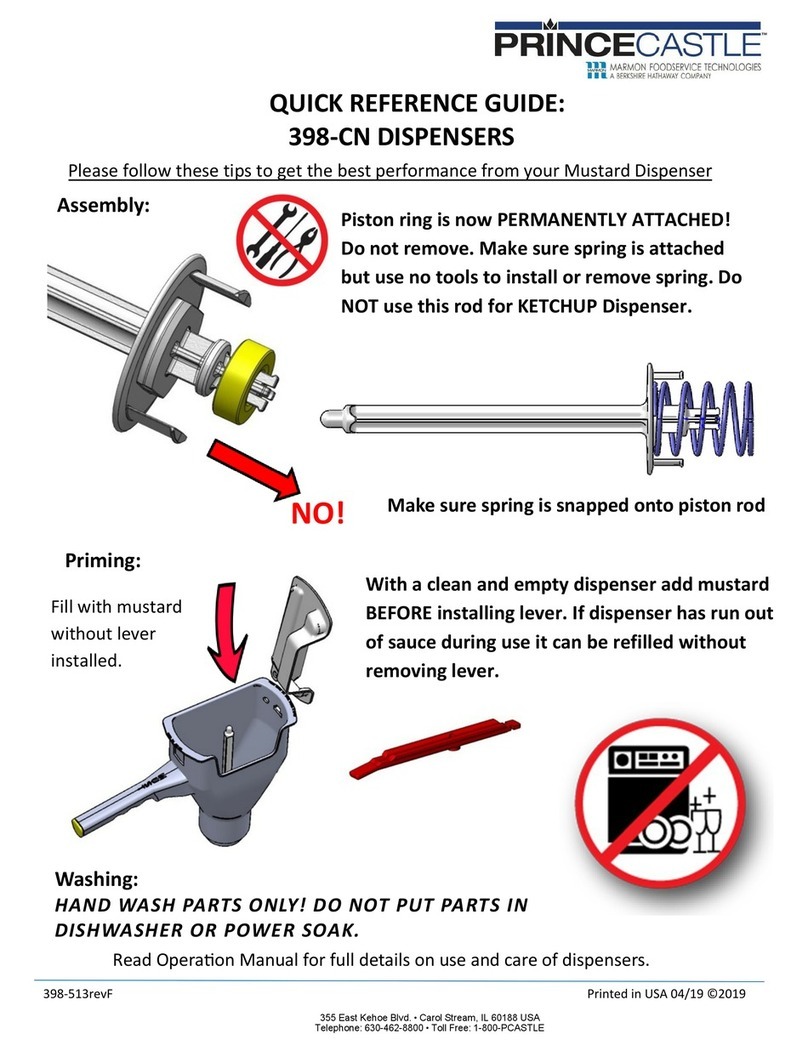
Prince Castle 398-CN User manual

Mustard Dispenser
Model No. 398-CN
398-513revA-EN Printed in USA 12/09 © 2009
Operation
Manual
Product Identification
Tether
Narrow Lid
Narrow Container
with Handle
Lever
Refill Line
Note: This dispenser uses the same lever and pump parts
as the standard mustard-only dispenser. Only the lid and
container are different.
355 East Kehoe Blvd. • Carol Stream, IL 60188 USA
Telephone: 630-462-8800 • Toll Free: 1-800-PCASTLE
Fax: 630-462-1460 • www.princecastle.com
LIMITED WARRANTY
This product is warranted to be free from defects in material and/
or workmanship for a period of two (2) years from date of original
installation, not to exceed 30 months from date of original
shipment from our factory. If this product proves to be faulty in
material and/or workmanship, it will be replaced or repaired (at
the option of Prince Castle, Inc.) without cost to the customer
for parts.
TABLE OF CONTENTS
Product Identification . . . . . . . . . . . . . . . . . . . . . . . . . . . . . . . 1
Safety Information . . . . . . . . . . . . . . . . . . . . . . . . . . . . . . . . . 2
Important . . . . . . . . . . . . . . . . . . . . . . . . . . . . . . . . . . . . . . . . 2
Setup . . . . . . . . . . . . . . . . . . . . . . . . . . . . . . . . . . . . . . . . . . . 2
Calibration . . . . . . . . . . . . . . . . . . . . . . . . . . . . . . . . . . . . . . . 3
Operation . . . . . . . . . . . . . . . . . . . . . . . . . . . . . . . . . . . . . . . 3
Cleaning. . . . . . . . . . . . . . . . . . . . . . . . . . . . . . . . . . . . . . . . . 4
Troubleshooting . . . . . . . . . . . . . . . . . . . . . . . . . . . . . . . . . . . 4
Ordering/Service Information . . . . . . . . . . . . . . . . . . . . . . . . . 4
Exploded View and Parts List. . . . . . . . . . . . . . . . . . . . . . . . . 5
Parts Kits . . . . . . . . . . . . . . . . . . . . . . . . . . . . . . . . . . . . . . . . 6
Tips on Improving Mustard Dispensing
(English, Spanish, French). . . . . . . . . . . . . . . . . . . . . . . . . . . 7
Instruction Sheet . . . . . . . . . . . . . . . . . . . . . . . . . . . . . . . . . . 10
Printed in USA 12/09 © 2009 2 398-513revA-EN
Mustard Dispenser
Model No. 398-CN
Safety Information
Indicates information important to the operation of the unit.
Failure to observe may result in damage to the equipment.
Hazard Communication Standard (HCS) – Procedure(s) in
this equipment manual include the use of chemical
products. These chemical products will be highlighted with
bold face letters followed by the abbreviation (HCS) in the
text of the manual. See the Hazard Communication
Standard (HCS) Manual for the appropriate Material Safety
Data Sheet(s) (MSDS).
CAUTION
Important
Prince Castle reserves the right to change specifications
and product design without notice. Such revisions do not
entitle the buyer to corresponding changes, improvements,
additions or replacements for previously purchased
equipment.
Setup
Place dispenser container in prep table pan (without
internal parts).
Note: Before filling dispenser, shake mustard container
vigorously. Be sure lid on mustard gallon is tightly
sealed.
1
Fill the lower
cavity of the
empty
container
with mustard
(approximately
2 inches).
Fill with approximately
2 inches of mustard
2
Assemble all internal
parts of the spring
assembly.
Piston Push Rod
Piston Spring
Cylinder
Check Valve
Check Valve Spring
3
Place
assembled
parts into
dispenser at
an angle.
Rotate
assemblyone
full turn while
inserting into
mustard-filled
bottom.
Note: Make
sure cylinder
is filled with
mustard in lower cavity.
4
Place
adjustingcam
on top of
piston push
rod and insert
push rod into
hole #3 of
adjusting
cam.
Note: Make
sure that
arrow on side
of adjusting
cam points to
handle of dispenser and numbers are facing up.
5
398-513revA-EN 3 Printed in USA 12/09 © 2009
Mustard Dispenser
Model No. 398-CN
Setup (continued)
Attach lever so
rounded corners
face down
towards the
adjusting cam.
A. Slide lever
through the
hole in the
container
located
above the
handle of the
dispenser.
B. Continue to
slide the
lever forward over adjusting cam while pressing
down on the adjusting cam and the piston push rod.
C. Continue to slide the lever forward until the push rod
falls into the hole located in the lever.
D. Continue pressing adjusting cam and push rod
while sliding the lever forward until the front end
enters the “T”-shaped hole on the other side of the
container.
6
Dispenser is
now fully
assembled.
Pour mustard
into the
container.
Place the lid
on top of the
container
before using
the dispenser.
7
The mustard dispenser must be primed before using.
Press down on lever several times (approximately 20)
to completely prime.
8
Wipe the bottom of the dispenser with a clean, moist
hand towel after priming.
Note: If air remains in the piston spring and cylinder
area, the dispenser will not dispense the correct
amount of mustard, and mustard will drip after each
shot. To release trapped air, remove lever and cam,
and gently pull out piston push rod and all assembled
parts. Repeat steps 4 thru 8 to reassemble. If
necessary, empty some of the mustard already in
container before reassembling.
9
Calibration
Set Brix cup
under dispenser
and dispense 47
shots of mustard
into cup.
Note: Allow the
lever to return
fully after each
shot.
1
47 shots will dispense 1 fl. oz. (30 ml) of mustard into
the Brix cup.
A. If the amount of mustard dispensed into the cup is
above 1 fl. oz. (30 ml), move adjusting cam from
hole #3 to hole #2 to DECREASE volume.
B. If below 1 fl. oz. (30 ml), move to hole #4 to
INCREASE the amount of mustard dispensed.
2
Repeat this adjustment until dispenser is calibrated.
Note: The lower numbered holes dispense less
mustard. The higher numbered holes dispense more
mustard. For all hole number settings, the arrow mark
on the side of the adjusting cam must always point
towards the handle of the dispenser.
3
Operation
This dispenser is used
for portion control of
mustard being
dispensed on toasted
buns.
• After buns are
separated and
placed on the prep
table, hold dispenser
approximately 1"
(25 mm) above
toasted bun.
• Press lever all the
way down to
dispense mustard on
the caramelized
surface of the toasted bun. This is repeated on all buns
which require mustard.
Note: The mustard dispenser has a YELLOW cap on the end
of the handle for easy identification.
Printed in USA 12/09 © 2009 4 398-513revA-EN
Mustard Dispenser
Model No. 398-CN
Cleaning
Empty mustard from dispenser and discard.
1
Fill dispenser with warm water. Repeatedly press
actuating lever to pump water and flush out dispenser.
2
Remove internal parts
from container by
pushing down on the
lever and the piston push
rod. Slide the lever out of
the “T” shaped hole in
the container. Remove
the adjusting cam.
“T” Shaped
Hole
3
Lift the push rod and the spring assembly straight up
and out of the container.
4
Separate all internal parts to clean thoroughly. Wash
the container and all loose internal parts in a solution of
warm water and All Purpose Concentrate (APC)
(HCS).
5
Rinse all loose parts and the container with running
water.
6
Sanitize dispenser. Use 1 packet of Sanitizer (HCS) to
2-1/2 gallons (8.5 l) of warm water.
7
Let air dry.
Note: Do not reassemble dispenser until it is ready to
be used the next day.
8
PROBLEM PROBABLE CAUSE SOLUTION
Will not dispense Plastic parts broken. Replace broken parts.
Not assembled properly. Assemble properly.
Not primed. See Setup procedure.
Parts missing. Check for proper assembly and placement.
Does not dispense full portion. Out of calibration. Re-calibrate. (See Calibration instructions.)
Mustard pattern is irregular. Diffuser holes plugged in bottom of container. Disassemble and clean diffuser holes by flushing
water through holes.
Does not dispense correct
amount and mustard drips from
dispenser after each shot.
Air pocket in piston spring and cylinder area. Remove lever and cam, gently pull piston push rod
and assembly parts from mustard to release trapped
air. Reassemble. (See Setup.)
Mustard collects on bottom of
dispenser. Bottom of dispenser has made contact with
bun. Wipe off bottom of dispenser with damp cloth.
Troubleshooting
Ordering/Service Information
WHERE AND HOW TO ORDER REPLACEMENT
PARTS
To order replacement parts, look on the back of your
Prince Castle Price List for the name and phone number
of your local Prince Castle Service Center. You may also
call Prince Castle at 1-800-323-2930 (or fax us at
630-462-1460) for the name of your local service center.
1
PARTS RETURNS
To return parts to your service center for credit, you
must obtain authorization from your center.
Note: All warranty situations should be handled by
your center.
2
PRICES
A. All prices are F.O.B. Prince Castle Service Center
or F.O.B. factory, Carol Stream, Illinois.
B. All prices are subject to change without notice.
These prices are exclusive of all sales taxes or any
special taxes which may be levied by federal,state,
or city governments.
OUTSIDE THE U.S.
Contact your kitchen equipment supplier or designated
repair facility for parts and service.
NON-SCHEDULED MAINTENANCE
Not applicable.
3
398-513revA-EN 5 Printed in USA 12/09 © 2009
Mustard Dispenser
Model No. 398-CN
Exploded View and Parts List
Note: Parts are not sold individually. See Part Kits on page 6.
ITEM PART NO. DESCRIPTION QTY FUNCTION
1398-112 Narrow Container with Handle 1 Holds all internal parts in proper position and provides a reservoir for mustard.
2404-7 Check Valve Spring 1 Returns check valve to the closed position.
3398-034 Check Valve 1 Works in conjunction with piston push rod.
4398-091 Cylinder 1 Holds mustard.
4a N/A Cylinder, Valve, and Spring Assembly 1 Consists of Items 2, 3, 4 and 5.
5398-20 Piston Spring 1 Returns the piston to the UP position.
6398-032 Piston Push Rod 1 Pumps mustard through the check valve and out of the 5 holes located on the
bottom of the container.
7398-031 Adjusting Cam 1 Calibrates the dispenser for proper volume of mustard to be dispensed.
8398-033 Lever 1 Pushes plunger rod down and forces piston to push mustard through diffuser
holes located on bottom of container.
8a N/A Lever and Cam Assembly 1 Consists of Items 7 and 8.
9404-13S Tether (pkg. of 6) 1 Attaches the lid to the container.
10 406-152S Narrow Lid with Tether (pkg. of 3) 1 Keeps foreign particles out of container and keeps mustard from drying out.
2
3
4
5
6
4a
1
7
8
9
10
8a
398-112
404-7
398-032
404-13S
406-152S
Printed in USA 12/09 © 2009 6 398-513revA-EN
Mustard Dispenser
Model No. 398-CN
Parts Kits
Part No. Description Qty
398-CN Entire Dispenser
398-112 Container with Handle 1
404-7 Check Valve Spring 1
398-034 Check Valve 1
398-091 Cylinder 1
398-20 Piston Spring 1
398-032 Piston Push Rod 1
398-031 Adjusting Cam 1
398-033 Lever 1
406-152 Lid 1
404-13 Tether 1
398-032S Upgrade Kit
404-7 Check Valve Spring 1
398-034 Check Valve 1
398-091 Cylinder 1
398-032 Piston Push Rod 1
398-031 Adjusting Cam 1
398-033 Lever 1
398-20 Piston Return Spring 1
398-033S Adjusting Cam Kit
398-031 Adjusting Cam 1
398-033 Lever 1
398-091S Cylinder, Valve and Spring Kit
404-7 Check Valve Spring 1
398-034 Check Valve 1
398-091 Cylinder 1
398-20 Piston Spring 1
398-034NS Spare Parts Kit
404-7 Check Valve Spring 3
398-034 Check Valve 3
398-091 Cylinder 2
398-20 Piston Spring 2
398-032 Piston Push Rod 2
398-031 Adjusting Cam 1
398-033 Lever 1
406-152 Lid, Narrow 2
404-13 Tether 2
398-20S Piston Return Spring Kit
398-20 Piston Return Spring 6
404-7S Check Valve Spring Kit
404-7 Check Valve Spring 6
406-152S Narrow Lid and Tether Kit
406-152 Lid, Narrow 3
404-13 Tether 3
404-13S Tether Kit
404-13 Tether 6
398-112 Narrow Container 1
Part No. Description Qty
398-112
404-7
398-032
404-7
398-032
404-7
404-7
398-032
404-7
398-513revA-EN 7 Printed in USA 12/09 © 2009
Mustard Dispenser
Model No. 398-CN
To ensure that you are always dispensing your mustard properly, perform the following tasks:
All replacement parts for your dispensers are available through your local KES.
Tips on Improving Mustard Dispensing
Check holes at bottom of canister to evaluate for
damage.
– Never use any type of object to unclog the
dispenser. Foreignobjects may cause damage to
the dispenser, which could restrict or alter
dispensing. A clogged dispenser should only be
cleaned using the procedures developed for the
3-compartment sink or in an approved
dishwasher.
1
Wipe bottom of dispenser frequently with a clean,
sanitized towel and then discard this towel into the
soiled towel bucket.
– If mustard is smeared along bottom of canister
and left for an extended period of time, the
mustard will dry out and clog the holes.
2
Monitor how crew is using the dispenser.
– Crew members sometimes touch the dispenser
to the bun, causing mustard to smear along the
bottom and ultimately clog.
3
Keep lid on dispenser.
– If lid is not on mustard, the mustard will dry out at
the top. When the mustard is almost at empty,
this crusty mustard will infiltrate the internal parts
and negatively affect pumping.
4
Try to fill dispenser with no more than 12 ounces
of mustard.
– Prevents waste and the opportunity for the
mustard to harden over time.
When mustard hardens, it becomes more difficult
to pump.
– Dispenser must be cleaned at the end of every
day.
5
If mustard is not being dispensed, you may need
to re-prime or reassemble it.
– Also, check for broken parts.
– If dispensers clog during the day, disassemble,
clean and sanitize the dispenser.
6
If you are not dispensing the correct amount of
mustard:
– Check the calibration.
– Check the tension of your springs. The springs
produce the force of dispensing. Older springs
produce less force, which reduces the amount of
mustard dispensed.
Replace both the check valve and piston springs
every 3-4 months to ensure proper force when
dispensing.
– There may be an air pocket in the piston spring
and cylinder area. Remove the lever and cam
and gently pull piston rod and assembly parts
from mustard to release air. Reassemble the
parts.
Because of mustard’s unique properties,
certain parts may discolor over time. This
discoloration does not affect the unit’s
performance or cause any food safety
concerns.
7
Printed in USA 12/09 © 2009 8 398-513revA-EN
Mustard Dispenser
Model No. 398-CN
Para asegurarse de que siempre está sirviendo la mostaza correctamente, realice las siguientes tareas:
Consejos para mejorar la manera de servir la mostaza
Compruebe los orificios del fondo del recipiente
para ver si presentan daños.
– Con el tiempo, cuando el personal limpia los
orificios con varios objetos, incluyendo lápices,
ganchos para papel y otros objetos cuyo uso
original no es para limpiar, los agujeros se
dañan, se tapan o se altera la manera de servir.
1
Limpie frecuentemente el fondo del dispensador.
– Si la mostaza se extiende por el fondo del
recipiente y se deja por un período de tiempo
prolongado, la mostaza se secará y taponará los
agujeros.
2
Controle la manera en que el personal utiliza el
dispensador.
– Los miembros del personal a veces tocan el pan
con el dispensador, causando que la mostaza se
extienda por el fondo y como consecuencia se
tapone.
3
Mantenga la tapa en el dispensador.
– Si la tapa no está en la mostaza, ésta se secará
por la parte de arriba. Cuando el recipiente de
mostaza está casi vacío, la mostaza seca se
infiltra por las partes internas y afecta el bombeo
de forma negativa.
4
Intente llenar el dispensador con 12 onzas o
menos de mostaza.
– Evita el desperdicio y la necesidad de guardar la
mostaza en el refrigerador.
La mostaza se endurece y resulta más difícil de
bombear.
– Si se guarda en el refrigerador, entonces el
dispensador no se limpiará esa noche.
5
Si la mostaza no se dispensa, puede que necesite
volver a cebar o a armarlo.
– Compruebe además si hay piezas rotas.
6
Si no se está dispensando la cantidad correcta de
mostaza:
– Compruebe el calibrado.
– Compruebe la tensión de los resortes. Los
resortes producen la fuerza para dispensar. Los
resortes viejos producen menos fuerza, lo cual
reduce la cantidad de mostaza dispensada.
Cambie los resortes cada 3 ó 4 meses para
asegurar la fuerza de dispensado adecuada.
– Es posible que haya una burbuja de aire en el
resorte del pistón y el área del cilindro. Retire la
palanca y la leva y tire suavemente de la varilla
del pistón y las piezas del conjunto para sacarlos
de la mostaza a fin de sacar el aire. Vuelva a
armar las piezas.
Debido a las propiedades exclusivas de la
mostaza, ciertas piezas podrían decolorarse
con el tiempo. Esta decoloración no afecta el
rendimiento de la unidad ni es motivo de
preocupación por la higiene de los alimentos.
7
398-513revA-EN 9 Printed in USA 12/09 © 2009
Mustard Dispenser
Model No. 398-CN
Pour garantir une distribution uniforme de la moutarde, procédez comme suit :
Suggestions pour une meilleure distribution de la moutarde
Vérifiez les trous de distribution en bas du
conteneur. Évaluez les dommages.
– Au fur et à mesure que le personnel nettoie les
trous à l’aide de divers objets, y compris stylos,
trombones qui n’ont pas été conçus pour le
nettoyage, les trous subissent des dommages qui
restreignent ou modifient la distribution.
1
Nettoyez fréquemment le bas du distributeur.
– Si la moutarde étalée en bas du conteneur n’est
pas nettoyée pendant une période prolongée,
elle sèche et bouche les trous.
2
Surveillez la façon dont le personnel se sert du
distributeur.
– Le personnel touche parfois le distributeur avec
le pain, ce qui force la moutarde à s’étaler au
fond du conteneur et à boucher les trous.
3
Le couvercle doit toujours se trouver sur le
distributeur.
– Si le couvercle n’est pas sur la moutarde, elle
sèchera au-dessus. Lorsque le conteneur de
moutarde est pratiquement vide, la couche dure
de la moutarde s’infiltre dans les pièces internes
et affecte l’action de pompage.
4
Remplissez le distributeur de moutarde d’une
quantité supérieure à 12 oz.
– Élimine le gâchis et le besoin de réfrigérer la
moutarde pendant la nuit.
La moutarde durcit et il est de plus en plus
difficile de pomper.
– Si la moutarde est placée au réfrigérateur, le
distributeur ne sera pas nettoyée cette nuit-là.
5
Si la moutarde ne sort pas, vous devez réamorcer
le système ou le réassembler.
– Vérifiez également qu’il n’y a pas de pièces
cassées.
6
Si vous n’obtenez pas la quantité correcte de
moutarde, procédez comme suit.
– Vérifiez l’étalonnage.
– Vérifiez la tension des ressorts. Les ressorts
exercent la force nécessaire à la distribution. Les
ressorts anciens exercent moins de force ce qui
réduit la quantité de moutarde distribuée.
Remplacez les ressorts tous les 3 ou 4 mois pour
garantir une force correcte à la distribution.
– Il peut y avoir une poche d’air dans la zone du
ressort du piston et du cylindre. Retirez le levier
et la came. Tirez soigneusement sur la tige du
piston et sur les pièces pour les séparer de la
moutarde et laisser l’air s’échapper.
Réassemblez les pièces.
En raison des propriétés particulières de la
moutarde, certaines pièces peuvent être
décolorées avec le temps. Toutefois, cette
décoloration n’affecte pas la performance de
l’unité et ne représente pas de source de
danger pour la nourriture.
7
Printed in USA 12/09 © 2009 10 398-513revA-EN
Mustard Dispenser
Model No. 398-CN
Mustard Dispenser Assembly and Calibration Instructions
Assembly
Assemble the mustard rod, ensuring that all springs are
completely fastened. Parts include:
A. Mustard rod
B. Piston return spring
C. Mustard cylinder
D. Check valve
E. Check valve spring
Note: All of the plastic pieces should be white to ensure
optimal performance. Because of the natural properties
of mustard, it is not unusual for these parts to be
stained by mustard.
DBCAE
1
Insert the plunger rod assembly
into the canister.
2
Place the lever into the
adjusting cam and set
initially at setting 3. To
set correctly, ensure
that “HANDLE” on the
adjusting cam is facing
toward the canister's
handle (see inset).
Insert the plunger rod
into the adjusting cam/
lever hole.
3
Attach the lid to the
canister by using the
tether.
4
Calibration
Fill and prime
dispenser per
Setup
instructions on
page 2.
1
With adjusting
cam set at
setting 3,
depress rod to
dispense
mustard into the
Brix cup. The
target spec is
45-50 shots per
ounce (30 mL).
2
If you do not
attain the target
spec, move the
cam to adjust
dispense
amount.
To increase the
amount
dispensed
(reduce number
of shots per
ounce), move
cam to a higher number.
To decrease the amount dispensed (increase number
of shots per ounce), move cam to a lower number.
Note: Settings 1 and 2 are on the other side of the
adjusting cam.
3

Other manuals for 398-CN

1

Other Prince Castle Dispenser manuals

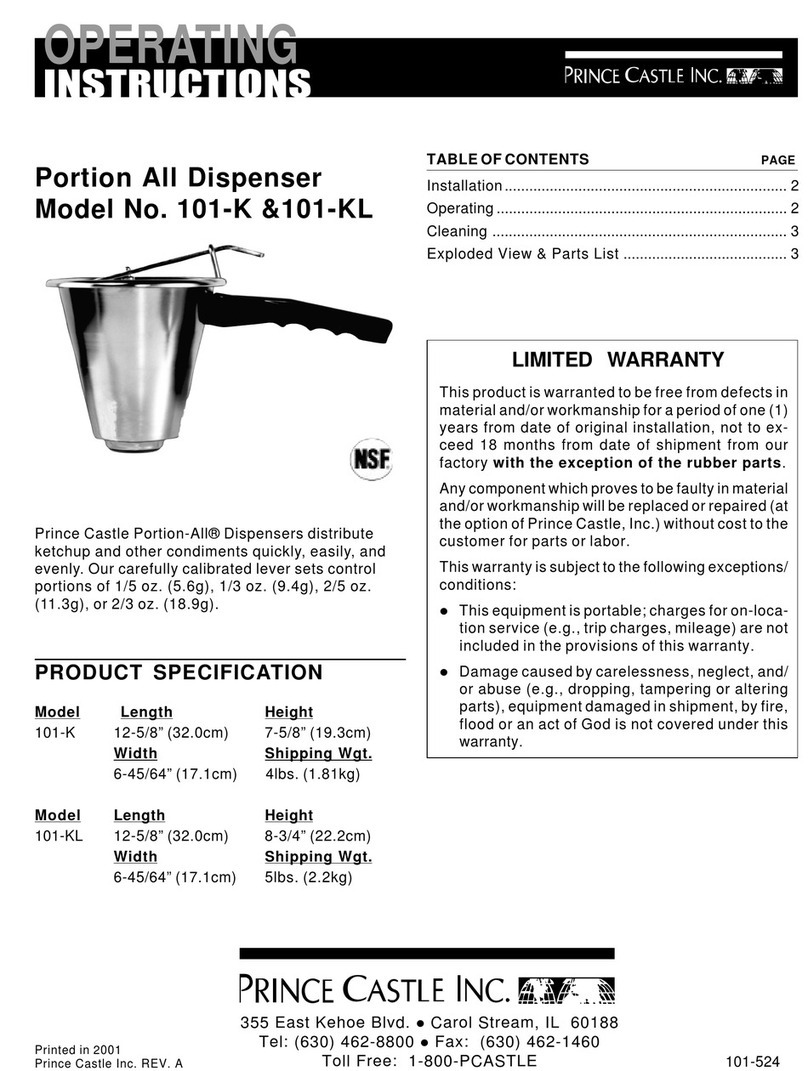
Prince Castle 101-K User manual

Prince Castle

Prince Castle 101-K User manual

Prince Castle 398-CN User manual

Prince Castle

Prince Castle 398-CN User manual

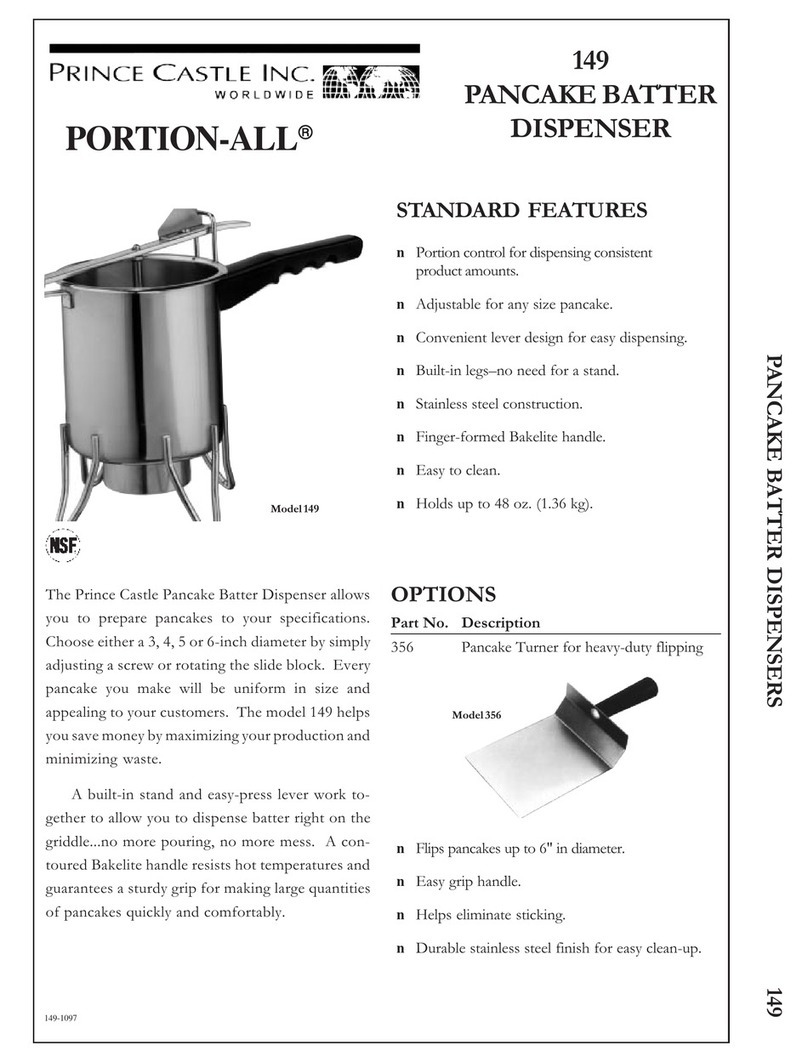
Prince Castle PANCAKE BATTER DISPENSER 149 User manual

Prince Castle

Prince Castle PANCAKE BATTER DISPENSER 149 User manual

Prince Castle 406-AN User manual

Prince Castle

Prince Castle 406-AN User manual

Prince Castle Portion-All Ketch-All 57 User manual

Prince Castle

Prince Castle Portion-All Ketch-All 57 User manual

Prince Castle McDONALD'S 398-B User manual

Prince Castle

Prince Castle McDONALD'S 398-B User manual

Popular Dispenser manuals by other brands

AIRSENZ DIGITAL FRAGRANCE DISPENSER instruction manual

AIRSENZ

AIRSENZ DIGITAL FRAGRANCE DISPENSER instruction manual

Hartmann CleanSafe instruction manual

Hartmann

Hartmann CleanSafe instruction manual

jbc SB05CC instruction manual

jbc

jbc SB05CC instruction manual

DAV DA1000V Installation and maintenance guide

DAV

DAV DA1000V Installation and maintenance guide

Dover Hydro AccuPro quick start guide

Dover

Dover Hydro AccuPro quick start guide

TECHCON SYSTEMS TS255 user guide

TECHCON SYSTEMS

TECHCON SYSTEMS TS255 user guide

VIEWEG DC 600 operating instructions

VIEWEG

VIEWEG DC 600 operating instructions

Presto 60375 installation guide

Presto

Presto 60375 installation guide

FISNAR DC50 operating manual

FISNAR

FISNAR DC50 operating manual

MTN Products Horizons Counter Top Complete manual

MTN Products

MTN Products Horizons Counter Top Complete manual

lancer 4500 Series installation guide

lancer

lancer 4500 Series installation guide

Royal Catering RCCS-10 user manual

Royal Catering

Royal Catering RCCS-10 user manual

Casselin CDJ8 operating instructions

Casselin

Casselin CDJ8 operating instructions

IPS 555ES operating manual

IPS

IPS 555ES operating manual

Cornelius IDC 255 PROGATE DRIVE THRU UNIT Operator's manual

Cornelius

Cornelius IDC 255 PROGATE DRIVE THRU UNIT Operator's manual

TEFAL Hot water Urn BR 301 User instructions

TEFAL

TEFAL Hot water Urn BR 301 User instructions

tatsuno OCEAN TOWER Series Installation and user manual

tatsuno

tatsuno OCEAN TOWER Series Installation and user manual

Bobrick SureFlo B-8281 troubleshooting guide

Bobrick

Bobrick SureFlo B-8281 troubleshooting guide

manuals.online logo
manuals.online logoBrands
  • About & Mission
  • Contact us
  • Privacy Policy
  • Terms and Conditions

Copyright 2025 Manuals.Online. All Rights Reserved.