manuals.online logo
Brands
  1. Home
  2. •
  3. Brands
  4. •
  5. Prince Castle
  6. •
  7. Toaster
  8. •
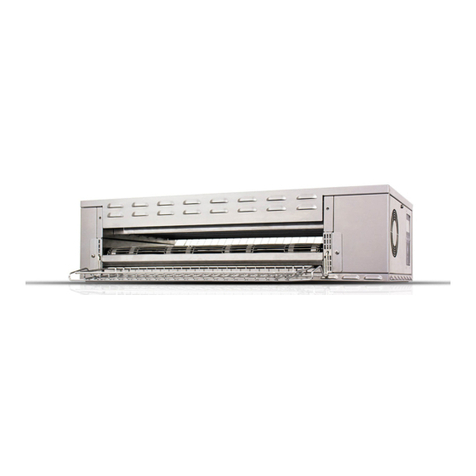
  9. Prince Castle DCFT-MCD User manual

Prince Castle DCFT-MCD User manual

527-502revC_EN 01/2014
©McDonald’s Corporation · Planned Maintenance Manual
PREP EQUIPMENT
PR
34
Prince Castle LLC
Vertical Toaster
Model DCFT
-
MCD
Daily maintenance tasks
PR 34 D01 Clean DCFT
Release Sheets and
Club & Conveyor
Belts
Weekly maintenance tasks
PR 34 W01 Clean DCFT –
In-Feed
Assemblies
Monthly maintenance tasks
PR 34 M01 Deep Clean DCFT
Conveyor Belt
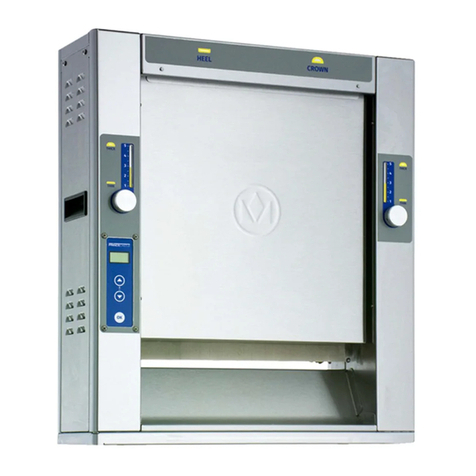
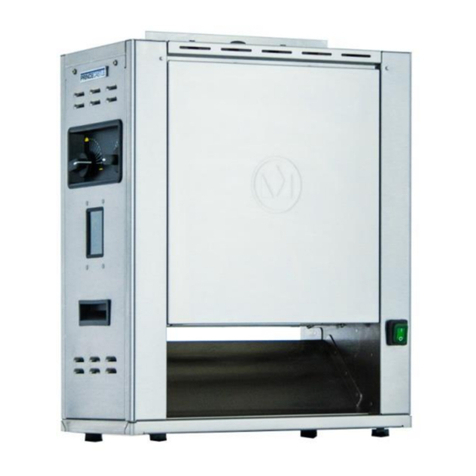
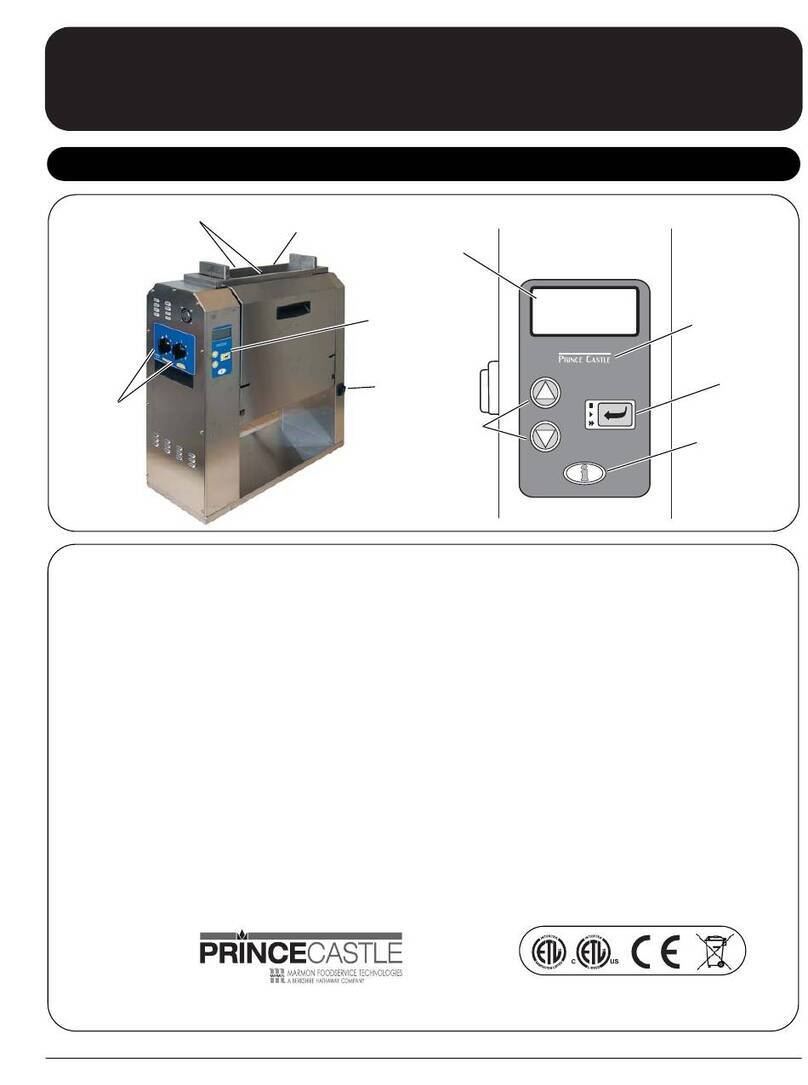
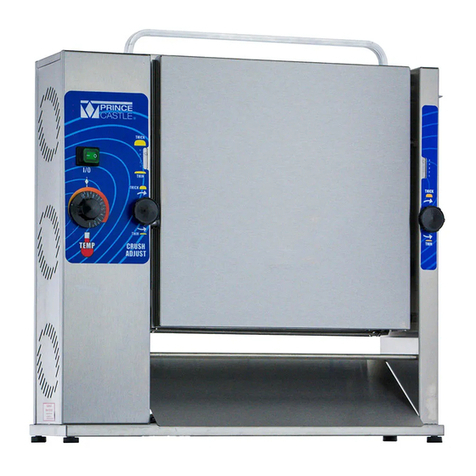
McDonald’s Vertical Toaster
A. Power Switch B. Pick-Up Zone C. Club In-Feed D. Program Buttons
E. Heel/Crown In-Feed F. Exit Chute
A
B
D
C
E
Prince Castle DCFT-MCD Vertical Toaster
PR 34
F
Hazards
These icons alert you to a possible risk of personal injury.
E uipment alerts
Look for this icon to find information about how to avoid damaging the
equipment while doing a procedure.
Tips
Look for this icon to find helpful tips about how to do a procedure.
Clean DCFT Release
Sheets and Club &
Conveyor Belts Daily
PR 34 D01
527-502revC_EN 01/2014
©McDonald’s Corporation · Planned Maintenance Manual
Page 1of 4
Prince Castle DCFT-MCD Vertical Toaster Daily PR 34 D01
Why To maintain effectiveness of the Prince Castle DCFT release sheets and club and conveyor belts
Time required 5 minutes to clean and prepare 10 minutes including belts, 5 minutes without belts to
complete
Time of day After Close For 24-hour restaurants: during low-volume times
Hazard icons Chemicals Hot Surfaces
Tools and su lies
Clean, sanitizer-
soaked towels
Bucket, soiled
towels
Heat-resistant
Gloves
Approved
Detergent
Solution
McDonald’s DR
Concentrated
Disinfectant
Cleaner
Approved
Degreaser
Solution
KAY® Specialty
Cleaner & Polish
Approved Detergent
Solution and Sanitizer
Solution
Procedure
1
Turn the toaster OFF.
Put on the heat-resistant
gloves.
Hot Surfaces
NOTE: Failure to wear
gloves while performing this
cleaning procedure can
result in burns.
2
Remove the release sheet from
the toaster and clean.
•Remove release sheet and
place on a clean, flat and
dry surface.
•Inspect the release sheet.
•Replace sheet if any tears
or cracks are found or if
excessive build-up cannot
be removed.
Equi ment Alert
NOTE: DO NOT fold or
crease release sheet or take
to the 3-compartment sink
to be cleaned.
Clean DCFT Release Sheets and Club & Conveyor Belts (continued)
527-502revC_EN 01/2014
©McDonald’s Corporation · Planned Maintenance Manual
Page 2of 4
2
(continued)
•Spray a clean, sanitizer-
soaked towel with
approved detergent
solution or McDonald’s
DR Concentrated
Disinfectant Cleaner
solution and use to wipe
release sheet clean.
•Clean the entire surface of
the release sheet.
•Immediately rinse the sheet
with a clean, sanitizer-
soaked towel.
•Flip the release sheet over
and repeat cleaning
instructions.
•Rinse this side of sheet.
Chemicals
Sanitizer solution, Detergent
solution or McDonald’s DR
Concentrated Disinfectant
Cleaner
•Install release sheet, making
sure that sheet is centered
over platen and the crease in
sheet is centered.
•Insert the release sheet over
the center bar of the in-feed
cover with one end of the
sheet in the Crown slot and
one end in the Heel slot.
•Position the crease on the
release sheet on top of the
in-feed chute center bar,
making sure that the sheet
corners are not curled
exposing the platen.
•Check to see that 12.7 mm
(1/2") of release sheet
extends below each side of
the platen.
NOTE: If 12.7 mm (1/2") of
the release sheet does not
extend below the bottom of
the platen, then the sheet is
not properly positioned.
NOTE: Make sure release
sheet is completely dry before
installing.
NOTE: When installing
release sheet, you may flip
inside-out and use the other
side if needed.
3
Clean front and rear conveyor
and club belts.
•With power off, remove
gloves from hands to
unscrew and lift lid and
open front conveyor door.
•Put heat-resistant gloves
back on to clean.
•Using the sanitizer-soaked
towel, clean the front main
conveyor and club belts.
•Close front door, power
unit ON, count 13 seconds
to reveal unclean side of
belt, power unit OFF, open
door and repeat cleaning
using the sanitizer-soaked
towel.
•Close door, power unit ON,
count 13 seconds again,
power unit OFF, open door
and repeat cleaning.
•Wipe down the inner panel
of the conveyor access
door with a clean,
sanitizer-soaked towel
sprayed with approved
detergent solution or
McDonald’s DR
Concentrated Disinfectant
Cleaner.
•Repeat the belt cleaning
process for rear main
conveyor belt, rear club
belt and rear inner panel.
Chemicals
Sanitizer solution, Detergent
solution or McDonald’s DR
Concentrated Disinfectant
Cleaner
•Close the conveyor access
door and secure.
•Re-tighten top cover
screws.
Clean DCFT Release Sheets and Club & Conveyor Belts (continued)
527-502revC_EN 01/2014
©McDonald’s Corporation · Planned Maintenance Manual
Page 3of 4
4
Remove wire bun chute and
clean.
•Lift chute at an angle,
lifting rear of chute and
then pulling chute forward
out of toaster.
•Spray a clean, sanitizer-
soaked towel with
approved detergent
solution or McDonald’s
DR Concentrated
Disinfectant Cleaner.
•Use the towel to clean the
wire bun chute.
•Use the towel to clean all
exterior areas of the
toaster.
Chemicals
Sanitizer solution, Detergent
solution or McDonald’s DR
Concentrated Disinfectant
Cleaner
5
Clean landing zone and
reinstall wire bun chute.
•Spray a clean, sanitizer-
soaked towel with
approved detergent
solution or McDonald’s
DR Concentrate
Disinfectant Cleaner.
•Use the towel to clean the
Pick-Up Zone.
•Spray all areas of the Pick-
Up Zone with SolidSense
Sanitizer and allow to air
dry.
Chemicals
Sanitizer solution, Detergent
solution or McDonald’s DR
Concentrated Disinfectant
Cleaner
•Install wire bun chute by
sliding the wire bun chute
over the landing zone and
into the toaster.
•Position the chute so that
the rear of the chute is
secured by 2 posts at the
rear of the toaster.
NOTE: Front edge of the wire
bun chute should be
positioned at the edge of the
toaster landing zone.
Proper installation of wire bun
chute is shown above right.
Improper installation of wire
bun chute is shown below
right.
Clean DCFT Release Sheets and Club & Conveyor Belts (continued)
527-502revC_EN 01/2014
©McDonald’s Corporation · Planned Maintenance Manual
Page 4of 4
6
Clean exterior of the toaster.
•Clean exterior of toaster
unit and all parts with a
clean, sanitizer-soaked
towel sprayed with
approved degreaser
solution or McDonald’s
DR Concentrated
Disinfectant Cleaner.
•Rinse exterior of unit using
a clean, sanitizer-soaked
towel.
NOTE: If streaking occurs,
spray a paper towel with KAY
Specialty Cleaner & Polish
and wipe down to polish the
exterior of the equipment.
Chemicals
Sanitizer solution, Degreaser
solution, and McDonald's
DR Concentrated
Disinfectant Cleaner, KAY
Specialty Cleaner & Polish
7
Turn the toaster ON.
Allow the toaster to warm up.
The toaster is now ready to
resume use.
8
Assemble o tional club feed
extension.
•Slide the slot on the left
side of the club feed
extension over the edge of
the club in-feed chute.
•Position the center tab on
the club feed extension
behind the rear edge of the
club in-feed chute.
•Position the outside tabs on
the club feed extension in
front of the rear edge of the
club in-feed chute.
•Push the club feed
extension down until it is
positioned on the in-feed
chute.
Clean DCFT – In-
Feed Assemblies
Why
To maintain effectiveness of the Prince Castle MCD DCFT
Time required 5
minutes to prepare
Time of day After Close
Hazard icons
Tools and supplies
Clean, sanitizer-soaked
towels
Bucket, soiled towels
Procedure
1
Turn the toaster OFF.
After waiting 15 minutes for
unit to cool, put on the heat-
resistant gloves.
NOTE: Failure to wear
gloves while performing
this cleaning procedure can
result in burns.
2
Remove and clean release
sheet follo ing Daily PM
procedure.
3
Remove the in-feed cover by
unscre ing top scre s
by hand and take the in-feed
cover to the 3-compartment
sink.
Feed Assemblies
Bi-Weekly
©
McDonald’s Corporation · Planned Maintenance Manual
To maintain effectiveness of the Prince Castle MCD DCFT
minutes to prepare
5 minutes to complete
For 24-
hour restaurants: during low
Heat-resistant Gloves
Approved
Detergent
solution
McDonald’s DR
Concentrated
Disinfectant
Cleaner
Approved Detergent
Solution and Sanitizer
Solution
4
Wash, rinse and sanitize the
top in-feed cover at the
3-compartment sink.
Wash and sanitize with
approved detergent solution
and sanitizer solution.
Allow
to air dry.
Sanitizer solution,
Detergent solution or
McDonald’s DR
Concentrated Disinfectant
Cleaner
5
Reinstall the in-feed cover.
6
Re-install release sheet
follo ing Daily PM procedure.
PR 34 W01
527-502revC_EN 01/2014
McDonald’s Corporation · Planned Maintenance Manual
Page 1of 2
Prince Castle DCFT-MCD Vertical Toaster Bi-Weekly PR 34 W01
hour restaurants: during low
-volume times
Approved Detergent
Solution and Sanitizer
Solution
Allow
Clean DCFT – In-Feed Assemblies (continued
527-502revC_EN 01/2014
©McDonald’s Corporation · Planned Maintenance Manual
Page 2of 2
7
Turn the toaster ON.
The toaster is now ready to
resume use once it reaches
operating temperature.
Deep Clean DCFT Conveyor Belt
Why
To maintain effectiveness of the Prince Castle MCD DCFT
Time required 5
minutes to prepare
Time of day After Close
Hazard icons
Tools and supplies
Clean, sanitizer
-
soaked towels
Bucket, soiled towels
Heat
-
resistant
gloves
Approved
Sanitizer
Solution
Approved
Degreaser
Solution
Procedure
1
Turn the toaster OFF.
After waiting 15 minutes for
unit to cool, put on the heat-
resistant gloves.
NOTE: Failure to wear
heat-resistant gloves while
performing this cleaning
procedure can result in
burns.
Deep Clean DCFT Conveyor Belt
Mont ly
©
McDonald’s Corporation · Planned
To maintain effectiveness of the Prince Castle MCD DCFT
conveyor belt
minutes to prepare
15 minutes to complete
For 24-
hour restaurants: during low
resistant
Approved Detergent
Solution
McDonald’s DR
Concentrated
Disinfectant Cleaner
KAY® QSR
Hi-Temp Grill Cleaner
2
Remove the main release
sheet from the toaster.
•Place release sheet on a
clean, flat and dry surface.
•
Inspect the release sheet for
tears, cracks and sticking.
•Replace when necessary.
quipment Alert
NOTE: DO NOT fold or
cease release sheet or take
to the 3-compartment sink
to be cleaned.
PR 34 M01
527-502revF_EN 01/2014
McDonald’s Corporation · Planned
Maintenance Manual
Page 1of 3
Prince Castle DCFT-MCD Vertical Toaster Monthly PR 34 M01
hour restaurants: during low
-volume times
McDonald’s
GR
Grill Cleaner
Inspect the release sheet for
Deep Clean DCFT Conveyor Belt (continued)
527-502revF_EN 01/2014
©McDonald’s Corporation · Planned Maintenance Manual
Page 2of 3
3
Open conveyor door.
•Unscrew and lift lid and
open front conveyor door.
4
Prepare grill cleaner
•Pour one packet of Hi-
Temp Grill Cleaner or
McDonald’s GR Grill
Cleaner into an entrée
base/lid or stainless steel
pan.
•Be sure to discard entrée
base/lid after use.
Hi-Temp Grill Cleaner or
McDonald’s GR Grill
Cleaner
5
Clean conveyor and club
belts.
•With power off, open front
conveyor door.
•Fully wring out a clean,
sanitizer-soaked towel.
•Quickly dip the towel in
Hi-Temp Grill Cleaner or
McDonald’s GR Grill
Cleaner and use to clean
the front main conveyor
and front club belts.
•Rinse the belts with
another clean, sanitizer-
soaked towel.
5
(continued)
•Close door, power unit ON,
count 13 seconds to reveal
unclean side of belts,
power unit OFF, open door
and repeat cleaning using
the sanitizer-soaked towel.
•Close door, power unit ON,
count 13 seconds again,
power OFF, open door and
repeat cleaning.
•Wipe down the inner panel
of the conveyor access
door with a clean,
sanitizer-soaked towel
sprayed with approved
detergent solution or
McDonald’s DR
Concentrated Disinfectant
Cleaner.
•Repeat the belt cleaning
process for rear belts.
Hi-Temp Grill Cleaner or
McDonald’s GR Grill
Cleaner, Sanitizer solution,
Detergent solution or
McDonald’s DR
Concentrated Disinfectant
Cleaner
NOTE: Do not clean ANY
belts while they are
turning.
•Close the conveyor access
door and secure.
•Re-tighten top cover
screws.
Deep Clean DCFT Conveyor Belt (continued)
527-502revF_EN 01/2014
©McDonald’s Corporation · Planned Maintenance Manual
Page 3of 3
6
Reinstall release sheet.
NOTE: Make sure release
sheet is completely dry
before installing.
NOTE: When installing
release sheet, you may flip
inside-out and use the other
side if needed.
7
Turn the toaster ON.
Allow
the toaster to warm up. The
toaster is now ready to
resume use.

Other Prince Castle Toaster manuals

Prince Castle Slim-Line 296 Series User manual

Prince Castle

Prince Castle Slim-Line 296 Series User manual

Prince Castle TX-230BKCE User manual

Prince Castle

Prince Castle TX-230BKCE User manual

Prince Castle Excalibur 411-SL Series User manual

Prince Castle

Prince Castle Excalibur 411-SL Series User manual

Prince Castle 428 Series User manual

Prince Castle

Prince Castle 428 Series User manual

Prince Castle 428-3B User manual

Prince Castle

Prince Castle 428-3B User manual

Prince Castle 464-B User manual

Prince Castle

Prince Castle 464-B User manual

Prince Castle CBT-SB-NA-1PS User manual

Prince Castle

Prince Castle CBT-SB-NA-1PS User manual

Prince Castle 428-BX User manual

Prince Castle

Prince Castle 428-BX User manual

Prince Castle DCFT-MCD Series User manual

Prince Castle

Prince Castle DCFT-MCD Series User manual

Prince Castle TX-208BK User manual

Prince Castle

Prince Castle TX-208BK User manual

Prince Castle IRT-SB-NA-1PS User manual

Prince Castle

Prince Castle IRT-SB-NA-1PS User manual

Prince Castle DCFT-MCD Series User manual

Prince Castle

Prince Castle DCFT-MCD Series User manual

Prince Castle 340-TCE User manual

Prince Castle

Prince Castle 340-TCE User manual

Prince Castle 428 User manual

Prince Castle

Prince Castle 428 User manual

Prince Castle DCFT-MINI-MCD Series User manual

Prince Castle

Prince Castle DCFT-MINI-MCD Series User manual

Prince Castle 297 Series User manual

Prince Castle

Prince Castle 297 Series User manual

Prince Castle TX-208 User manual

Prince Castle

Prince Castle TX-208 User manual

Prince Castle 212-GFCCE User manual

Prince Castle

Prince Castle 212-GFCCE User manual

Prince Castle 296 Series User manual

Prince Castle

Prince Castle 296 Series User manual

Prince Castle 247 Series User manual

Prince Castle

Prince Castle 247 Series User manual

Prince Castle IRT-SB-NA-1PS User manual

Prince Castle

Prince Castle IRT-SB-NA-1PS User manual

Prince Castle 428 Series User manual

Prince Castle

Prince Castle 428 Series User manual

Prince Castle 297-T12 User manual

Prince Castle

Prince Castle 297-T12 User manual

Prince Castle DCFT-BKCE User manual

Prince Castle

Prince Castle DCFT-BKCE User manual

Popular Toaster manuals by other brands

Scarlett SC-TM11022 instruction manual

Scarlett

Scarlett SC-TM11022 instruction manual

Zelmer ts1710 user manual

Zelmer

Zelmer ts1710 user manual

Paderno TOA005 user manual

Paderno

Paderno TOA005 user manual

Kenwood TTM320A instructions

Kenwood

Kenwood TTM320A instructions

Progress SKANDI instruction manual

Progress

Progress SKANDI instruction manual

PowerPac PPT05 quick start guide

PowerPac

PowerPac PPT05 quick start guide

TEFAL Express TT356630 manual

TEFAL

TEFAL Express TT356630 manual

DeLonghi CTZ 2003 Series Instructions for use

DeLonghi

DeLonghi CTZ 2003 Series Instructions for use

Jacob Jensen JBXFB01 user manual

Jacob Jensen

Jacob Jensen JBXFB01 user manual

Elite Gourmet ECT-4829 user manual

Elite Gourmet

Elite Gourmet ECT-4829 user manual

APW Wyott M-95-2 Specification sheet

APW Wyott

APW Wyott M-95-2 Specification sheet

Breville BSG220 Instruction booklet

Breville

Breville BSG220 Instruction booklet

Vitek VT-1583 ST user manual

Vitek

Vitek VT-1583 ST user manual

Hatco TM-5 Installation and operating manual

Hatco

Hatco TM-5 Installation and operating manual

Daewoo Emerald SDA2288 user manual

Daewoo

Daewoo Emerald SDA2288 user manual

Kenwood TTM312 manual

Kenwood

Kenwood TTM312 manual

KitchenBrothers KB4004 user manual

KitchenBrothers

KitchenBrothers KB4004 user manual

Sunbeam Toastermatic Instruction book

Sunbeam

Sunbeam Toastermatic Instruction book

manuals.online logo
manuals.online logoBrands
  • About & Mission
  • Contact us
  • Privacy Policy
  • Terms and Conditions

Copyright 2025 Manuals.Online. All Rights Reserved.