PROAIM Fly 22 User manual

Instruction Manual
Fly 22” Camera Crane Production
Package (P-FLY-22-PP)

2
Subject Page
Foreword 3
Introducon 4-5
Assembling 6-15
Warranty 16
At Proaim, our goal is to ensure 100% Customer Sasfacon in all that we do.
We back our sales with a 1 year warranty from the date of purchase and work hard
to resolve any problems in the unlikely event one should arise.
With our commitment to connuous improvement and your Feedback, building on
our reputaon of providing aordable, quality products is
PRIORITY #1.
Table of Contents

3
Dear Client,
On behalf of all the people that work so hard to provide you with the most
up-to-date, exible and cost-ecient producon gear, we would like to welcome
you into the Proaim family.
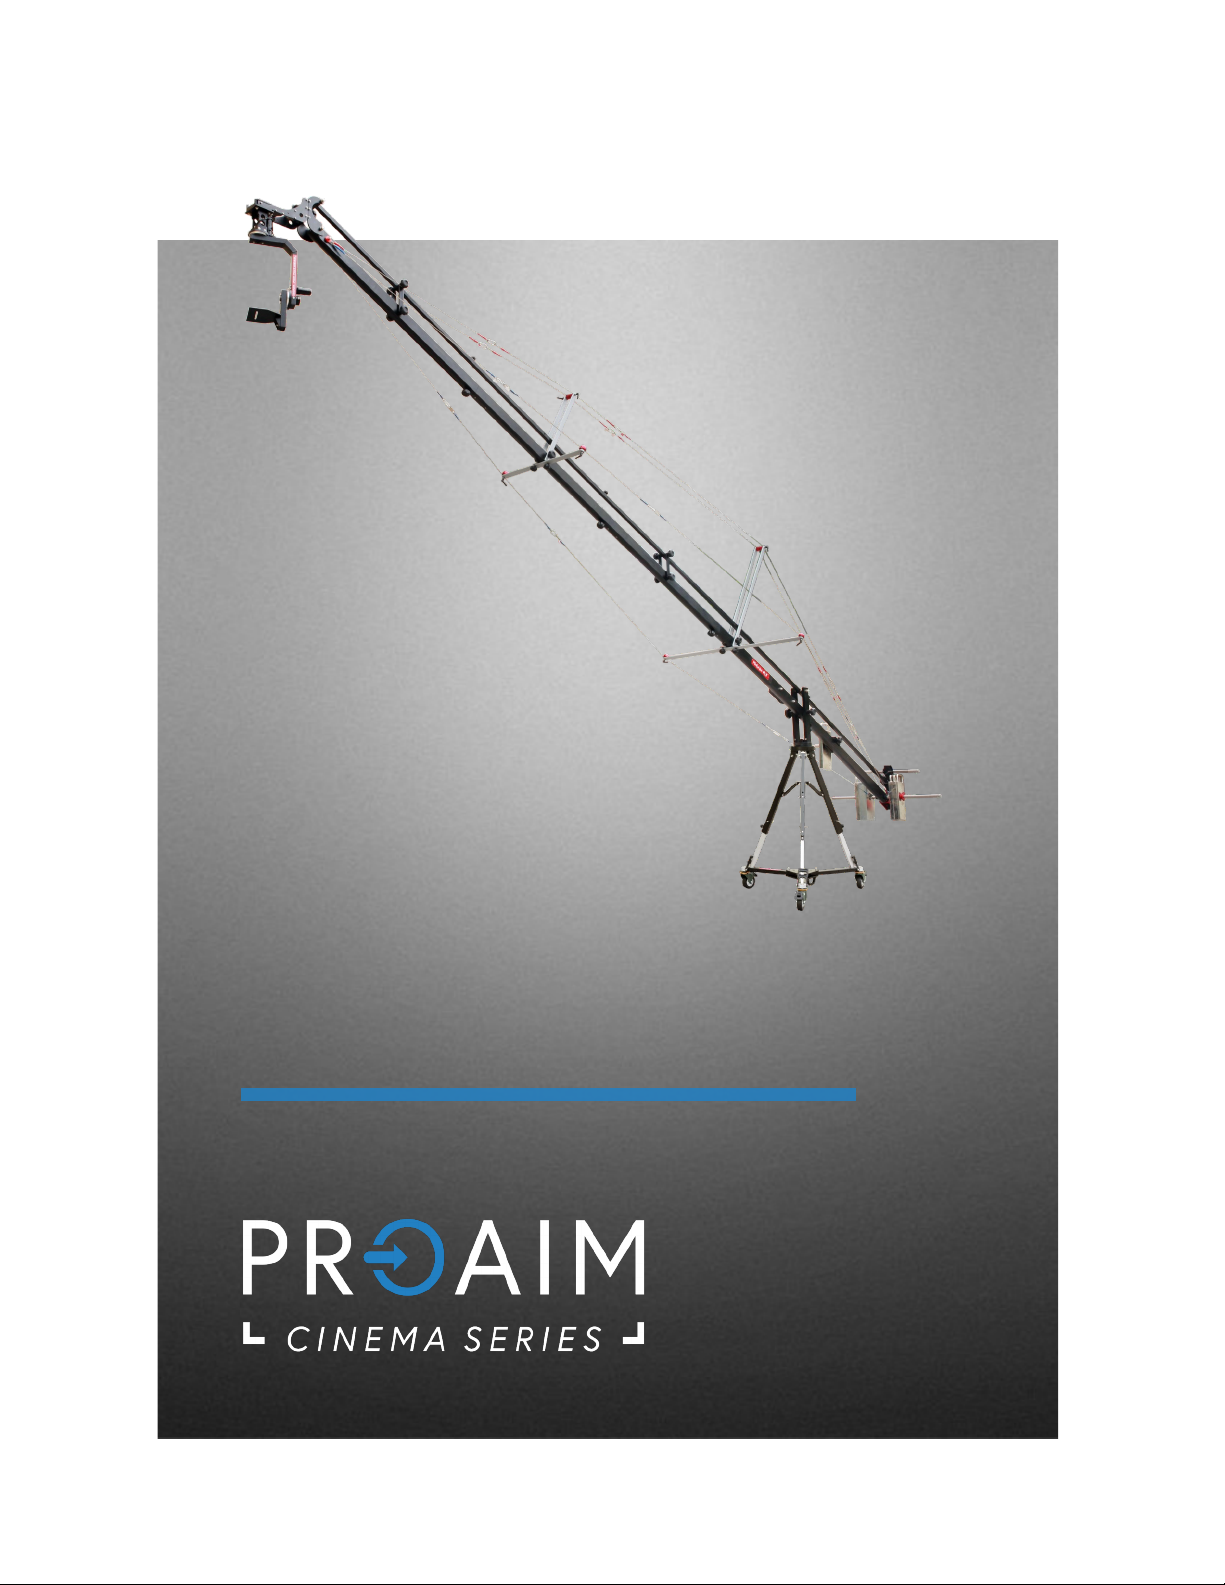
By purchasing your Proaim Fly 22' Camera Crane Producon Package, you have just
joined a host of designers, engineers, machinists, assembly, customer service and
oce sta that take great pride in all that they do. Our mantra of connuous im-
provement has been the guiding principle of how we conduct our business since
day one.
Once you have the opportunity to experience your new Proaim Fly 22' Camera
Crane Producon Package, we hope you will agree that we cra quality products at
a compeve price. Products designed to meet and exceed the standards of to-
day’s real producon world.
Standards set by our valued clients and standards we strive to maintain.
With Best Wishes,
Proaim Team
Welcome To Proaim!

4
Introducon
Almost every producon you see today has some type of crane shot in it because
shooters know how important it is to visualize story telling. Our Proaim Fly 22' is a
lightweight mul- funcon package that lets you boom your camera up and down,
move your camera in an innite number of 360 degree areas to incorporate various
angles easily. Its modular approach oers sophiscated versality to achieve steady
and balanced shots with cameras weighing up to 15kg/33lbs (without pan-lt).
Its unique interlocking joining system enables quick setup. It features a
well-engineered counterbalance system that uses standard weights (not included)
to maintain the balance of crane for aaining smooth and stable shots with
minimal eort. There’s a lot more that goes into this producon package, a rugged
dolly for dynamic moving shots.
What’s In The Box
Please inspect the contents of your shipped package to ensure you have received
everything that is listed below.
LW-100 Jib stand
2 X Red Cables 2X blue Cables
Spreader
Cable Guide support rods

5
Dolly
Weight closer Weight safety ends Connecvity Plate
Weight rod
Sr. Pan Tilt Head with Joysc box Lanc Zoom Controller
Cables and accessories
Packing

6
Take out the Spreader from the Accessory Bag. Spread the spreader on oor and open the
legs of spreader with the help of provided knob.
Assembling
Open the legs of 100mm jib stand then aach it to spreader, lock it in place with the
rubber grips.
In case of Dolly,
Loosen the screw of dolly and extend it as per your requirement and reghten the screw to
secure it.

7
Assembling Jib Secons
Now mount the central fork onto the tripod , then aach boom clamp to secure it well.
Slide the (1 A Secon) into the central fork (secon 2 B) and ghten with the help of knob.
Slide
Insert the connecng bars (secon 1 A) aached it with both the ends (weight bar&
secon 2B) the both the ends using the provided knob.
Connecon bar
knob

8
Assembling Cable Guide And Support Rod
Using the same approach insert 3rd, 4th and remaining secons to the joints and secure
via knobs as shown below.
Aach short cable guide rod on 3rd secon properly. Insert the knob onto the cable guide
rod and ghten the knob properly.
Loosen the bolts on cable guide rod in order to aach cable guide support rod to it.
Reghten the bolt.

9
Using the same steps to and aach long cable guide rod on 2nd secon as shown below.
Insert the weight rod on (1 secon) and ghten the bolt with the help of allen key as shown
in the picture.
Then insert the safety ends at both
sides onto the weight rod.

10
Adjusng The Stability Cables
Cable code (red)
Now aach the both red cable hook onto the provided bolts properly as shown below.
Note : Both the red cables are following same steps.
Aach (Red) cable to the (2 B secon) and (secon 3 C) & align itproperly with the help of
cable guide clamp and aached with (5 E secon).
Cable code (blue)
Aach the cables and insert the hook onto the weight rod.

11
Align it to the cable guide side rod and aach it to the end (secon 5th).
NOTE: You can adjust the cable with the
help of wire tensioner.
Aach your head plate properly and ghten the knob.

12
Loosen the bolts of head plate & remove the plate. Then you can aach as an under slung
mode.
Aach the Pan Tilt Head and secure by ghtening the bolts. Now mount your camera with
camera mounng screw on Pan Tilt Head.
Install the 12 volt DC power (4 pin XLR) in rear of joysck box.
Note: Any 12 volt baery may operate
the PROAIM™ Sr. PAN TILT HEAD as long
as the connector mates and is #1 pin
Negave and #4 pin Posive.
CAUTION: DO NOT USE A UNREGULATED POWER SUPPLY! IF USING A REGULATED POWER
SUPPLY IT MUST PRODUCE LESS THAN 12 VOLTS. MORE THAN 24 VOLTS MAY CAUSE
PERMANENT DAMAGE.

13
Joysck
The joysck may be operated hand held, from a at surface like a table top or aached to the
boom arm of the jib.
PROAIM™ Sr. PAN TILT HEAD Digital only
Aach the 4-pin power cord to rear of
joysck box.
Aach the four pin male connector of
cable to the four pin female connector
of head for panning & lng.
If the joysck control is opposite, undo
the connectors at the motors, rotate
180 degrees and re-install.
Loosen the knob of accessory bar and insert the rod and ghten the knob properly .

14
Loosen the knob and adjust the height and then reghten the knob.
Loosen the knob of controller box and insert into the rod and re-ghten the knob as shown
below.
Now slide in weight to it as per your requirement and screw in weight closer properly.
(Counter weight not included)

15
Mount the lanc zoom controller on
weight rod & ghten the knob, now
aach the one end of 9mtr wire with
lanc zoom controller and second end
of cable with camera.
YOUR PROAIM FLY 22 CAMERA CRANE PRODUCTION PACKAGE
ALL DRESSED UP AND READY TO GO!
(SHOWN WITH OPTIONAL ACCESSORIES)
WARRANTY
We oer a one year warranty for our products from the date of purchase.
We will repair or replace your product, free of charge, in the event of a defect in materials or
crasmanship obtained during normal use or handling based on the user manual. Please note
that we will not cover any shipping costs for returning the product to us. If any VAT or import
dues are applied to the return, we will also charge these costs to the customer.
The warranty does not include, by the way of example, damage caused by products that we do
not supply or from mishandling in transit, accident, misuse, neglect, lack of care of the product ,
or service by anyone other than our company.

16
We are not liable for incidental or consequenal damages resulng from the use of the unit or
occurring due to any breach of this warranty.
Replacement parts of the product will be provided at nominal cost (covering the cost price of the
replacement parts only) to the customers aer the Warranty Period has expired. We will cover
the complete cost of sending replacement parts within the warranty period. Aer that, Nominal
cost of the product & Actual shipping cost will be charged.
Do not send the unit to us without rst geng a response and geng the approval to send back
the item.
In case of any kind of dissasfacon, we urge you to Contact us immediately and we shall do our
Best to help you out. For any other assistance you can reach us via email.
For any other assistance you can reach us via email.
Other manuals for Fly 22
1
This manual suits for next models
1
Other PROAIM Construction Equipment manuals

PROAIM
PROAIM P-WV-2SD User manual

PROAIM
PROAIM P-21-J User manual

PROAIM
PROAIM CINEMA Series User manual

PROAIM
PROAIM P-CMBD-S User manual

PROAIM
PROAIM P-18-JS User manual

PROAIM
PROAIM P-WV-2PP User manual

PROAIM
PROAIM Cinema P-21-JS User manual

PROAIM
PROAIM P-WV-2 User manual

PROAIM
PROAIM CINEMA Series User manual

PROAIM
PROAIM JB-AS04-00 User manual