PROAIM P-CMBD-S User manual

Cambird Dolly Crane Slider
(P-CMBD-S)
I N S TR UC T I O N M A N UA L
All rights reserved
No part of this document may be reproduced, stored in a retrieval system, or transmitted by any form or by any
means, electronic, mechanical, photocopying, recording, or otherwise, except as may be expressly permitted by
the applicable copyright statutes or in writing by the Publisher.
For demonstration only

Proaim Cambird Dolly Crane Slider (P-CMBD-S) 2
INTRODUCTION
It is a heavy duty slider, mini jib and crane, all in one piece of performance package. The unique construc-
on instantly gets converted from a slider to a jib by one man. The adjustable camera plate acts as a great
soluon for your shoong needs whilst covering all the angles. The unique counter balance system deliv-
ers connuous balanced control with uerly uid camera movements. It is engineered to support camer-
as up to 5kg/11lb.
WHAT’S IN THE BOX
Please inspect the contents of your shipped package to ensure you have received all that is pictured and
listed below. The grey foam shipping/storage container has been especially designed to protect your pur-
chase while in transit and is a good place to keep your Proaim Cambird Dolly Crane Slider when not in
use.
CONTENTS OF SHIPPING BOX
BOX—1
(1) Proaim Cambird Dolly Crane Slider
(2) Crane Arm
Please use the following sequence of pictures and text in the order they appear to set up your new
Proaim Cambird Dolly Crane Slider. Technical assistance is available by contacng your sales repre-
sentave.
BOX—2
(3) Center Fork with knobs both side
(4) Two Ears with 4 bolts
(5) 37 pc counter weights (4mm each)
(1) Take the Center Fork and aach ears on both
sides. Secure the allen bolts with allen key.

Proaim Cambird Dolly Crane Slider (P-CMBD-S) 3
(3) Now Mount the Slider rail system on Center Fork and secure it well with provided red knobs on both
sides.
(2) Then Mount the Center Fork on your 100mm stand and secure it well with provided knob.
(4) Mount your at plate uid head onto the 3/8” threaded screw on the slider rail camera plaorm.
ghten the at plate uid head to the rail plaorm unl it is secure. Mount your camera package to
the uid head (camera package and uid head not to exceed 11 lb)

Proaim Cambird Dolly Crane Slider (P-CMBD-S) 4
(5) Add counterbalance weights on both sides of the steel shank to equal the weight of camera and uid
head package. Aach the red knobs for weight security.
(6) There is a red knob on the sliding plate that acts as a brake. Loosen that knob and slide the camera
away from the center and ghten the knob.
(7) Loosen the Red Knobs on both sides of the Center Fork and then hold both sides of the slider rail to
check the balance..

Proaim Cambird Dolly Crane Slider (P-CMBD-S) 5
(8) You may need to add or subtract counterbalance weight for precision. Repeat steps 6 & 7 if rebalanc-
ing is needed. Once the system has been accurately balanced, you may begin shoong.
(9) For slow sliding movements you may insert
the crank handle provided onto the crank
spline..
NOTE: Remove the crank handle when not in use
while operang as it may cause shaking of the
rail..
(10) To angle the rail for diagonal slides:
(i) move the camera to the middle of the slider rail. And then ghten the slider brake knob (red).

Proaim Cambird Dolly Crane Slider (P-CMBD-S) 6
(ii) Loosen the Red knob on both side of Center Fork and posion the Slider rail in the desired
posion. Then ghten the Red Knob again on both side of center fork..
(11) Hold the camera with one hand and loosen the black knob. Posion the camera base plate in de-
sired angle and then ghten with red knob opposite side of black knob..
(12) Now loosen the slider brake knob (red) and you are now ready to go.

Proaim Cambird Dolly Crane Slider (P-CMBD-S) 7
CAMBIRD MINI JIB CRANE SETUP
IMPORTANT : You must complete the counterbalance procedure in the rst secon of the manual before
compleng this setup.
(14) Slide the camera base plate to the end of the slider rail opposite to the crank spline and ghten the
slider brake knob (red).
(13) Level the slider rail setup and ghten the Red knobs on both sides of the Center Fork.
(15) Take the crane arm and install its end part opposite the front part with knob onto the focal point ad-
justment located on center fork.

Proaim Cambird Dolly Crane Slider (P-CMBD-S) 8
(18) You can adjust the height of crane arm by using the knob on height adjuster available at below of
Front part of crane arm.
(17) Aach the Front part of crane arm to the camera plaorm through its two screws and ghten the
knob on Front Part
(19) You may need to adjust the length of crane
arm to adjust framing. Use the adjusng
hand grip on the crane arm to accomplish
this.
(16) Turn the red knob to reposion the end of
crane arm so that it is on the top of the ad-
justment..

Proaim Cambird Dolly Crane Slider (P-CMBD-S) 9
(23) The mini Jib will now focus on the framed
object as the system elevates and descends.
You may need to use the adjusng hand grip
depending on your distance between the
camera and the point of interest.
(24) Loosening up the Panning knob on the middle of Center Fork will allow 360 degree panning move-
ment of the Slider Crane.
(21) As the mini jib moves up and down the
camera should stay parallel with the ground.
(22)If you desire to keep an object within the
camera frame, reposion the focal point ad-
justment to the boom.
(20) Loosen the Red Knob on each side of Cen-
ter Fork to acvate the mini Jib Crane Func-
on.

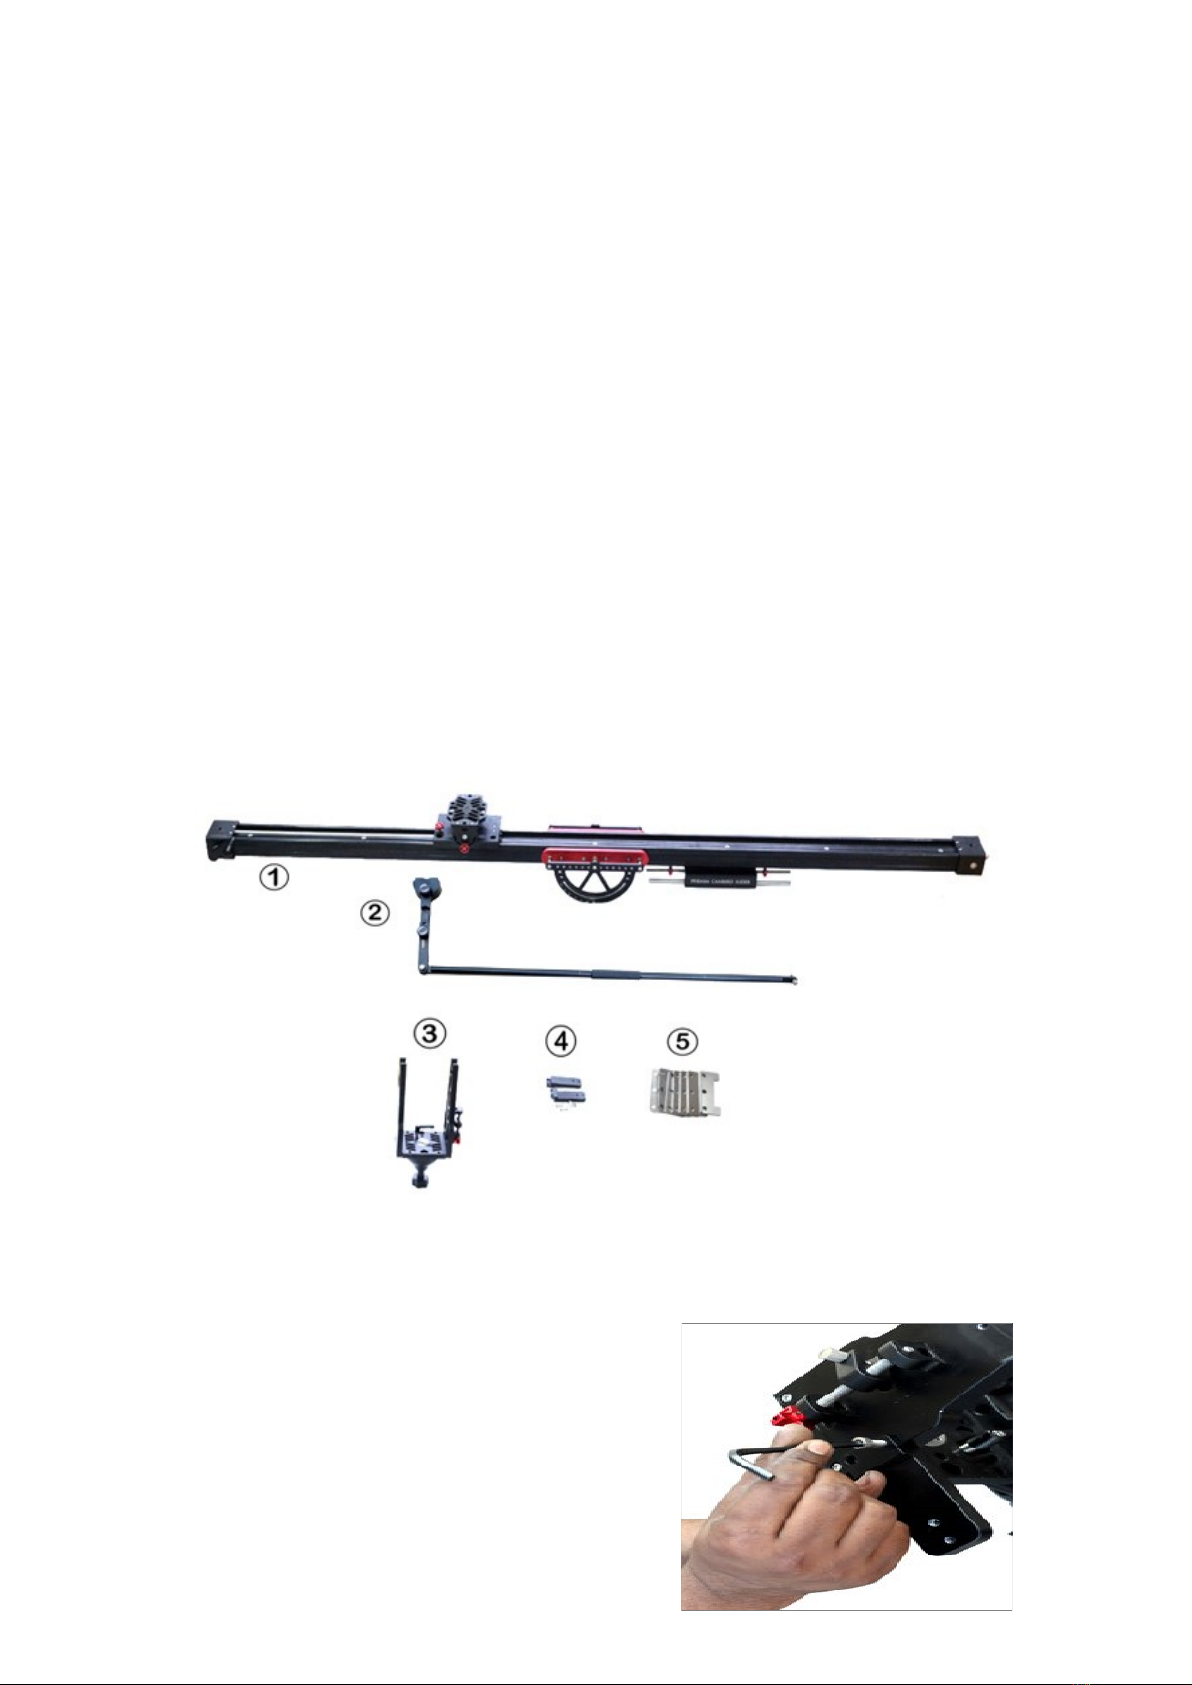
Proaim Cambird Dolly Crane Slider (P-CMBD-S) 10
WARRANTY
We oer a limited me warranty for our products. For Mechanical products we provide a 6 month war-
ranty & for electronic products we provide a 3 month warranty from the date of purchase.
We will repair or replace your product, free of charge, in the event of a defect in materials or crasman-
ship obtained during normal use or handling based on the user manual. Please note that we will not
cover any shipping costs for returning the product to us. If any VAT or import dues are applied to the
return, we will also charge these costs to the customer.
The warranty does not include, by the way of example, damage caused by products that we donot sup-
ply or from mishandling in transit, accident, misuse, neglect, lack of care of the product , or service by
anyone other than our company.
We are not liable for incidental or consequenal damages resulng from the use of the unit or occur-
ring due to any breach of this warranty.
Replacement parts of the product will be provided at nominal cost (covering the cost price of the re-
placement parts only) to the customers aer the Warranty Period has expired. We will cover the com-
plete cost of sending replacement parts within the warranty period. Aer that, Nominal cost of the
product & Actual shipping cost will be charged.
Donot send the unit to us without rst geng a response and geng the approval to send back the
item.
In case of any kind of dissasfacon, we urge you to Contact us immediately and we shall do our best to
help you out.
For any other assistance you can reach us via email.
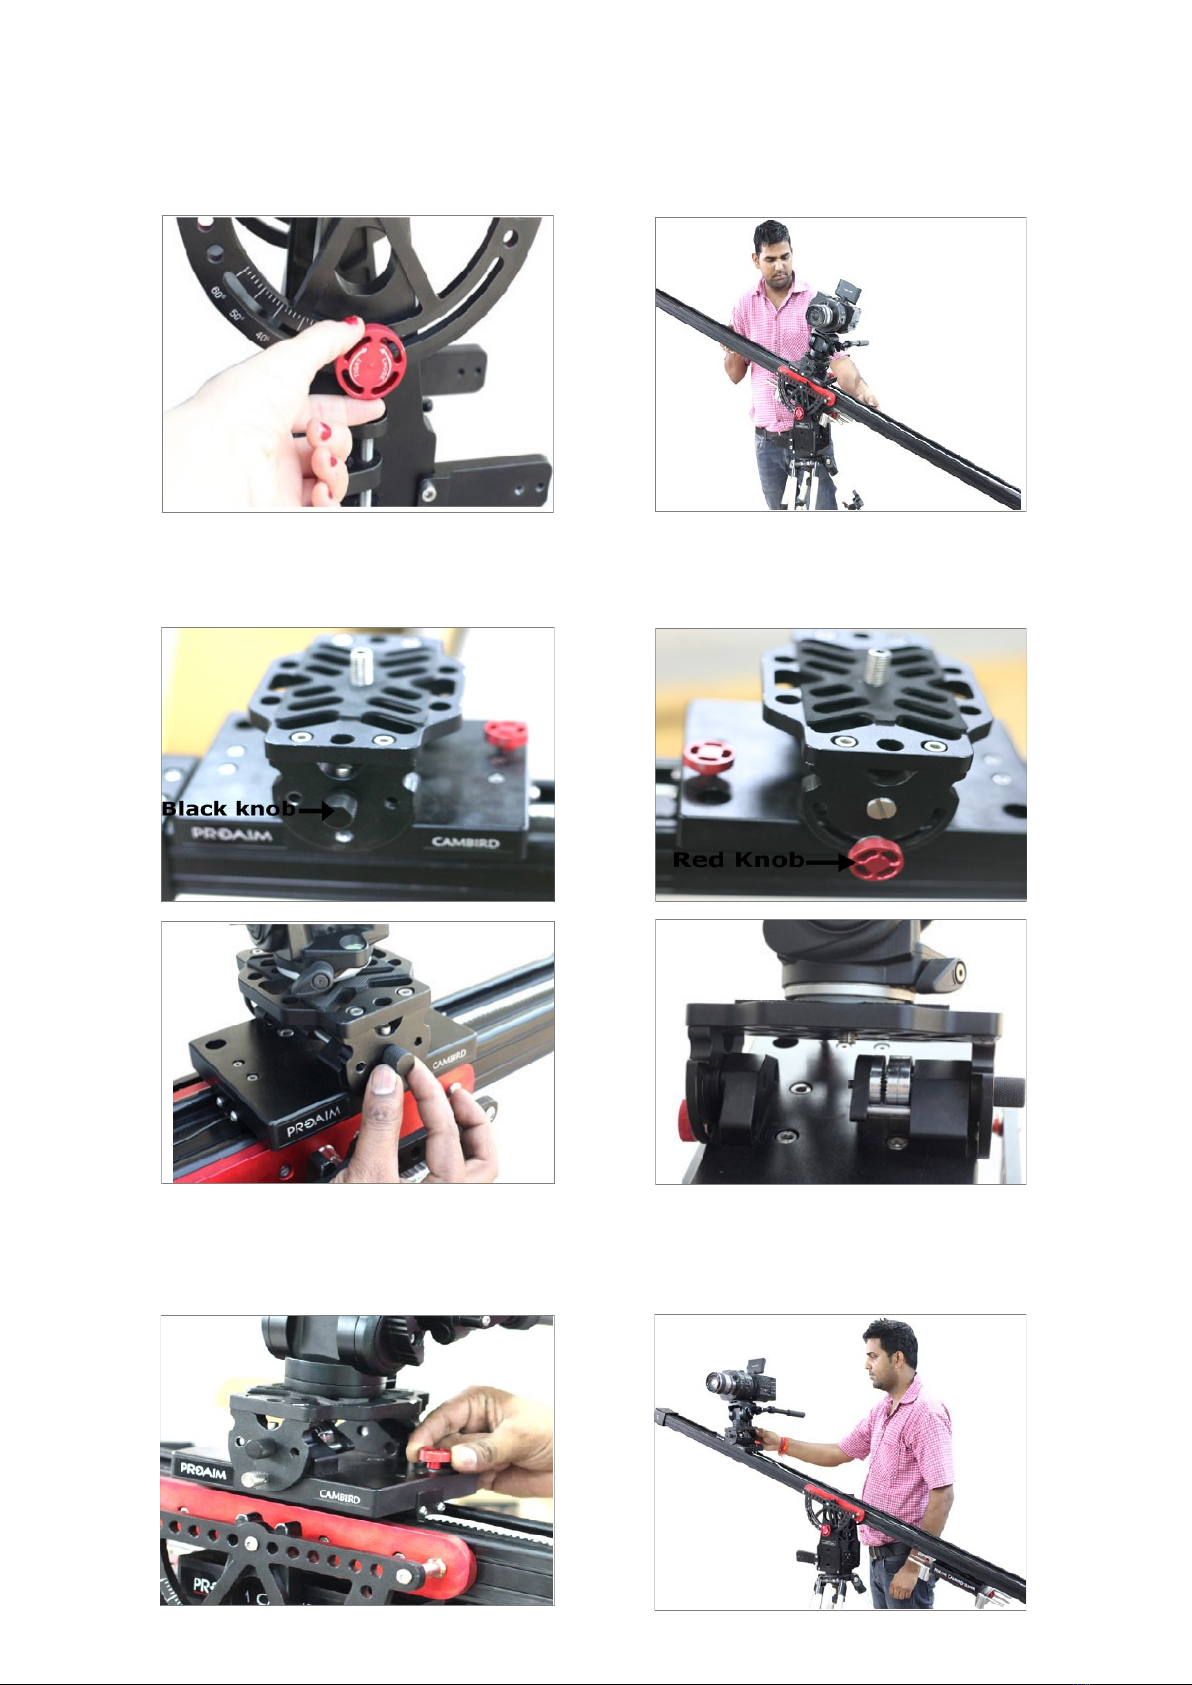
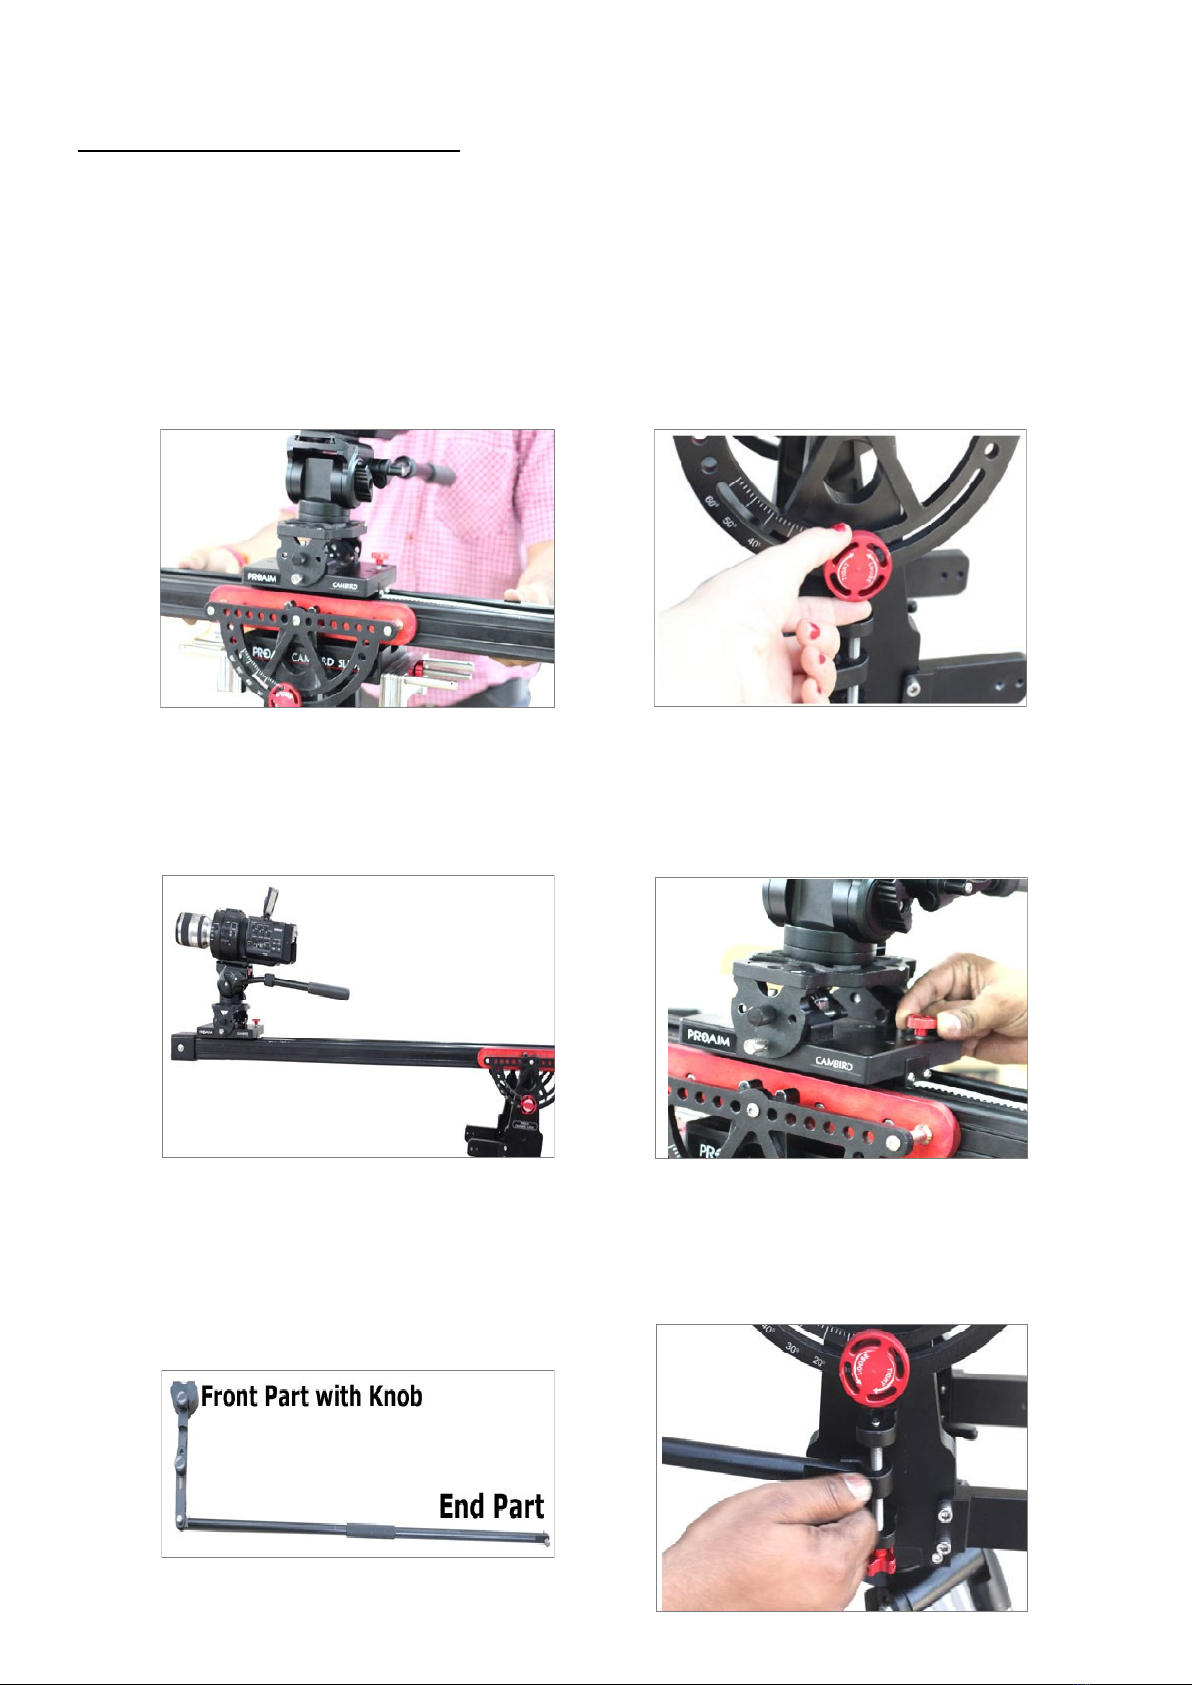
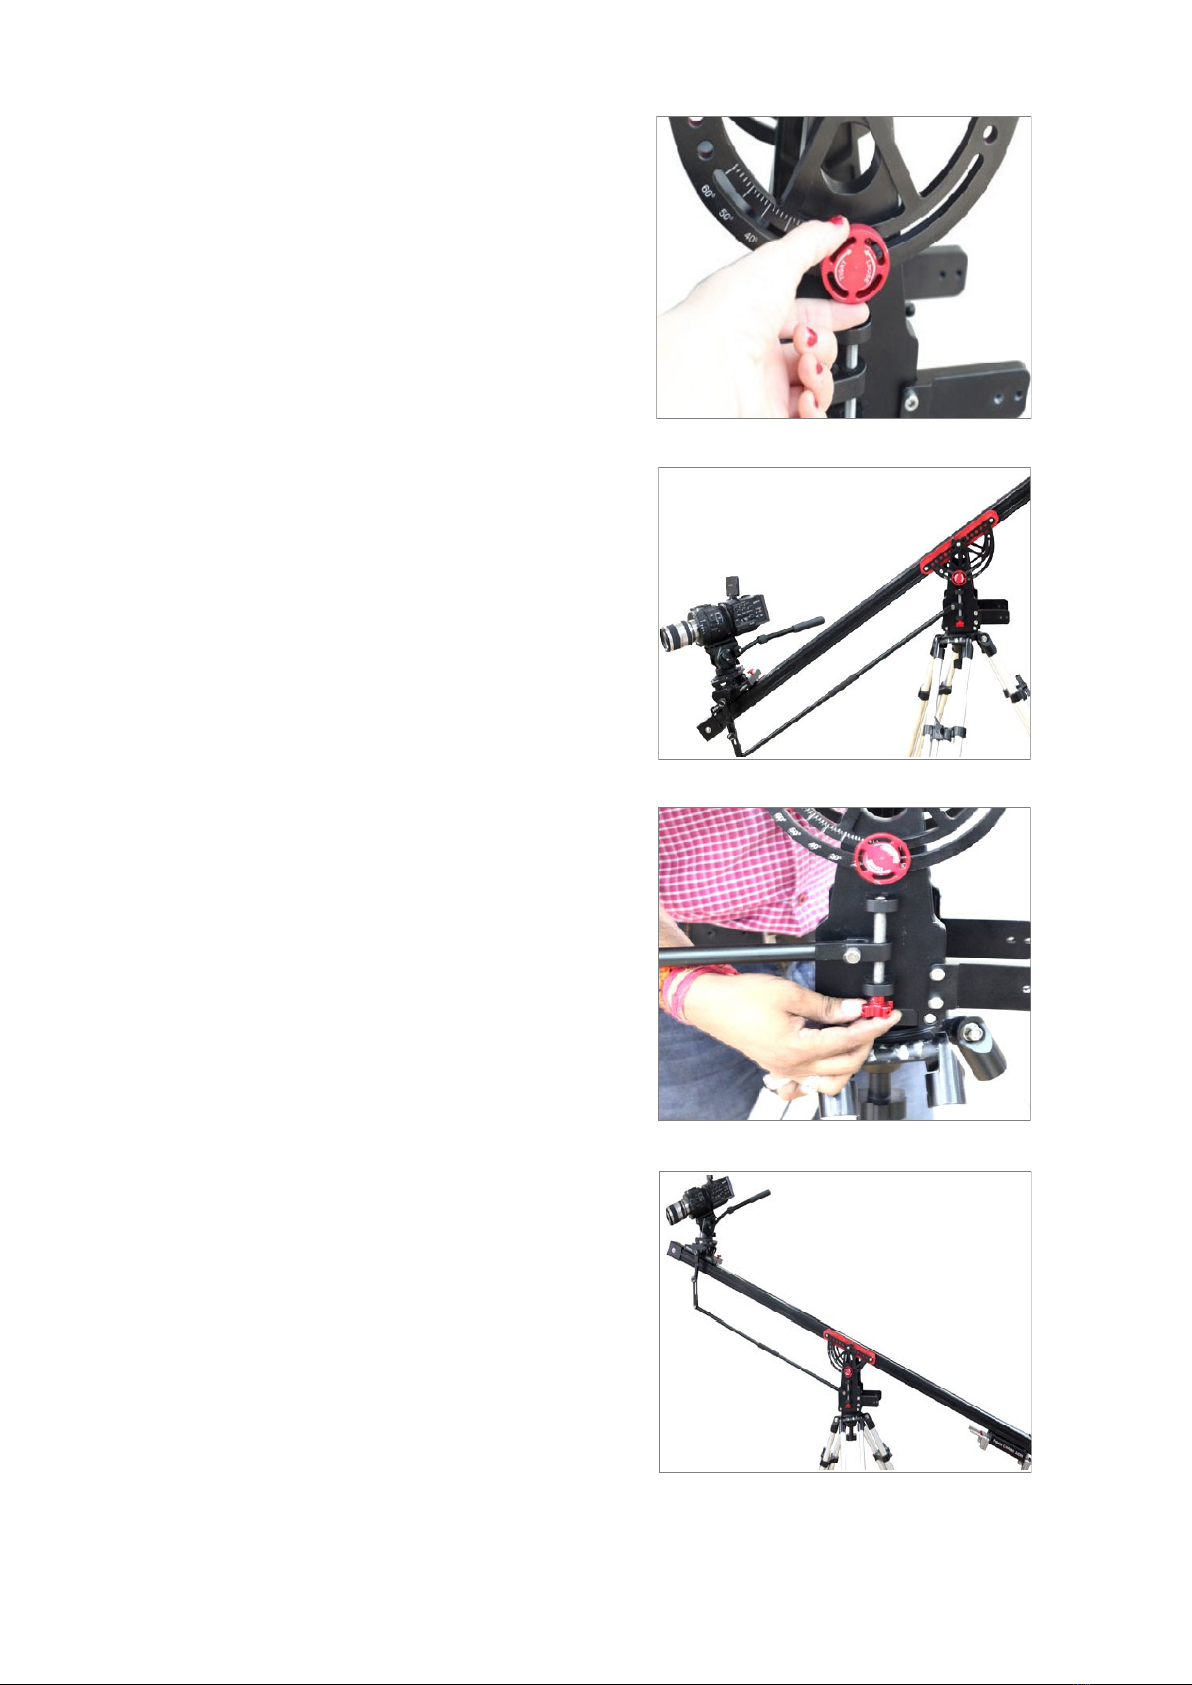
For Demonstraon Purpose
NOW YOUR PROAIM CAMBIRD DOLLY CRANE FULLY DRESSED UP AND READY TO GO
Table of contents
Other PROAIM Construction Equipment manuals

PROAIM
PROAIM JB-AS04-00 User manual

PROAIM
PROAIM CINEMA Series User manual

PROAIM
PROAIM P-WV-2PP User manual

PROAIM
PROAIM P-21-J User manual

PROAIM
PROAIM P-WV-2SD User manual

PROAIM
PROAIM Cinema P-21-JS User manual

PROAIM
PROAIM P-18-JS User manual

PROAIM
PROAIM CINEMA Series User manual

PROAIM
PROAIM P-18-JS User manual

PROAIM
PROAIM P-WV-2 User manual
Popular Construction Equipment manuals by other brands

Gardner Bender
Gardner Bender B2000 Cyclone instruction sheet

SoRoTo
SoRoTo 120L manual

Auto Crane
Auto Crane NEXSTAR III HC-7X owner's manual

Youngman
Youngman boss solo 700 user guide

Paragon Pro
Paragon Pro Tele-Tower 1101-22 Operator's manual

Harbor Freight Tools
Harbor Freight Tools Central Hydraulics 38024 Assembly and operating instructions