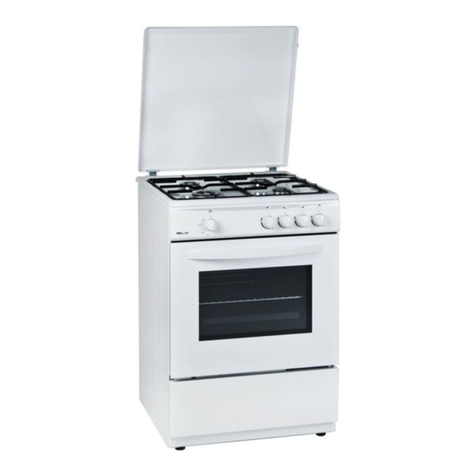
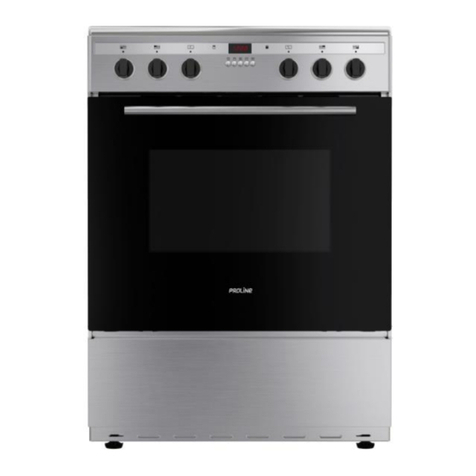
Proline CVMP660W-1 User manual

OPERATING AND INSTALLATION
INSTRUCTIONS OF
ELECTRICAL COOKER
EN
CVMP660W-1
Downloaded from www.vandenborre.be

Dear Customer,
Thank you for purchasing this Cooking Appliance. The safety precautions and
recommendations in these instructions are for your own safety and that of others.
They will also provide a means by which to make full use of the features offered by
your appliance.
Please keep this booklet in a safe place. It may be useful in future, either to
yourself or to others in the event that doubts should arise relating to its operation.
This appliance must be used only for its intended purpose, that is for the domestic
cooking of foodstuffs. Any other form of usage is to be considered as inappropriate
and therefore dangerous.
The manufacturer declines all responsibility in the event of damage caused by
improper or incorrect use of the appliance.
CE Declaration of conformity
This cooking appliance has been designed to be used only for cooking. Any other use
(such as heating a room) is improper and dangerous.
This cooking hob has been designed, constructed and marketed incompliance with:
- Safety requirements of the ''LVD'' Directive 2006/95/EC;
- Safety requirements of the ''EMC'' Directive 2004/108/EC;
- Requirements of the Directive 93/68/EC.
Downloaded from www.vandenborre.be

CONTENTS:
1. INTRODUCTION OF PRODUCT
2. SAFETY WARNINGS
3. INSTALLATION AND PREPARATION FOR USE
4. USING THE PRODUCT
5. CLEANING AND MAINTENANCE
6. TROUBLESHOOTING
Downloaded from www.vandenborre.be

1
PART 1: INTRODUCTION OF PRODUCT
List of Components
1. Cooktop
2. Control panel
3. Oven door handle
4. Storage compartment door
5-
6. Oven door
7. Oven Tray
8. Wire Grid
9. Grill element
Adjustable foot
10. Oven lamp
1
2
345
6
7
8
9
10
MODEL
CVMP660W-1 60 60 85
WIDTH
(cm)
HEIGHT
(cm)
DEPTH-
DECODER (cm)
Downloaded from www.vandenborre.be

4
2
READ THESE INSTRUCTIONS CAREFULLY AND COMPLETELY BEFORE USING YOUR
APPLIANCE, AND KEEP IT IN A CONVENIENT PLACE FOR REFERENCE WHEN NECESSARY.
General Safety Warnings
-This appliance is intended for domestic
household use only and should not be used for
any other purpose or in any other application,
such as for non-domestic use or in a
commercial environment.
- This appliance can be used by children aged
from 8 years and above and persons with
reduced physical, sensory or mental capabilities
or lack of experience and knowledge if they
have been given supervision or instruction
concerning use of the appliance in a safe way
and understand the hazards involved. Children
shall not play with the appliance. Cleaning and
user maintenance shall not be made by children
without supervision.
- If the supply cord is damaged, it must be
replaced by the manufacturer, its service agent
or similarly qualified persons in order to avoid a
hazard.
- WARNING: The appliance and its accessible
parts become hot during use. Care should be
taken to avoid touching heating elements.
Children less than 8 years of age shall be kept
PART 2 SAFETY WARNINGS
Downloaded from www.vandenborre.be

3
away unless continuously supervised.
- WARNING: Unattended cooking on a hob with
fat or oil can be dangerous and may result in
fire. NEVER try to extinguish a fire with water,
but switch off the appliance and then cover flame
e.g. with a lid or a fire blanket.
- WARNING: Danger of fire: do not store items
on the cooking surfaces.
- WARNING: If the surface is cracked, switch off
the appliance to avoid the possibility of electric
shock.
- The appliance is not intended to be operated
by means of an external timer or separate
remote-control system.
- During use, the appliance becomes hot. Care
should be taken to avoid touching heating
elements inside the oven.
- Do not use harsh abrasive cleaners or sharp
metal scrapers to clean the oven door glass and
other surface since they can scratch the surface,
which may result in shattering of the glass.
- Do not use steam cleaners for cleaning the
appliance.
The oven must be switched off before removing
the guard. After cleaning, the guard must be
replaced according to the instructions.
Downloaded from www.vandenborre.be

4
- WARNING: Ensure that the appliance is
switched off before replacing the lamp to avoid
the possibility of electric shock.
- CAUTION: Accessible parts may be hot during
use. Young children should be kept away.
General safety instructions:
• Your appliance is produced in accordance with all applicable local and international standards and
regulations.
• Maintenance and repair work must be made only by authorised service technicians. Installation and
repair work that is carried out by unauthorised technicians may endanger you. It is dangerous to alter
or modify the specifications of the appliance in any way.
• Prior to installation, ensure that the local distribution conditions (electricity voltage and frequency)
and the requirements of the appliance are compatible. The requirements for this appliance are stated
on the label.
• CAUTION: This appliance is designed only for cooking food and is intended for indoor domestic
household use only and should not be used for any other purpose or in any other application, such
as for non-domestic use or in a commercial environment or room heating.
• Do not try to lift or move the appliance by pulling the door handle.
• All possible security measures have been taken to ensure your safety. Since the glass may break,
you should be careful while cleaning to avoid scratching. Avoid hitting or knocking on the glass with
accessories.
• While the oven door is open, do not let children climb on the door or sit on it.
Installation Warnings
In order to prevent tipping of the appliance, the stabilizing brackets provided must be installed
following the manufacturer's instructions.
• Do not operate the appliance before it is fully installed.
• The appliance must be installed by an authorised technician and put into use. The producer is not
responsible for any damage that might be caused by defective placement and installation by
unauthorised people.
• When you unpack the appliance, make sure that it has not been damaged during transportation. In
case of any defect; do not use the appliance and contact a qualified service agent immediately. As
the materials used for packaging (nylon, staplers, styrofoam...etc) may cause harmful effects to
children, they should be collected and removed immediately.
• Protect your appliance against atmospheric effects. Do not expose it to effects such as sun, rain, snow
etc.
Downloaded from www.vandenborre.be

5
During use
• When you first run your oven a certain smell will emanate from the insulation materials and the
heater elements. For this reason, before using your oven, run it empty at maximum temperature for
45 minutes. At the same time you need to properly ventilate the environment in which the product is
installed.
• During usage, the outer and inner surfaces of the oven get hot. While opening the oven door, step
back to avoid the hot steam coming out of the oven. There may be a risk of burns.
• Do not put flammable or combustible materials, in or near the appliance when it is operating.
• Always use oven gloves to remove and replace food in the oven.
• Always position pans over the centre of the cooking zone, and turn the handles to a safe position
so they cannot be knocked or grabbed.
• If you will not use the appliance for a long time, plug it off. Keep the main control switch off.
• Make sure the appliance control knobs are always in the "0" (stop) position when it is not used.
• The trays incline when pulled out. Be careful not to let hot liquid spill over.
• When the oven door or storage compartment door is open, do not leave anything on it. You may
unbalance your appliance or break the door.
• Do not put heavy things or flammable or ignitable goods (nylon, plastic bag, paper, cloth...etc) into
the storage compartment. This includes cookware with plastic accessories (e.g. handles).
• Do not hang towels, dishcloths or clothes from the appliance or its handles.
During cleaning and maintenance
• Always turn the appliance off before operations such as cleaning or maintenance. You can do it
after plugging the appliance off or turning the main switches off.
• Do not remove the control knobs to clean the control panel.
TO MAINTAIN THE EFFICIENCY AND SAFETY OF YOUR APPLIANCE, WE RECOMMEND YOU
ALWAYS USE ORIGINAL SPARE PARTS AND TO CALL ONLY OUR AUTHORISED
SERVICE AGENTS IN CASE OF NEED.
Downloaded from www.vandenborre.be

6
PART 3: INSTALLATION AND PREPARATION FOR USE
Before any installation work can be carried out a number of requirements must be met.
Make sure that you and your installer are familiar with all the relevant building and fire
regulation requirements before choosing the location of your appliance.
This appliance must be installed in accordance with the instructions to validate the guarantee.
· The position of the cooker should ensure free access to all controls.
· Avoid installing the cooker next to a fridge, freezer or boiler.
· Do not install directly below or near combustible materials (e.g. curtains).
· Ensure that the surrounding material is heat resistant and non-combustible and must be
manufactured resistant to temperatures of up to 80°c.
· The electricity supply must be routed near to the installation.
· There must not be any plugs, wires or sockets in the wall directly above or behind the cooker top.
Certain minimum clearances must be allowed for when planning the unit's location.
· There should be an open space above the hob to allow kitchen odours to disperse. A cooker hood
may be installed to either absorb or extract the odours. The distance between the hob and the
hood must not be less than 65cm (with hood) or 70cm (without hood).
· There should be a space of a minimum of 2cm at the rear and sides of the appliance to ensure
good ventilation.
· If the kitchen furniture is higher than the cooktop, it must be at least 10cm away from the
appliance.
THIS APPLIANCE MUST BE INSTALLED BY AN AUTHORISED SERVICE TECHNICIAN
Min. 60cm
COOKER HOOD
Min. 42cm
Min. 42cm
Min. 65cm(with hood)
Min. 70cm(without hood)
Downloaded from www.vandenborre.be
7
Before proceeding with the electrical connection, verify that the current carrying capacity of the
is adequate for the maximum power rating of the cooker.
Do not use adaptors, multiple sockets and/or extension leads.
Fused switch must be accessible once the cooker has been installed.
IMPORTANT: The following diameters of supply cable must be used at least in case of one
phase connection:
electrical supply
Connection diagram is given below.
3x2.5 mm 220V~
3x2.5 mm 230V~
3x2.5 mm 240V~
²
²
²
5x1.5 mm 380V 3N~
5x1.5 mm 400V 3N~
5x1.5 mm 415V 3N~
²
²
²
3.2 ADJUSTMENT OF FEET
Do not lift by pulling the oven door handle.
Your cooker stands on 4 adjustable feet. When the cooker is
placed where it will be used, check if the cooker is balanced. If
it is not balanced, you can make the adjustment by turning the
feet clockwise if required. It is possible to raise the appliance a
maximum of 30mm by the feet. If the feet are adjusted
appropriately, you should not move the appliance by dragging,
it should be moved by lifting it up.
PART 3: INSTALLATION AND PREPARATION FOR USE
THIS COOKER MUST BE HARDWIRED ONLY
Figure 2
3.3 ELECTRIC CONNECTION AND SAFETY
One-phase, 32A Three-phase, 16A
Downloaded from www.vandenborre.be
8
4.2. USING THE CERAMIC HOB
The hob part of the appliance is controlled via a knob with 7 positions on the control panel.
Position ''0'' means off position. The remaining 6 positions indicate the following types of use:
1 :Heat maintenance position
2-3 :Heating in low temperature position
4-5-6 :Cooking, frying and boiling position
Pans with a flat base are highly recommended. Also the size of pan must be in line with the size of
the cooking zone for most efficient usage. Always centre the pan on the cooking zone. Using small
sized pans on the large sized cooking zone will cause heat loss and so energy will be wasted.
Please make sure to use only pans designed for ceramic glass.
4.1. CONTROL PANEL
The control panel of the cooker is shown below.
PART 4: USING THE PRODUCT
Oven function
control knob
Oven thermostat
control knob Hob control knobs
50°
MAX
200°150°
100°
6
1
25
3 4
6
1
25
3 4
6
1
25
3 4
6
1
25
3 4
6
1
25
3 4
Figure 4
CORRECT INCORRECT INCORRECT INCORRECT
Downloaded from www.vandenborre.be
9
After using any hob, please make sure that it is switched off.
Never touch any cooking zone, after it is turned off, because they retain the heat for a certain
period.
Clean the cooking zones with a damp cloth and a suitable washing up liquid after using them.
Oven Function Control Knob:
To select the desired cooking function, turn the knob to
the related symbol (figure 5). The details of the oven
functions will be explained in the following pages.
Oven Thermostat Knob:
Once the cooking function has been set, adjust to the
desired temperature by turning the oven thermostat knob
(figure 6), and the oven will start to operate. Thermostat
signal light will be on or off according to thermostat
operation.
Figure 10
Figure 11
4.2.1 Use of the Oven
PART 4: USING THE PRODUCT
Residual temperature indicator
During and after cooking, the glass reaches a high temperature. As long as this temperature
does not fall below 60°C, the residual temperature light will stay on (even if the switch is on "0"
position).
Downloaded from www.vandenborre.be

10
Static Cooking Function
Defrost Function
The oven will be turned on, the lower and upper heating
elements will start operating.
This function emits heat, ensuring even cooking of the lower and upper food. This is
ideal for making pastries, cakes, baked pasta, lasagne and pizza. Preheating the oven for 10 minutes
is recommended and it is best to cook on only one shelf at a time in this function.
's thermostat and oven lamp
The oven lamp will be turned on, the fan will start operating.
To use the defrost function, take your frozen food and place it in the oven on a shelf placed in the
third slot from the bottom. It is recommended that you place an oven tray under the
defrosting food, to catch the water accumulated due to melting ice. This function will not cook or
bake your food, it will only help to defrost it.
Fan Function
The oven will be turned on, the upper and lower heating
elements and fan will start operating.
This function is very good for obtaining results in baking pastry. Cooking is carried out by the lower
and upper heating elements within the oven and by the fan providing air circulation, which will
ensure even cooking. Preheating the oven for about 10 minutes is recommended.
's thermostat and oven lamp
PART 4: USING THE PRODUCT
Oven Lamp
Only the oven light will be turned on and it remains on in all the cooking functions.
Lower Heating and Fan Function
The oven will be turned on, the lower heating element and fan
will start operating.
This function is ideal for heating foods equally in a short time. Preheating the oven for about 10
minutes is recommended.
's thermostat and oven lamp
Downloaded from www.vandenborre.be

11
PART 4: USING THE PRODUCT
Grilling Function with Rotisserie
Faster Grilling Function with Rotisserie
The oven will be turned on, the grill heating element and turnspit
will start operating.
This function is used for grilling and toasting foods and roasting chicken with the roasting skewer.
For grilling, use the upper shelves of the oven;for roasting, use the skewer. Place foods in the centre
of the grid. Always place a tray beneath to catch any drips of oil or fat. For roasting chicken; please
look at the oven accessories part. Preheating the oven for about 10 minutes is recommended.
Warning: When grilling or roasting, the oven door must be closed and the oven temperature should
be adjusted to 190°C.
's thermostat and oven lamp
The oven will be turned on, the upper heating elements and the fan
will start operating.
This function is used for faster grilling or roasting and for covering a larger surface area, such as
grilling meats, and roasting chicken with the roasting skewer. For grilling, use the upper shelves of
the oven;for roasting, use the skewer. Place foods in the centre of the grid. Always place a tray
beneath to catch any drips of oil or fat. For roasting chicken; please look at the oven accessories part.
Preheating the oven for about 10 minutes is recommended.
Warning: When grilling or roasting, the oven door must be closed and the oven temperature should
be adjusted to 190°C.
's thermostat and oven lamp
Ventilated Grill Function with Rotisserie
The oven will be turned on, upper heating elements, the fan and the
turnspit will start operating.
This function is ideal for thicker foods when grilling and roasting chicken. For grilling, use the upper
shelves of the oven;for roasting, use the skewer. Place foods in the centre of the grid. Always place a
tray beneath to catch any drips of oil or fat. For roasting chicken; please look at the oven accessories
part. Preheating the oven for about 10 minutes is recommended.
Warning: When grilling or roasting, the oven door must be closed and the oven temperature should
be adjusted to 190°C.
's thermostat and oven lamp
Downloaded from www.vandenborre.be
12
ENERGY SAVING
During use of electrical cookers , it is best to use saucepans with flat bases.
Choose a cookware of appropriate size.
Using a lid will reduce cooking times.
Minimize the amount of liquid or fat to reduce cooking times.
When liquid starts boiling ,reduce the temperature setting.
Oven door should not be opened often during cooking period.
PART 4: USING THE PRODUCT
· If small sized containers are used, place them on the shelf such that they are precisely in the
middle of the wire.
· If food for cooking does not cover the entire surface of the cooktop, if it is food from the
freezer, the tray may undergo changes in shape due to high temperatures caused by cooking. The
tray will take back its original shape only when it has completely cooled after cooking. This is a
perfectly normal phenomenon caused by heat transfer.
· If you use dishes and other glassware for cooking, do not expose directly to cold after taking
them out of the oven. Do not place on cold or wet surfaces. Place them on a dry kitchen towel or
on a trivet, and make sure they cool slowly, so as to prevent them from breaking.
Downloaded from www.vandenborre.be
13
Cooker Accessories
Wire grid is used to grill or to place different cookwares on it.
To locate the wire grid correctly in the cavity, put it to any
rack and push it up to the end.
Wire grid
Storage compartment
Flapping door
System
Push pull
Deep tray is used to cook stews.
To locate the tray correctly in the cavity, put it to any rack and
push it up to the end.
Deep Tray
PART 4: USING THE PRODUCT
Roasting skewer
WARNING- Fit the grid correctly into
any rack in the oven
cavity and push it to the end.
corresponding
This compartment is used to store oven
accessories. Do not put any flammable
material in this compartment.
Downloaded from www.vandenborre.be

14
PART 4: USING THE PRODUCT
Downloaded from www.vandenborre.be
15
5.1 GENERAL
5.2 CLEANING THE OVEN
PART 5: CLEANING AND MAINTENANCE
Before starting to clean your cooker, be sure that all control knobs are off and your appliance
Before using the cleaning materials whether they are appropriate and recommended
by the manufacturer of your they may damage the surfaces. Do not use caustic creams,
abrasive cleaning powders, thick wire wool or hard tools.
Do not use cleaning materials containing particles that might scratch the enameled and painted
parts of your .
In the event of excess liquidsspilling on to your cooker, immediately clean up the spilt liquids.
Do not use steam cleaners for cleaning the cooker.
has
been allowed to cool.
, please check
cooker, as
cooker
· WARNING: The oven must be switched off and be allowed to cool down to room temperature
before cleaning.
· When cleaning the oven, do not use harsh abrasives, caustic cleaners or sharp objects, use warm
soapy water.
· Clean the knobs and control panel using mild cleaners which do not contain abrasives.
Glass door:
· Clean the glass part of the door with hot water and a soft cloth. Wipe the seals with a soft cloth
taking care not to damage them.
·
· Remove spillages and other types of incrustations.
· Dust or food particles can be removed with a damp cloth.
· If you use a detergent, please make sure that it is not abrasive or scouring. Abrasive or scouring
powders can damage the ceramic surface of the hob.
· All traces of the cleaner must be removed with a damp cloth.
· Dust, fat and liquids from food that has boiled over must be removed as soon as possible. If they
are allowed to harden they become increasingly difficult to remove. This is especially true in the
case of sugar/syrup mixtures which could permanently pit the surface of the hob if left to burn on
it.
· Avoid using a knife or other sharp utensil as these may damage the ceramic surface.
· Do not use steel wool or an abrasive sponge which could scratch the surface permanently
5.3. CLEANING THE CERAMIC HOB
Before starting cleaning, wait for the ceramic hob to completely cool down.
Downloaded from www.vandenborre.be
16
PART 5: CLEANING AND MAINTENANCE
CLEANING THE ENAMELLED PARTS
In order to keep them as new, regularly clean the enamelled parts with soap water, and then wipe
them with a soft cloth. Do not clean when the parts have not been allowed to cool down. Never
use any abrasive cleaner. Do not let the following items in prolonged contact with enamelled parts:
vinegar, coffee, milk, salt, water, lemon or tomato juice. These can cause irremediable damage to
the enamelled surface.
CATALYTIC CLEANING
Catalytic cleaning is operated via a special coating on the removable sides of the oven. The
catalytic oven sides are covered with a micro-porous enamel absorbing and removing the fat
residues during cooking. Where oily liquids have been spilt, self-cleaning action will not be
sufficient. You will have to wipe the greasy marks with a damp cloth and run the oven at 250°C for
one hour. Wait for the oven to cool down and wipe again with a damp cloth. Clean the catalytic
parts using only soapy water, and never cleaning materials for enamel. If you need to use cleaners
for enamel, remove the catalytic panel following the instructions above. Note that with catalytic
cleaning, the cavity will not be fully cleaned: you will have to clean the enamelled parts as well as
the oven door glass yourself.
Warning: under such conditions, the surfaces may get hotter than usual and children should be
kept away. How to remove the catalytic panel
How to remove the catalytic panel
To remove the catalytic panel:
Unscrew the screws on each side of the catalytic panel.
Downloaded from www.vandenborre.be

How to remove the oven door
Saddle
bracket Recessed
form
1
2
3
To remove the oven door:
• Open the oven door (figure 1).
• Open the blocking bracket to final position (figure 2).
• Close the door to the last position it will stay open by
itself before it closes (figure 3). Lift the door up and out
of the oven.
Make sure the hinges are correctly fitted in the bracket
(figure 2).
To reinstall the door, invert the above instructions.
Check that
the hinges are in the right position.
17
PART 5: CLEANING AND MAINTENANCE
5.4. MAINTENANCE
Change of Oven Lamp
The change of oven lamp must be done by an authorised service company. Before changing the
lamp , the cooker should be and it should be cold. After removing the lid in front of
the light, take also the bulb off its place. Insert the new bulb resistant to 300ºC (230V, 25Watt,
Type E14), into the place of the bulb you have removed. Then fit the light protecting glass back
into its place.
switched off
Downloaded from www.vandenborre.be
Table of contents
Languages:
Other Proline Cooker manuals

Proline
Proline CP561 STE-2 User manual

Proline
Proline ESI 1050 Operation instructions

Proline
Proline EFG 502 User manual

Proline
Proline PGC66 WF/1 User manual

Proline
Proline PMC66SS-N User manual

Proline
Proline PMC57W-F User manual

Proline
Proline P601IMCIXT User manual

Proline
Proline PCC561SL User manual

Proline
Proline Euro EP54UEWH Firmware update

Proline
Proline PMC56W-F User manual
Popular Cooker manuals by other brands

SIGURO
SIGURO SGR-SO-S150W operating instructions

Thetford
Thetford K1000 Series installation manual

Indesit
Indesit KD6G25M Instructions for installation and use

Elba
Elba EEC 566 WH Instructions for the use - installation advices

Indesit
Indesit ID50C1 S operating instructions

North
North FGASE4 Technical Instruction