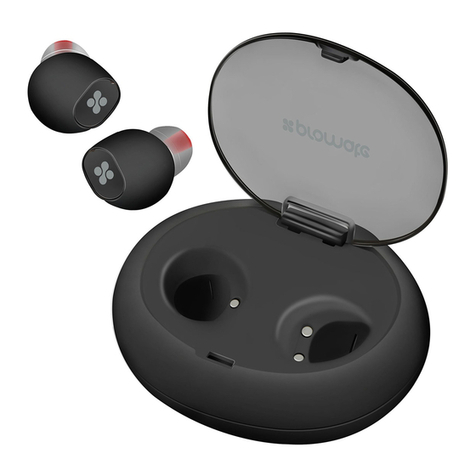
Promate PrimeBud User manual

1 3 4 5
6 7 8 9 10 11
12 13 14 15 16 17
18 19 20 21 22 23
24 25 26 27 28 29
30 31 32 33 34
36 37 38
35
2
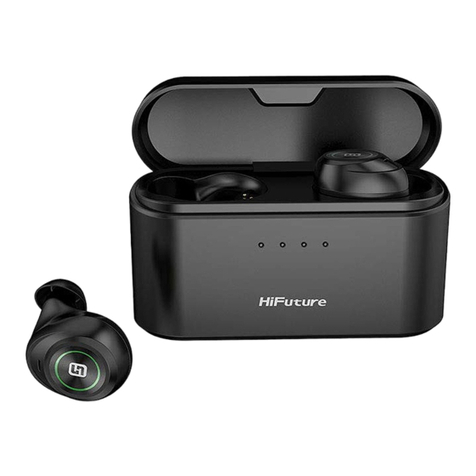
PrimeBud
Secure Fit Design • Rich HD Sound • Portable Charging Case
Ultra-Mini True Wireless Stereo Earphones

1 3 4 5
6 7 8 9 10 11
12 13 14 15 16 17
18 19 20 21 22 23
24 25 26 27 28 29
30 31 32 33 34
36 37 38
35
2
Introduction
Go wireless with PrimeBud, a pair of truly wireless smart earphones; PrimeBud’s innovative lightweight
design and best in class technology gives you freedom and comfort to listen to your tracks for hours.
Communicate and handle calls with the built-in wireless Bluetooth microphone. 4.5 hours battery life,
enough for any workout and the portable charging case lets you recharge the headset up to 3 times
on the go!
PackagingContents
•PrimeBud
•Charging Case
•User Guide
•2Pcs Small Ear Buds
•2Pcs Large Ear Buds
Specifications
•Bluetooth Version: 4.2
•Bluetooth Chipset: CSR 64110
•Bluetooth Profile: HSP, HFP, A2DP
•Input: 5V, 500mAh
•Output: 5V, 100mAH
Features
• Completely Wireless Earbuds: A new generation of True Wireless Stereo (TWS) earbuds that deliver
incredible sound without the cord.
• Permanently Untangled: PrimeBud offers a truly wire-free experience to give you complete freedom
of movement.
• Audio Evolved: Experience acoustic bliss with wirelessly streamed audio that lets you feel every
note of your music when you hear it.
• Long Battery Life: Built-in rechargeable lithium polymer battery, it supports up to 4.5 hours playing
/talking time.
•Impedance: 16Ω - 32Ω ±(15%)
•Speaker Frequency: 50Hz~20KHz
•Charging Time: 1 hour
•Playing Time: 5-6 hours
•Headset Battery Capacity: 65mAh x 2

1 3 4 5
6 7 8 9 10 11
12 13 14 15 16 17
18 19 20 21 22 23
24 25 26 27 28 29
30 31 32 33 34
36 37 38
35
2
• Passive Noise Cancellation: Enjoy your favourite tracks without any disturbance.
• Ergonomic Design: Created for comfort, designed to last. The premium quality earbuds provide a
custom fit and help minimise sound leakage.
• Ultra-Portable: The ultra-light weight design makes PrimeBud a very portable accessory to use,
even on the move.
• Rugged Design: This headset’s lightweight design is built tough to ensure a robust, comfortable .
fit that does not fall out easily.
Compatibility
PrimeBud can be paired to any Bluetooth enabled device.
Precautions
Please read all safety instructions and warnings thoroughly before using this product. Improper use of
this product may result in damage to this or attached products.
1.Do not disassemble the product or attempt to fix it.
2.Do not attempt to replace any part of this product or battery inside.
3.Do not crush, puncture, dispose of in fire, short the contacts or expose the product to water or other liquids.
4.Do not store or use the product in a high-temperature environment, including intense sunlight or heat.
5.Avoid drops, bumps, abrasions and impacts.
6.If there is any reason to believe that there is damage to the product, discontinue use immediately.
7.If you find that the product is too hot, is emitting an odour, or is deformed, punctured or exhibits any
suspicious or abnormal behaviour, discontinue use immediately and contact our customer service.
8.Always charge this product before extended storage.

1 3 4 5
6 7 8 9 10 11
12 13 14 15 16 17
18 19 20 21 22 23
24 25 26 27 28 29
30 31 32 33 34
36 37 38
35
2
123
4
5
6
7
Appearance & Interface Description
1.Led Indicator
2.Multi-function Button
3. Mic
4.Earbuds Charging Indicator
5.Power Button
6.Charging Case Led Indicator
7.Charging Case USB Charging port
Operation Instructions
1.Switching PrimeBud On/Off
•To turn on PrimeBud, press and hold the Multi-function Button on one of the earpieces for about 5
seconds until the Blue LED and red LED starts flashing alternately.
•To turn off PrimeBud manually, press and hold the Multi-function Button on one of the earpieces
for about 4 seconds.
2.Pairing PrimeBud
•Before connecting PrimeBud to your device, make sure that PrimeBud is in pairing mode.
•To enter pairing mode, press and hold the Multi-function Button on one of the earpieces for 5
seconds, until Blue LED and red LED starts flashing alternately.
•Press and hold the Multi-Function button on the other earpiece for 3-4 seconds until the red LED’s
start flashing and the LED on the first earpiece flashes blue and red.
•Turn on the Bluetooth function of the device you wish to connect and search for “PrimeBud”. From
the list of found devices, select“PrimeBud”.
•PrimeBud is now connected to your device.

1 3 4 5
6 7 8 9 10 11
12 13 14 15 16 17
18 19 20 21 22 23
24 25 26 27 28 29
30 31 32 33 34
36 37 38
35
2
3.Call Function
• Answering a Call: Press the Multi-function Button on the earpiece once to answer an incoming call.
• Rejecting a Call: Double press and hold the Multi-function Button on the earpiece for to reject an
incoming call.
• Ending a Call: Press the Multi-function Button on the earpiece once to end an ongoing call.
4.Music Function:
• Play/ Pause: Press the multi-funtion button once on either earpiece to play/pause a music track
• Next Track: Double press the multi-function button on either earbud to skip to the next track
5.Charging PrimeBud Earphones & Charging Case
• PrimeBud’s charging case has a built-in battery.
• To charge the charging case, plug one end of the charging cable into PrimeBud charging case charging
input and the other end into a USB Power Adapter or a Laptop/Desktop.
• The red LED turns on to indicate that the charging case is charging. Once completely charged the LED
will turn off.
• Place the earpieces into the charging case to charge the earpieces.
• The red LED indicator on the lid of charging case turns on to indicate that the headset is charging
normally and the blue LED will turn on once fully charged.
Correct disposal of this Product
(Waste Electrical & Electronic Equipment (WEEE)
Your product is designed and manufactured with high quality materials and components
which can be recycled and reused.
This symbol means that electrical and electronic equipment, at their end of-life should be
disposed of separately from your household waste.
Please dispose of this equipment at your local community waste
collection/recycling center.
This product complies with European safety and electrical interference directives
This product does not contain environmentally hazardous materials (lead, mercury,
cadmium, hexavalent chromium and brominated flammable agents: PBB and PBDE).
1 3 4 5
6 7 8 9 10 11
12 13 14 15 16 17
18 19 20 21 22 23
24 25 26 27 28 29
30 31 32 33 34
36 37 38
35
2
123
4
5
6
7
Apariencia y descripción de Interface
1.Indicador Led
2.Botón multifunción
3.Micrófono
4.Indicador de carga de auriculares
5.Botón de encendido
6.Indicador Led de estuche de carga
7.Puerto de carga USB de estuche de carga
Instrucciones de operación
1.Encendido/Apagado de PrimeBud
•Para encender PrimeBud, presione y mantenga presionado el Botón Multifunción en uno de los
auriculares durante aproximadamente 5 segundos hasta que el LED azul y el LED rojo comiencen a
destellar alternativamente.
•Para apagar PrimeBud manualmente, presione y mantenga presionado el Botón Multifunción en
uno de los auriculares durante aproximadamente 4 segundos.
2.Sincronización de PrimeBud
•Antes de conectar PrimeBud a su dispositivo, asegúrese de que PrimeBud esté en modo sincronización.
•Para ingresar a modo sincronización, presione y mantenga presionado el Botón Multifunción en
uno de los auriculares durante 5 segundos, hasta que el LED azul y el LED rojo comiencen a destellar
alternativamente.
• Press and hold the Multi-Function button on the other earpiece for 3-4 seconds until the red LED’s start
flashing and the LED on the first earpiece flashes blue and red.
• Turn on the Bluetooth function of the device you wish to connect and search for“PrimeBud”. From the
list of found devices, select“PrimeBud”.
• PrimeBud is now connected to your device.

1 3 4 5
6 7 8 9 10 11
12 13 14 15 16 17
18 19 20 21 22 23
24 25 26 27 28 29
30 31 32 33 34
36 37 38
35
2
• Presione y mantenga presionado el Botón Multifunción en el otro auricular durante 3-4 segundos hasta
que el LED rojo comience a destellar y el LED en el primer auricular destelle azul y rojo.
• Encienda la función Bluetooth del dispositivo que desea conectar y busque “PrimeBud”. De la lista de
dispositivos que encuentre, seleccione“PrimeBud”.
• PrimeBud ahora está conectado a su dispositivo.
3.Función de llamada
• Responder a llamada: Presione una vez el Botón Multifunción en el auricular para responder una
llamada entrante.
• Rechazar una llamada: Presione dos veces y mantenga presionado el Botón Multifunción en el auricular
para rechazar una llamada entrante.
• Finalizar una llamada: Presione una vez el Botón Multifunción en el auricular para finalizar una llamada
en curso.
4.Función música:
• Reproducir/ Poner en pausa: Presione una vez el Botón Multifunción en el auricular para reproducir
/poner en pausa una pista de música.
• Pista siguiente: Presione dos veces el Botón Multifunción en cualquiera de los auriculares para saltar
a la pista siguiente.
5.Cargar auriculares y estuche de carga PrimeBud
• El estuche de carga PrimeBud cuenta con una batería integrada.
• Para cargar el estuche de carga, enchufe un extremo del cable de carga a la entrada de carga del
estuche de carga PrimeBud y el otro extremo a una Adaptador USB de alimentación o a un ordenador
portátil/de escritorio.
• El LED rojo se enciende para indicar que el estuche de carga se está cagando. Una vez que esté
completamente cargado el LED se apagará.
• Coloque los auriculares en el estuche de carga para cargar los auriculares.
• El indicador de LED rojo en la tapa del estuche de carga se enciende para indicar que el auricular se
está cargando normalmente y el LED azul se encenderá una vez que esté totalmente cargado.

1 3 4 5
6 7 8 9 10 11
12 13 14 15 16 17
18 19 20 21 22 23
24 25 26 27 28 29
30 31 32 33 34
36 37 38
35
2
123
4
5
6
7
Aspect & Description Interface
1.Indicateur LED
2.Bouton Multifonction
3. Micro
4.Indicateur Chargement des Ecouteurs
5.Bouton de Marche
6.Indicateur LED Etui de Chargement
7.Port de Charge USB Etui Chargement
Mode d’Emploi
1.Allumer et Eteindre le PrimeBud
• Pour allumer le PrimeBud, appuyez et maintenez appuyé pendant environ 5 secondes le Bouton
Multifonction sur l’un des écouteurs jusqu’à ce que les voyants LED bleu et rouge clignotent
alternativement.
• Pour éteindre manuellement le PrimeBud, appuyez pendant environ 4 secondes le Bouton
Multifonction sur l’un des écouteurs.
2.Appairage du PrimeBud
• Avant de connecter le PrimeBud à votre appareil, vérifiez que le premier est en mode appairage.
• Pour passer en mode pairage, appuyez pendant environ 5 secondes sur la touche Multifonction
d’un des écouteurs, jusqu’à ce que les voyants LED Bleu et Rouge clignotent alternativement.
• Appuyez pendant

1 3 4 5
6 7 8 9 10 11
12 13 14 15 16 17
18 19 20 21 22 23
24 25 26 27 28 29
30 31 32 33 34
36 37 38
35
2
• Appuyez pendant environ 3 à 4 secondes sur le bouton Multifonction de l’autre écouteur jusqu’à ce
que le voyant LED rouge commence à clignoter et que l’autre écouteur clignote en bleu et rouge.
• Activez la fonction Bluetooth de l’appareil auquel vous souhaitez vous connecter et recherchez
« PrimeBud ». Dans la liste des périphériques détectés, sélectionnez « PrimeBud ».
• Le PrimeBud est maintenant connecté à votre appareil.
3.Fonction Appel
• Répondre à un Appel : Appuyez une fois sur le Bouton Multifonction de l’écouteur pour répondre à un
appel entrant.
• Rejeter un appel : Appuyez deux fois et maintenez appuyé le Bouton Multifonction sur l’écouteur pour
rejeter un appel entrant.
• Terminer un Appel : Appuyez une fois sur le Bouton Multifonction de l’écouteur pour terminer un
appel en cours.
4.Fonction Musique :
• Play/Pause : Appuyez une fois sur le bouton multifonction de chaque écouteur pour faire play/pause
sur un morceau de musique.
• Piste Suivante : Appuyez deux fois sur le bouton multifonction de chaque écouteur pour passer au
morceau suivant
5.Chargement des écouteurs PrimeBud & Etui de Chargement :
• L’étui de chargement du PrimeBud contient une batterie intégrée.
• Pour charger l’étui de chargement, branchez une extrémité du câble de chargement sur l'étui du
PrimeBud et l’autre extrémité sur un adaptateur USB ou sur un ordinateur portable/ordinateur de bureau.
• La voyant LED rouge s’allume pour indiquer que l’étui est en cours de chargement. Une fois le
chargement complété, le voyant LED s’éteindra.
• Placez les écouteurs dans l'étui de chargement pour les recharger.
• Le voyant rouge LED sur le couvercle de l'étui de chargement s'allume pour indiquer que le casque
se recharge normalement et le voyant LED bleu s’allume une fois l'appareil entièrement chargé.

1 3 4 5
6 7 8 9 10 11
12 13 14 15 16 17
18 19 20 21 22 23
24 25 26 27 28 29
30 31 32 33 34
36 37 38
35
2
123
4
5
6
7
Aussehen & Schnittstellenbeschreibung
1.Led-Anzeige
2.Multifunktionstaste
3.Mikrofon
4.Ohrhörer-Ladeanzeige
5.Netztaste
6.Ladeschale-LED-Anzeige
7.Ladeschalte-USB-Ladeanschluss
Bedienungsanleitung
1.PrimeBud Ein-/Aus
• Um PrimeBud einzuschalten, halten Sie die Multifunktionstaste an einem der Ohrstücke für etwa
5 Sekunden gedrückt bis die blaue LED und rote LED abwechselnd blinken.
• Um PrimeBud manuell auszuschalten, halten Sie die Multifunktionstaste an einem der Ohrstücke
für etwa 4 Sekunden gedrückt.
2.Pairing des PrimeBud
• Bevor Sie PrimeBud mit Ihrem Gerät pairen, stellen Sie sicher, dass sich PrimeBud im Pairing-Modus
befindet.
• Um zum Pairing-Modus zu gelangen, halten Sie die Multifunktionstaste an einem der Ohrstücke
für 5 Sekunden gedrückt bis die blaue LED und rote LED abwechselnd blinken.

1 3 4 5
6 7 8 9 10 11
12 13 14 15 16 17
18 19 20 21 22 23
24 25 26 27 28 29
30 31 32 33 34
36 37 38
35
2
• Halten Sie die Multifunktionstaste an dem anderen Ohrstück für 3-4 Sekunden gedrückt bis die rote
LED blinkt und die LED an dem ersten Ohrstück blau und rot blinkt.
• Schalten Sie die Bluetooth-Funktion des Gerätes an, das Sie verbinden möchten und suchen nach „
PrimeBud”. Wählen Sie„PrimeBud“ aus der Liste der gefunden Geräte.
• Jetzt ist PrimeBud mit Ihrem Gerät verbunden.
3.Anruffunktion
• Anruf annehmen: Drücken Sie die Multifunktionstaste an dem Ohrstück einmal, um ein eingehendes
Gespräch anzunehmen.
• Anruf abweisen: Drücken Sie die Multifunktionstaste an dem Ohrstück zweimal und halten Sie diese
gedrückt, um ein eingehendes Gespräch abzuweisen.
• Anruf beenden: Drücken Sie die Multifunktionstaste an dem Ohrstück einmal, um ein Gespräch zu
beenden.
4.Musikfunktion:
• Wiedergabe/ Pause: Drücken Sie die Multifunktionstaste einmal an einem der Ohrstücke, um einen
Musiktitel abzuspielen/pausieren
• Nächster Titel: Drücken Sie die Multifunktionstaste an einem der Ohrstücke einmal, um zum nächsten
Titel zu springen
5.Aufladen des PrimeBud-Ohrhörers & Ladeschale
• Die Ladeschale des PrimeBud verfügt über eine eingebaute Batterie.
• Zum Laden der Ladeschale stecken Sie das eine Ende des Ladekabels in den Ladeeingang der Ladeschale
des PrimeBud und das andere Ende in ein USB-Netzteil oder einen Laptop/Desktop.
• Die rote LED leuchtet und zeigt an, dass die Ladeschalte auflädt. Nach vollständiger Aufladung erlischt
die LED.
• Setzen Sie den Ohrhörer zum Aufladen in die Ladeschale.
• Die rote LED-Anzeige auf dem Deckel der Ladeschale leuchtet auf und zeigt an, dass der Kopfhörer
normal lädt und die blaue LED leuchtet bei vollständiger Aufladung auf.

1 3 4 5
6 7 8 9 10 11
12 13 14 15 16 17
18 19 20 21 22 23
24 25 26 27 28 29
30 31 32 33 34
36 37 38
35
2
123
4
5
6
7
Descrição de Aparência e Interface
1.Indicador Led
2.Botão Multifuncional
3.Microfone
4.Indicador de carga dos auriculares
5.Botão de alimentação
6.Indicador Led de carga
7.Porta de carga USB
Instruções de Utilização
1.Ligar/desligar PrimeBud
• Para ligar o PrimeBud, pressione e mantenha pressionado o botão multifuncional num dos auriculares
durante aproximadamente 5 segundos até aos indicadores LED azul e vermelho começarem a piscar
alternadamente.
• Para desligar o PrimeBud manualmente, pressione e mantenha pressionado o botão multifuncional em
um dos auriculares durante aproximadamente 4 segundos.
2. Emparelhar o PrimeBud
• Antes de conectar o PrimeBud ao seu dispositivo, verifique se o PrimeBud está no modo de emparelhamento.
• Para entrar no modo de emparelhamento, pressione e mantenha pressionado o botão multifuncional
num dos auriculares durante 5 segundos, até os indicadores LED azul e vermelho começarem a piscar
alternadamente.

1 3 4 5
6 7 8 9 10 11
12 13 14 15 16 17
18 19 20 21 22 23
24 25 26 27 28 29
30 31 32 33 34
36 37 38
35
2
• Pressione e mantenha pressionado o botão multifuncional no outro auricular durante 3-4 segundos até
ao indicador LED vermelho começar a piscar e o LED no primeiro auricular piscar intermitentemente em
azul e vermelho.
• Ligue a função Bluetooth do dispositivo que deseja conectar e procure "PrimeBud". Na lista de
dispositivos encontrados, selecione "PrimeBud".
• PrimeBud está agora conectado ao seu dispositivo.
3. Função de chamada
• Atender uma chamada: pressione o botão multifuncional no auricular uma vez para atender uma chamada
recebida.
• Rejeitar uma chamada: pressione e mantenha pressionado o botão multifuncional no auricular para
rejeitar uma chamada recebida.
• Terminar uma chamada: pressione o botão multifuncional no auricular uma vez para finalizar uma chamada
em progresso.
4. Função de música:
• Reproduzir/Pausar: Pressione o botão multifuncional uma vez em qualquer um dos auriculares para
reproduzir/pausar uma faixa de música
• Próxima faixa: Pressione duas vezes o botão multifuncional em qualquer um dos auriculares para ignorar
a próxima faixa
5. Carga dos auriculares PrimeBud e caixa de carga
• A caixa de carga da PrimeBud possui uma bateria incorporada.
• Para carregar a caixa de carga, conecte uma extremidade do cabo de carga à caixa de carga PrimeBud
e a outra extremidade a um adaptador de alimentação USB ou a um laptop / desktop.
• O indicador LED vermelho vai acender-se para indicar que a caixa de carga está a ser carregada. O indicador
LED vai desligar-se uma vez completamente carregado.
• Coloque os auriculares na caixa de carga para carregar os auriculares.
• O indicador LED vermelho na caixa de carga vai acender-se para indicar que o auricular está a carregar
normalmente e o indicador LED azul vai ligar-se uma vez completamente carregado.

1 3 4 5
6 7 8 9 10 11
12 13 14 15 16 17
18 19 20 21 22 23
24 25 26 27 28 29
30 31 32 33 34
36 37 38
35
2
123
4
5
6
7
Descrição de Aparência e Interface
1.Indicador Led
2.Botão Multifuncional
3.Microfone
4.Indicador de carga dos auriculares
5.Botão de alimentação
6.Indicador Led de carga
7.Porta de carga USB
Instruções de Utilização
1.Ligar/desligar PrimeBud
• Para ligar o PrimeBud, pressione e mantenha pressionado o botão multifuncional num dos auriculares
durante aproximadamente 5 segundos até aos indicadores LED azul e vermelho começarem a piscar
alternadamente.
• Para desligar o PrimeBud manualmente, pressione e mantenha pressionado o botão multifuncional
em um dos auriculares durante aproximadamente 4 segundos.
2. Emparelhar o PrimeBud
• Antes de conectar o PrimeBud ao seu dispositivo, verifique se o PrimeBud está no modo de emparelhamento.
• Para entrar no modo de emparelhamento, pressione e mantenha pressionado o botão multifuncional
num dos auriculares durante 5 segundos, até os indicadores LED azul e vermelho começarem a piscar
alternadamente.

1 3 4 5
6 7 8 9 10 11
12 13 14 15 16 17
18 19 20 21 22 23
24 25 26 27 28 29
30 31 32 33 34
36 37 38
35
2
• Pressione e mantenha pressionado o botão multifuncional no outro auricular durante 3-4 segundos até
ao indicador LED vermelho começar a piscar e o LED no primeiro auricular piscar intermitentemente em
azul e vermelho.
• Ligue a função Bluetooth do dispositivo que deseja conectar e procure "PrimeBud". Na lista de dispositivos
encontrados, selecione "PrimeBud".
• PrimeBud está agora conectado ao seu dispositivo.
3. Função de chamada
• Atender uma chamada: pressione o botão multifuncional no auricular uma vez para atender uma
chamada recebida.
• Rejeitar uma chamada: pressione e mantenha pressionado o botão multifuncional no auricular para
rejeitar uma chamada recebida.
• Terminar uma chamada: pressione o botão multifuncional no auricular uma vez para finalizar uma
chamada em progresso.
4. Função de música:
• Reproduzir/Pausar: Pressione o botão multifuncional uma vez em qualquer um dos auriculares para
reproduzir/pausar uma faixa de música
• Próxima faixa: Pressione duas vezes o botão multifuncional em qualquer um dos auriculares para ignorar
a próxima faixa
5. Carga dos auriculares PrimeBud e caixa de carga
• A caixa de carga da PrimeBud possui uma bateria incorporada.
• Para carregar a caixa de carga, conecte uma extremidade do cabo de carga à caixa de carga PrimeBud e
a outra extremidade a um adaptador de alimentação USB ou a um laptop / desktop.
• O indicador LED vermelho vai acender-se para indicar que a caixa de carga está a ser carregada. O indicador
LED vai desligar-se uma vez completamente carregado.
• Coloque os auriculares na caixa de carga para carregar os auriculares.
• O indicador LED vermelho na caixa de carga vai acender-se para indicar que o auricular está a carregar
normalmente e o indicador LED azul vai ligar-se uma vez completamente carregado.

1 3 4 5
6 7 8 9 10 11
12 13 14 15 16 17
18 19 20 21 22 23
24 25 26 27 28 29
30 31 32 33 34
36 37 38
35
2

1 3 4 5
6 7 8 9 10 11
12 13 14 15 16 17
18 19 20 21 22 23
24 25 26 27 28 29
30 31 32 33 34
36 37 38
35
2
123
4
5
6
7
Внешний вид и описание интерфейса
1.Светодиодный индикатор
2.Многофункциональная кнопка
3.Микрофон
4.Индикатор зарядки микронаушников
5.Кнопка питания
6.Светодиодный индикатор зарядного чехла
7.Зарядный порт USB зарядного чехла
Инструкция по эксплуатации
1.Включение/Выключение PrimeBud
•Чтобы включить PrimeBud, нажмите и удерживайте многофункциональную кнопку на одном из
наушников на протяжении примерно 5 секунд, пока синий и красный светодиоды не начнут
поочередно мигать.
•Чтобы выключить PrimeBud вручную, нажмите и удерживайте многофункциональную кнопку на
одном из наушников примерно 4 секунды.
2.Сопряжение PrimeBud
•Перед подключением PrimeBud к Вашему устройству убедитесь, что PrimeBud находится в
режиме сопряжения.
•Чтобы инициировать режим сопряжения, нажмите и удерживайте многофункциональную
кнопку на одном из наушников на протяжении примерно 5 секунд, пока синий и красный
светодиоды не начнут поочередно мигать.

1 3 4 5
6 7 8 9 10 11
12 13 14 15 16 17
18 19 20 21 22 23
24 25 26 27 28 29
30 31 32 33 34
36 37 38
35
2
•Нажмите и удерживайте многофункциональную кнопку на другом наушнике в течение 3-4 секунд,
пока красный индикатор не начнет мигать, а индикатор на первом наушнике не замигает синим и
красным светом.
•Включите функцию Bluetooth того устройства, которое вы хотите подключить, и поищите PrimeBud.
Выберите PrimeBud из списка найденных устройств.
•Теперь устройство PrimeBud подключено к вашему приспособлению.
3.Функция вызова
•Ответ на звонок: Чтобы ответить на входящий звонок, нажмите многофункциональную кнопку на наушнике.
•Сброс звонка: Чтобы отклонить входящий звонок, дважды нажмите и удерживайте многофункцио
нальную кнопку на наушнике.
•Завершение вызова: Чтобы завершить текущий звонок, один раз нажмите на многофункциональ
ную кнопку на наушнике.
4.Функция прослушивания музыки:
•Воспроизведение/Пауза: Чтобы воспроизвести/приостановить музыкальную композицию, один
раз нажмите на многофункциональную кнопку на наушнике
•Следующий трек: Для перехода к следующей дорожке два раза нажмите на многофункционал
ьную кнопку на любом наушнике
5.Зарядка наушников и зарядного чехла PrimeBud
•Зарядный чехол PrimeBud имеет встроенную батарею.
•Для зарядки зарядного чехла подключите один конец зарядного кабеля к входу для зарядки
зарядного чехла PrimeBud, а другой конец – к адаптеру источника питания USB или ноутбуку /
настольному компьютеру.
•Включение красного светодиода показывает, что зарядный чехол заряжается. После того как он
полностью зарядится, светодиод выключится.
•Для зарядки наушников поместите их в зарядный чехол.
•Включение красного индикаторного светодиода на крышке зарядного чехла указывает, что
гарнитура заряжается нормально, а синий светодиод включится после полной зарядки.

1 3 4 5
6 7 8 9 10 11
12 13 14 15 16 17
18 19 20 21 22 23
24 25 26 27 28 29
30 31 32 33 34
36 37 38
35
2
123
4
5
6
7
Dış Görünüm & Arayüz Tanımları
1.Led Gösterge
2.Çoklu-Fonksiyon Tuşu
3.Mikrofon
4.Kulaklık Şarj Göstergesi
5.Güç Düğmesi
6.Şarj Kutusu Led Göstergesi
7.Şarj Kutusu USB Şarj Yuvası
Kullanım Talimatları
1.PrimeBud Açma/Kapama
• PrimeBud’ı açmak için, kulaklıkların birinde bulunan Çoklu-Fonksiyon tuşuna, yaklaşık 5 saniye kadar,
Mavi ve Kırmızı LEDler sırayla yanıp sönmeye başlayana kadar basılı tutun.
• PrimeBud’ı kapatmak için, kulaklıkların birinde bulunan Çoklu-Fonksiyon tuşuna, yaklaşık 4saniye
kadar basılı tutun.
2.PrimeBud’I Eşleştirme
• PrimeBud’ı cihazınıza bağlamadan önce, PrimeBud’ın eşleştirme modunda olduğundan emin olun.
• Eşleştirme moduna girmek için kulaklıkların birinde bulunan Çoklu-Fonksiyon tuşuna, yaklaşık 5 saniye
kadar, Mavi ve Kırmızı LEDler sırayla yanıp sönmeye başlayana kadar basılı tutun.

1 3 4 5
6 7 8 9 10 11
12 13 14 15 16 17
18 19 20 21 22 23
24 25 26 27 28 29
30 31 32 33 34
36 37 38
35
2
• Diğer kulaklıkta bulunan Çoklu-Fonksiyon tuşuna Kırmızı LED yanıp sönmeye başlayana kadar ve ilk
kulaklıktaki LED mavi ve kırmızı yanıp sönene kadar 3-4 saniye kadar basılı tutun.
• Bağlamak istediğiniz cihaın Bluetooth fonksiyonunu açın ve“PrimeBud” için arama yapın. Bulunan cihazlar
listesinden “PrimeBud” seçin.
• PrimeBud artık cihazınıza bağlandı.
3.Çağrı Fonksiyonu
• Çağrı Cevaplama: Gelen bir çağrıyı cevaplamak için kulaklıktaki Çoklu-Fonksiyon tuşuna bir kez basın.
• Çağrı Reddetme: Gelen bir aramayı reddetmek için kulaklıktaki Çoklu-Fonksiyon tuşuna çift basın.
• Çağrı Sonlandırma: Devam eden bir görüşmeyi sonlandırmak için Çoklu-Fonksiyon tuşuna bir kez basın.
4.Müzik Fonksiyonu:
• Oynat/Durdur: Bir şarkıyı oynatıp/durdurmak için herhangi bir kulaklıktaki Çoklu-Fonksiyon tuşuna bir
kez basın.
• Sonraki Şarkı: Sonraki şarkıya geçmek için çoklu-fonksiyon tuşuna çift basın
5.PrimeBud Kulaklık & Şarj Kutusunu Şarj Etme
• PrimeBud şarj kutusunun bütünleşik bataryası vardır.
• Şarj kutusunu şarj etmek için şarj kablosunun bir ucunu PrimeBud şarj kutusunun şarj girişine ve diğer
ucunu da bir USB Güç Adaptörüne veya bir Masaüstü/Dizüstüne takın.
• Şarj kutusunun şarj olduğunu gösteren kırmızı LED yanacaktır. Tam şarj olduğunda LED sönecektir.
• Kulaklıkları şarj etmek için kulaklıkları şarj kutusuna koyun.
• Kulaklık Setinin normal şekilde şarj olduğunu gösteren Şarj Kutusunun kapağında bulunan Kırmızı LED
gösterge yanacaktır ve tam şarj olduğunda Mavi LED yanacaktır.
Table of contents
Languages:
Other Promate Headphones manuals

Promate
Promate Impact User manual

Promate
Promate Waves User manual

Promate
Promate Atom User manual

Promate
Promate proHarmony.3 User manual

Promate
Promate TrueBlue User manual

Promate
Promate Revolt User manual

Promate
Promate PX16 User manual

Promate
Promate TrueBlue-2 User manual

Promate
Promate Action User manual

Promate
Promate bluTrend User manual