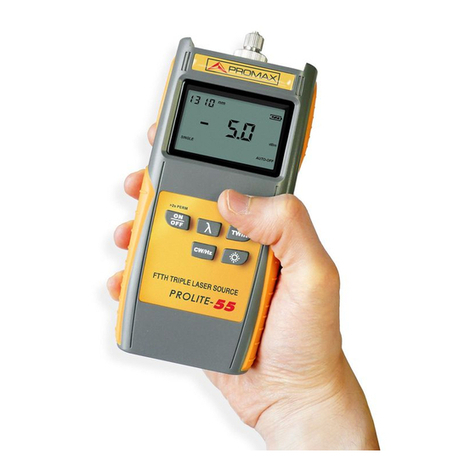
Promax PROLITE-63 User manual

PROLITE-63
FTTH OPTICAL POWER METER
- 0 MI2003 -


SAFETY NOTES
Read the user’s manual before using the equipment, mainly "SAFETY RULES"
paragraph.
The symbol on the equipment means "SEE USER’S MANUAL". In this manual
may also appear as a Caution or Warning symbol.
WARNING AND CAUTION statements may appear in this manual to avoid injury
hazard or damage to this product or other property.
USER MANUAL VERSION
Version Date Firmware Version
2.0 January 2014 1.04
Software Version1.03


January 2014
SAFETY RULES
* The safety could not be assured if the instructions for use are not closely
followed.
* The external DC charger is Class I equipment. For safety reasons plug it to a supply
line with the corresponding ground terminal.
Use the mains adapter in Over-Voltage Category II installations and Pollution
Degree 1 environments. It is for INDOOR USE.
* When using some of the following accessories use only the specified ones to
ensure safety.
Power adapter.
Car cigarette lighter adapter.
Mains cord.
* Observe all specified ratings both of supply and measurement.
* Use this instrument under the specified environmental conditions.
* The user is not authorised to manipulate inside the instrument:
Any change on the equipment should be carried out by qualified personnel.
* Follow the cleaning instructions described in the Maintenance paragraph.

* Symbols related with safety:
Descriptive Examples of Over-Voltage Categories
Cat I Low voltage installations isolated from the mains.
Cat II Portable domestic installations.
Cat III Fixed domestic installations.
Cat IV Industrial installations.
January 2014

January 2014
TABLE OF CONTENTS
1INTRODUCTION........................................................................................... 1
1.1 Description ....................................................................................... 1
2INSTALATION.............................................................................................. 2
2.1 Power Supply.................................................................................... 2
2.1.1 Operation Using the Mains Adapter................................................... 2
2.1.2 Operation Using the Battery ............................................................ 2
2.1.3 Battery Charging ........................................................................... 2
2.1.4 Recommendations using the battery................................................. 3
3OPERATING INSTRUCTIONS .......................................................................... 4
3.1 Descriptions of Controls and Elements .................................................. 4
3.2 Operating Instructions........................................................................ 5
3.2.1 SETUP Mode.................................................................................. 6
3.2.2 OPTICAL POWER METER Function (OPM) ........................................... 7
3.2.3 OPTICAL LOSS TEST SET Function.................................................... 9
3.2.4 THRESHOLD CONFIGURATION Mode................................................11
3.2.5 LOGGER Function..........................................................................12
3.3 Connecting to a computer..................................................................14
4CONTROL SOFTWARE PROLITE-63.................................................................15
4.1 Description ......................................................................................15
4.2 Hardware and software Requirements .................................................15
4.3 Installation ......................................................................................16
4.3.1 Software Installation .....................................................................16
4.4 LEGAL CONDITIONS..........................................................................16
4.4.1 Connection between PROLITE-63 and PC...........................................17
5INSTRUCTIONS FOR USING THE CONTROL SOFTWARE ....................................19
5.1 Start...............................................................................................19
5.2 Main window....................................................................................21
5.3 Menu bar.........................................................................................23
5.3.1 File.............................................................................................23
5.3.2 Loggers.......................................................................................24
5.3.3 Editors ........................................................................................24
5.3.4 Language ....................................................................................25
5.3.5 Upgrade ......................................................................................25
5.3.6 Help............................................................................................25
6SPECIFICATIONS ........................................................................................26
7MAINTENANCE ...........................................................................................28
7.1 Instructions for returning by mail........................................................28
7.2 Maintenance instructions ...................................................................28
7.2.1 Cleaning the cover........................................................................28
7.2.2 Not replaceable fuses by user.........................................................29
APPENDIX A: APPLICATION NOTE.....................................................................30
January 2014

January 2014 1
FTTH TESTER & OPM
PROLITE-63
1 INTRODUCTION
1.1
Description
The PROLITE-63 is a high-performance optical power meter for optical fibre
networks, which features high-speed testing and is prized for its quality, value
and reliability. Its internal microprocessor and linear amplifier technology ensures
high precision.
It is a compact and lightweight instrument, easy to carry thanks to its small size
and unique features such high-speed tests on optical fibre systems, either single-
mode or multi-mode, and display results on its LCD. Its quality, performance,
reliability and security make it an alternative to other equipments in its class.
Under the situation of laboratory LANs, WANs and CATV as well as long distance
optical networks, the Optical Power Meter together with a PROLITE-105
stabilized laser source, can be used to identify optic fibre, measure
simultaneously optical attenuation for GPON networks (1310 nm, 1490 nm and
1550 nm), verify continuity and evaluate fibre link transmission quality.
It also has a logger function that stores up to 100 measurements per function.
They can be reviewed later or transferred to a PC. It has an USB connector to
connect to a computer and then you can obtain reports, print it or update
firmware.
The design of the PROLITE-63 is adapted for fieldwork: it is compact and
resistant to adverse conditions. Backlight LCD and contrast control provides an
excellent visibility for reading the results. A hard-plastic case, perfectly adapted,
protects the instrument from hitting or accidental falling and facilitates holding it.
The Li-Ion battery is rechargeable and provides a long operation time.
In conclusion, the PROLITE-63 is the ideal tool for any installation of optic fibre,
because is ergonomically designed, robust, easy to use and economical. It has all
the functions needed to make an installation of optical fibre.

2 INSTALATION
2.1
Power Supply
The PROLITE-63 is a portable instrument powered by a rechargeable Li-Ion
battery. The instrument comes with a mains adapter which enables the
PROLITE-63 to be plugged to the mains for operation and battery charging.
2.1.1 Operation Using the Mains Adapter
Connect the mains adapter to the PROLITE-63 through the external power
connector placed at the right side of the instrument. Then, connect the adapter
to the mains to start up battery charging. Next, press the ON/OFF key. Then
the instrument starts working.
CAUTION
Before using the mains adapter make sure that it is the appropriate one for
your mains voltage.
2.1.2 Operation Using the Battery
Press the key ON/OFF [1] to start the instrument powered by the battery.
When the battery is full loaded, the PROLITE-63 has an autonomy aprox. of
25 hours of continuous work.
Si la batería está descargada, el equipo no se encenderá o, si está en
funcionamiento, se apagará.
2.1.3 Battery Charging
First switch off the PROLITE-63 in order to charge the battery. Then connect
the power input to the mains adapter. Now connect the adapter to the mains.
Charging time depends on the state of the battery. If the battery is flat, the
battery charging time is 3 hours aprox.
2 January 2014

January 2014 3
2.1.4 Recommendations using the battery
If anticipating a long period of inactivity for your instrument, it is advisable to
store it with the battery fully charged and at temperatures below 25 °C.
It is also advisable in these cases to carry out a cycle of charging/discharging
and a subsequent half charge (i.e. 50 %) every 3 months.

3 OPERATING INSTRUCTIONS
3.1
Descriptions of Controls and Elements
Front Panel
Figure 1.
1Signal detection LED:
COLOURS: GREEN (value within thresholds).
RED (value below threshold).
ORANGE (value above threshold).
2CURSOR keys with several functions according to the screen:
Main Menu Screen: It moves the cursor over the functions.
Function Screen: It shows the available values in the selected field.
Attenuation Test/OPM Screen: It captures a value to use as a reference by
pressing both key simultaneously.
3SELECTION key with several functions according to the screen:
Main Menu Screen: It gets into the slected options.
Function Screen: It moves between the editable fields.
Configuration Screen: It enters/quits the editable field.
4 January 2014

January 2014 5
3.2
Operating Instructions
Main functions of the PROLITE-63 are accesible through the main menu, which
you can access at by pressing the button CONFIG :
Figure 2. MENU screen.
►OPTICAL POWER METER (OPM):
It measures optical power at the input in the whole infrared band (1100-1700)
and allows you to take a reference value to measure from it.
►OPTICAL LOSS TEST SET:
It measures the attenuation for GPON networks by identificating modulation
of 270 Hz for 1310 nm, 1 kHz for 1490 nm and 2 kHz for 1550 nm.
►THRESHOLD CONFIGURATION
It allows you to configure up to 10 different pairs of threshold values.
►SETUP
It allows you to configure some parameters such as language, time, data, contrast,
etc.
To access any of these menus, press the button CONFIG to access the main
menu and then press UP or DOWN until your option is selected. Now
press CONFIG or SEL .

3.2.1 SETUP Mode
This menu allows you to edit some basic parameters such as time, hour and
language among others.
To access the SETUP menu:
Press the button CONFIG .
Press or [5] until pointing at SETUP.
Press CONFIG [2] or SEL [4] to get into the SETUP menu.
It shows a screen with some parameters to configurate the system (Fig. 3).
Figure 3. SETUP Screen.
To edit the status or change a parameter value:
Press or to move along the menu.
Place the arrow pointing at the parameter to modify and press SEL .
The arrow moves next to the parameter value. Now you can change it using
or . When editing date and time, press SEL to move to the next
field.
Once edited, press again SEL to get out of the parameter edition.
Press CONFIG to get out from the SETUP menu and back to the main
menu.
6 January 2014

January 2014 7
Parameters you can edit are:
►LANGUAGE
It is the language used on screen and menus. Press or to move
among the available languages (Spanish, English and German).
►TIME
It indicates current time. Press or to enter hour and minutes.
►DATE
It indicates current data in European format (dd-mm-yy). Press or
to enter day, month and year.
►BEEP
This parameter enables (YES) or disables (NO) the beep. When it is
enabled a beep sounds when pressing any button.
►BACKLIGHT MODE
This parameter allows you to enable (YES) or disable (NO) the backlight.
When AUTO option is active, the backlight turns off automatically after 1
minute without pressing any key.
►LCD CONSTRAST
This parameter allows you to change the screen contrast.
►AUTO-POWER OFF
This parameter lets you define a time for the instrument automatic
shutdown. After this time without pressing any key, the instrument
automatically turns off. This time can range from 1 to 60 minutes. To
disable this option select OFF.
3.2.2 OPTICAL POWER METER Function (OPM)
This function allows you to measure optical power across the infrared wavelength
band (1100 nm - 1700 nm).
Under the situation of laboratory, LANs, WANs and CATV as well as
longdistance optical network, the Optical Power Meters, together with PROMAX
stabilized laser sources, can be used to identify optic fibre, measure optical
attenuation, verify continuity and evaluate fibre link transmission quality.
To access this function:
Press CONFIG .
Press or until pointing at OPTICAL POWER METER.

Press SEL or CONFIG to get into this function (see figure below).
Figure 4. OPTICAL POWER METER.
Next are described each one of the fields on screen:
Wavelenght at which it is measuring. Available wavelenght are 1310, 1490,
1550 and 1625 nm.
Reference value from which is calculated the relative losses. Reference
value can be changed.
Modulation frequency.
Graphical representation of the power.
Selected threshold group of values. Threshold values are grouped and
saved on the memory of the instrument, then later they can be selected in
order to the quality criterium to meet.
Lower threshold value.
Maximal power value recommended for the selected wavelenght.
Upper threshold value.
Signal status with respect to threshold values. Three status are possible:
LOW, PASS, HIGH.
Relative signal losses (attenuattion) at the selected wavelenght. It is in dB.
It is equal to:
ATTEN = Ref (dBm) - POT (dBm)
8 January 2014

January 2014 9
Absolute optical signal power at the selected wavelenght. Absolute
measurement mode represents the absolute signal power value in dBm (dB
referred to 1 mW). Power measure is right only when the measured input
It is an arrow which indicates if the value exceeds (arrow pointing up) or
does not arrive (arrow pointing down) to the minimum levels in order to be
graphically represented.
To navigate through the editable fields on the screen press SEL . The selected
field changes to shaded.
To edit the wavelenght or the threshold group, select it and press or .
To capture a new reference value, select the current reference value and press
both keys and simultenously.
To make or consult a logger refer to the section LOGGER Function.
3.2.3 OPTICAL LOSS TEST SET Function
This function measures signals emitted by a test source (e.g. PROLITE-105). It
measures the attenuation for GPON networks by identificating modulation of
270 Hz for 1310 nm, 1 kHz for 1490 nm and 2 kHz for 1550 nm. It should be
used in combination with a PROLITE-105. It shows on screen absolute
measures, relative measures and measurement with respect to the threshold
value.
To access this function:
Press CONFIG .
Press or until pointing at OPTICAL LOSS TEST SET.
Press SEL or CONFIG to get into this function (see figure below).

Figure 5. OPTICAL LOSS TEST SET Screen.
The display is divided into three equal rows. Each row shows measurements for
each wavelenght. Next are described each one of the fields on screen:
The SIGNAL LED indicates the status of the signal with respect to the
threshold values. Three indicator lights colours are possible and each
colour represents status signal with respect to threshold values: GREEN
(PASS), AMBER (HIGH) and RED (LOW).
Wavelenght at which it is measuring. Wavelenght at 1310 nm corresponds
to the UPSTREAM and the other two (1490 y 1550 nm) to the
DOWNSTREAM.
Signal status with respect to threshold values. Three status are possible:
PASS, HIGH, LOW.
Power graphical representation.
Lower threshold value.
Upper threshold value.
Group of threshold values selected. Threshold values can be grouped and
saved on the memory of the instrument and later to select the one that
best meets the criterion of quality to follow.
Relative losses of the signal with respect to the reference value. Reference
value can be changed by capturing a new one.
Absolute signal losses at the corresponding wavelenght. It represents the
losses power of the signal in dB.
10 January 2014

January 2014 11
Absolute optical power of the signal at the corresponding wavelenght.
Absolute measurement mode is the absolute power of signal in dBm
(dB referred to 1mW).
To navigate through the editable fields on the screen press SEL . The selected
field changes to shaded.
To edit a threshold group of values, select it and press or .
To capture a new reference value, select the current reference value and press
both keys and simultenously.
To make or consult a logger refer to the section LOGGER Function.
3.2.4 THRESHOLD CONFIGURATION Mode
It allows you to define up to ten pairs of threshold values.
Figure 6. THRESHOLD CONFIGURATION screen.
Next are described each one of the fields on screen:
Number assigned to the group of threshold values.
Upper value threshold.
Lower value threshold.
Name assigned to the group of threshold values.

To modify the threshold values:
Press SEL to move along the parameters.
To change a parameter, it must be shaded. Once it is shaded it can be
modified by using the arrows.
Once changes are made, press again SEL to get out from editing the
parameter.
To get out from the configuration mode and back to the main menu press
CONFIG .
3.2.5 LOGGER Function
LOGGER function takes data and save them on the memory, so they can be
viewed or downloaded on a computer.
Each funtion has its own logger memory up to 99 loggers par function.
To access the LOGGER Function:
From the function you are press STO/RCL .
Upper line on the screen changes (see figure below).
Figure 7. Logger.
In this line is shown the last logger accessed and date and hour when was
taken.
If the upper line does not show date and hour means that the register is
empty (see figure below).
Figure 8. Empty Register.
12 January 2014
Table of contents
Other Promax Measuring Instrument manuals

Promax
Promax HD Ranger + User manual

Promax
Promax RANGER Neo 2 User manual

Promax
Promax PROPOWER - 5 User manual

Promax
Promax OS-782 User manual

Promax
Promax TVHUNTER+ User manual

Promax
Promax 26 User manual

Promax
Promax CP-543C User manual

Promax
Promax 27 User manual

Promax
Promax HD RANGER Eco User manual

Promax
Promax Cable Ranger+ User manual

Promax
Promax PROLITE-63B User manual

Promax
Promax Prolite-52 User manual

Promax
Promax 25 User manual

Promax
Promax RANGERNeo 4 User manual

Promax
Promax PROPOWER-5 User manual

Promax
Promax PROMAX-12 User manual

Promax
Promax RANGER mini User manual

Promax
Promax HD Ranger + User manual

Promax
Promax PROMAX-10 User manual

Promax
Promax PROMAX-4 User manual