Installation
Where line pressure exceeds recommended max pressure on housing
label a pressure limiting valve must be installed. Protect the housing
from water hammer.
Use on water only up to 52°C. For installation over 52°C please enquire as
to a suitable housing. Protect the housing from freezing.
Do not install in direct sunlight and clear housings must not be installed
externally.
Use PTFE thread seal tape on all connections. Use of pipe sealants will
void warranty. Do not overtighten. Too much tape or over tightening may
cause head to split.
For point of entry installations an approved dual check backflow prevention
device must be fitted in accord with national plumbing product codes.
Do not use with water that is microbiologically unsafe or with water of
unknown quality without adequate disinfection.
Clear bowl housings should be installed in a dark position away from
direct sunlight.
Installation of this housing onto mains water supplies must be by a
licensed plumber.
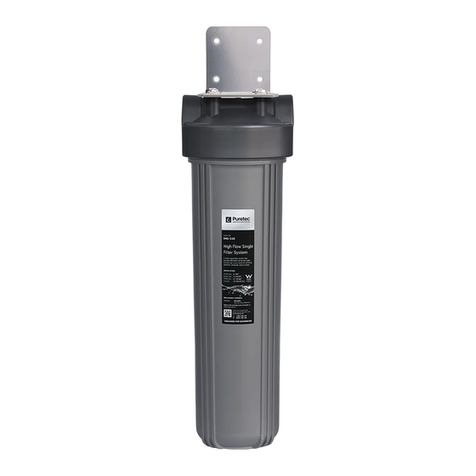
Positioning your lter
Choose a location where the water spillage will not cause damage. If
cupboard is chosen care needs to be taken in case of water spillage or
flooding. Make sure mounting position is solid so that filter stays in position
when changing filters. An isolation valve may be installed immediately prior
to the filter to isolate the filter for changing the cartridge.
Installation Procedure
1 Isolate water supply and relieve pressure by opening a downstream tap.
2 Cut pipe to suit length of required valve and housing installation.
3 Useapprovedbrass,galv/polyplumbingttingstosuitexisting
pipework. The female threads on the housing will receive tapered
male threads. Thread into housing head carefully as too much tape or
overtightening may cause it to split.
4 Ifusingsweatedttings,allowenoughtimetocoolbeforeconnecting
to the housing.
5 Securelyxwallmountbracketandpipeworkwithsuitableclips.Allow
50mmclearanceunderthebowlforlterchanges.
6 Flush debris from pipework.
7 Installltercartridgeaspercartridgereplacementinstructions.
Copyright © Puretec Pty Ltd 2019 Copyright © Puretec Pty Ltd 2019 Copyright © Puretec Pty Ltd 2019
The following table provides a guide as to what filter you can use in your
housing:
Dirt, Rust,
Sediment
(Mains Water)
Taste, Odour
Removal
(Mains Water)
Dirt, Rust,
Sediment
(Rainwater)
Taste, Odour
Removal
(Rainwater)
Filter Housing Cartridge Cartridge Cartridge Cartridge
FP10M PX051 GC051 PL051 DP101
FP10B PX051 GC051 PL051 DP101
FP10C PX051 GC051 PL051 DP101
FP10Q PX051 GC051 PL051 DP101
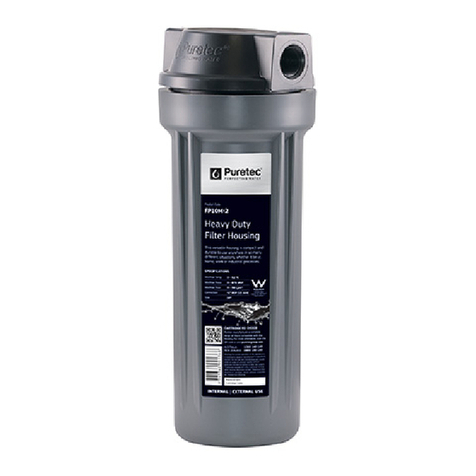
FP10M-2 PX051 GC051 PL051 DP101
FP5M-3 PX055 GC205 PL305 -
FP20B PX052 GC202 PL052 DP102
Puretec Customer Service
ThankyouforpurchasingaPuretecwaterlterhousing.Yourhousingisa
proven performer manufactured from only quality materials and will give
years of trouble free service if maintained properly.
Thishousingcanbeusedisawidevarietyofdierentapplications.Choosea
cartridge that best suits your situation, remembering Puretec stocks a wide
rangeofcartridges.Ifyouhavetroubledeningwhatyouneed,contactyour
local stockist or call our Puretec Customer Service Helpline.
RegularmaintenanceofyourPuretecwaterlterincludesregular
replacementofdisposableltercartridges.Replacecartridgeswhenwater
owisreduced,tasteorodourreturnstowater(carboncartridgesonly)orat
6monthlyintervals,whichevercomesrst.
Cartridge Replacement
Tomaintainthehighqualityofthepuriedwaterthecartridgesneed
changing every 6 months, dependent on wtaer quality and usage. You can
obtain replacement cartridges from your local Puretec stockist. To maintain
performance, Australian standards and warranty use geniune Puretec
replacements.
To changetheltercartridgepleaseadheretothefollowingprocedure:
1. Turnwatersupplyoandrelievepressurebyopeningadownstreamtapor
pressingtheredpressurereliefbuttononthehousing(iftted).
2. Unscrewthelterbowl.Ifdiculttoundo,awrenchmaybepurchasedto
make it easier. Remove old cartridge.
3. Clean bowl with soap and warm water and rinse thoroughly. Check O-Rings
for damage and if there is any, replace.
4. Check O-Ring lubrication and if necessary apply a light coating of food grade
silicone lubricant or similar.
5. Removeallpackagingfromnewltercartridgeandinsertintohousingbowl
making sure that it is properly seated over spigot in the base of bowl. Where
present,ensurethatthearrowontheltercartridgeispointingtowardsthe
head of the housing. Remember to record the product no. of the cartidge
you use.
6. Hold bowl upright while screwing onto head. Make certain that the spigot in
the in the housing head is located centrally to the cartridge to make a good
seal.Handtightenbowluntilrm.DONOTOVERTIGHTEN.
7. Open downstream tap to allow air to be released and gently open water
supply allowing all air to be purged.
8. Allowwatertorunfor2minutestoushthesystem.
9. Close the downstream tap and check for leaks.
NOTE:Flushthesystemfor10minutesaeranyperiodofnon-usemorethan2
days. For a period of non-use of 2 weeks or more, it may be necessary to replace
the cartridge.
Cartridge Installation/Changeout
Applications
Pureteclterhousingsaredesignedtosuitawiderangeofcartridgesforvari-
ous applications.
Somefeaturesofasedimentremovallterinclude:
• Supply clean water to kitchen, bahroom and laundry.
• Extends life of appliance by removal of silt, rust etc. for protection of hot
water systems, washing machines, dishwashers, solenoid garden valves,
tap washers, ceramic disc mixers and thermostatic mixing valves.
• Minimizes build-up in pipework and reduces repair costs.
Somefeaturesofatasteandodourremovallterinclude:
• Provides healthy, clean, fresh water for all household drinking, cooking
and showering needs.
• Havebettertastingbeverages,tea,coee,drinkingwaterandice.
• Safe water to drink, free from harmful chemicals - also safe for baby
formula.
• Enjoy a chemical free shower or bath leaving skin feeling less irritated.
