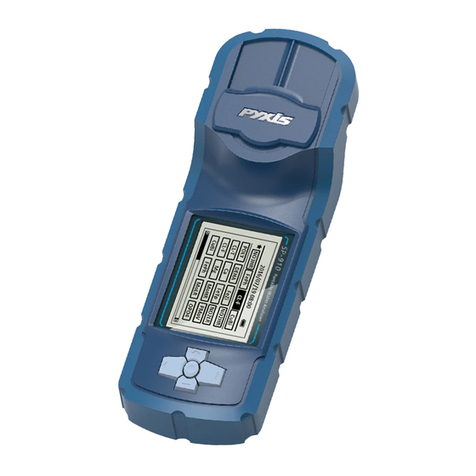
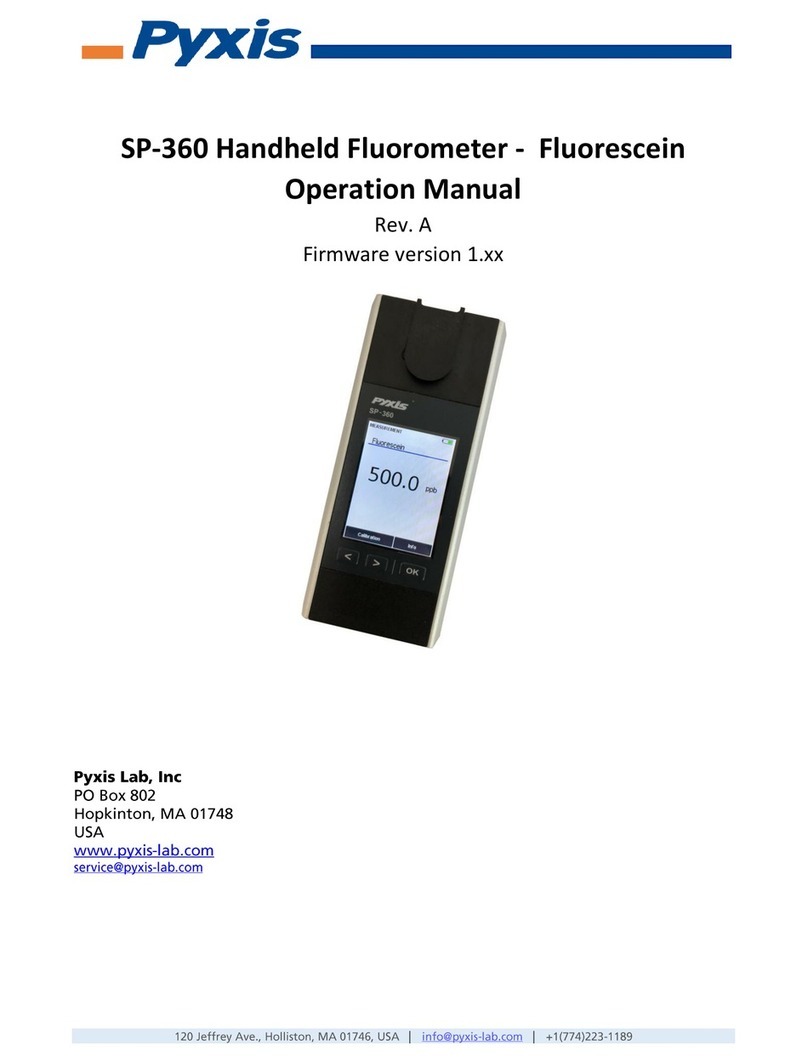
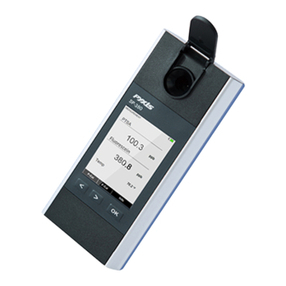
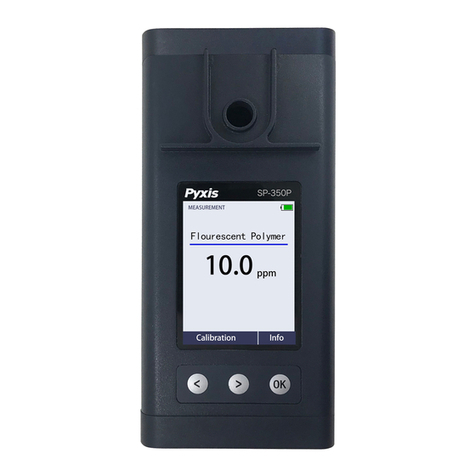
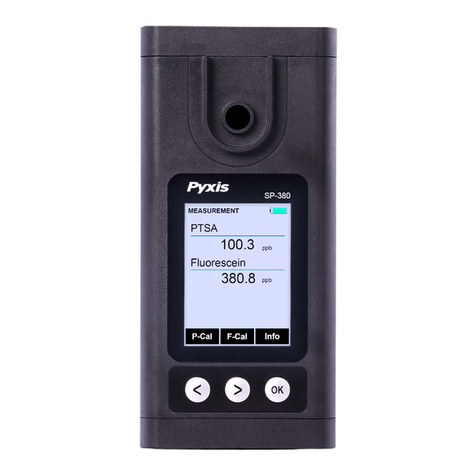
Pyxis SP-380 User manual

SP-380 Handheld Dual Fluorometer -
PTSA and Fluorescein
Operation Manual
Rev. A
Firmware version 1.xx

2
Pyxis Lab, Inc
PO Box 802
Hopkinton, MA 01748
USA
www.pyxis-lab.com
service@pyxis-lab.com

ii
1Contents
1General Description .................................................................................1
1.1 Specification......................................................................................1
1.2 Pyxis SP-380 Major Features ............................................................1
1.3 Unpackaging the Instrument ............................................................2
1.4 Standard Accessories........................................................................2
1.5 Optional Accessories.........................................................................2
1.6 Light Shield Cover .............................................................................2
2Start Pyxis SP-380.....................................................................................3
2.1 Battery Installation ...........................................................................3
2.2 Description of the Navigational Control Keys...................................4
2.3 Turning On/Off Pyxis SP-380.............................................................5
3PTSA and Fluorescein Measurement.......................................................5
4Calibration................................................................................................5
4.1 PTSA Calibration Process ..................................................................5
4.2 Fluorescence Calibration Process .....................................................9
5Device Information and Diagnosis .........................................................14
6Wireless Connection ..............................................................................15

iii
Confidentiality
The information contained in this manual may be confidential and proprietary and is
the property of Pyxis Lab. Information disclosed herein shall not be used to
manufacture, construct, or otherwise reproduce the goods disclosed herein. The
information disclosed herein shall not be disclosed to others or made public in any
manner without the express written consent of Pyxis Lab Inc.
Standard Limited Warranty
Pyxis Lab warrants its products for defects in materials and workmanship. Pyxis Lab
will, at its option, repair or replace instrument components that prove to be defective
with new or remanufactured components (i.e., equivalent to new). The warranty set
forth is exclusive and no other warranty, whether written or oral, is expressed or
implied.
Warranty Term
The Pyxis warranty term is thirteen (13) months ex-works. In no event shall the
standard limited warranty coverage extend beyond thirteen (13) months from original
shipment date.
Warranty Service
Damaged or dysfunctional instruments may be returned to Pyxis for repair or
replacement. In some instances, replacement instruments may be available for short
duration loan or lease.
Pyxis warrants that any labor services provided shall conform to the reasonable
standards of technical competency and performance effective at the time of delivery.
All service interventions are to be reviewed and authorized as correct and complete at
the completion of the service by a customer representative, or designate. Pyxis
warrants these services for 30 days after the authorization and will correct any
qualifying deficiency in labor provided that the labor service deficiency is exactly
related to the originating event. No other remedy, other than the provision of labor
services, may be applicable.
Repair components (parts and materials), but not consumables, provided in the
course of a repair, or purchased individually, are warranted for 90 days ex-works for
materials and workmanship. In no event will the incorporation of a warranted repair
component into an instrument extend the whole instrument’s warranty beyond its
original term.
Shipping
A Repair Authorization Number (RA) must be obtained from the Technical Support
pay freight charges to ship replacement or repaired products to the customer. The
customer shall pay freight charges for returning products to Pyxis. Any product
returned to the factory without an RA number will be returned to the customer.

1
1General Description
1.1 Specification
PTSA
Measurement Range
0 to 300 ppb
Excitation Wavelength
365 nm LED
Emission Wavelength
410 nm
Wavelength Accuracy
±1 nm
Resolution
1 ppb
Accuracy
±1% or ±1 ppb
Calibration Solution Point
0, 100, and 200 ppb
Fluorescein
Measurement Range
0 to 600 ppb
Excitation Wavelength
470 nm LED
Emission Wavelength
520 nm
Wavelength Accuracy
±1 nm
Resolution
0.1 ppb
Accuracy
±1% or ±1 ppb
Calibration Solution Point
0, 50, 250, and 500 ppb
Temperature
Measurement Range
32-160℉
Resolution
0.1℉
Accuracy
±1% of reading
Compensation Method
Automatic to 25 ℃
Others
Battery
9V alkaline battery
Typical Battery Life
3200 readings(480mAh battery)
Display
320x240 TFT-LCD, visible under direct sunlight
Dimension
L160 W74 H33 (mm)
Weight
310g (without battery)
Temperature Range
40 to 106 ℉(4 to 41 ℃)
Humidity
85% at 106 ℉(41 ℃)
Environmental
IP67, dustproof and waterproof
1.2 Pyxis SP-380 Major Features

2
The Pyxis SP-380 analyzer simultaneously measures the concentration of fluorescent
tracer PTSA and the concentration of fluorescent tracer fluorescein of a water sample.
Main features include:
Pyxis SP-380 is pre-calibrated for measuring PTSA (pyrenetetrasulfonic acid) in
the range of 0 to 300 ppb. The fluorescence PTSA measurement is automatically
compensated for sample color and turbidity interference.
Pyxis SP-380 is pre-calibrated for measuring fluorescein in the range of 0 to 20
ppb.
Large color graphic screen that can be read on direct sunlight.
1.3 Unpackaging the Instrument
Remove the instrument and accessories from the shipping container and inspect each
item for any damage that may have occurred during shipping. Verify that all items
listed on the packing slip are included. If any items are missing or damaged, please
contact Pyxis Customer Service at service@pyxis-lab.com.
1.4 Standard Accessories
•Quick Instruction Guild
•9V alkaline battery
•Full instrument manual is available from www.pyxis-lab.com
1.5 Optional Accessories
•Carrying case for SP-380
•100 ppb PTSA standard in a 500 ml brown plastic bottle
•10 ppb fluorescein standard in a 500 ml brown plastic bottle
1.6 Light Shield Cover
The light shield cover is shown in Figure 1.It should be in the closed position during
PTSA and fluorescein measurement.

3
Figure 1 Light Shield in the Open Position
2Start Pyxis SP-380
2.1 Battery Installation
Pyxis SP-380 is powered by a 9V alkaline battery. Do not use rechargeable nickel
cadmium (NiCad) batteries or any 9V lithium battery. A typical 9V battery lasts for two
months and enables about 3000 measurements. When the battery capacity is low,
Pyxis SP-380 will prompt a LOW BATTERY warning for 5 seconds and turn off
automatically. Replace the battery to resume operation of Pyxis SP-380 after the
battery warning. After new battery installation, Pyxis SP-380 will be automatically
turned on to the measurement mode.
The Pyxis SP-380 battery compartment, shown in Figure 2, is on the back side of the
instrument. Install batteries as followings:
1. Remove the battery compartment cover by loosening four screws.
2. Make sure that the smaller circular terminal (positive) of the battery is aligned with
the hexagonal socket (positive) of the battery holder, the hexagonal socket
(negative) of the battery with the circular terminal of the holder. Snap the battery
firmly into the battery holder.
Light Shield
Three keys
Measurement Cell

4
3. Replace the battery compartment cover, making sure that the sealing O-ring is
lying flat on the battery holder and tighten the four screws.
Figure 2 Install Battery
2.2 Description of the Navigational Control Keys
The Pyxis SP-380 has three keys as shown in Figure 3. The left (<), right (>) and OK
keys are used to launch an action indicated on the screen right above the keys. The
action associated with each key could be different in different operation modes.
Figure 3 Keys and the associated functions in the Measurement Mode
MEASUREMENT
PTSA
Fluorescein
P-Cal F-Cal Info
100.0 ppb
10.0 ppb
>
<OK Key Functions
Keys

5
2.3 Turning On/Off Pyxis SP-380
To turn on SP-380, press and hold on the OK key for 3 seconds, and release the OK
key when the LCD is lit.
To turn off SP-380, press and hold on the OK key for 3 seconds, and release the OK
key when the LCD is off. SP-380 will turn itself off after 60 seconds without user
interaction through the keys.
3PTSA and Fluorescein Measurement
When turned on, SP-380 will be in the measurement mode as shown in figure 3.
The water sample can be transferred to the measurement cell with using a pipette.
SP-380 can directly take a water sample from a faucet or sample valve port.
The light shield needs to be in the closed position in order to measure PTSA and
fluorescein.
Allow a few seconds for SP-380 to reach a stable PTSA and fluorescein readings. For a
sample containing 100 ppb PTSA, the measured PTSA should be stabilized within the
range of 98 to 102 ppb. For a sample containing 10.0 ppb fluorescein, the measured
fluorescein should be stabilized within the range of 9.8 to 10.2 ppb.
SP-380 does not need to be turned off between measurements of two samples.
Rinsing the measurement cell a few times is recommended.
4Calibration
SP-380 fluorescence PTSA measurement and fluorescein measurement can be
calibrated separately. To calibrate PTSA measurement requires the 100 ppb or 200
ppb PTSA standard solution. A standard with fluorescein value 10 ppb or 20 ppb can
be used to calibrate fluorescein.
4.1 PTSA Calibration Process
1) Rinse sample cell with DI water and with it near full, close the light shield. In
emergency, “non-PTSA” water, such as city water, may be used, but re-calibrate
using DI water for the zero set step as soon as it is available.
2) Power on by a press of OK key. Allow 5-10 seconds for meter to stabilize.

6
3) A Screen similar to Figure 4 appears. The unit is actively reading and displaying
both PTSA and fluorescein. The values will be very low if DI water is used; PTSA and
fluorescein should be near zero. A low non-zero value (e.g. 0.2 or 0.4, etc.) is not
problematic.
Figure 4
4) Press P-Cal labeled key (<).
5) Figure 5, the first screen of the PTSA (alone) calibration, appears.
Figure 5
MEASUREMENT
PTSA
Fluorescein
P-Cal F-Cal Info
0.0 ppb
0.0 ppb
Zero Slope Exit
PTSA CALIBRATION
Insert DI Solution
Press Zero Button

7
6) Press Zero labeled key (<) to set the zero point.
7) After successful zero set, a checkmark symbol will appear next to “Press Zero
Button” to confirm success. The screen will also update to show the Slope steps,
as in Figure 6. The Cycle command replaces Zero on the black bar and the
possible PTSA selection is displayed in red. The default is 100 ppb.
Figure 6
8) Rinse the sample cell out thoroughly (twice) with the desired PTSA standard and
with the measurement cell near full, close the light shield. (If the screen darkens,
promptly press any key to re-set the timer for auto shutdown. The key pressed
does not perform its activity, only re-sets timer. The screen then re-lights.)
9) If the 100 ppb PTSA default is not the desired PTSA for calibration, press the Cycle
labeled key (<) to cycle between the PTSA standards 100-200-300 ppb (it
repeats). The value in red will update as the setting is changed. If the default of
100 is desired then the use of Cycle (<) is not required. Ensure the value selected
matches the standard actually present.
10) Press the Slope labeled key (>) to set the slope of the standard desired and
complete PTSA calibration.
11) If calibration is successful, the screen will update with a second checkmark for the
Slope setting as in Fig. 7, and the message Calibration Succeed will appear.
MEASUREMENT
Cycle Slope Exit
PTSA CALIBRATION
Insert DI Solution
Press Zero Button
Insert 100 ppb Solution
√
Press Slope Button
Press cycle to choose solution

8
Figure 7
12) Press the Exit labeled key (OK) to return to the basic read screen. The screen will
be similar to Fig. 3. Slight variance in the PTSA value is not problematic. If Exit is
done before the second checkmark appears, the calibration will not be completed
and must be re-done. After a successful calibration, the unit does not
automatically return to the read (Measurement) mode. If Exit is held down too
long the unit will power down rather than returning to the read mode.
Quick Tips
1) If the 100 ppb PTSA concentration (the default) is the desired calibration and it is
what has been added to the measurement cell for the slope (step 9), then the key
presses from the beginning, including the power on, are: OK, <, <, {refill with PTSA
standard}, >, then after completion, Exit to return to Measurement Mode.
2) If screen darkens, the timer will shortly power down the meter. Any key press
will reset the timer, but this press does not perform any activity other than timer
restart. The next key press needed must still be done after this timer re-set press.
The timer is set to help maximize battery life. After the key press to set the zero
point, there is 40 seconds to rinse and refill the measurement cell with PTSA
standard (and close the light shield), before the next key press of either “Cycle”
(<) to change PTSA setting or “Slope” (>) to execute the final part of the
calibration.
3) After returning to read mode after calibration, rinse several times with the first
sample. The unit will continue to read the sample values without any further key
presses if it has not powered off. If there are no key presses for 20 seconds the
screen will darken (40 sec. in a calibration mode), and after another 20 seconds
without key activity will power down. If you have multiple samples a quick press
MEASUREMENT
Cycle Slope Exit
CHLOROPHYLLE CALIBRATION
Insert DI Solution
Press Zero Button
Insert 100 ppb Solution
√
Press Slope Button
√
Calibration Succeed

9
on OK or the other keys will keep the timer going, giving you time to add the next
one. To ensure accurate results and avoid sample carry-over/contamination,
rinse at least twice with the next sample before closing light shield (it’s smart to
include rinsing the inside surface of the light shield.)
4) Always rinse the unit with clean water after use and dry by clean tissue or paper
towel. Be gentle handling the open light shield.
4.2 Fluorescence Calibration Process
1) Rinse sample cell with DI water and with it near full, close the light shield. In
emergency, “non-fluorescein” water, such as city water, may be used, but re-
calibrate using DI water for the zero step as soon as it is available.
2) Power on by a press of OK key. Allow 5-10 seconds for meter to stabilize.
3) A Screen similar to Figure 3 appears. The unit is actively reading and displaying
fluorescein. The value will be very low if DI water is used; fluorescein should be near
zero. A low non-zero value (e.g. 0.1 or 0.2, etc.) is not problematic.
4) Press Calibration labeled key (<).
5) Figure 8, the first screen of the fluorescein (alone) calibration, appears.
Figure 8
4) Press Zero labeled key (<) to set the zero point.
5) After successful zero set, a checkmark symbol will appear next to “Click Zero
Button” to confirm success. The screen will also update to show the Slope steps,
as in Figure 9. The Cycle command replaces Zero on the black bar and the
possible fluorescein selection is displayed in red. The default is 50 ppb.
MEASUREMENT
Zero Slope Exit
FLUORESCEIN CALIBRATION
Insert DI Solution
Press Zero Button

10
Figure 9
6) Rinse the sample cell out thoroughly (twice) with the 50 ppb fluorescein standard
and with the measurement cell near full, close the light shield. (If the screen
darkens, promptly press any key to re-set the timer for auto shutdown. The key
pressed does not perform its activity, only re-sets timer. The screen then re-
lights.)
7) Press the Slope labeled key (>) to set the slope of the standard desired and
complete low-range fluorescein calibration.
8) If calibration is successful, the screen will update with a second checkmark for the
Slope setting as in Fig. 10, and the message Calibration Succeed will appear.
Figure 10
MEASUREMENT
Cycle Slope Exit
FLUORESCEIN CALIBRATION
Insert DI Solution
Click Zero Button
Insert 50 ppb Solution
√
Click Slope Button
Press cycle to choose solution
MEASUREMENT
Cycle Continue Exit
FLUORESCEIN CALIBRATION
Insert DI Solution
Click Zero Button
Insert 50 ppb Solution
√
Click Slope Button √
Calibration Succeed
Press Continue to Proceed

11
9) Press the Continue labeled key (>) to continue middle range fluorescein
calibration, the screen will also update to show the second Slope step, as in
Figure 11. The possible fluorescein selection is displayed in red. The default is
250 ppb. If middle range and high range fluorescein calibration are not required,
press the Exit labeled key (OK) any keys to exit. return to the basic read screen.
The screen will be similar to Fig. 3. Slight variance in the fluorescein value is not
problematic. If Exit is done before the second checkmark appears, the low range
calibration will not be completed and must be re-done. After a successful
calibration, the unit does not automatically return to the read (Measurement)
mode. If Exit is held down too long the unit will power down rather than
returning to the read mode.
Figure 11
10) Rinse the sample cell out thoroughly (twice) with the 250 ppb fluorescein
standard and with the measurement cell near full, close the light shield. (If the
screen darkens, promptly press any key to re-set the timer for auto shutdown.
The key pressed does not perform its activity, only re-sets timer. The screen then
re-lights.)
11) Press the Slope labeled key (>) to set the slope of the standard desired and
complete middle-range fluorescein calibration.
12) If calibration is successful, the screen will update with a third checkmark for the
Slope setting as in Fig. 12, and the message Calibration Succeed will appear.
MEASUREMENT
Cycle Slope Exit
FLUORESCEIN CALIBRATION
Insert 50 Solution
Click Slope Button
Insert 250 ppb Solution
√
Click Slope Button

12
Figure 12
13) Press the Continue labeled key (>) to continue high range fluorescein calibration,
the screen will also update to show the third Slope step, as in Figure 13. The
possible fluorescein selection is displayed in red. The default is 500 ppb. If high
range fluorescein calibration is not required, press the Exit labeled key (OK) any
keys to exit return to the basic read screen. The screen will be similar to Fig. 3.
Slight variance in the fluorescein value is not problematic. If Exit is done before
the third checkmark appears, the middle range calibration will not be completed
and must be re-done. After a successful calibration, the unit does not
automatically return to the read (Measurement) mode. If Exit is held down too
long the unit will power down rather than returning to the read mode.
Figure 13
MEASUREMENT
Cycle Slope Exit
FLUORESCEIN CALIBRATION
Insert 50 Solution
Click Slope Button
Insert 250 ppb Solution
√
Click Slope Button
Calibration Succeed
Press Continue to Proceed
√
MEASUREMENT
Cycle Slope Exit
FLUORESCEIN CALIBRATION
Insert 250 Solution
Click Slope Button
Insert 500 ppb Solution
√
Click Slope Button

13
14) Rinse the sample cell out thoroughly (twice) with the 500 ppb fluorescein
standard and with the measurement cell near full, close the light shield. (If the
screen darkens, promptly press any key to re-set the timer for auto shutdown.
The key pressed does not perform its activity, only re-sets timer. The screen then
re-lights.)
15) Press the Slope labeled key (>) to set the slope of the standard desired and
complete high-range fluorescein calibration.
16) If calibration is successful, the screen will update with a fourth checkmark for the
Slope setting as in Fig. 14, and the message Calibration Succeed will appear.
Figure 14
17) Press the Exit labeled key (OK) any keys to exit return to the basic read screen.
The screen will be similar to Fig. 3. Slight variance in the fluorescein value is not
problematic. If Exit is done before the fourth checkmark appears, the high range
calibration will not be completed and must be re-done. After a successful
calibration, the unit does not automatically return to the read (Measurement)
mode. If Exit is held down too long the unit will power down rather than
returning to the read mode.
Quick Tips
1) If the 50 ppb fluorescein concentration (the default) is the desired calibration and
it is what has been added to the measurement cell for the slope (step 9), then the
key presses from the beginning, including the power on, are: OK, <, <, {refill with
√
MEASUREMENT
Cycle Slope Exit
FLUORESCEIN CALIBRATION
Insert 250 Solution
Click Slope Button
Insert 500 ppb Solution
√
Click Slope Button
Calibration Succeed
√

14
FLUORESCEIN standard}, >, then after completion, press Exit key to return to
Measurement Mode.
2) If screen darkens, the timer will shortly power down the meter. Any key press
will reset the timer, but this press does not perform any activity other than timer
restart. The next key press needed must still be done after this timer re-set press.
The timer is set to help maximize battery life. After the key press to set the zero
point, there is 40 seconds to rinse and refill the measurement cell with
fluorescein standard (and close the light shield), before the next key press of
either “Cycle” (<) to change fluorescein setting or “Slope” (>) to execute the final
part of the calibration.
3) After returning to read mode after calibration, rinse several times with the first
sample. The unit will continue to read the sample values without any further key
presses if it has not powered off. If there are no key presses for 20 seconds the
screen will darken (40 sec. in a calibration mode), and after another 20 seconds
without key activity will power down. If you have multiple samples a quick press
on OK or the other keys will keep the timer going, giving you time to add the next
one. To ensure accurate results and avoid sample carry-over/contamination,
rinse at least twice with the next sample before closing light shield (it’s smart to
include rinsing the inside surface of the light shield.)
4) Always rinse the unit with clean water after use and dry by clean tissue or paper
towel. Be gentle handling the open light shield.
5Device Information and Diagnosis
The device information is shown when the Info labeled OK key in the measurement mode
is pressed momentarily (Figure 3). The screen contains the device serial number, software
version, and hardware version (Figure 15). The battery life as a percentage and the
standard that were used in the last calibration are also shown.
Press the diagnosis labeled key to switch to the diagnosis screen where raw measurement
data are displayed (Figure 16). The information has no use for normal operation. Please
provide an image of both the device information screen and the diagnosis screen when

15
Figure 15 Figure 16
6Wireless Connection
Pyxis SP-380 can be connected to a smart phone or a computer via WIFI or Bluetooth
for upgrading the device software. SP-380 can be wirelessly paired with other Pyxis
devices for exchanging data. In the normal operation modes, the wireless function is
turned off. If you want to explore the SP-380 wireless functions, please contact Pyxis
MEASUREMENT
Diagnosis Exit
DEVICE INFORMATION
Serial Number 160868
Hardware Ver 3.0
Software Ver 1.1.1
Software Rev 488
Battery Satus 54%
WiFi SSID SP380-160001
PTSA Calib 100
FC Calib 10
MEASUREMENT
FactoryReset Exit
SYSTEM DIAGNOSIS
250 2064 20083 201065
[1] 69
[2] 115
[3] 700
[4] 500
[5] 3000
[10] 210
[11]
[12] 0.00
[6] 3366
[7] 6
[8] 16
[9] 1257
[10] 2278
Other manuals for SP-380
1
Table of contents
Other Pyxis Measuring Instrument manuals

Pyxis
Pyxis ST-525 User manual

Pyxis
Pyxis SP-800 Reference guide

Pyxis
Pyxis IK-76SSS-S03 User manual

Pyxis
Pyxis IK-765SS-O3 User manual

Pyxis
Pyxis SP-395T TTA User manual

Pyxis
Pyxis ST-540SS-HR User manual

Pyxis
Pyxis SP-900 User manual

Pyxis
Pyxis EM-400 User manual

Pyxis
Pyxis ST-774 User manual

Pyxis
Pyxis PRISM RT-100 User manual

Pyxis
Pyxis ST-525SS User manual

Pyxis
Pyxis ST-590 Series User manual

Pyxis
Pyxis SP-210 User manual

Pyxis
Pyxis HM-500 Series User manual

Pyxis
Pyxis SP-395 User manual

Pyxis
Pyxis SP-200 OXIPOCKET User manual

Pyxis
Pyxis PRISM RT-200 User manual

Pyxis
Pyxis FS-100 Series User manual

Pyxis
Pyxis PRISM RT-100 User manual

Pyxis
Pyxis SP-910 Reference guide