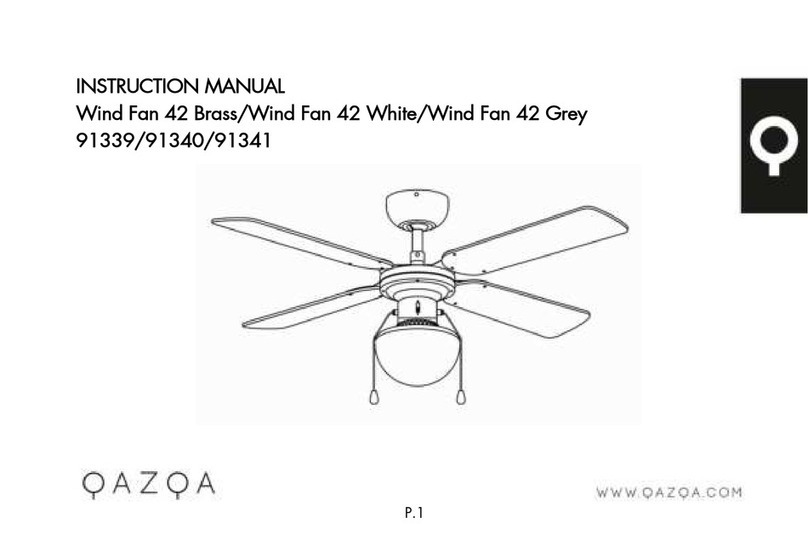
Qazqa Wind 91339 User manual

P.1
INSTRUCTION MANUAL
English and Dutch
Wind Fan 42 Brass/Wind Fan 42 White/Wind Fan 42 Grey
91339/91340/91341

1. Warning symbols
R
ead the instructions
C
aution
L
amp
2. General Safety Instructions
R
ead this instruction manual thoroughly before using the appliance and save it for future reference and if
necessary pass the instruction manual on to a third party.
WARNING:
W
hen using electrical appliance, basic safety precautions should always be followed to
reduce the risk of fire, electrical shock and personal injury.
P.2

1
)
General
P.3
B
efore carrying out any work on the fan, disconnect it from the electrical supply!
C
heck if the electrical specifications of this appliance are compatible with your installation. The suppler
accepts no responsibility for any physical injur
y
or material damage resulting from incorrect use or installation
of this fan. If you have the slightest doubt, please contac
t
electrician.
U
nauthorized use and technical modifications to the appliance can lead to danger to life and health.
T
his appliance can be used b
y
children aged from 8 years and above and persons with reduced physical,
sensor
y
or mental capabilities or lack of experience and knowledge if they have been given supervision or
instruction concerning use of the appliance in a safe way and understand the hazards involved. Children shall
no
t
play with the appliance. Cleaning and user maintenance shall no
t
be made b
y
children withou
t
supervision
C
hildren should be supervised to ensure that they do no
t
play with the appliance.
T
his appliance is for indoor use only.
M
eans for disconnection must be incorporated in the fixed wiring in accordance with the wiring rules.
N
ever install the appliance in a mois
t
or wet room.
B
e careful when working near the rotating blades. The fan should be installed a
t
leas
t
aheigh
t
of 2.3m
B
efore pushing the reversible slide switch, it is necessary to stop the action of the blades b
y
turning off the fan
D
on’
t
place your arm or other object in the path of the blades, when the fan is operating.
A
lways maintain the minimum distance between the lamp and an
y
inflammable material
(curtains, wall etc), as indicated on the pictogram
M
eans for all poles disconnection having a contact separation that provide full disconnection under over
voltage categor
y
III conditions must be incorporated in the fixed wiring in accordance with national wiring
rules.
P
ower suppl
y
wire from ceiling needs 1.5 sq mm wire
W
arning: Before obtaining access to terminals, all suppl
y
circuits must be disconnected.

2
.
El
ectrica
l
sa
f
et
y
T
he appliance should be installed by authorized electrician only acc. to national wiring rules.
3. S
p
ecific Safet
y
Rules
T
he fan is to be installed so tha
t
the blades are more than 2.3 m above the floor
4
.
E
nvironmenta
l
p
rotection
CAUTION!
E
lectrical
p
roducts must no
t
be thrown out with domestic waste. The
y
mus
t
be taken to a communal
collectin
g
p
oin
t
for environmentall
y
friendl
y
dis
p
osal in accordance with local re
g
ulations. Contac
t
y
our
local authorities or stockis
t
for advice on rec
y
clin
g
.The
p
acka
g
in
g
material is rec
y
clable. Dis
p
ose of
the
p
acka
g
in
g
in an environmentall
y
friendl
y
manner and make it available for the rec
y
clable material
collection-service.
5. A
pp
liance s
p
ecifications
TECHNICAL CHARACTERISTICS
Rated volta
g
e230-240
V
Rated fre
q
uenc
y
50
Hz
Rated wattage 50
W
Bulb ratin
g
E14 1x60W Max.
Ambien
t
o
p
eratin
g
tem
p
erature 25
°C
Protection class I
IP number IPX0
Protective shields N/A
P.4

.
6. The ceiling fan (element)
PARTS DESCRIPTION
1. MOUNTING PLATE
2.
J
HOOK (FOR TEMPORARY HANG UP THE
FAN
WHEN WIRING CONNECTION)
3. SCREWS
4. SCREWS
5. HANGER BALL
6. UPPER CANOPY
7. DOWNROD
8. CROSS PIN
9. SCREWS
10. COTTER PIN
11. DOWNROD YOKE
12. MOTOR
13. BLADE HOLDERS SCREW
14. BLADE
15. BLADE HOLDER
16. SCREW
17. SCREW
18. LIGHT PLATE
19. LAMP HOLDER
20. BULB (No
t
p
rovided)
21.GLOBE
P.5

7. Installation of the ceilin
g
fan
1. Install the mounting
plate by screw (Fig.1)
2. Insert downrod over
upper canopy (Fig 2 3)
3. Then, insert the cross
pin over yoke and
Cotter pin(Fig 4)
4. Connect the wire as the
fig show (Fig 5)
P.6

5. Make sure the wirin
g
correct, if
y
ou
are no
t
sure,
p
ls consult
q
ualified
electrician
(
Fi
g
.6
)
Black +Brown wire “L”
Blue wire “N”
Green &
y
ellow wire
6. Han
g
u
p
the fan and assembl
y
the mountin
g
p
late with the
motor se
t
b
y
4sidescrews
(
Fi
g
7
)
7. Assembl
y
the blades to blade
holders
(
Fi
g
8
)
8. Install the holder on motor b
y
screws
(
Fi
g
9
)
9. Install the light bulb (not provided)
(Fig 10)
10. Install the
g
lass
(
Fi
g
11
)
P.7

If the fan or light kit is PARTIALLY pre-assembled, you can skip the assembly procedures to next step
11
11. Now, the fan is
completed (Fig 12)
P.8

8
.
H
ow to use
-
O
ne pull chain switch is for light control, another one for speed control
-
T
he speed can be selected by pressing the speed chain
HI
-1 pull,
MED
–2 pull,
LOW
—3 pull,
OFF
----4 pull
-
L
ight on off can be controlled by pressing the light chain
ON
–1 pull,
OFF
–2 pull
-
D
irection switch on the fan ‘s switch box(SUMMER and WINTER switch)
-
D
own for summer make the air movement directly from ceiling
-
U
p for winter, to circulate the warm air generated by heater to floor
9. Remote Control
(
remote control ada
p
table, but this model does not included
)
T
his ceiling fan can be installed with remote control, but make sure
y
ou know how to install the device in safe way or
consult licensed electrician
W
arranty may be affected if
y
ou install the improper remote control or install it in improper way
10.Disconnect from mains before maintenance or cleanin
g
.
D
o not use a wet sponge to clean the appliance.
1.
B
efore conducting any cleaning or maintenance work, disconnect the lamp from the electrical supply and wait until it
cools down
2.
N
o abrasive products, solvents, detergent or any other liquid may be used to clean the fan or lamp
3.
B
esurethepowerisoffwhen
y
ou clean the fan
4.
D
on’t clean the motor, switch house and other electric parts of the fan with water in order to avoid short circuit
st nd rd th
s
t
n
d
P.9

11.Trouble shootin
g
TROUBLE PROBABLE CAUSES SUGGESTED REMEDY
1. Fan will not start A/ Fuse or circuit breaker blown.
B/ Loose
p
ower line connections
to the fan.
C/ S
p
eed controller not in correct
p
osition.
A/ Check main and branch circuit
fuses or circuit breakers.
B/ Check line wire connections to fan
C/ Check s
p
eed controller’s
p
osition.
2. Fan sound nois
y
A/ To
p
cano
py
touchin
g
ceilin
g
.
B/ Loose fan blade screws.
C/ Ceilin
g
fan not secured a
g
ainst
ceilin
g
.
D/ Incorrect s
p
eed controller.
A/ Lower Cano
py
from ceilin
g
to
ensure minimum 3 mm clearance.
B/ Re-ti
g
hten all screws on fan blades
but never over-ti
g
hten.
C/ Re-ti
g
hten all screws in the
han
g
in
g
bracket or
p
late.
D/ Chan
g
e the controller to the one
su
pp
lied.
3. Mechanical Noise A/ Allow at least for 8 hours
settlin
g
-in
p
eriod.
4. Fan Wobbles A/ Fan blades are not horizontal to
ceilin
g
.
B/ Blade screws are loose.
A/ Measure from ceilin
g
to ti
p
of
blades, then rotate fan so all blades
are checked for e
q
ual hei
g
ht from
ceilin
g
(not ad
j
ustments ma
y
be made
b
y
sli
g
ht
p
ressure u
p
or down on
blade holders). Make sure all screws
are securel
y
fastened.
DYNAMIC BLADE BALANCE KIT
YARDSTICK
MEASURING
POINT
P.10

PREFACE
Y
our ceiling fan may sometimes have wobble problem when operate due to irregularity in blades or the blade holder. Also, improper assembly in the mounting system
may cause some additional problem also bearing crooked. The following procedure to remedy such problem is strongly recommended by us from our past experience in
handling the wobble problem.
D
ynamic blade balancing kit for ceiling fans
1.
M
ake sure that all blade are firmly screwed into the blade holder
2.
M
ake sure that all blades are firmly secured the flywheel and check pitch of blade holders all must be the same
3.
B
y looking up the fan from below, check and be certain that none of the blade holders are bent so that none of the blade is out of position. A correction can be
made by very gently bending the blade holder back into position
4.
B
y the simple use of a household yardstick blade tracking can be checked, out the yardstick up against the ceiling vertically and even with the outside leading edge
of a blade. Note the distance of the edges of the blade to t he ceiling; carefully turn the blade slowly by hand to check the remaining blades. If blade is notin
alignment, the blade holder may be gently bent up or down to be in line with the other blades
I
f by following all the steps and the wobble problem is not solved, a dynamic balancing need to be done by the use of the balancing kit. Follow the procedure listed below:
T
urn the fan on and adjust the speed control (usually high speed) setting to the speed, which creates to greatest wobble.
T
urn the fan off; select on blade place the balance clip on it. Halfway between the blade holder and the blade up on the rear edge of the blade.
T
urn the fan on, watch to see of the wobble is improved or worse. Then, turn the fan off again and move the clip to another blade and test again. Repeat this process
with all blades and then note that blade which is the most improved.
M
ove the clip back to the blade, which showed the most improvement. Move the clip inward and outward on this blade and operate t he fan to find the position
where the clip gives the most improvement
N
ext remove the clip and install a balancing weight to the top of the blade along the centerline near the point where the clip was positioned.
C
aution: stay clear of the blades if the clip for any reason is not secured, injury could result
12
.
O
t
h
ers
H
ave your product repaired by a qualified person
T
his electric product is in accordance with the relevant safety requirements. Repairs should only be carried out by qualified persons using original spare parts; otherwise
this may result in considerable danger to the user. This appliance can be used by children aged from 8 years and above if they have been given supervision or instruction
concerning use of the appliance in a safe way and if they understand the hazards involved. Cleaning and user maintenance shall not be made by children unless they are
older than 8 and supervised. Keep the appliance and its cord out of reach of children aged less than 8 years.
P
lease contact the store which you bought the product for after sale services if
question
P.11

T
his appliance can be used by children aged from 8 years and above if they have been given supervision or instruction concerning use
of the appliance in a safe way and if they understand the hazards involved. Cleaning and user maintenance shall not be made by children
unless they are older than 8 and supervised. Keep the appliance and its cord out of reach of children aged less than 8 years.
A
ppliances can be used by persons with reduced physical, sensory or mental capabilities or lack of experience and knowledge if they
have been given supervision or instruction concerning use of the appliance in a safe way and understand the hazards involved.
Children shall no
t
p
la
y
with the a
pp
liance.

P.1
INSTRUCTION MANUAL
Wind Fan 42 Brass/Wind Fan 42 White/Wind Fan 42 Grey
91339/91340/91341
HANDLEIDING
Plafondventilator Wind 42
91339/91340/91341
P. 1
HANDLEIDING
Plafondventilator Wind 42
91339/91340/91341
P. 1

1. Warning symbols
R
ead the instructions
C
aution
L
amp
2. General Safety Instructions
R
ead this instruction manual thoroughly before using the appliance and save it for future reference and if
necessary pass the instruction manual on to a third party.
WARNING:
W
hen using electrical appliance, basic safety precautions should always be followed to
reduce the risk of fire, electrical shock and personal injury.
P.2
Lees de instructies
Waarschuwing
Lamp/Lichtbron
2. Algemene veiligheidsinstructies
Lees dit instructieboekje zorgvuldig door voor gebruik. Bewaar de kassabon samen met deze
handleiding als toekomstige referentie/garantie en geef dit boekje door wanneer nodig aan de
derde partij.
WAARSCHUWING: Bij gebruik het van elektrische producten, neem de voorzorgsmaatregelen
in acht om kans op vuur, elektrische schokken en persoonlijke verwondingen te voorkomen.
1. Waarschuwings symbolen
P. 2
Lees de instructies
Waarschuwing
Lamp/Lichtbron
2. Algemene veiligheidsinstructies
Lees dit instructieboekje zorgvuldig door voor gebruik. Bewaar de kassabon/factuur samen met
deze handleiding als toekomstige referentie/garantie en geef dit boekje door wanneer nodig
aan de derde partij.
WAARSCHUWING: Bij gebruik het van elektrische producten, neem de voorzorgsmaatregelen
in acht om kans op vuur, elektrische schokken en persoonlijke verwondingen te voorkomen.
1. Waarschuwings symbolen
P. 2

1
)
General
P.3
B
efore carrying out any work on the fan, disconnect it from the electrical supply!
C
heck if the electrical specifications of this appliancearecompatiblewithyourinstallation.Thesuppler
accepts no responsibility for any physical injur
y
or material damage resulting from incorrect use or installation
of this fan. If you have the slightest doubt, please contac
t
electrician.
U
nauthorized use and technical modifications to theappliancecanleadtodangertolifeandhealth.
T
his appliance can be used b
y
children aged from 8 years and above and persons with reduced physical,
sensor
y
or mental capabilities or lack of experience and knowledge if they have been given supervision or
instruction concerning use of the appliance in a safe way and understand the hazards involved. Children shall
no
t
play with the appliance. Cleaning and user maintenance shall no
t
be made b
y
children withou
t
supervision
C
hildren should be supervised to ensure that they do no
t
play with the appliance.
T
his appliance is for indoor use only.
M
eans for disconnection must be incorporated in the fixed wiring in accordance with the wiring rules.
N
ever install the appliance in a mois
t
or wet room.
B
e careful when working near the rotating blades. The fan should be installed a
t
leas
t
aheigh
t
of 2.3m
B
efore pushing the reversible slide switch, it is necessary to stop the action of the blades b
y
turning off the fan
D
on’
t
place your arm or other object in the path of the blades, when the fan is operating.
A
lways maintain the minimum distance between the lamp and an
y
inflammable material
(curtains, wall etc), as indicated on the pictogram
M
eans for all poles disconnection having a contact separation that provide full disconnection under over
voltage categor
y
III conditions must be incorporated in the fixed wiring in accordance with national wiring
rules.
P
ower suppl
y
wire from ceiling needs 1.5 sq mm wire
W
arning: Before obtaining access to terminals, all suppl
y
circuits must be disconnected.
1) Algemeen
De installatie van de ventilator moet worden uitgevoerd door iemand die over de
benodigde kennis beschikt of door een erkend elektricien.
WAARSCHUWING: Om het risico van brand en elektrische schokken te voorkomen,
schakel je de stroomtoevoer naar de ventilator uit in de hoofdzekeringkast of de hoofd-
schakelkast voor je begint met het installeren van de ventilator of voor je de ventilator
onderhoud of accessoires installeert.
Controleer voordat je de ventilator aansluit of het voltage van de ventilator overeenkomt
met de netspanning van je woning. De verkoper is niet aansprakelijk voor lichamelijke of
materiële schade die te wijten is aan het niet naleven van deze handleiding of wanneer
blijkt dat de ventilator niet naar behoren is gemonteerd. Als je enige onzekerheden hebt
neem dan contact op met een elektricien.
Gebruik uitsluitend de door de fabrikant geleverde of aanbevolen onderdelen. Maak geen
aanpassingen aan de ventilator. Onverantwoord gebruik en technische modificaties aan
de ventilator kunnen leiden tot lichamelijk letsel of schade aan de ventilator.
De installatiehoogte tussen vloer en bladen moet ten minste 2,30 meter zijn.
Zorg ervoor dat je voor de ventilator een plaats hebt gekozen die voldoende vrije ruimte
biedt zodat de bladen ongehinderd kunnen draaien. Controleer of er geen obstakels in het
draaigebied zijn.
De - / + polen moeten los van elkaar worden bevestigd om overspanning op de bedrading
te voorkomen. Zorg ervoor dat alle elektrische aansluitingen voldoen aan de plaatselijke
wetgeving en voorschriften inzake elektrische installaties.
Deze ventilator mag alleen worden gebruikt met minimaal 1,5 mm²installatiedraad.
P. 3
1) Algemeen
WAARSCHUWING: Om het risico van brand en elektrische schokken te voorkomen,
schakel je de stroomtoevoer naar de ventilator uit in de hoofdzekeringkast of de hoofd-
schakelkast voor je begint met het installeren van de ventilator of voor je de ventilator
onderhoudt of accessoires installeert.
Controleer voordat je de ventilator aansluit of het voltage van de ventilator overeenkomt
met de netspanning van je woning. De verkoper is niet aansprakelijk voor lichamelijke of
materiële schade die te wijten is aan het niet naleven van deze handleiding of wanneer
blijkt dat de ventilator niet naar behoren is gemonteerd. Als je enige onzekerheden hebt
neem dan contact op met een elektricien.
Gebruik uitsluitend de door de fabrikant geleverde of aanbevolen onderdelen. Maak geen
aanpassingen aan de ventilator. Onverantwoord gebruik en technische modificaties aan
de ventilator kunnen leiden tot lichamelijk letsel of schade aan de ventilator.
De installatiehoogte tussen vloer en bladen moet ten minste 2,30 meter zijn.
Zorg ervoor dat je voor de ventilator een plaats hebt gekozen die voldoende vrije ruimte
biedt zodat de bladen ongehinderd kunnen draaien. Controleer of er geen obstakels in het
draaigebied zijn.
De - / + polen moeten los van elkaar worden bevestigd om overspanning op de bedrading
te voorkomen. Zorg ervoor dat alle elektrische aansluitingen voldoen aan de plaatselijke
wetgeving en voorschriften inzake elektrische installaties.
Deze ventilator mag alleen worden gebruikt met minimaal 1,5 mm²installatiedraad.
Kinderen onder de 8 jaar en personen met een lichamelijke of verstandelijke beperking die
niet in staat zijn het apparaat te hanteren zoals in de gebruiksaanwijzing is beschreven,
mogen dit apparaat niet gebruiken.
P. 3

1. Warning symbols
R
ead the instructions
C
aution
L
amp
2. General Safety Instructions
R
ead this instruction manual thoroughly before using the appliance and save it for future reference and if
necessary pass the instruction manual on to a third party.
WARNING:
W
hen using electrical appliance, basic safety precautions should always be followed to
reduce the risk of fire, electrical shock and personal injury.
P.2
Lees de instructies
Waarschuwing
Lamp/Lichtbron
2. Algemene veiligheidsinstructies
Lees dit instructieboekje zorgvuldig door voor gebruik. Bewaar de kassabon samen met deze
handleiding als toekomstige referentie/garantie en geef dit boekje door wanneer nodig aan de
derde partij.
WAARSCHUWING: Bij gebruik het van elektrische producten, neem de voorzorgsmaatregelen
in acht om kans op vuur, elektrische schokken en persoonlijke verwondingen te voorkomen.
1. Waarschuwings symbolen
P. 2
Laat geen verpakkings onderdelen (plastic zak, doos en piepschuim) binnen het bereik van
kinderen liggen.
Om de kans op lichamelijk letsel of schade aan de ventilator of andere voorwerpen te
vermijden, dien je voorzichtig te zijn bij het werken aan of in de buurt van de ventilator en
bij het schoonmaken ervan. Schoonmaken en onderhoud van de ventilator mag niet
worden gedaan door kinderen zonder toezicht.
Gebruik geen water of agressieve reinigingsmiddelen voor het schoonmaken van de ventila-
tor en de bladen. Een droge stofdoek of licht bevochtigde doek volstaat meestal voor het
schoonmaken.
Gebruik deze ventilator niet in dezelfde ruimte en op hetzelfde ogenblik met een gasvuur of
vuur met andere brandstof, tenzij het rookkanaal onder deze omstandigheden door een
bevoegd persoon is getest.
Deze ventilator is niet geschikt voor gebruik in de badkamer of in andere ruimtes waarin de
ventilator in contact met water kan komen.
Gebruik de knop voor het omkeren van de draairichting niet voordat de ventilator volledig
tot stilstand is gekomen.
Steek nooit iets tussen de bladen van de ventilator terwijl ze draaien
Vanwege Europese veiligheidsvoorschriften mag de ventilator, indien deze vlak tegen het
plafond wordt geïnstalleerd niet opnieuw worden geïnstalleerd met een stang. Als dit wordt
geprobeerd, kan dit ernstig letsel veroorzaken.
Gebruik geen dimmer om de snelheid van de ventilator te regelen.
Na het voltooien van de installatie controleer je of alle aansluitingen absoluut veilig en
stevig zijn gemonteerd.
P. 4

2. Elektriciteits veiligheid
De installatie van de ventilator moet worden uitgevoerd door iemand die over de beno-
digde kennis beschikt of door een erkend elektricien volgens de nationale bedrading regels.
3. Specifieke veiligheidsregels
Zorg dat de ventilator minimaal 2.30 meter boven de vloer geïnstraleerd word.
4. Milieubescherming
5. Ventilator Specificaties
WAARSCHUWING!
Gooi elektrische producten niet bij het huisvuil. Neem contact op met je
gemeente of fabrikant voor advies over het recyclen van de ventilator. Ook
het verpakkingsmateriaal is recyclebaar. Lever dit product en het verpakking-
smateriaal in bij het daarvoor bestemde inzamelpunt in je gemeente.
Voltage / Spannings toevoer
Frequentie
Wattage
Lichtbron
Omgevingstemperatuur
Bescherm Klasse
IP waarde
Bescherm Velden
220/240V
50HZ
50W
E14 1X60W max
25 °C
I
IP20
N/A
TECHNISCHE GEGEVENS
P. 5

1. Warning symbols
R
ead the instructions
C
aution
L
amp
2. General Safety Instructions
R
ead this instruction manual thoroughly before using the appliance and save it for future reference and if
necessary pass the instruction manual on to a third party.
WARNING:
W
hen using electrical appliance, basic safety precautions should always be followed to
reduce the risk of fire, electrical shock and personal injury.
P.2
!
6. The ceiling fan (element)
PARTS DESCRIPTION
1. MOUNTING PLATE
2.
J
HOOK (FOR TEMPORARY HANG UP THE
FAN
WHEN WIRING CONNECTION)
3. SCREWS
4. SCREWS
5. HANGER BALL
6. UPPER CANOPY
7. DOWNROD
8. CROSS PIN
9. SCREWS
10. COTTER PIN
11. DOWNROD YOKE
12. MOTOR
13. BLADE HOLDERS SCREW
14. BLADE
15. BLADE HOLDER
16. SCREW
17. SCREW
18. LIGHT PLATE
19. LAMP HOLDER
20. BULB (No
t
p
rovided)
21.GLOBE
P.5
ONDERDELEN BESCHRIJVING
1. Montageplaat
2. J- haak (voor het tijdelijk ophangen van de ventilator
tijdens het aansluiten van de bedrading)
3. Schroeven
4. Schroeven
5. Bevestigings module
6. Plafondplaat
7. Stalen stang
8. Splitpen
9. Schroeven
10. Dwarspen
11. Stang bevestiging
12. Motor
13. Bladhouders Schroeven
14. Ventilator blad
15. Blad houder
16. Schroeven
17. Schroeven
19. Fitting
20. Lichtbron (niet inclusief)
21. Glazen kap
6. Onderdelen plafondventilator
P. 6
ONDERDELEN BESCHRIJVING
1. Montageplaat
2. J- haak (voor het tijdelijk ophangen van de ventilator
tijdens het aansluiten van de bedrading)
3. Schroeven
4 . Schroeven
5. Bevestigings module
6. Plafondplaat
7. Stalen stang
8. Splitpen
9. Schroeven
10. Dwarspen
11. Stang bevestiging
12. Motor
13. Bladhouders Schroeven
14 . Ventilator blad
15. Blad houder
16. Schroeven
17. Schroeven
18. Trekkoord
19. Fitting E27
20. Lichtbron (niet inclusief)
21. Glazen kap
6. Onderdelen plafondventilator
P. 6

1. Warning symbols
R
ead the instructions
C
aution
L
amp
2. General Safety Instructions
R
ead this instruction manual thoroughly before using the appliance and save it for future reference and if
necessary pass the instruction manual on to a third party.
WARNING:
W
hen using electrical appliance, basic safety precautions should always be followed to
reduce the risk of fire, electrical shock and personal injury.
P.2
Kinderen onder de 8 jaar en personen met een lichamelijke of verstandelijke beperking die
niet in staat zijn het apparaat te hanteren zoals in de gebruiksaanwijzing is beschreven,
mogen dit apparaat niet gebruiken.
Laat geen verpakkings onderdelen (plastic zak, doos en piepschuim) binnen het bereik van
kinderen liggen.
Om de kans op lichamelijk letsel of schade aan de ventilator of andere voorwerpen te
vermijden, dien je voorzichtig te zijn bij het werken aan of in de buurt van de ventilator en
bij het schoonmaken ervan. Schoonmaken en onderhoud van de ventilator mag niet
worden gedaan door kinderen zonder toezicht.
Gebruik geen water of agressieve reinigingsmiddelen voor het schoonmaken van de ventila-
tor en de bladen. Een droge stofdoek of licht bevochtigde doek volstaat meestal voor het
schoonmaken.
Gebruik deze ventilator niet in dezelfde ruimte en op hetzelfde ogenblik met een gasvuur of
vuur met andere brandstof, tenzij het rookkanaal onder deze omstandigheden door een
bevoegd persoon is getast.
Deze ventilator is niet geschikt voor gebruik in de badkamer of in andere ruimtes waarin de
ventilator in contact met water kan komen.
Gebruik de knop voor het omkeren van de draairichting niet voordat de ventilator volledig
tot stilstand is gekomen.
Steek nooit iets tussen de bladen van de ventilator terwijl ze draaien
Vanwege Europese veiligheidsvoorschriften mag de ventilator, indien deze vlak tegen het
plafond wordt geïnstalleerd niet opnieuw worden geïnstalleerd met een stang. Als dit wordt
geprobeerd, kan dit ernstig letsel veroorzaken.
Gebruik geen dimmer om de snelheid van de ventilator te regelen.
Na het voltooien van de installatie controleer je of alle aansluitingen absoluut veilig en
stevig zijn gemonteerd. P. 4
7. Installatie van de plafondventilator
P. 7
1. Pak de ventilator uit en controleer de inhoud.
Schakel voor installatie de stroomtoevoer uit om
elektrische schokken te voorkomen.
2. Boor 2 gaten in een plafond(balk). Zorg ervoor dat
je geen elektrische leidingen doorboort. Schroef de
montageplaat vast met schroeven, zoals afgebeeld
in fig. 2. Deze constructie moet een gewicht van
tenminste 4 0 kg kunnen dragen.
3. Haal het installatiedraad door de stalen stang en
plaats de plafondplaat over de stang, zoals afge
beeld in fig. 3 en 4
4 . Steek de dwarspen door de stang en zet het vast
met de splitpen en schroef het vast, zoals afge-
beeld in fig. 5
5. Verbind de bedrading zoals in fig 6.

If the fan or light kit is PARTIALLY pre-assembled, you can skip the assembly procedures to next step
!!
11. Now, the fan is
completed (Fig 12)
"#$
7. Zorg dat de bedrading correct wordt aange-
sloten. Bij onzekerheid neem contact op met
een elektricien, fig 7
A. Zwart + Bruine draad (schakel + fase) “L”
B. Blauwe draad (nul) “N”
C. Groen/gele draad (aarde)
8. Hang de de ventilator op en monteer de
montageplaat met de motor. Gebruik hiervoor
de vier meegeleverde schroeven, fig. 8
9. Bevestig de bladen in de bladhouders, fig 9
10. Bevestig de bladhouders aan de motor door
middel van de meegeleverde schroeven, fig. 10
11. Installeer de lichtbron (niet incl.) fig. 11
12. Installeer het glas en bevestig dit met een
schroef, fig 12
P. 8
7. Zorg dat de bedrading correct wordt aange-
sloten. Bij onzekerheid neem contact op met
een elektricien, fig 7
A. Zwart + Bruine draad (schakel + fase) “L”
B. Blauwe draad (nul) “N”
C. Groen/gele draad (aarde)
8. Hang de de ventilator op en monteer de
plafondplaat met de motor. Gebruik hiervoor
de vier meegeleverde schroeven, fig. 8
9. Bevestig de bladen in de bladhouders, fig 9
10. Bevestig de bladhouders aan de motor door
middel van de meegeleverde schroeven, fig. 10
11. Installeer de lichtbron (niet incl.) fig. 11
12. Installeer het glas en bevestig dit met een
schroef, fig 12
P. 8
This manual suits for next models
2
Table of contents
Languages:
Other Qazqa Fan manuals

Qazqa
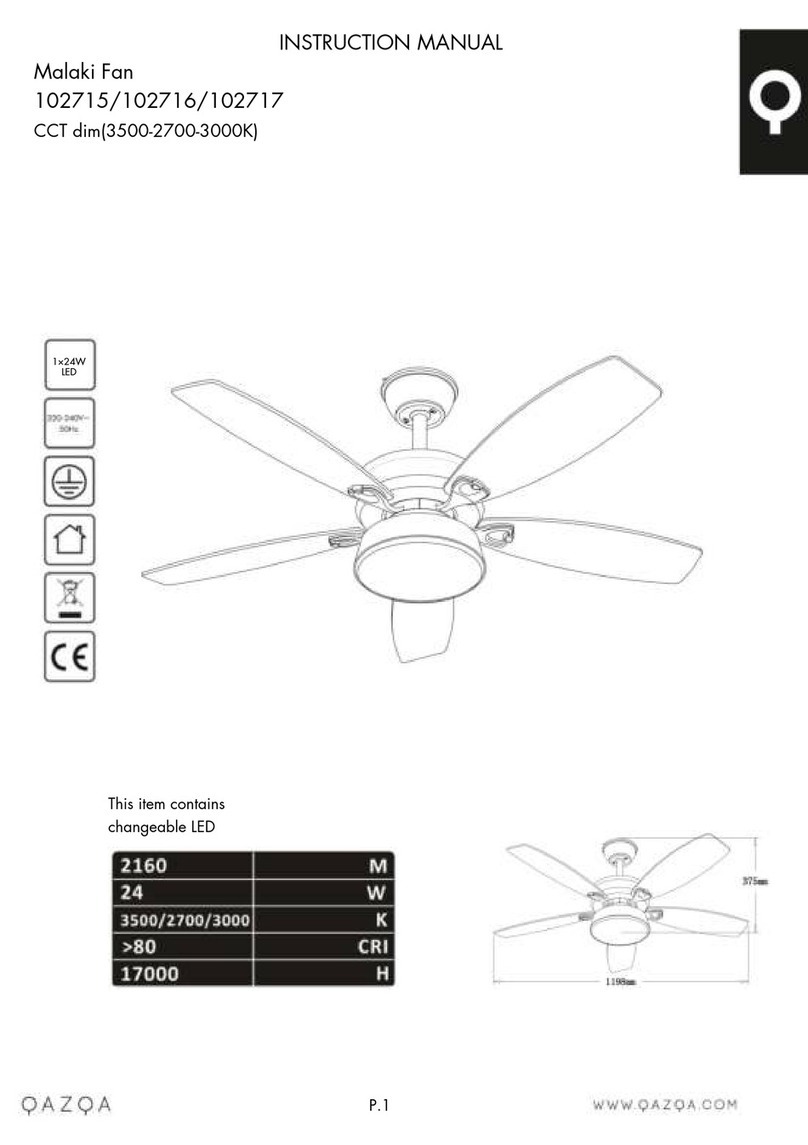
Qazqa Malaki 102715 User manual

Qazqa
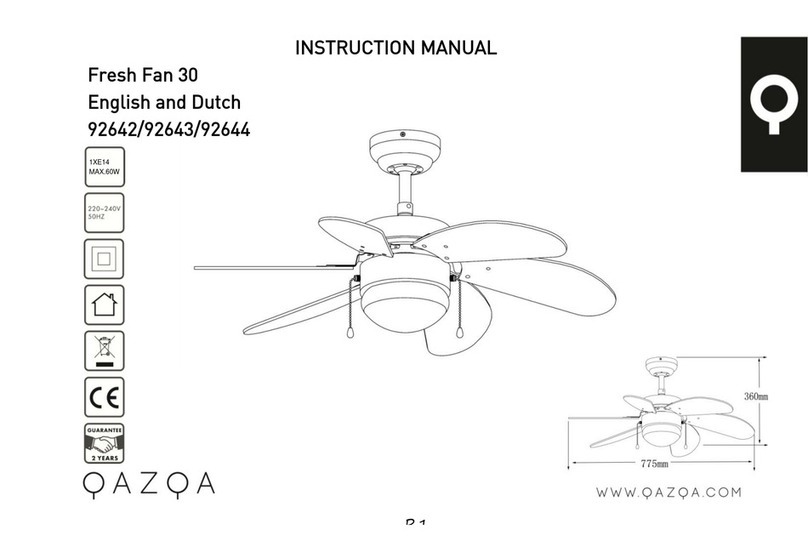
Qazqa 92642 User manual

Qazqa
Qazqa Malaki 102716 User manual

Qazqa
Qazqa Xiro 102709 User manual

Qazqa
Qazqa Wind Fan 42 Brass User manual

Qazqa
Qazqa Vifte User manual

Qazqa
Qazqa Mistral User manual

Qazqa
Qazqa 92648 User manual

Qazqa
Qazqa 102713 User manual

Qazqa
Qazqa Gaiola 102712 User manual

Qazqa
Qazqa Gaiola 102712 User manual

Qazqa
Qazqa Kolm 102718 User manual

Qazqa
Qazqa Tak Fan Black User manual

Qazqa
Qazqa 102718 User manual

Qazqa
Qazqa Vifte 102706 User manual
Qazqa
Qazqa Xiro User manual

Qazqa
Qazqa Cool Fan 52 User manual
Qazqa
Qazqa 91342 User manual

Qazqa
Qazqa Fanattic 98355 User manual
Qazqa
Qazqa 102468 User manual