manuals.online logo
Brands
  1. Home
  2. •
  3. Brands
  4. •
  5. Qleen
  6. •
  7. Cleaning Equipment
  8. •
  9. Qleen DISY E Operation manual

Qleen DISY E Operation manual

User information
DISY E
70054 & 70040
Version 01/2023
2 |
Introduction to the user information QLEEN DISY E
Thank you for choosing a QLEEN DISY E cleaning system from Lehmann.
Before you start with the cleaning work, here is some important user information.
Please read these carefully and be sure to observe them.
As the owner of a QLEEN DISY E cleaning system, please also make absolutely sure that your employees have also
read the „DISY E User Information“ and follow the safety and warning instructions.
Please also observe and comply with the „General User and Safety Instructions“ (separate publication of
Lehmann KG).
This document is the original user information. It is written in German. Copies in other languages are translations
of this original user information.
Manufacturer / Publisher
Address Karlhans Lehmann KG
Kranichstrasse 2a
D-17235 Neustrelitz
Phone (+49) 3981 48 850
Fax (+49) 3981 44 06 20
E-Mail info@qleen.de
Internet www.qleen.de
Youtube www.youtube.com/@qleen
Facebook www.facebook.com/lehmannkg/
Copyright
This document is protected by copyright.
Copying, reproduction, translation or conversion into an electronic medium or into a machine-readable form, as
a whole document or in parts, is not permitted without the permission of Lehmann KG. Subject to change without
notice.
© Lehmann KG, Neustrelitz, 2023
Trademark
The names QLEEN, PURAQLEEN, ROTAQLEEN, CARBONPOLE, TITANPOLE are registered trademarks of Lehmann
KG, Neustrelitz.
Country of origin
Federal Republic of Germany
Introduction
| 3
We are pleased that you have chosen our QLEEN DISY E product.
Item number __ 70052
__ 70040
Type designation __ QLEEN DISY E DUO Hose
__ QLEEN DISY E Complete set
Serial number _________________
Year of manufacture _________________
* Picture shows the QLEEN DISY E complete set (70040)
Introduction
4 | Table of contents
1 Table of contents
Topics Page
2. General notes and safety instructions 2.1 Instruction structure 5
2.2 Safety instructions 6
3. Description of the QLEEN DISY E
3.1
The PUREWATER principle - cleaning with pure water
7
3.2 Sustainability 7
3.3 Water hardness and yield of the mixed bed resin 7
3.4 Functionality of the QLEEN DISY E 8
3.5 Areas of application 8
3.6 Scope of delivery 8
3.7 Connections and controls 9
3.8 Remote control 10
3.9 Hose reel 10
4. Starting up
4.1 Transport and parking 11
4.2 Mount hose reel and unroll hose 11
4.3 Connection of the water supply 12
4.4 Water supply through the house water connection 12
4.5 Water supply through a water tank 13
4.6 Power supply 13
4.7 Switching on the remote control 14
4.8 Bleeding 14
4.9 Bleeding the pump 14
4.10 Bleeding the dosing pump 15
4.11 Mounting the rods and brush 16
4.12 Connecting a ROTAQLEEN 18
5. Cleaning
5 Cleaning 19
5.1 Cleaning with PUREWATER 20
5.2 Cleaning with tap water and cleaning solution 20
5.3 Cleaning with ROTAQLEEN 23
6. Water quality meter 6.1 Operation 24
7. Aer cleaning 7.1 Dismantling 24
| 5
Topics Page
8. Additional information
8.1
Maintenance and cleaning of the device and accessories
27
8.2 Replacing of the mixed bed resin 27
8.3 Clean/replace strainer at water inlet 28
8.4 Battery change meter 28
8.5 Battery change remote control 29
8.6 Troubleshooting 30
8.7 Storage 31
8.8 Repair and maintenance 31
8.9 Recycle and dispose 31
8.10 Warranty and guarantee 31
8.11 Manufacturer information 32
9. Technical information
9.1 Supply connections 33
9.2 Climatic operating conditions 33
9.3 Technical data 33
9.4 CE Declaration of Conformity 33
Table of contents
2 General notes and safety instructions
This manual will give you an overview of the functions, operation and proper use of our QLEEN DISY E
machine.
Certain symbols in these instructions indicate various information:
The information sign indicates useful tips and information.
The exclamation mark warns of potential dangers and risks
2.1 Instruction structure
6 | General notes and safety instructions
2.2 Safety instructions
Warning: Fire and explosion hazard:
• Never use flammable liquids or operate the machine near flammable liquids/vapors or
combustible dust.
This machine is not equipped with an explosion-proof motor. The electric motor emits sparks
during startup and operation that can cause ignition of flammable materials.
• Do not aspirate flammable materials with the machine.
Warning: Risk of electric shock:
• Before each start-up, check the power cable and the power plug for damage.
If any damage is detected, the machine must be shut down immediately and repaired by a
specialist!
• When plugging in the machine, make sure that the power plug and your hands are not wet!
Caution: Danger of accident:
• The operating personnel must be adequately trained in the use of the machine.
• The machine must be in perfect condition.
• Only set up the machine on solid, even surfaces.
• Wear sturdy, non-slip footwear with protective caps to protect yourself from being crushed by
the machine.
• Work on roofs only with appropriate safety equipment.
• Take care not to get mixed bed resin in your eyes. For further safety instructions and handling
of the mixed bed resin, read the "Mixed bed resin systems user information".
• When using cleaning solution, observe the respective manufacturer's specifications.
Warning: Risk of accidents and damage to the machine and equipment
• Use the machine only from +5 °C and higher, frost damage to the machine and equipment may
occur.
• Do not work with the pole system in wind forces above 2 (>3.3 m/s), the rod system may
buckle and fall o
| 7
Description of the QLEEN DISY E
3 Description of the QLEEN DISY E
3.1 The PUREWATER principle - cleaning with pure water
The high chemical-free cleaning power of PUREWATER is the basis on which the
PURAQLEEN principle for cleaning glass, solar and facade surfaces.
In this process, tap water is passed through a granulate bottle. The minerals contained in the tap water
accumulate in the mixed bed resin and all salts are removed from the water.
The tap water is demineralized by pre-pressurization in the granulate bottle and reaches the cleaning head as
PUREWATER.
PUREWATER not only has a very good wetting capacity, but also dries without stains or streaks, even in strong
sunlight.
This means that in many cases the use of cleaning solutions can be dispensed with.
(exception: greasy, oily or very heavy soiling).
3.2 Sustainability
Our system contributes to the careful and sustainable use of resources for cleaning in times of dwindling resources.
In contrast to the reverse osmosis process, our devices operate in the energy-saving low-pressure range; the
pressure of the domestic water supply is suicient to operate our devices.
In addition, our systems convert 100% of the supplied water into PUREWATER, which can be used for cleaning.
3.3 Water hardness and yield of the mixed bed resin
The water hardness at the place of use can be obtained from the local water supplier.
This allows you to estimate the yield of the granulate bottle.
Depending on the measured value, the following values result for the maximum PUREWATER quantity and
cleaning time with a granulate bottle (at a maximum initial value of 50 µS, approximate data):
German hardness level Corresponds
approximately to
conductance Estimated total quantity Estimated total cleaning
time*
2,8 °dH 100 µS 10200 l 51,0 h
5,6 °dH 200 µS 5100 l 25,5 h
8,4 °dH 300 µS 3400 l 17,0 h
11,2 °dH 400 µS 2500 l 12,5 h
14,0 °dH 500 µS 2000 l 10,0 h
16,8 °dH 600 µS 1700 l 8,5 h
19,7 °dH 700 µS 1650 l 8,25 h
22,5 °dH 800 µS 1200 l 6,0 h
25,3 °dH 900 µS 1100 l 5,5 h
28,0 °dH 1000 µS 1000 l 5,0 h
* Based on a flow rate of 200 l/h with the brush bow Vario
8 |
3.4 How the QLEEN DISY E works
Aer plugging in the power plug, the control buttons light up blue and the system is ready for operation.
The operating modes are selected via the control buttons or the remote control.
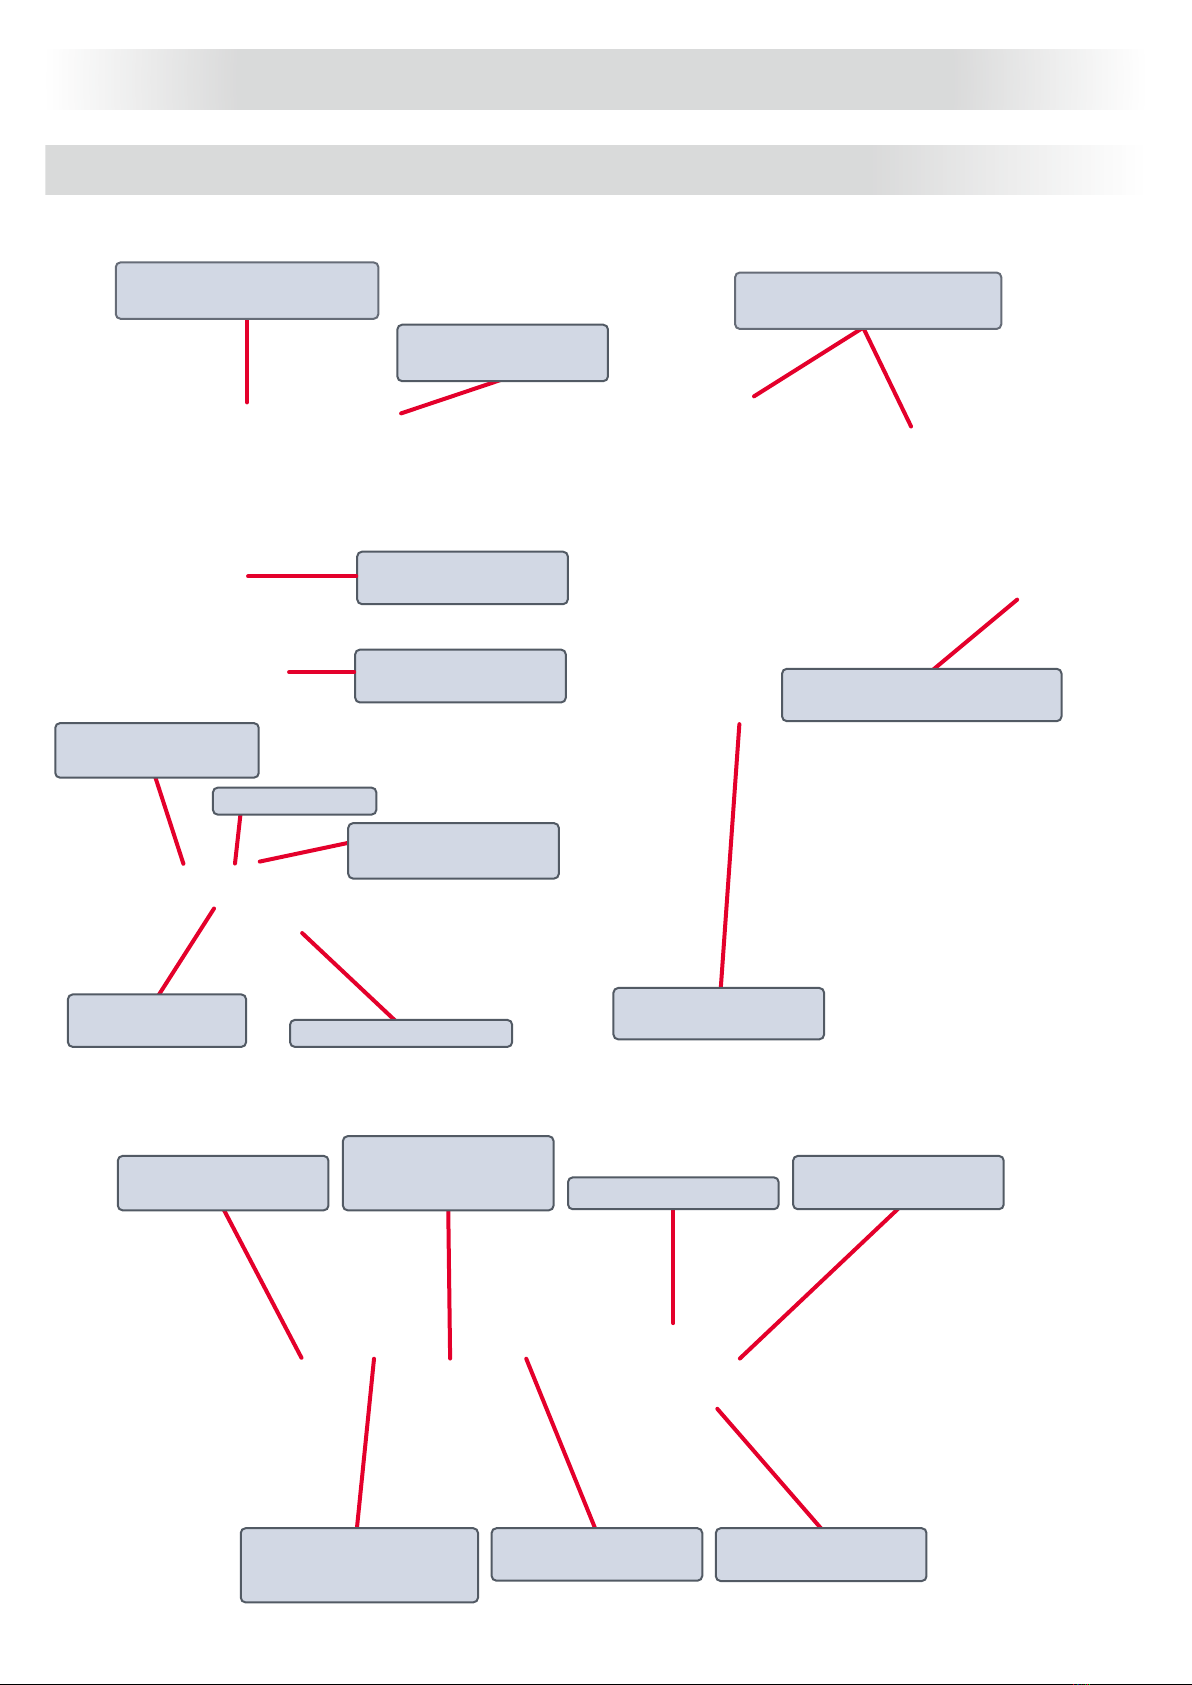
PUREWATER blue hose, Cleaning solution/tap water black hose, direction change ROTAQLEEN
Tap water is required for cleaning with PUREWATER.
For this purpose, tap water is passed through the mixed bed resin system in the granulate bottle and
demineralized in the process.
See also „User information mixed bed resin system“ (Publication of Lehmann KG).
Tap water is required for cleaning with cleaning solution (for particularly heavy soiling). The cleaning solution
is sucked in by the dosing pump from a cleaning solution container and added to the tap water in the dosage
to be set.
Aer working with cleaning solutions, the system should always be rinsed with tap water.
A pump conveys the clean and/or Cleaning solution/tap water via a DUO hose attached to the rod set* to the
cleaning head* at the top end of the pole set*.
There it is distributed evenly and sparingly over the surfaces to be cleaned via fine nozzles*.
The pole set* consists of individual, mountable rods.
This results in variable working lengths between approx. 2 m (min.) and 21 m (max.).
With the DUO hose, PUREWATER is conveyed in the blue hose and tap water or cleaning solution in the black
hose.
The integrated water quality measuring device provides information on the quality of the incoming tap water
and the outgoing PUREWATER.
3.5 Areas of application
Typical applications for the QLEEN DISY E are:
• To restore and increase the energy yield of solar and photovoltaic systems.
• Glass-clear and streak-free view for windows, window frames, conservatories, glass and greenhouses
• Oen diicult to access outdoor advertising spaces and lighting boxes
• Against the intensive pollution by insects on vehicles (train, ship, plane, truck, car).
* Only included in the QLEEN DISY E complete set variant (70040)
3.6 Scope of delivery
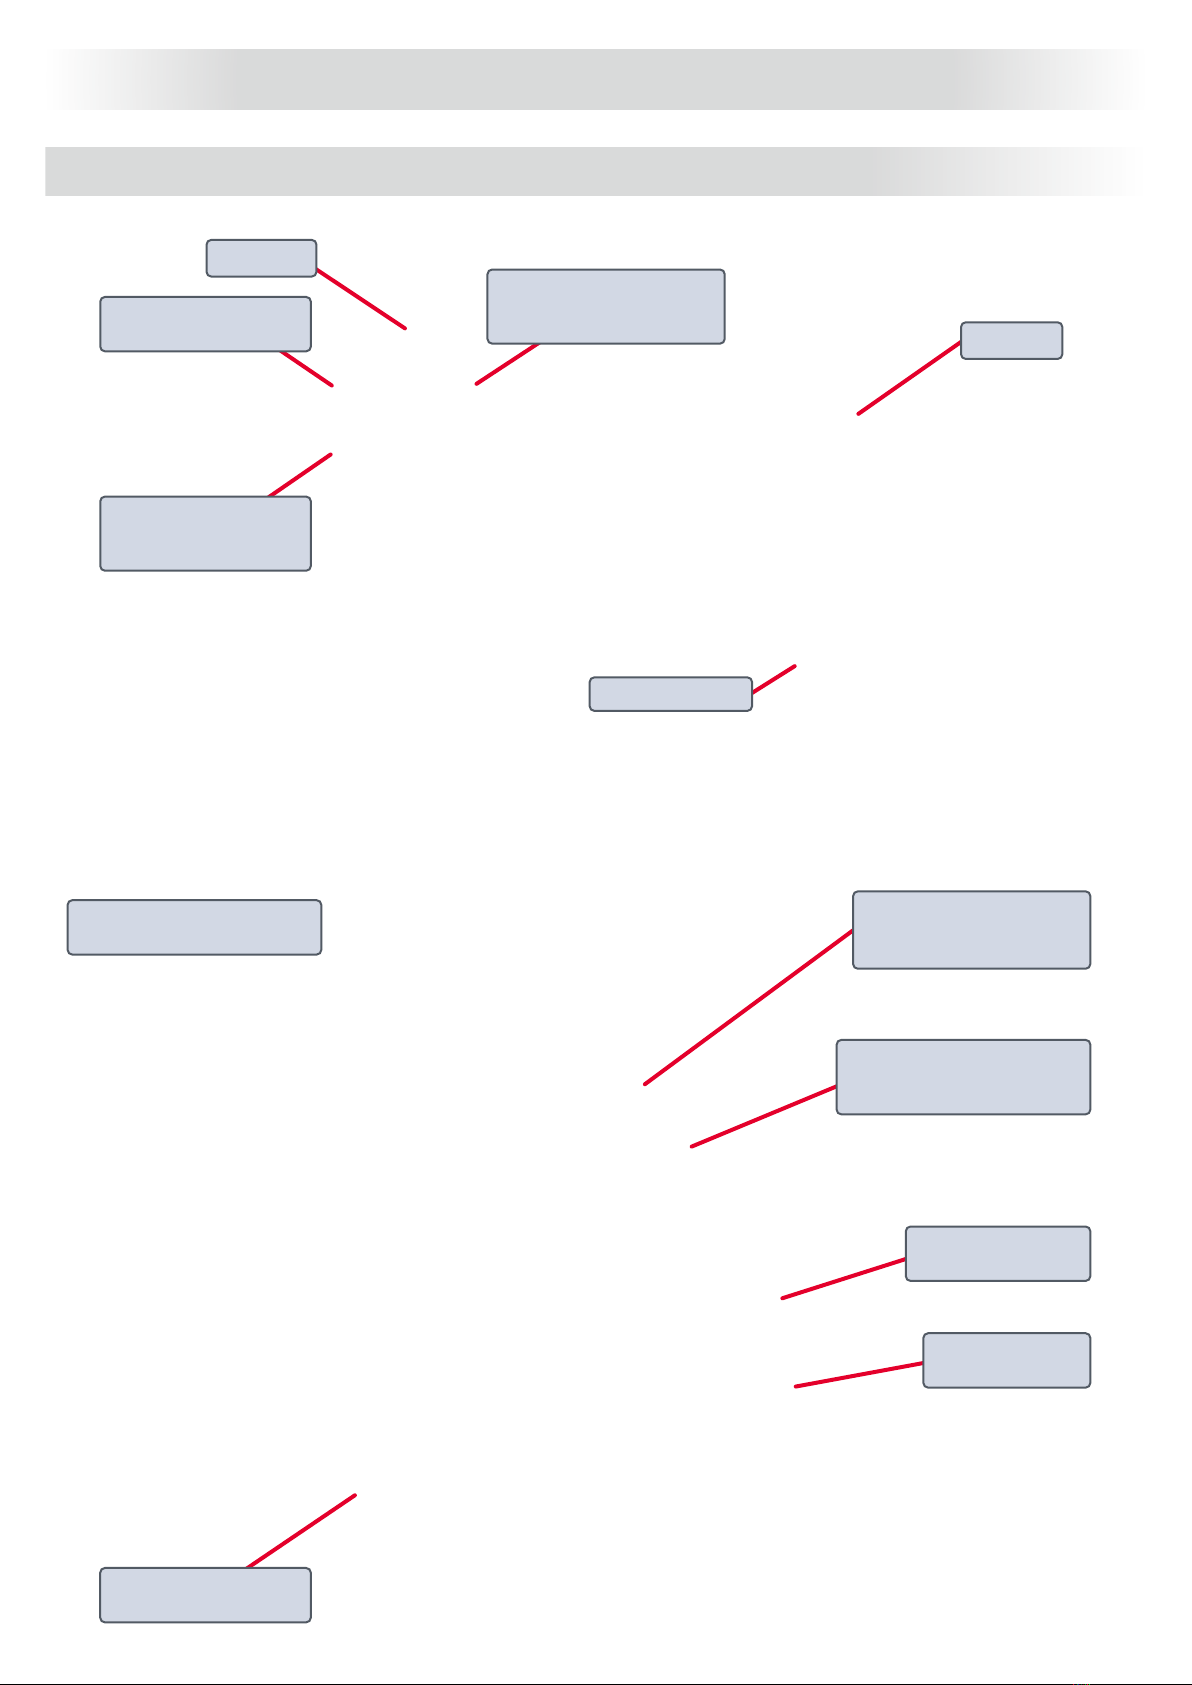
QLEEN DISY E (70052)
• QLEEN DISY E base station with 25 l granulate bottle filled up with mixed bed resin, pump, dosing pump
and integrated measuring device for water quality
• 50 m DUO hose on removable hose reel
• Remote control
• Suction hose
• Gardena to quick coupling adapter
• Quick Start Guide, Instruction
QLEEN DISY E complete set (70040)
• QLEEN DISY E base station with 25 l granulate bottle filled up with mixed bed resin, pump, dosing pump
and integrated measuring device for water quality
• 50 m DUO hose on removable hose reel
• Remote control
• Suction hose
• Gardena to quick coupling adapter
• Rod set with 5 CARBON POLES, 3 TITANIUM POLES, 1/2 TITANIUM POLES and brush adapter up to 14 m
working height
• Brush bow with 180° adjustable Vario joint with 5 integrated fan nozzles
• 40 cm window washing brush
• Quick Start Guide, Instruction
Description of the QLEEN DISY E
| 9
3.7 Connections and controls
Description of the QLEEN DISY E
Receptacle for the
hose reel
Connection for the
DUO hose
Button for the blue hose
(PUREWATER)
Button for changing
the direction of the
ROTAQLEEN On/O switch Meter
Measuring device for
the PUREWATER quality
Button for the black hose
(Cleaning solution/tap
water)
Controller for dosing
pump quantity
Button for measuring
input/output water
Removable hose reel with 50 m
DUO hose
Small wheels for
horizontal transport
Connection for all
common ROTAQLEEN
Bleeding tap
25 l mixed bed resin
bottle with fine filter
100-240 V Power supply
Suction hose for
cleaning solution
Water inlet via claw
coupling or Gardena
Control panel with integrated
water quality meter Mounting and fastening for 8
whole and one half poles
10 |
3.8 Remote control
3.9 Hose reel
Power switch
Belt clip
Button for changing
the direction of the
ROTAQLEEN
Button for the black hose
(Cleaning solution/tap
water)
Button for the blue hose
(PUREWATER)
Status LED
Connection for the blue hose
(PUREWATER)
Connection hose for
the black hose (Cleaning
solution/tap water)
Connection for the black
hose (Cleaning solution/tap
water)
Locking lever for the
drum
Locking pin for the
drum attachment
Crank handle with
folding function
Description of the QLEEN DISY E
Starting up
| 11
4. Unfold the hand crank
5. Fold the red safety lever upwards
6. Extend the DUO hose to the required length
1. Pull out the locking pin and turn it 90 degrees to fix it in place
4 Starting up
4.1 Transport and parking
The QLEEN DISY E can be transported with the trolley.
Only park the trolley on a straight, level and non-slip surface.
Caution Risk of injury
• Wear sturdy shoes with steel toe caps when transporting the unit, as this can cause bruising
to the foot when the unit is set down!
• Do not place on inclined, sloping and uneven surfaces, the QLEEN DISY E may fall over and this
may result in injury and damage!
• If there are obvious defects on the QLEEN DISY E or the pole system, do not put it into
operation!
Starting up
4.2 Mount hose reel and unroll hose
2. Place the hose reel in the holder from the right and push it to
the le as far as it will go
3. Turn the locking pin by 90 degrees and let it snap into the
specified locking hole
Attention risk of accident:
Always make sure that the hose reel is firmly seated and fixed with the locking pin!
12 |
7. Connect the blue hose on the right side with the H2O
connection (le) on the machine
8. Take the black connection hose on the le side
of the reel and connect it to the reel outlet for the black hose
the black hose and connect it on the machine
connect with the connection for cleaning solution (on the
right)
⇒The hose reel is mounted and the DUO hose is ready for use
4.3 Connection of the water supply
Water can be supplied directly to the house water connection via a Gardena hose or from a tank using the
suction hose.
Caution the device may be damaged:
Only use clean tap water with a maximum inlet pressure of 5 bar for the water supply!
Otherwise, the unit or the mixed bed resin may be damaged.
Before assembly, check the strainer and the seals in the quick coupling for contamination.
These can reduce the flow rate and lead to a pressure drop at the nozzles.
4.4 Water supply through the house water connection
2. Connect the house water connection by means of Gardena
hose to the input of the QLEEN DISY E
3. Open the tap of the house water connection
⇒The water supply via the house water connection is
established
1. Attach the Gardena adapter to the water inlet and lock it in
place by turning it clockwise
Starting up
| 13
3. Sink the side with the filter in the tank to the bottom
⇒The water supply via the water tank is established
Starting up
4.5 Water supply through a water tank
4.6 Power supply
Warning: Risk of electric shock:
• Before each start-up, check the power cable and the power plug for damage.
If any damage is found, the machine must be shut down immediately and repaired by a
specialist!
• When plugging in the machine, make sure that the power plug and your hands are not wet!
2. Attach the suction hose to the machine with the quick
coupling and screw it tight
• Insert the mains plug into the socket, the control buttons
light up blueblue
⇒The power supply is established
1. Remove the Gardena adapter from the water inlet by turning
it counterclockwise
14 | Starting up
4.8 Bleeding
In order to ensure a uniform water flow and pressure, the pump must be bled before each use.
If a cleaning solution is to be used, the dosing pump must also be bled.
4.9 Bleeding the pump
1. Open the bleeding tap
4.7 Switching on the remote control
4. Close the bleeding tap
The control keys on the machine are mirrored on the remote control. It can be switched on with the control
keys and switched o again with the remote control and vice versa.
The speaker key has no function.
7. To switch on the remote control, set the power switch to »I«
5. Switch o the machine with the »PUREWATER« key, all keys
light up blueblue
⇒The pump is bleeded
2. Switch on the machine with the »PUREWATER« key,
the key lights up greengreen
3. Run for 1 - 2 minutes until the water flows evenly from the
bleeding tap
| 15
2. Turn the dosing pump controller to 100%.
4.10 Bleeding the dosing pump
Starting up
1. Place the cleaning solution suction hose in the cleaning
solution tank and let it sink to the bottom
3. Start bleeding with the »Cleaning solution/tap water« key,
the key flashes greengreen/turquoiseturquoise for approx. for 20 seconds
during bleeding
4. When bleeding is complete, the »Cleaning solution/tap
water« key lights up greengreen continuously
5. Switch o the machine with the
Switch o the »Cleaning solution/tap water« key, all keys
light up blueblue
⇒The dosing pump is bleeded
⌛20 Seconds
16 |
4.11 Mounting the poles and brush*
Starting up
The pole system supplied is for a height of up to 15 m and can be extended to a height of 21 m.
The carbon poles should always be at the top and the titanium poles below them because of weight and
stability.
To protect against damage to edges and protrusions, the half titanium poles must always be mounted in the
uppermost position.
1. Place the brush adapter on the half titanium pole and fasten it with a clockwise rotation
2. Secure with the wing screw
Caution: Danger of falling:
• Always secure the poles and brush adapter with the wing screws.
• Always use half the titanium pole as the top pole to protect the carbon poles from damage
• Do not use rod set above wind force 2 (>3,3 m/s)
3. Insert the brush bow into the brush adapter until the snap button engages
4. Loosen the knurled screw on the joint and set the desired working angle of the brush
5. To set the brush vertically, press the snap button and rotate the brush holder 90 degrees
180°
* Only in the variant QLEEN DISY E complete set (70040)
| 17
6. Connect the blue hose with the 2 nozzles through or over the brush
7. Connect the black hose to the single chemistry nozzle or the 2 free nozzles
8. Fix the DUO hose with the Velcro tape
9. Place the brush against the wall and push it upwards
10. Click in the next poles from below and fix them with a half
clockwise rotation of the pole
11. Secure with the wing screw
12. Secure the tube to the pole with the Velcro strap
13. Add more poles up to the required height, by repeating steps
9 - 12
14. At the end of the poles, attach the handle and secure it with
the wing screw, so that the pole system can be put down
⇒The device is now ready for operation
Starting up
18 |
4.12 Connecting a ROTAQLEEN*
The ROTAQLEEN are electric rotating brushes for use with heavy soiling and/or large areas.
The QLEEN DISY E is equipped with a connection and control for supply and return for all current
ROTAQLEEN
For more information, read the „User information ROTAQLEEN“.
Starting up
* The ROTAQLEEN is an accessory and not included in the scope of delivery
Beware of damage to the ROTAQLEEN:
• Always connect the blue input to the ROTAQLEEN and run water through it during operation,
this serves to cool the motor.
• Do not use a cleaning solution with the ROTAQLEEN.
1. Mount the pole set and brush adapter, see Page 16 (4.11
Mounting the rods and brush)
2. Insert the ROTAQLEEN into the brush adapter until the
snap button clicks into place
1. Roll out the cable to the required length
2. Connect the socket of the cable drum with the plug of the ROTAQLEEN
3. Connect the plug of the cable drum with the ROTAQLEEN socket on the machine
4. Connect the hose with the nozzles on the ROTAQLEEN
5. Fasten the hose and the cable to the poles with the Velcro straps
⇒The ROTAQLEEN is ready for operation
| 19
Cleaning
5 Cleaning
Caution Risk of injury
• Tripping hazard: Pay attention to the hose when working!
• Crash hazard: Place the poles on the floor during work interruptions! Do not lean against
vertical walls, this may cause them to fall over and result in injury or damage to the
equipment!
• Crash hazard: Do not work with the pole system above wind force 2 (>3,3 m/s)
• Risk of electric shock: Do not work with the pole system under high-voltage lines!
For most soiling, the PUREWATER is completely suicient.
Only heavily soiled and oily or greasy surfaces must be pre-treated with a cleaning solution.
Dirt that can only be removed by intensive mechanical cleaning (e.g. glass plane) should also be pre-treated
accordingly.
The higher the level at which work is carried out, the greater the dirt load at the lower levels, because the
"foreign dirt" from the higher level is added to the "inherent dirt".
This should be taken into account when calculating the work and the order.
1. Mount the pole system to the maximum height of the cleaning area,
see Page 16 (4.11 Mounting the rods and brush)
2. Position the brush in the upper area and activate the desired cleaning mode with the remote control
3. Move the brush from one side to the other with even up and down movements over the surface to be
cleaned
4. To increase the mechanical cleaning power, press the pole system lightly against the surface to be
cleaned with the help of the guide hand
5. Proceed in the same way for the surfaces below until the entire surface has been cleaned
6. Adjust the pole system according to the working height to ensure fatigue-free work
20 |
For cleaning solution operation, the dosing pump must first be bled, see Page 15 (4.10 Bleeding
the dosing pump).
When using cleaning solution, observe the respective specifications and safety instructions of
the manufacturer.
5.1 Cleaning with PUREWATER
5.2 Cleaning with tap water and cleaning solution
In the case of heavy soiling, it is cheaper and more eective to pre-clean with tap water first.
The dosing pump mixes the aspirated cleaning solution with the tap water.
The dosing pump has an adjustable flow rate of 1 to 6 liters per hour.
In the case of the Vario brush bow, approximately 200 liters per hour flow through the nozzles, which
corresponds to an adjustable mixing ratio of 1:200 to 1:33.
It is possible to change the cleaning mode at any time using the control buttons and the remote control.
For example, aer cleaning with cleaning solution, the hose can be rinsed or the area to be cleaned can be
rinsed with tap water.
The tap water or the cleaning solution is pumped through the black hose.
Cleaning with PUREWATER is the most chemical-free and sustainable way of cleaning.
Surfaces dry streak-free and without wiping due to the good salt absorption capacity of the PUREWATER.
The PUREWATER is pumped through the blue hose.
Cleaning
Switching on the PUREWATER
• Briefly press the »PUREWATER« button on the machine or
remote control, the button lights up greengreen
⇒Aer a short time, the PUREWATER comes out of the
nozzles via the blue hose and the ROTAQLEEN starts up
Switching o the PUREWATER
• Briefly press the »PUREWATER« button on the machine or on
the remote control, all buttons light up blueblue
⇒Stop the PUREWATER and the ROTAQLEEN

This manual suits for next models

2

Other Qleen Cleaning Equipment manuals

Qleen PROFI II User manual

Qleen

Qleen PROFI II User manual

Qleen DISY Electro User manual

Qleen

Qleen DISY Electro User manual

Qleen Q-Station User manual

Qleen

Qleen Q-Station User manual

Qleen PURASTART E Operation manual

Qleen

Qleen PURASTART E Operation manual

Qleen PROFI I User manual

Qleen

Qleen PROFI I User manual

Popular Cleaning Equipment manuals by other brands

Uni-ram UG5000E operating manual

Uni-ram

Uni-ram UG5000E operating manual

POLTI CIMEX ERADICATOR Plus instruction manual

POLTI

POLTI CIMEX ERADICATOR Plus instruction manual

RIDGID K-750R manual

RIDGID

RIDGID K-750R manual

Realtech REAL CLEAN SYSTEM I owner's manual

Realtech

Realtech REAL CLEAN SYSTEM I owner's manual

Nilfisk-Advance SC3000 Instructions for use

Nilfisk-Advance

Nilfisk-Advance SC3000 Instructions for use

Edic PTAC Owner's/operator's manual

Edic

Edic PTAC Owner's/operator's manual

Reer 36120 instruction manual

Reer

Reer 36120 instruction manual

RIDGID WD1245 owner's manual

RIDGID

RIDGID WD1245 owner's manual

Evergreen EG - 1001 instruction manual

Evergreen

Evergreen EG - 1001 instruction manual

Forterra Bio Clean CPS Operation & maintenance manual

Forterra

Forterra Bio Clean CPS Operation & maintenance manual

DIP'N DRY MAX 41709 instruction manual

DIP'N DRY MAX

DIP'N DRY MAX 41709 instruction manual

HB-THERM M8146-EN Assembly instructions

HB-THERM

HB-THERM M8146-EN Assembly instructions

Lincoln Electric WELDLINE OPTICLEAN II Use and maintenance instructions

Lincoln Electric

Lincoln Electric WELDLINE OPTICLEAN II Use and maintenance instructions

Sprintus CRAFTIX M Original user manual

Sprintus

Sprintus CRAFTIX M Original user manual

Mytee Spinners 8903 user manual

Mytee

Mytee Spinners 8903 user manual

SCANMASKIN Scan Dust 2900 manual

SCANMASKIN

SCANMASKIN Scan Dust 2900 manual

Alfalaval Gunclean Toftejorg TZ-75 instruction manual

Alfalaval

Alfalaval Gunclean Toftejorg TZ-75 instruction manual

Fantom Professional PROMAX 600 CM2 Assembly

Fantom Professional

Fantom Professional PROMAX 600 CM2 Assembly

manuals.online logo
manuals.online logoBrands
  • About & Mission
  • Contact us
  • Privacy Policy
  • Terms and Conditions

Copyright 2025 Manuals.Online. All Rights Reserved.