Homepage: www.qleen.de
Phone: +49 (0)3981 48850
Karlhans Lehmann KG, Kranichstraße 2a, DE -17235 Neustrelitz
4.1 The dosing quantity is adjusted with the dosing pump regulator (Fig. 2)
4.2 The total amount of the cleaning solution can be adjusted with the water flow regulator (Fig. 1), if the total
amount is decreased, the concentration of the solution is increased
5. Cleaning with tap water
5.1 Press the button (o / greengreen ⇒ turquoiseturquoise) for 2 seconds, only tap water comes through the blue hose
5.2 To switch to pure water, press the key (o / turquoiseturquoise ⇒ greengreen) again for 2 seconds
5.3 Press the key (o / greengreen ⇒ turquoiseturquoise) for 2 seconds, the dosing pump is switched o and only
tap water comes through the black hose
5.4 To switch on the dosing pump again, press the key (o / turquoiseturquoise ⇒ greengreen) for 2 seconds
6. Control of the ROTAQLEEN
6.1 The ROTAQLEEN starts automatically in forward operation or last selected direction, if pure/line water
and/or cleaning solution/line water is switched on
6.2 For a change of direction of the ROTAQLEEN press the key (greengreen ⇒ turquoiseturquoise) and for back
(turquoiseturquoise ⇒ greengreen)
Note: The machine can be controlled in parallel with the remote control in the same wayNote: The machine can be controlled in parallel with the remote control in the same way
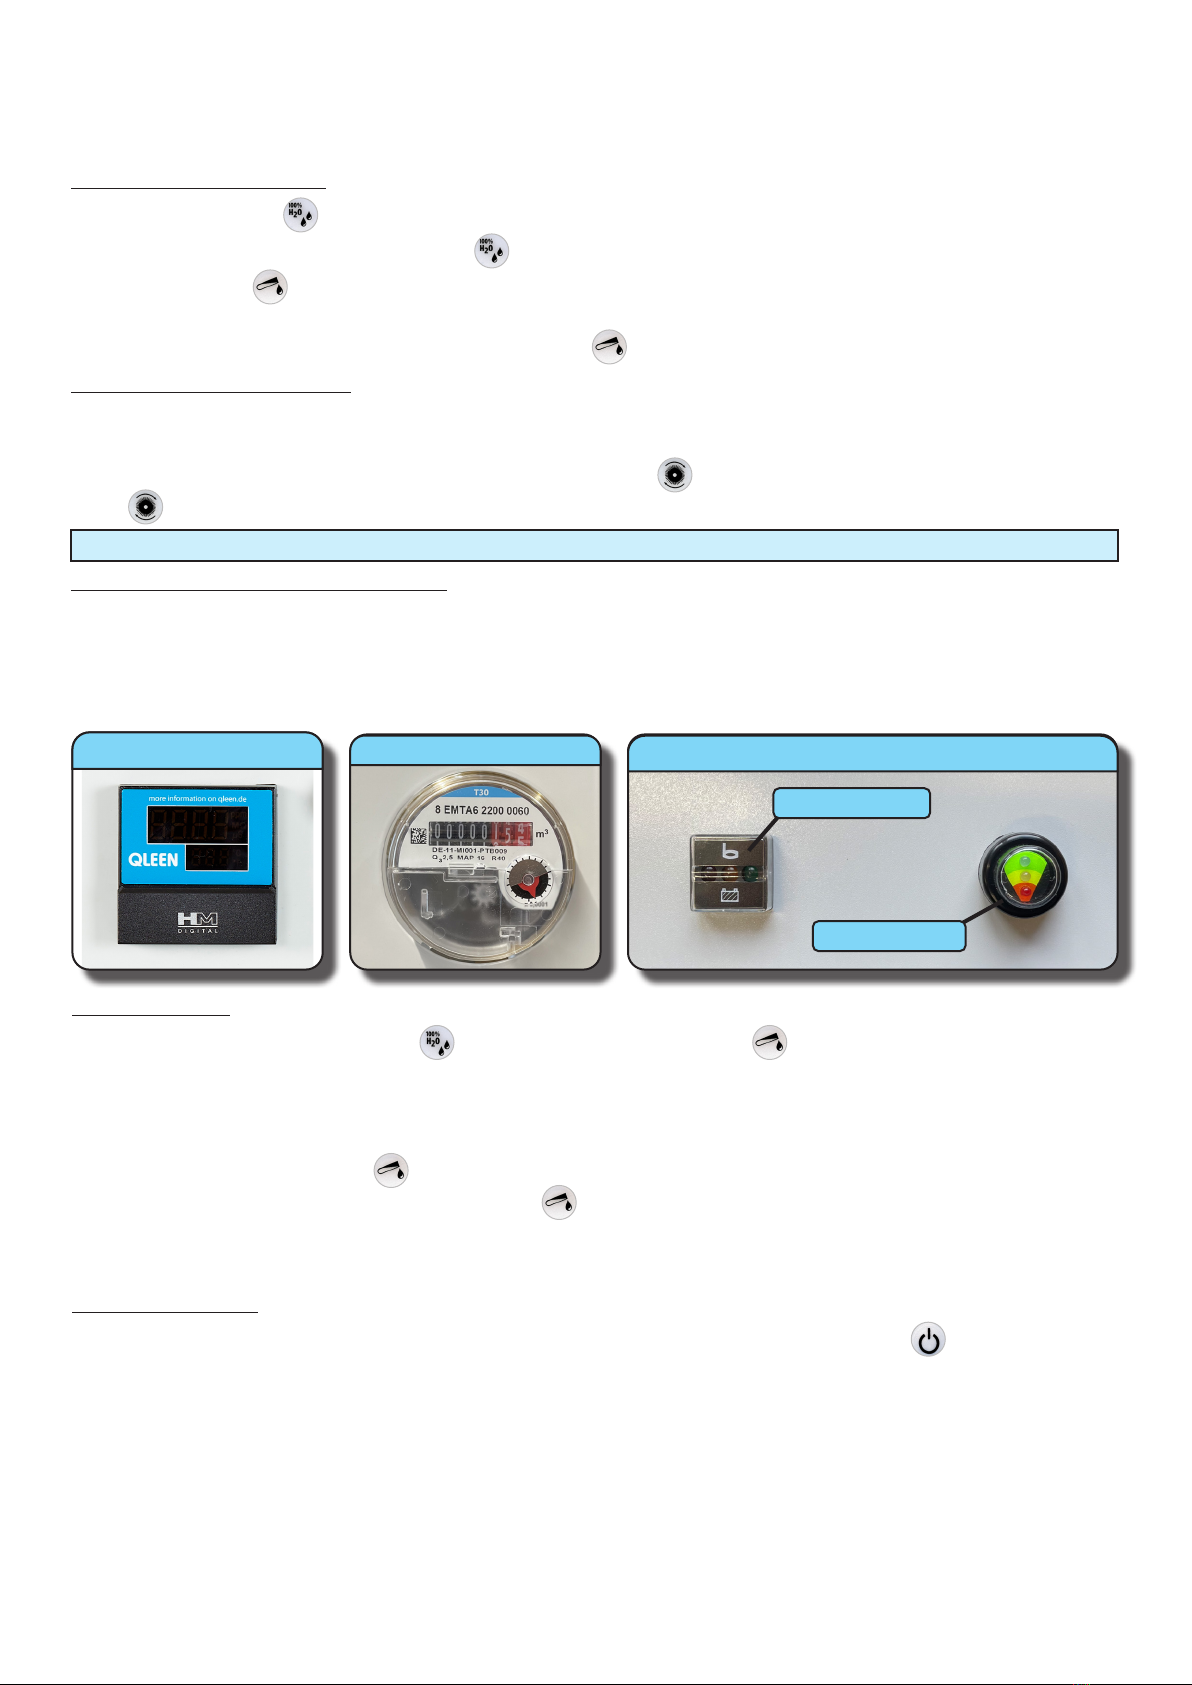
7. Water quality meter and water clock
7.3 The water quality meter (Fig. 3) shows the temperature and the quality of the pure/line water for the
blue hose.
7.4 We recommend changing the granules at a value of 50 µS
7.5 The water clock (Fig.3) measures the quantity of pure water produced
8. Aer cleaning
8.1 Switch o the machine with the (greengreen / turquoiseturquoise ⇒ o) and/or (greengreen / turquoiseturquoise ⇒ o) key
8.2 Cleaning solution was used:
• Place the suction hose for cleaning solution (Fig. 1) in tap water
• Set the dosing pump regulator (Fig. 2) to 100%
• Switch on with the key (o ⇒ greengreen) and rinse the dosing pump for 2 min
• Then switch o the machine with the key (greengreen ⇒ o)
8.3 Pull out the mains plug (optional), close the water supply and disconnect the connection
8.4 Remove the connection for the black hose (Fig. 1), roll up the hose
Water quality meter
3
9. Battery charging
9.1 The machine must be switched o or running in optional mains operation for charging (o or turquoiseturquoise)
9.2 Connect the mains connector of the charger to the mains socket.
9.3 The charging indicator (Fig. 5) lights up redred aer a short time, changes in the loading process to yellowyellow and
then greengreen ⇒ the charging of the battery is completed
Indicators for battery
Charge indicator
Battery indicator
5
Water clock
4


