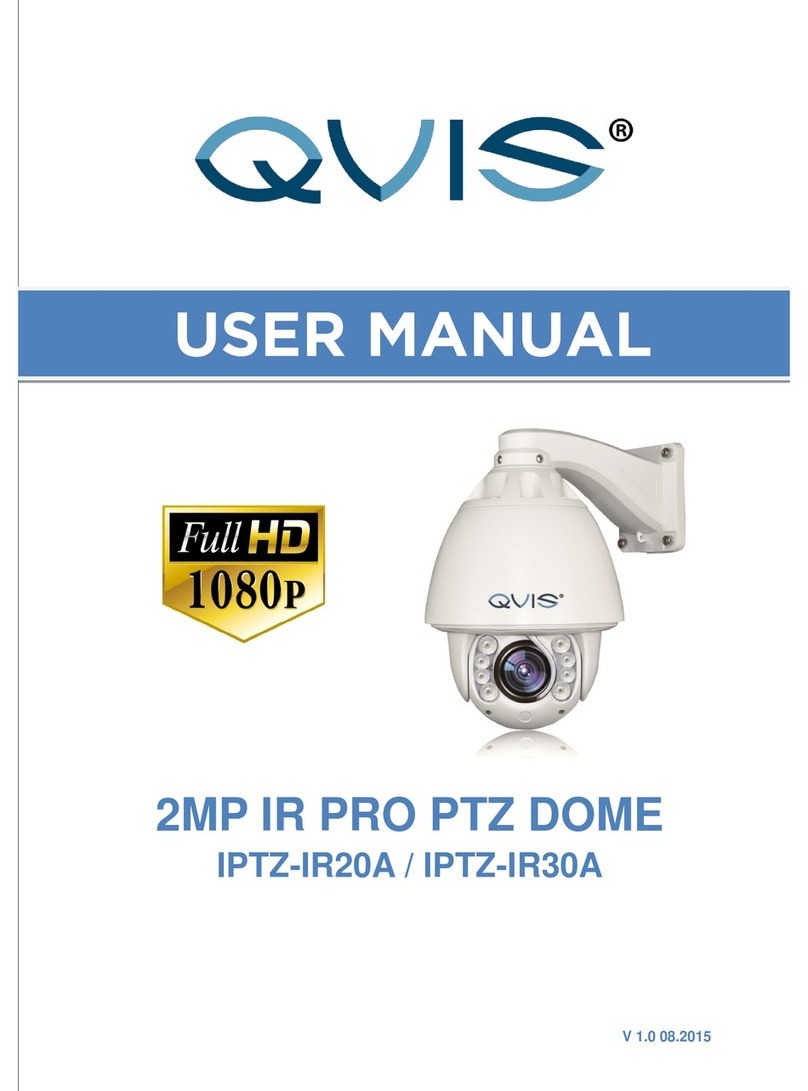
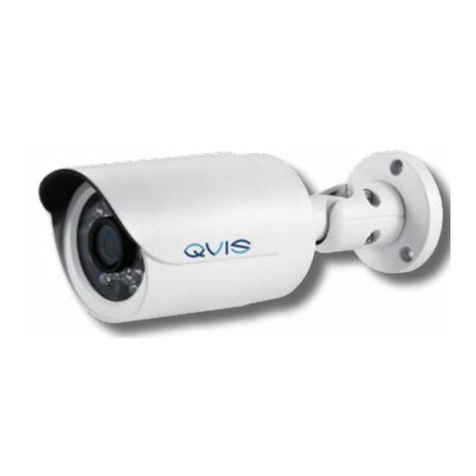
Qvis IPTZ-P400-10X User manual

© Copyright Qvis ®. All documentation rights reserved.
2MP IR MINI PTZ CAMERA
IPTZ-P400-10X
V 1.0 08.2015
USER MANUAL

© Copyright Qvis ®. All documentation rights reserved.

© Copyright Qvis ®. All documentation rights reserved.
Welcome
Thank you for purchasing the 2MP IR Mini PTZ Camera.
This user’s manual is designed to be a reference tool for the
installation and operation of your system.
Here you can find information about the corresponding IP camera’s
features and functions, as well as a detailed installation method.
Before installation and operation please read the following
safeguards and warnings carefully!

© Copyright Qvis ®. All documentation rights reserved.
Precautions
1.Electrical safety
All installation and operation here should conform to your local electrical safety
codes.
The power supply shall conform to the requirement in the SELV (Safety Extra Low
Voltage) and must make sure that the limited power source is rated 12V DC or 24V
AC.
Please note: Do not connect two power supplying sources to the device at the
same time; it may result in device damage!
We assume no liability or responsibility for all the fires or electrical shock caused by
improper handling or installation.
We are not liable for any problems caused by unauthorized modification or attempted
repair.
2.Transportation Security
Please ensure that the product does not endure heavy stresses, violent vibration or
contact with water during transportation, storage and installation.
Please use the original packing material (or the material of the same quality) if you
need to return it to vendor.
3.Installation
Do not apply power to the product before completing installation.
Do not put object(s) on the product.
Please install a proper power cut-off device during the installation connection.
4.Qualified engineers needed
All the examination and repair work should be done by the qualified service engineers.
We are not liable for any problems caused by unauthorised modifications or attempted
repair.
5. Environment
This product should be installed in a cool, dry place away from direct sunlight,
inflammable, explosive substances and etc.
Please keep it away from environments that contain electromagnetic radiation or
objects that produce it.
Please keep sound ventilation around the device at all times.

© Copyright Qvis ®. All documentation rights reserved.
Do not allow the water and other liquid to penetrate into the device if casing has been
compromised. This series product complies with the IP66 standard specified in the
Degrees of Protection Provided by Enclosure.
Ensure lightning surge protection is in place to make sure you fully protect camera
circuitry from electrical overload.
Please make sure the CCD (CMOS) component is away from the radiation of the
laser beam device. Otherwise it may result in CCD (CMOS) optical component
damage.
It is recommended that the grounding studs of the product should be grounded, so to
further enhance the reliability of the camera.
Avoid shooting very bright objects directly into the camera’s CCD (such as the sun or
light fittings), and avoid fixating the camera lens on bright static object for long time,
as it will cause Irreparable damage to the camera’s CCD.
6. Daily Maintenance
Please shut down the device and then unplug the power cable before you begin any
maintenance work.
Do not touch the CCD (CMOS) optic component. Please use an air jet to clean the
dust off the lens surface. You can use the dry cloth with some alcohol or mild
detergent to clear if necessary.
When the camera is not in use please put the dustproof cap to protect the CCD
(CMOS) component.
Do not use volatile solvent such as the benzene, paint thinner or detergent with the
ability to abrade surfaces. It may result in lens damage or adversely affect the
device’s performance.
7. Accessories
Always use all the accessories recommended by manufacturer.
Before installation, please open the package and check that all the components are
included. Contact your local retailer/vendor ASAP if something is missing.

© Copyright Qvis ®. All documentation rights reserved.
Table of Contents
1 General and Technical Features......................................................................................... 1
1.1 Special Features ……………………………………………….. .......................................1
1.2 Function Introduction.....................................................................................................2
1.3 PTZ Camera Integration................................................................................................2
1.4 All-Weather Outdoor Design .........................................................................................2
1.5 Preset Position Set Up and Call Up ..............................................................................3
1.6 Auto Scan......................................................................................................................3
1.7 Cruising Track ...............................................................................................................3
1.8 Pattern Tour................................................................................................................... 3
1.9 Technical Parameters ...................................................................................................4
1.10 OSD Menu Operation..................................................................................................4
2 Web Browser Operation Guide........................................................................................... 5
2.1 Common Operations .....................................................................................................5
2.1.1 Factory settings..........................................................................................................5
2.1.2 Network parameters...................................................................................................5
2.2 Web Login ..................................................................................................................... 7
2.2.1 Login...........................................................................................................................7
2.2.2 Download playing component.................................................................................... 7
2.2.3 Playback...................................................................................................................11
2.2.4 Log............................................................................................................................12
2.2.5 Configuration............................................................................................................13
2.2.5.1 Parameter Configuration.......................................................................................13
2.2.5.2 System...................................................................................................................14
2.2.5.3 Network .................................................................................................................16
2.2.5.4 Audio/Video...........................................................................................................22
2.2.5.5 Image.....................................................................................................................24
2.2.5.6 Safety ....................................................................................................................28
© Copyright Qvis ®. All documentation rights reserved.
3 OSD Menu Function ................................................................................................................ 37
3.1 Information....................................................................................................................... 37
3.2 Language......................................................................................................................... 38
3.3 IR Leds............................................................................................................................ 39
3.4 Idle................................................................................................................................... 40
3.5 Mask................................................................................................................................ 41
3.6 Alarm............................................................................................................................... 42
3.7 PTZ Display..................................................................................................................... 43
3.8 Image............................................................................................................................... 44
3.9 Exposure ......................................................................................................................... 45
3.10 Focus............................................................................................................................. 46
3.11 WDR.............................................................................................................................. 47
3.12 White Balance ............................................................................................................... 48
3.13 Image Enhancement..................................................................................................... 49
3.14 Image Adjustment ......................................................................................................... 50
3.15 Default........................................................................................................................... 51
3.16 Scan .............................................................................................................................. 52
3.17 Sequence ...................................................................................................................... 53
3.18 Pattern........................................................................................................................... 54
3.19 Restart........................................................................................................................... 55
3.20 Default........................................................................................................................... 56

© Copyright Qvis ®. All documentation rights reserved. 1
1.General and Technical Features
1.1 Special Features
High Definition Footage
Shoot video footage using MPEG H.264 compression at varying frame
rates, which allows you to save network bandwidth without
compromising on footage quality. You will also be able to adjust the
aspect ratio of the video footage to either 16:9 or 4:3. Also supports
dynamic coding within footage settings.
Fixed Focus/Veri-focus/Automatic focusing
In built 10 x optical zoom, veri-focus (variable focus) and automatic
focusing function. The automatic focusing function will adjust image to
optimum clarity whilst changing the zoom amount and what direction
the camera is pointing towards.
Double Stream Option
Supports double streaming (Main & Sub streams).
Multiple Supported protocols
Supports: TCP/IP, PPPoE, DDNS, FTP, UPNP, Onvif, etc.
Voice intercom function
1 x Audio In, 1 x Audio Out. Two Way audio ability.
Alarm function
Supports local and wide area network signal linkage; Link to a
networked alarm system using the network input/outputs.
Region of Interest
Stream concentration makes the drawing region clearer.
OSD function
Setup the camera with its onboard setup user interface, via a
connected monitor.

© Copyright Qvis ®. All documentation rights reserved. 2
1.2 Function Introduction
Infinitely variable speed, softened zoom and automatic speed matching
technology
Lowest manual operational movement speed:0.01º/S,
Fastest manual operational movement speed with precise positioning:
12º/S
256 tour presets. Supports auto sequence function, and 8 sequence
paths (each path could store 32 preset positions).
8 auto scans; set left and right boundary and scan speeds.
4 pattern path; each path can record more than 500 different orders or
600 seconds of path movements.
Built-in 1 x Alarm In, 1 xAlarm Output (optional).
Alarm linkage function; connect camera to an alarm system so that
when an alarm is triggered, the alarm calls up programmed preset,
which includes: position/sequence/pattern/TF card scan video captured
picture/trigger switch output/intelligent snapshot/FTP uploading/mail
linkage;
1.3 PTZ Camera Integration
New gear reversing technology, which improves the level of integration
and transmission accuracy
New type of ultra-thin precision stepper motor drive; stable running and
accurate positioning
1.4 All-Weather Outdoor Design
IP66 Protection standard
TVS 3000V Protection standard

© Copyright Qvis ®. All documentation rights reserved. 3
1.5 Preset Position Set Up and Call Up
Within the Preset function the camera stores the current pan/tilt angle,
zoom, and other position parameters into memory. When necessary
the camera recalls these parameters and adjusts the camera to a
particular position. The user can store, recall and clear the presets
easily and promptly by using the keyboard controller. The camera can
store up to 256 presets.
1.6 Auto Scan
Users can set up the left and right boundaries by using a control
keyboard. Then the camera can scan between these boundaries. It
can support up to 8 scanning path groups.
1.7 Cruising Track
The preset position can be programmed to be recalled in a set of
sequences. This sequence can be set to let the camera scan from one
position to the next in a cycle at a set speed. This feature is called the
‘auto cruise’. The cruise sequence and dwell time of each preset can
be set. It supports up to 8 cruising tracks, each cruising track with 32
presets.
1.8 Pattern Tour
Camera can memorize 600 second running paths or 500
programmable instructions. When starting a pattern tour, the camera
will move automatically according recorded action path. It supports 4
groups of pattern tours.

© Copyright Qvis ®. All documentation rights reserved. 4
1.9 Technical Parameters
1.10 OSD Menu Operation
Call up OSD menu
Call Preset 95 to enter the main OSD menu; call Preset 96 to close the
OSD menu or Select ‘Exit’
Confirm
The ‘Left ‘and ‘Right ‘button is controlled by PTZ can change the
required item, and the changed item is the confirmed one without
further confirmation. You can directly click ‘Up’and ‘Down’button to go
on your further operation. When setting the left and right boundary for
scan and pattern, you can click the ‘Focus Far’for confirmation.
Cancel
The ‘up’and ‘down’button controlled by PTZ carry out the request for
Further action; meanwhile, it carries out the ‘Cancel’order for last
operation.

© Copyright Qvis ®. All documentation rights reserved. 5
2. Web Browser Operation Guide
2.1 Common Operations
2.1.1 Factory settings
An IP camera is classified as a type of network equipment, you need to
configure its network IP address, gateway, and other information to fit within
the network it is being integrated into. The camera comes with a default
factory IP address, which the user can change it according to their setup
requirements.
Default factory IP settings:
Default IP address:192.168.0.99
Subnet mask:255.255.255.0
Gateway:192.168.0.1
WEB port:8000
2.1.2 Network parameters
You will need to connect the camera to a PC with Windows installed, in order
to check the camera’s IP network parameters and to see if there is a
successful connection. Make sure the default factory IP details of the camera
is within the network parameters of the user computer, and also within the
same network address segment. The IP address of the camera and the LAN
cannot be the same, otherwise they will interfere with each other, causing the
equipment to not operate correctly together.
Connect the camera to the PC by firstly connecting an Ethernet cable
between the camera and the PC’s NET port, and then provide power to the
camera using the power adapter. To test whether it has been successfully
connected, use the PING order within the ‘cmd’console.

© Copyright Qvis ®. All documentation rights reserved. 6
To find the ‘cmd’ console in Windows, firstly search for ‘cmd’ on your
computer, the icon for it should look like this:
Once loaded, the format of the command needs to be: ping 192.168.0.99
If the camera is correctly setup and connected the cmd console should
display this:
As the picture shown above, it indicates that there has been a successful
connection between the computer and the camera. However, if the screen
display like this:
This indicates a connection failure. To solve the connection issue please
check the following:
If the hardware is correctly connected together
If computer TCP/IP is within the same segment as the camera
If network forbids the ping order, please contact the network
administrator to gain permission.

© Copyright Qvis ®. All documentation rights reserved. 7
2.2 Web Login
2.2.1 Login
Open up web browser within the Windows interface, enter default factory IP
address (192.168.0.99) to open the camera’s web interface. A dialog box will
be shown as follows:
User name:Admin
Password:Admin
Port:Default 8000
2.2.2 Download playing component
After you have logged in, if the WEB browser indicates this is the first time
you’ve logged in and will ask for you to install the latest plug-in version. (See
Picture 2.2.2-1). Click ‘OK’ and the plugin will be downloaded. You can also
double-click the icon at the top-right corner of the login interface to download
plugin (see Picture 2.2.1.1, highlighted by the red box). Double-click the
downloaded WebPluginInstaller.exe and start & complete the installation for
web browser. You need to return to the web browser screen and refresh the
display (press F5 key) if you want to run this plug-in after installation, then you
will be able to watch the ‘preview’video stream from the camera.
Picture 2.2.1-1 login interface

© Copyright Qvis ®. All documentation rights reserved. 8
After you have installed the plug-in; input user name, code, and then click the
‘login ‘button to enter the ‘preview ‘screen. See 2.2.2-2
Picture 2.2.2-2 Preview screen
Picture 2.2.2-1 Plug-in installation
Sheet 2.2.2-3 Preview screen information

© Copyright Qvis ®. All documentation rights reserved. 9
Sheet 2.2.2-4 PTZ control screen information
In the preview screen, you can control the camera’s streamed video, which
includes control over video recording, snapshot, intercom, and the on/off of the
sound. The size of the image can be adjusted according to the needs of the
user to set its original size; we have ‘4:3’, ‘16:9’ or ‘Self-adaptation’ mode.
Preview code stream can be set as ‘main stream’‘sub stream’. See 2.2.2-3
Operation methods for preset position
1. Find the preset section to the interface, and it will show the current
preset camera position.
2. Setting a preset position; select a preset position number, and then
operate direction of the camera using the directional controls.
3. When the camera scene moves to the place you want to set, then click
the ‘save ‘key’ to save this preset position.
4. Call the preset position: click ‘call ‘and the set preset position can be
called.
5. Delete preset position: click ‘delete’can clear the information of preset
position.
6. Special function preset position; this kind of preset position can be
called, but it cannot be modified or deleted.

© Copyright Qvis ®. All documentation rights reserved. 10
Operation methods for pattern scanning
1. Enter the pattern scan screen, it will show the current pattern scan path.
See 2.2.2-5
2. Start recording the scanning; click start to record the pattern scan, and
the start using the camera directional controls to adjust the movement
of the camera.
3. Stop recording scan; click save to save the scanning path.
4. Start and stop the pattern scan: click start to start the pattern scan, and
click the stop key to stop the pattern scan. See 2.2.2-6.
5. Delete the pattern scan: click delete key to delete the pattern scan.
Picture 2.2.2.5 Sequence settings
Picture 2.2.2-6 Pattern settings
Operation methods for IR LED
Enter the IR LED setting screen to set the power of the low beam lights
between 1~10 amounts, the power of high beam lights, low beam lights
compensation, enable illumination, and IR status setting. See 2.2.2-7
Picture 2.2.2-7 IR LED Setting Screen

© Copyright Qvis ®. All documentation rights reserved. 11
Auto scanning setting
Enter the auto scan screen to set scan speed, left boundary, right boundary,
start scan, and to stop scan. Auto scanning include 8 scanning paths. See
2.2.2-7
Picture 2.2.2-8 Auto scans settings
1. Scanning speed: from 1~100, the larger the gap between numbers, the
more evident the effect will be.
2. To set left boundary and right boundary of the scan: first make the
camera move to a specified direction and then click the left boundary
icon. Move the camera to a right hand direction, stop camera
movement and then click the right boundary. Finally click the start key
and the camera will move in the range of the left and right limit. Click
stop to stop the movement.
3. It will be the same setting methods explained in the previous point
above to set other auto scanning paths.
2.2.3 Playback
Click ‘Playback’to enter the video search playback screen. The Playback
screen can inquire, playback and download effective video that has been
saved on to the SD card of the camera.
Select the inquiry type, start & end time, then click the ‘Search’ key, and the
eligible video files will be displayed in the right box. Select it and double-click
to open, and then the video files will start to playback. See 2.2.3-1.

© Copyright Qvis ®. All documentation rights reserved. 12
Picture 2.2.3-1 video playback
Note: playback function can only be used under the circumstance when
the camera has an SD card installed. If the camera has SD card, and it is
using it for the first time you must click the ‘Storage’ key to initialise the
SD card and set the video-recording plan.
2.2.4 Log
Click ‘Log’ key to enter the log inquiry screen. Log screen can search, show
and output the log information stored upon the SD card within the camera.
Select the type of the log, and set the start and end time of the log-search.
Click the search key, and all the eligible log information will be displayed in the
list. See 2.2.4-1. Click the ‘Save’ key, you can save the log information to your
local computer.
Picture 2.2.4-1 log record screen

© Copyright Qvis ®. All documentation rights reserved. 13
2.2.5 Configuration
2.2.5.1 Parameter Configuration
Click ‘Configuration’, enter configuration interface. To set local
configuration select ‘Local Configuration from the options list on the right
side of the screen, as shown in picture 2.2.5-1, each item instruction as
shown in picture 2.2.5-2
Picture 2.2.5-1
Picture 2.2.5-2 configuration information
Table of contents
Other Qvis Security Camera manuals

Qvis
Qvis MINI-PTZ-23X-H User manual

Qvis
Qvis KIT005-SFX User manual

Qvis
Qvis APOIP-BL User manual

Qvis
Qvis AHD-P400-4X User manual

Qvis
Qvis Quattro User manual

Qvis
Qvis IPTZ-IR20A User manual

Qvis
Qvis APOHD-PTZ20 User manual

Qvis
Qvis APOIR-PTZ23 User manual

Qvis
Qvis HDCVI-MB1 User manual

Qvis
Qvis APOIP-EYE1.3 User manual