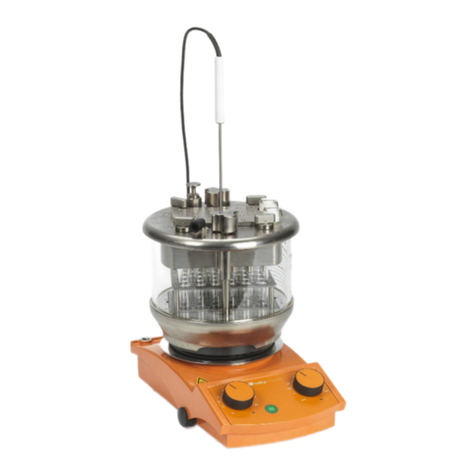
Radleys Carousel Standard User manual

Carousel Stirring Hotplates
Instruction Manual
Betriebsanleitung
Carousel Standard
Cat No. RR91200
Carousel Tech
Cat No. RR91203
Carousel Connect
Cat No. RR91207

Contents
Inhaltsverzeichnis
About this Document 4
Version and variants ...........................................................................................4
About this manual ..............................................................................................4
Terms and signs used..........................................................................................5
Safety Instructions 6
General safety instructions...................................................................................6
EU Declaration of Conformity.........................................................................6
Intended use...............................................................................................6
Installation / Electrical safety .......................................................................7
Personnel qualication..................................................................................7
Operating company’s obligations...........................................................................7
Installation site ...........................................................................................7
Changes to the unit .....................................................................................8
Safety for the personnel ...............................................................................8
Safety during use ...............................................................................................8
Disposal ............................................................................................................8
Device Description 9
Device overview .................................................................................................9
Carousel Standard overall view......................................................................9
Carousel Standard control panel ....................................................................9
Carousel Tech, Carousel Connect overall view ................................................10
Carousel Tech, Carousel Connect control panel ..............................................10
Start-Up 11
Setting up device .............................................................................................11
Connect/disconnect power cord ..........................................................................11
Switch unit on and off .......................................................................................12
Operation 13
Place vessels....................................................................................................13
Mixing.............................................................................................................14
Set speed and start rotation........................................................................14
Heating...........................................................................................................15
Set temperature ........................................................................................15
Show set parameters: Carousel Tech, Carousel Connect..................................16
Start heating.............................................................................................16
Stop heating .............................................................................................17
External temperature sensor Pt 1000 ...........................................................18
Heating with external temperature sensor: Carousel Tech, Carousel Connect .....18
Contents
Interface Carousel Connect................................................................................21
Connect and interlink interfaces...................................................................21
Interface commands ..................................................................................23
Cleaning and Maintenance 25
Cleaning..........................................................................................................25
Maintenance ....................................................................................................25
Troubleshooting 26
Possible errors and how to resolve ......................................................................26
General ....................................................................................................26
Carousel Standard .....................................................................................26
Carousel Tech / Carousel Connect ................................................................27
Assembly 28
Electrical connections........................................................................................28
Mounting periphery devices ...............................................................................29
Connect external temperature sensor Pt 1000 ...............................................29
Disassembly and Storage 30
Dismantling, transportation and storage ..............................................................30
Dismantling ..............................................................................................30
Transportation and storage .........................................................................30
Accessories and Spare Parts 31
Scope of delivery..............................................................................................31
Accessories......................................................................................................31
Attachments 32
Technical data ..................................................................................................32
Service 33
Contact / Technical Service ................................................................................33
Warranty.........................................................................................................34
Conrmation of condition of unit.........................................................................35

About this Document
4
About this Document
Version and variants
Version
This manual describes the function, operation and maintenance of the Carousel Standard
and Carousel Tech, Carousel Connect magnetic stirrers.
Version Alteration date
1.3 11.2016
Variants
The units are available in different con gurations. Certain features and functions apply to
speci c con gurations only. The varieties are documented in this manual.
About this manual
This operating manual is a component of the device described here.
➜Please read this manual carefully and obey all safety and warning
notices.
➜Ensure that every operator reads this manual.
➜Ensure that this manual is accessible for every operator.
➜Pass on the operating manual to the subsequent owner.
For more information please visit:
www.radleys.com
or contact our sales team at:
In addition please observe the regional regulations.

5
About this Document
Terms and signs used
In this manual you will nd standardized terms and signs to warn you of possible dangers
or give important hints. Please take special notice to these signs to avoid personal injury
or damage to the unit.
The following terms and type of signs (basic drawing elements) are used:
Symbol Additional term / Description
Warning
signs
The yellow triangle indicates hazardous situations. It is used in
combination with the following terms:
DANGER:
Indicates a hazardous situation which, if not avoided, will result in
irreversible injury or death.
WARNING:
Indicates a hazardous situation which, if not avoided, could result in
serious injury or material damage.
CAUTION:
Indicates a hazardous situation which, if not avoided, may result in a
minor injury or material damage.
Prohibitory
signs Do not do:
The red circle indicates a situation that should be avoided under all
circumstances to avoid injury or damage.
Mandatory
signs
Must do:
The blue circle indicates important information. Please obey to avoid
property damage.
Other signs used
Symbol Description
➜Handling instruction, action required
✓Result of action
▪
▪
▪
List of information
a.
b.
c.
List of variants

Safety Instructions
6
Safety Instructions
General safety instructions
EU Declaration of Conformity
This device complies with the following EC-Directives*:
▪2006/42/EC Machinery Directive
▪2014/30/EU Electromagnetic Compatibility Directive
*Also see attachment „EU Declaration of Conformity”.
The device has been constructed according to state-of-the-art technology and recognized
safety regulations. However, risks may still arise during installation, operation and
maintenance.
➜Please ensure the operating manual is available at all times.
The device may only be used under the following circumstances:
➜Only operate the device, if it is in full working order.
➜Ensure all operators of the device possess the necessary safety and risk awareness.
➜Operate the device according to the instructions stipulated in this manual only.
➜If there is something you do not understand, or certain information is missing, ask
your manager or contact the manufacturer.
➜Do not do anything on the device without authorization.
➜Only use the device according to its intended use.
Intended use
The device is intended for use by trained and authorized personnel only.
The device is suitable for the
following use:
▪heating
▪mixing
The operation for the device
is suitable in one of the
following locations:
In any research application
Improper use
Any use which deviates from the device‘s intended use is considered to be improper. The
manufacturer does not accept liability for any damages resulting from non-permitted
uses. The risk is carried by the operator alone.

7
Safety Instructions
Installation / Electrical safety
▪The device may only be connected when the mains voltage corresponds to the infor-
mation on the type plate of the unit.
▪The mains connection must be accessible at all times.
▪Repairs may only be performed by a qualied electrician.
▪Never operate the unit with a damaged power cord.
▪Always turn the unit OFF and disconnect mains power before performing any
maintenance or service.
Personnel qualication
▪The device may only be operated by qualied persons.
▪The device may only be operated by individuals who have been instructed in its
proper use by qualied persons.
▪The device may only be operated and maintained by persons who are of legal age.
▪Other personnel may only work with the unit under continuous supervision of an
experienced qualied operator.
▪This manual must be read and understood by all persons working with the device.
▪The personnel must receive special safety instructions in order to guarantee respon-
sible and safe work procedures.
Operating company’s obligations
Installation site
▪The device must be positioned in a suitable location.
▪The device must be installed sufciently stable on a dry, even and temperature
resistant surface.
▪Do not operate the device in proximity of highly inammable and explosive substances.
▪Installation and operation of the device is only permitted in facilities which are tted
with the appropriate laboratory equipment (e.g. with air extraction units).
▪We recommend operation in fume hood enclosures depending on the agents used.
▪The device may only be operated in enclosed spaces and under the following environ-
mental conditions:
Ambient temperature 5 - 31 °C at 80 % relative humidity
32 - 40 °C decrease linearly
till max. 50 % relative humidity
Installation altitude 0 - 2,000 m (6,500 feet) height above sea level
Degree of pollution 2
Overvoltage category II

Safety Instructions
8
Changes to the unit
▪No unauthorized changes may be made to the unit.
▪No parts may be used which have not been approved by the manufacturer.
▪Unauthorized changes result in the EC Declaration of Conformity loosing its validity,
and the unit may no longer be operated.
▪The manufacturer is not liable for any damage, danger or injuries that result from
unauthorized changes or from operating the unit other than as described in this
manual.
Safety for the personnel
➜Ensure that only qualied personnel operates the device.
➜Observe the following regulations:
- Laboratory guidelines
- Accident prevention regulation
- Ordinance on Hazardous Substances
- Other generally accepted rules of safety engineering and occupational health
- Local regulations
Safety during use
➜Beware of the effect of magnetic elds on cardiac pacemakers and data media.
Observe the according warning in chapter “Start-up”, “Setting up device”.
➜Wear the appropriate protective clothing when working on the device (clothing,
protective glasses and, if necessary, safety gloves).
➜Do not use the device in potentially explosive areas. The device is not protected
against explosion. There is no explosion or ATEX protection available.
➜Do not operate or assemble devices in the vicinity which are emission or radiation
sources (electromagnetic waves) for the frequency range (3*1011 Hz to 3*1015 Hz).
➜Avoid putting pressure on the display when you are not operating the device.
➜Eliminate errors immediately.
➜Do not use abrasive material to clean the surface. Only wipe with damp cloth.
➜Always switch the device off after use.
Disposal
➜Check the device components for hazardous substances and solvents.
➜Clean all components before disposal.
➜Dispose of the device according to the appropriate national legal regulations.
➜Dispose of the packaging material in accordance with the appropriate national legal
regulations.

Device Description
9
Device Description
Device overview
Carousel Standard overall view
Hotplate
(magnetic eld
underneath)
ON/OFF switch
(right side of device)
Connection Pt 1000
(back side of device)
Control panel
Carousel Standard control panel
Control light
unit ON/OFF
Speed control
knob:
set speed and
start / stop
rotation
Control light
heating up
Temperature
control knob:
set temperature
Heating button: start/stop heating

Device Description
10
Carousel Tech, Carousel Connect overall view
Hotplate
(magnetic eld
underneath)
ON/OFF switch
(right side of device)
Connection Pt 1000
(back side of device)
Control panel
Interface RS 232
(back side of device)
(only Carousel Connect)
Carousel Tech, Carousel Connect control panel
Select knob:
set speed and
temperature
Rotation button:
start/stop rotation
Display
Heating button:
start/stop heating

Start-Up
11
Start-Up
Setting up device
Warning:
Magnetic eld!
The magnetic eld beneath the hotplate could cause irritations with
cardiac pacemaker if you get too close.
Personnel with a cardiac pacemaker, implanted debrillator or dosing
pump should keep a minimum distance of 10 cm (4 inches) to the
device.
Warning:
Risk of slipping device!
As a result of vibrations generated during operation the device might
slide off the table top.
The surface must be smooth, clean and temperature resistant and
should be properly leveled.
➜Locate the stirring hotplate on a stable, horizontal surface.
➜Clean surface and feet with a damp cloth and ethanol regularly.
Connect/disconnect power cord
Connect power cord
The power cord comes with a three-wire
plug and recess on the bottom side.
Power cordUnit plug
The socket is located on the back side of
the unit.
➜Connect plug to the socket with the
recess facing down.
➜Push plug up against socket until
securely attached.
➜Connect plug to power socket.
Unit socket
Disconnect power cord
➜Disconnect plug from power socket rst.
➜Then disconnect plug from socket on unit.

Start-Up
12
Switch unit on and off
The ON/OFF switch is situated on the right side of the device beneath the control panel.
Switch unit on
➜Press ON/OFF switch on the right side.
✓The unit is switched on.
Carousel Standard
✓The green operating indicator lights
up.
Carousel Tec, Carousel Connect
✓The display switches on and shows the
actual parameters. OFF ON/OFF switch ON
Switch unit off
➜Press ON/OFF switch on the left side.
✓The unit powers off.
Carousel Standard
✓The green operating indicator switches off.
Carousel Tech, Carousel Connect
✓The display switches off.

Operation
13
Operation
Place vessels
Caution:
Risk of breakage and spillage
If the stirring bars start rotation suddenly at high speed or the vessels
are not placed securely vessels might break or they may slip off and
spill the sample.
Prior to start heating and mixing ensure that all vessels are placed
with sample and stirring bars and that they are securely placed.
Heating bath accessories for round asks and beakers as well as attachments for water,
gas and evaporating distributors are available.
➜To place a number of vessels securely on plate use optional adaptors (see general
catalogue).
➜Single vessels with at bottoms like beakers may be placed directly on hotplate.
A single ask should be arranged in the middle of the hotplate.
Several asks should be distributed equally on the plate.

Operation
14
Mixing
When using device inside heating cabinets, make reference to
ambient conditions as stipulated in chapter “Technical data”.
Set speed and start rotation
Warning:
Risk of poisoning!
Open vessels and too high speed may result in samples splashing.
Use vessels with narrow neck especially if sample is dangerous or
toxic.
Adjust speed step by step until you have reached the required rpm
settings.
Wear safety glasses and especially with dangerous and toxic samples
appropriate protective clothing.
Speed can be set between 100 rpm - 1,400 rpm.
➜Place vessel with sample and stirring bar on hotplate.
➜Turn item on with ON/OFF switch.
Carousel Standard
✓Operating indicator light is on.
➜Set speed with speed control knob.
✓Rotation starts immediately.
Speed control knob
Operating indicator light
Carousel Tec, Carousel Connect
➜Choose rotation setting with select
knob.
✓Rotation setting is marked with a frame.
➜Press select knob within 3 seconds.
➜Set required speed by turning knob.
➜Press rotation button.
➜Rotation button illuminates.
✓Rotation starts immediately.
✓The actual speed is shown in the
display.
Rotation setting: framed
Rotation button: rotation started
Select knob

Operation
15
Heating
Set temperature
Warning:
Risk of burning!
The hotplate can reach temperatures up to 300 °C.
If you work with temperatures above 50 °C wear safety gloves and
appropriate protective clothing.
Warning:
Risk of ignition!
In ammable samples may ignite with high temperatures.
If you work with in ammable samples set temperature at least
25 °C lower than ignition point of sample.
There are two options to control heating:
▪Without external temperature sensor: temperature will be measured and controlled
via hotplate.
▪With external temperature sensor: temperature will be measured and controlled via
sensor directly in sample (see chapter “Assembly, Temperature sensor”).
You can set the following temperature range:
▪Hotplate / temperature sensor: between 20 °C and 300 °C (lower degrees depending
on ambient temperature).
Working without external temperature sensor:
Due to differences in heat conductivity of various materials of vessels
and sample the temperature of hotplate should be set 1½ to 4 times
higher than the desired sample temperature.
Carousel Standard
✓Heating button is switched off.
➜Set required temperature with
temperature control knob.
Temperature control knob: set temperature
Control light Heating button: switched off

Operation
16
Carousel Tech, Carousel Connect
✓Actual temperature is shown in the
display.
➜Choose temperature setting with select
knob.
✓Temperature setting is marked with a
frame.
➜Press select knob within 3 seconds.
➜Set required temperature by turning
select knob.
➜Press select knob or wait 3 seconds.
✓Set temperature is saved.
✓The actual temperature appears in the
display.
Temperature setting: framed
Select knob
If no entries are made within 3 seconds the last entry will be saved
and the display switches to show actual parameters.
Working with external temperature sensor Pt 1000:
The display shows “ext” in addition. Setting temperature is exactly
the same procedure.
Show set parameters: Carousel Tech, Carousel
Connect
✓Device is switched on.
✓Display shows actual parameters for speed and temperature.
➜Press select knob and hold pressed.
✓Display switches to show set parameters.
Start heating
✓Vessel with sample and stirring bar is
placed on hotplate.
✓Device is switched on.
➜Press heating button.
✓Heating button illuminates.
✓Heating starts immediately.
✓The actual temperature is shown in the
display.
Heating button
Heating off Heating on

Operation
17
Carousel Standard
✓In addition to heating button, the
control light for heating up will
illuminate.
✓Control light will be illuminated as long
as set temperature is not reached.
✓When set temperature is reached the
control light for heating up will go out.
Temperature control knob
Control light: heating up
Heating button: Heating on
Carousel Tec, Carousel Connect
✓The actual temperature is shown in the
display.
✓An additional heating symbol will
be shown in the display as long as set
temperature is not reached.
✓When set temperature is reached the
heating symbol will disappear.
Actual temperature
Heating button: Heating on
Temperature can be adjusted any time when heating is on.
The unit is equipped with a residual heat indicator.
✓If heating is switched off and temperature is above 50 °C, the
heating button will blink orange.
✓The illumination of the heating button will switch off automatically,
when temperature decreases below 50 °C.
The residual heat indicator does not function when device is switched
OFF via main switch! When switched ON again, residual heat will
function again.
Stop heating
➜Press heating button.
✓Illumination of heating button will go out.
✓Heating is switched off.
A power failure will stop heating and mixing and put device on stand
by. Set temperature and speed will be saved.

Operation
18
External temperature sensor Pt 1000
(optional accessory, see chapter “Accessories and spare parts”)
As soon as the external temperature sensor Pt 1000 is connected, temperature will not
be measured and controlled at hotplate but directly at sensor. (Connection see chapter
“Assembly, Connect temperature sensor Pt 1000”).
For reliable measurement the temperature sensor has to be inserted
at least 20 mm into sample.
Warning:
Risk of burning! Possible damage of device
If temperature sensor is not inserted in sample the sensor measures
and controls ambient temperature. The hotplate keeps up raising
temperature till max. temperature of 300 °C but set temperature can
never be reached.
If temperature sensor Pt 1000 is connected always insert sensor in
sample before heating is started.
Heating with external temperature sensor:
Carousel Tech, Carousel Connect
When external temperature sensor is connected, 2 additional functions are available:
▪Heating up “Fast” or “Precise”:
Fast mode: speeds up heating to set temperature (factory setting) when shortest
heating up time is important.
Precise mode: enables heating up without overshooting for temperature-sensitive
samples.
▪Calibrate:
This function allows to change the temperature measured by sensor in a range of
-5 °C to +5 °C.
Selecting heating mode
✓Sample is positioned on hotplate.
✓Temperature sensor is connected and inserted in sample.
✓Required temperature is set.
➜Press heating button.
✓Heating button starts blinking.

Operation
19
✓“FA St” for fast mode appears in
display.
➜Press heating button within 3 sec.
✓Display changes from “FA St” to
“PrE CIS” for precise mode.
✓As long as the heating button keeps
blinking, you can switch back and forth
from fast mode to precise mode.
✓As soon as heating button is lit
continuously, device will be heating in
last mode selected.
✓Last mode selected will be saved after
switch off.
Heating button: blinking Select knob
Calibrate
✓Temperature sensor is connected and inserted in sample.
✓Device is switched on.
✓Rotation and heating are switched off.
➜Press select knob and hold pressed.
➜Press rotation button in addition once.
✓“CAL” appears in display.
➜While still pressing select knob press
rotation button repeatedly until
required temperature difference is
displayed.
➜Release select knob.
✓The device is calibrated.
✓Your settings will be saved after switch
off.
Rotation button Select knob

Operation
20
Deactivate and activate safety functions
If temperature is measured via external temperature sensor Pt 1000, the error control
switches off heating:
▪at sudden temperature decrease at sensor (error E21)
▪if temperature increase at sensor is too slow in correspondence to heating power
(error E22)
These safety functions are factory preset. If necessary you can deactivate these 2 safety
functions.
Warning:
Risk of burning! Possible damage of device
Described safety functions switch off heating including when
temperature sensor is not positioned in sample.
When temperature sensor is not positioned in sample, the sensor
measures ambient temperature. The hotplate keeps up raising
temperature till max. temperature of 300 °C but set temperature can
never be reached.
When deactivating these 2 safety functions:
▪Ensure that temperature sensor is always inserted in sample prior
to switch on heating.
▪Never ll in sample to already heated up sample during running
operation, if temperature differs to already heated up sample.
✓Temperature sensor is connected and
inserted in sample.
✓Device is switched on.
✓Rotation and heating are switched off.
➜Press select knob and hold pressed.
➜Press heating button in addition once.
✓“SAF On” appears in display.
➜While still pressing select knob press
heating button once again.
✓Display changes from “SAF On” to
“SAF OFF”
➜Release select knob.
✓The 2 safety functions are deactivated.
✓Your setting will be saved after switch
off.
➜To re-activate safety functions repeat
procedure till display shows “SAF On”.
Select knobHeating button
This manual suits for next models
5
Table of contents
Languages:
Other Radleys Laboratory Equipment manuals

Radleys
Radleys Carousel Work-Up Station User manual

Radleys
Radleys Reactor-Ready Pilot User manual

Radleys
Radleys Reactor-Ready User manual

Radleys
Radleys Reactor-Ready Lab Reactor User manual

Radleys
Radleys GreenHouse Plus User manual

Radleys
Radleys Reactor-Ready Pilot User manual

Radleys
Radleys GreenHouse User manual

Radleys
Radleys Heat-On RR68000 User manual

Radleys
Radleys Reactor-Ready User manual

Radleys
Radleys Carousel 6 Plus User manual