Installation Instructions
I - Sheet Number I-TVR-01 Rev. A
Retractable Soft Top
For proper installation and best possible fit, please read all instructions BEFORE you begin.
For technical assistance or to obtain missing parts, please call Customer Relations at 1-800-241-7219.
Important Safety Information
NOTE: Actual product may vary from illustration.Contents
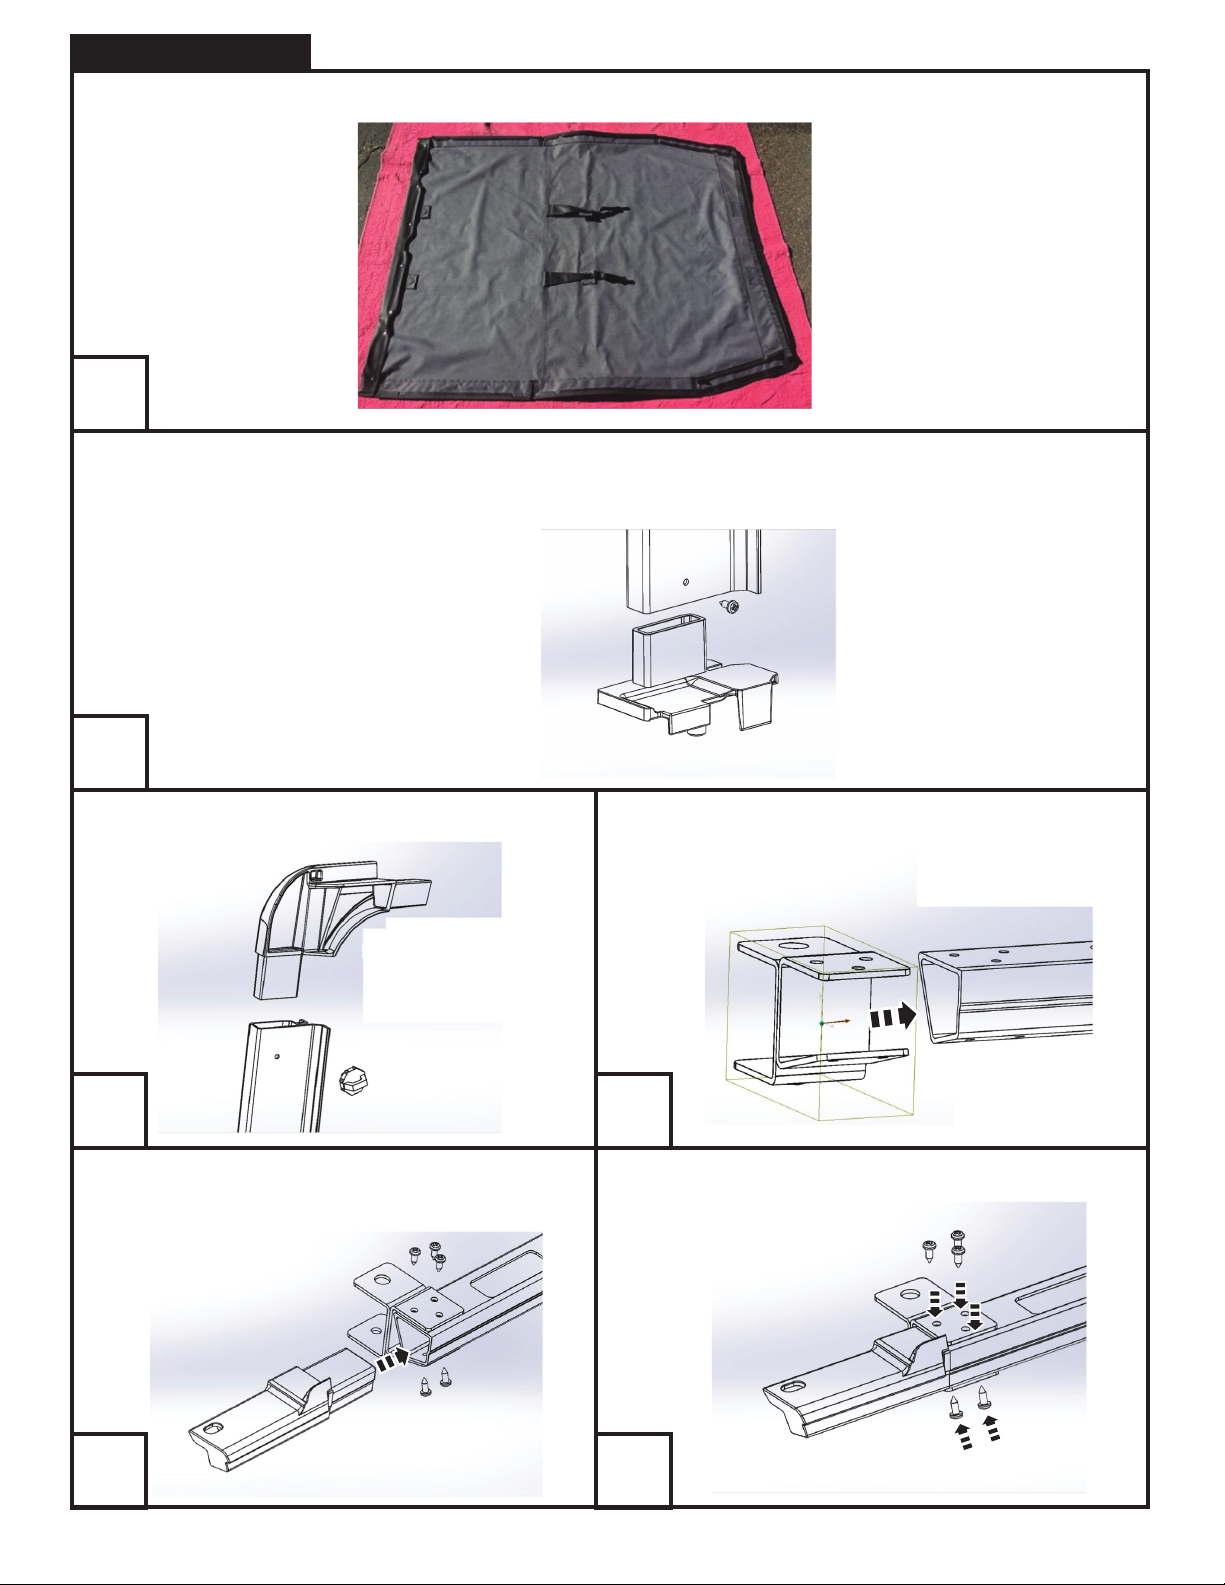
Soft Top Components x1
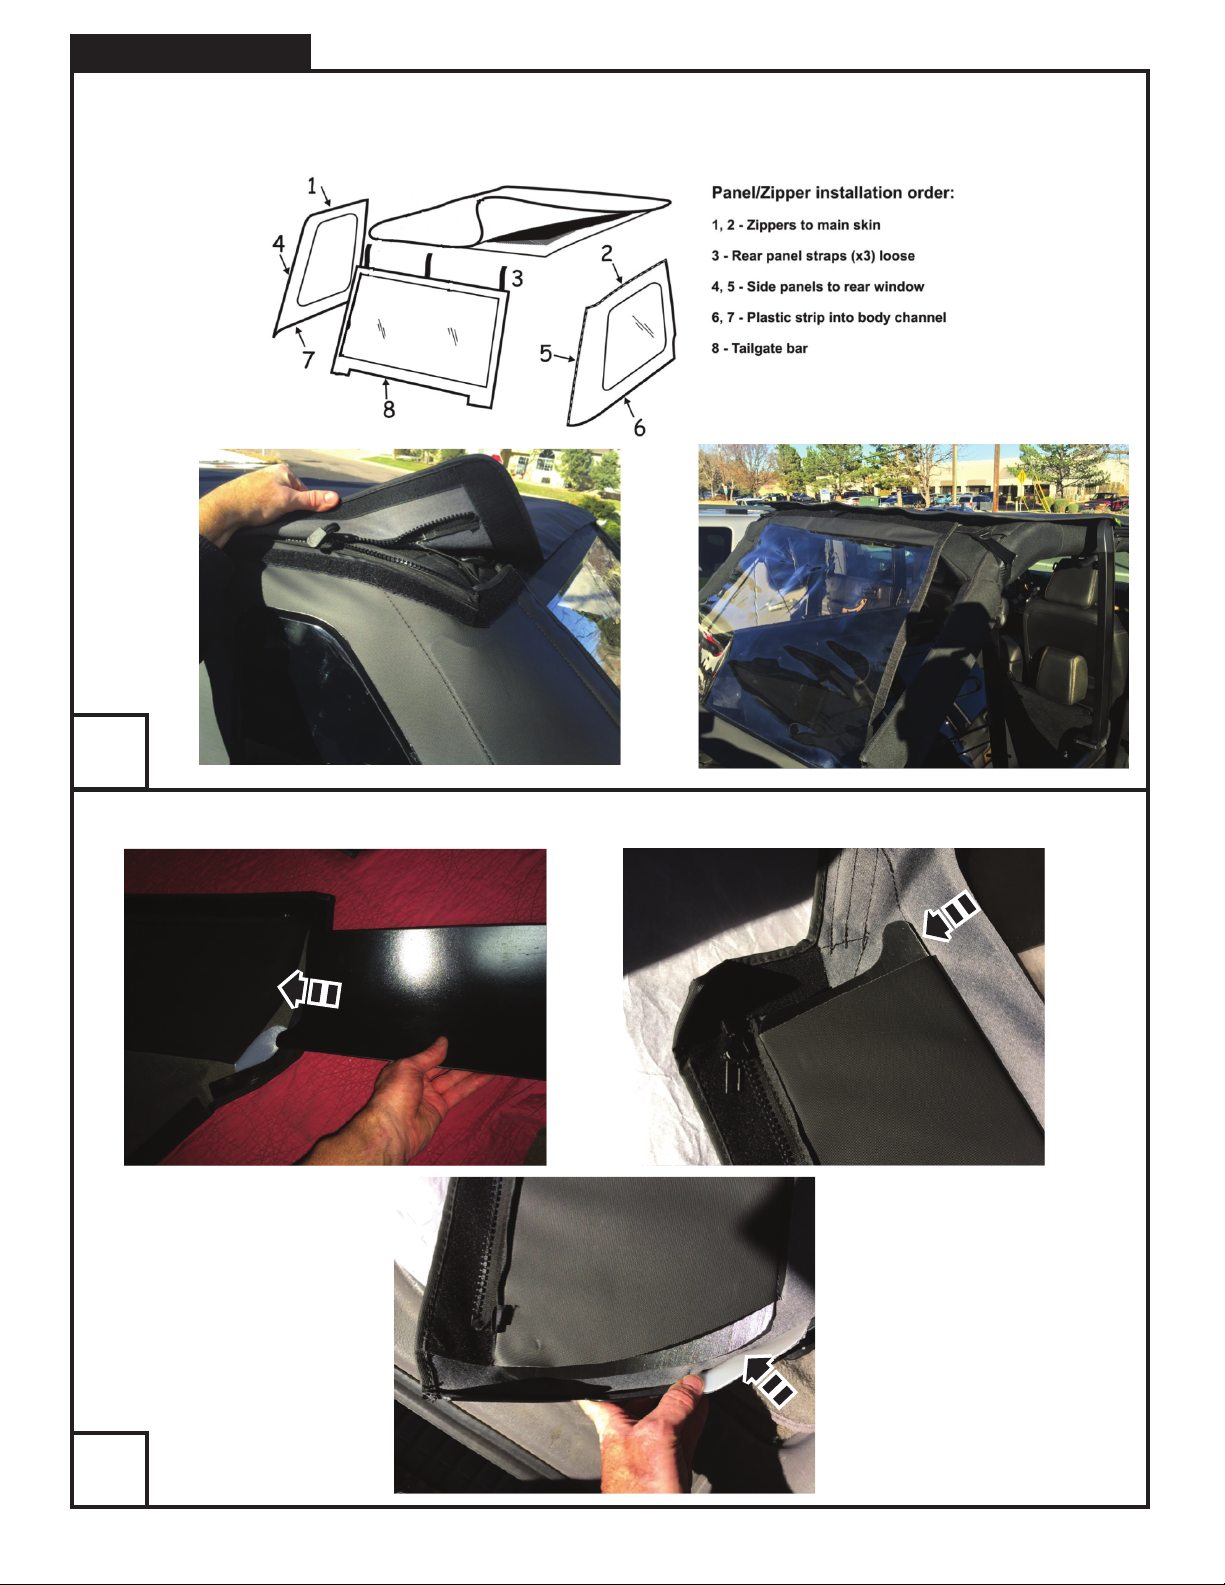
(Soft Top, Side Windows, Rear Window)
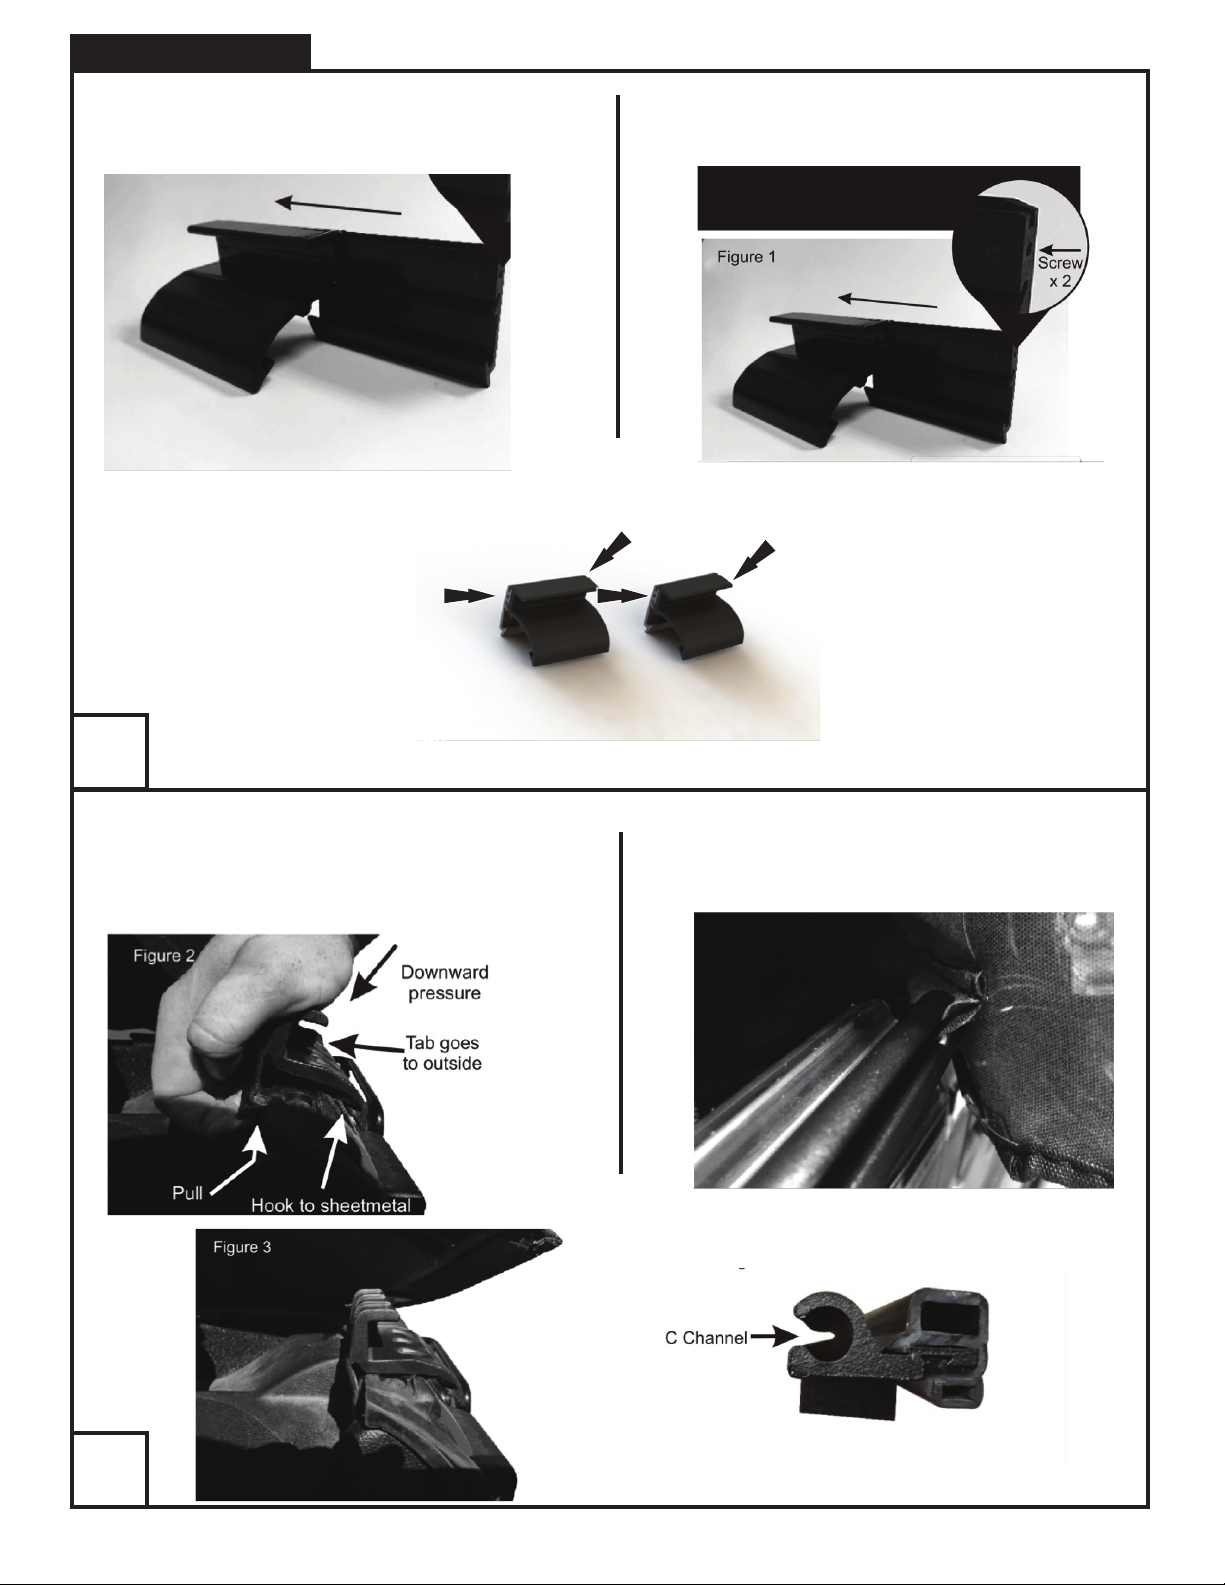
End Clamp Main Body x2 Set Door Surrounds x1 Tailgate Bar x1
Allen Key x2
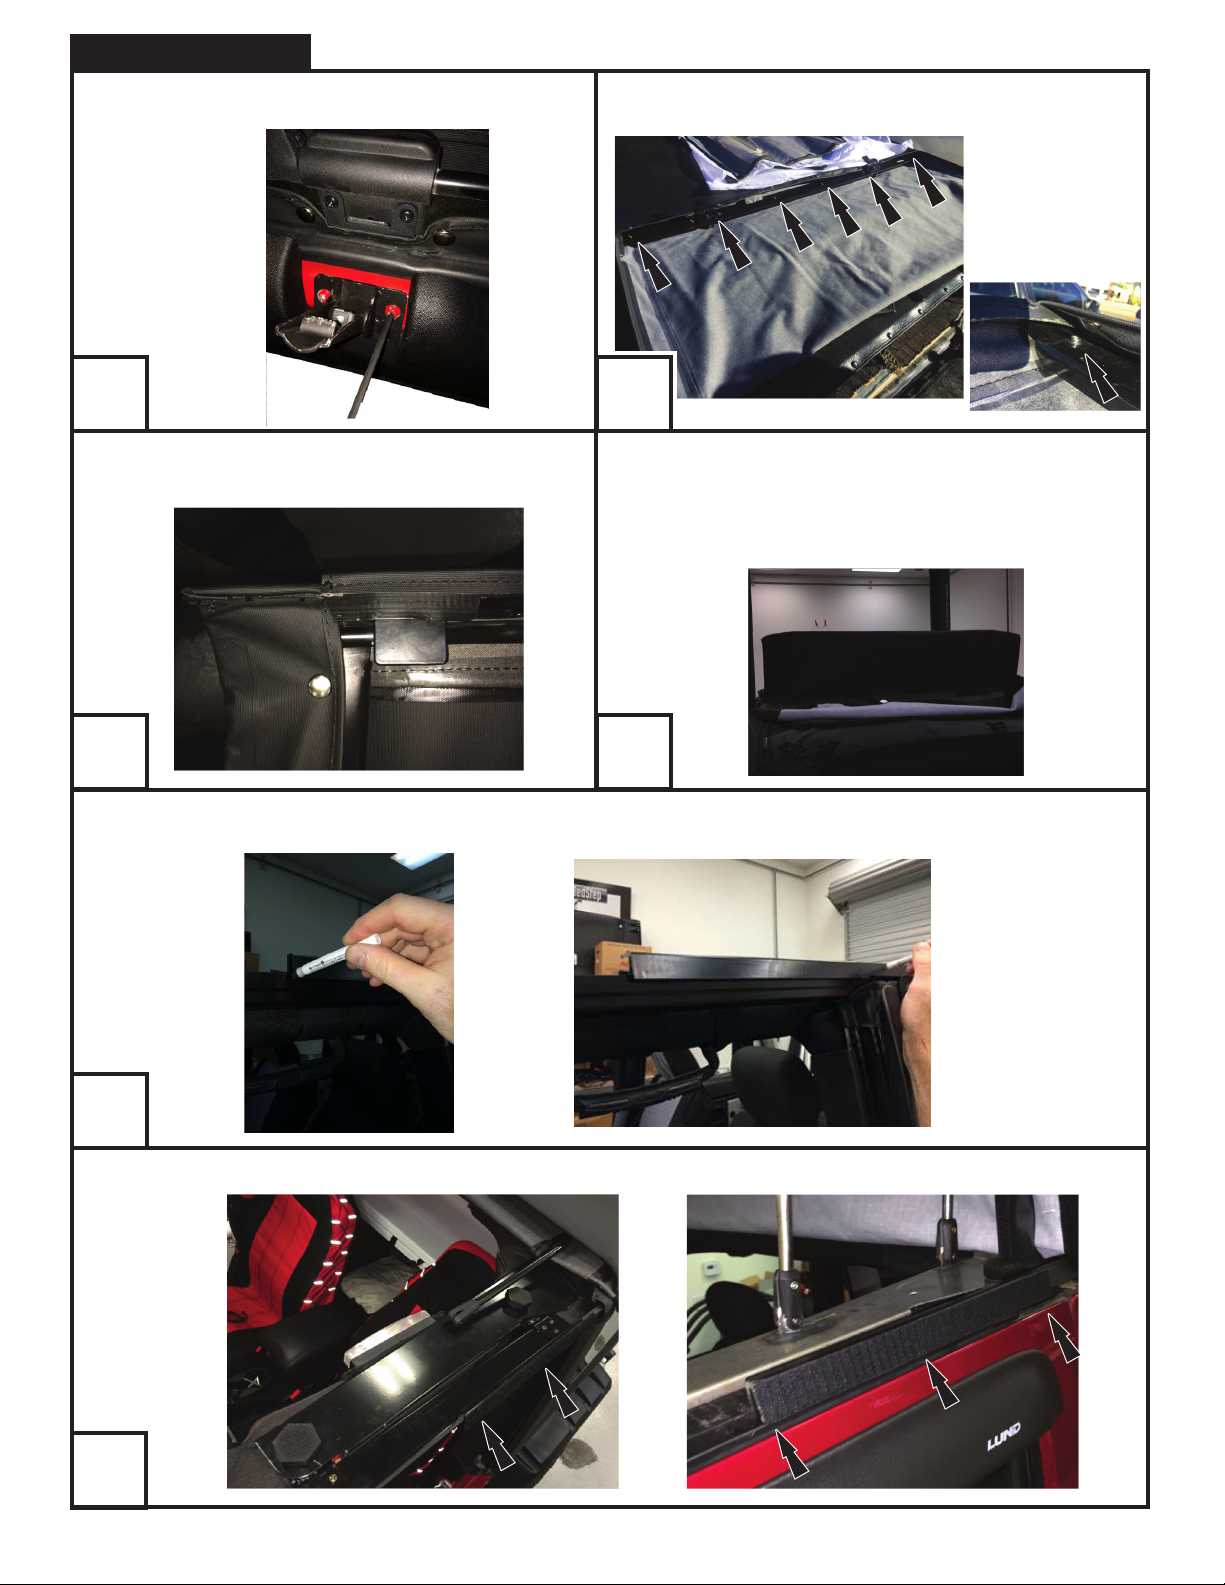
Hook and Loop Tape
for door surround x2
Small Turn Knobs x2 60mm length knobs x2 70mm length knobs x2
Retractable Trailview
Hardware x1
Self Tapping Screws x30
Short Middle Knobs x2
Tailgate Bar x1
Puddle Polesy x2
End Clamp Backing x2
Tools Required
Torx Bits Allen Wrench Safety Glasses
Ratchet and extensionsPhillips screwdriver
Preparation Before Installation
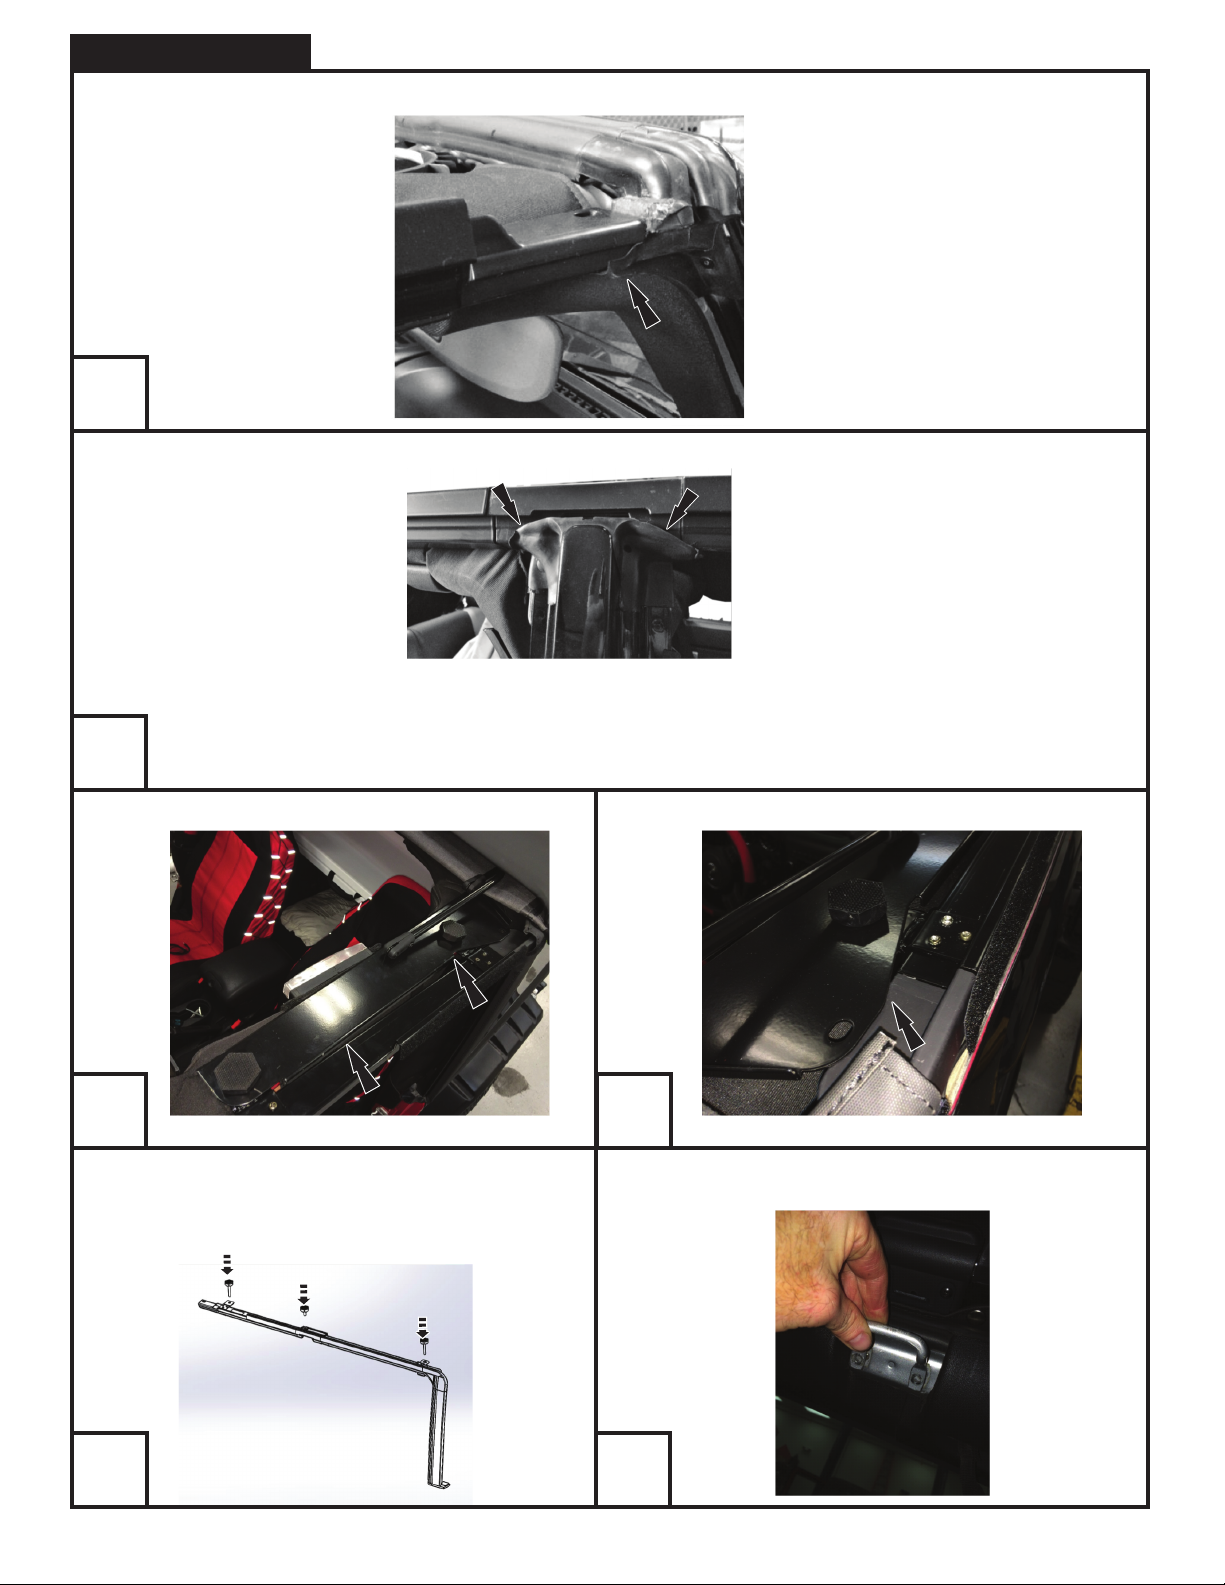
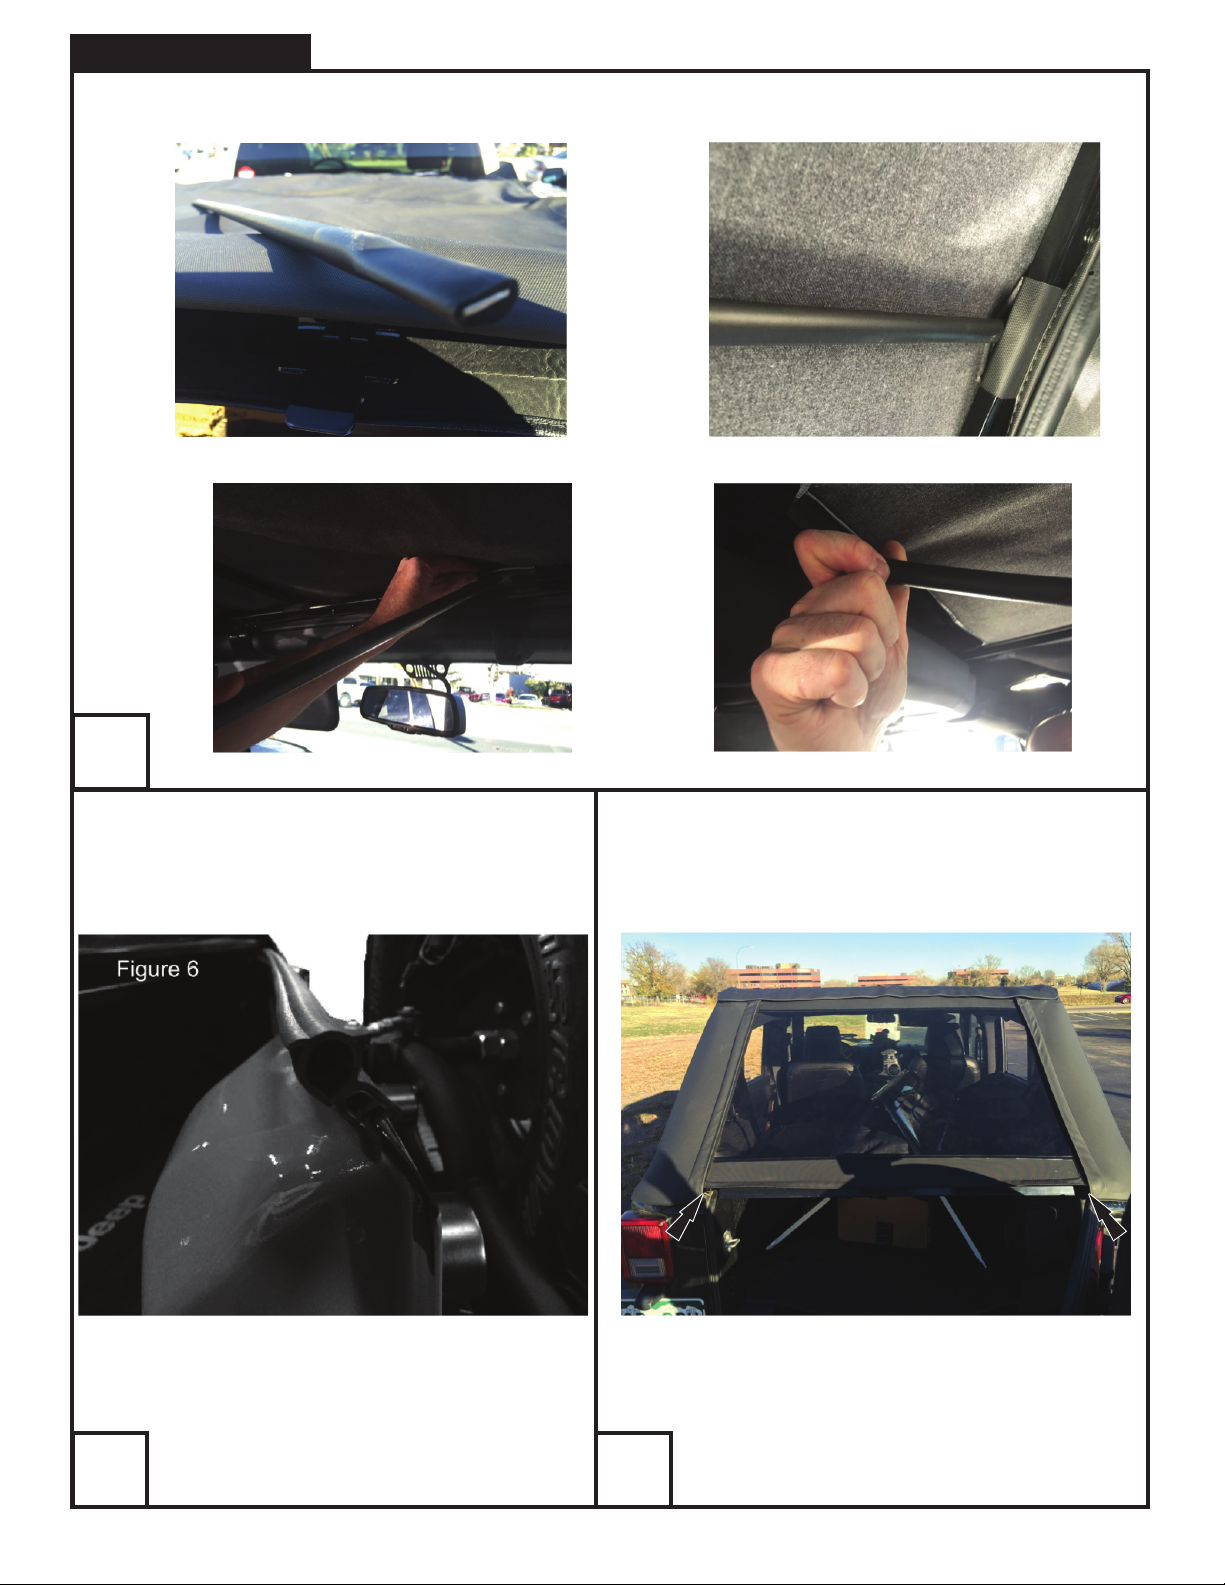
• Remove existing soft or hard top. For OEM (original/factory) soft tops: remove windshield header bar, remove tube frame
hardware from roll bar, side door surrounds and remove the rear window/tailgate bar/tail gate clips.
• To be used with Lund® branded products only.
• Periodically check all components for tightness.
• Be sure to wear safety goggles while installing.
• When using power tools, read and understand all operating instructions
Page 1 of 11