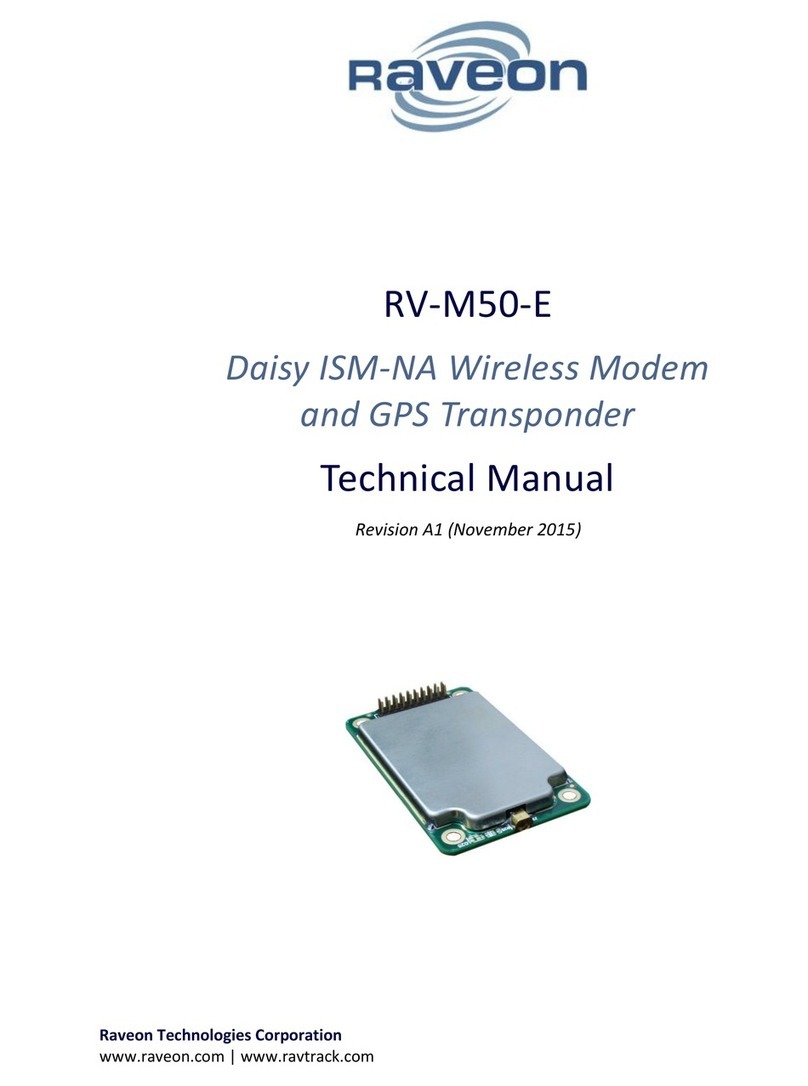
Raveon RV-M50 User manual

RV-M50-E Technical Manual
2
Table of Contents
1. General Information .............................................................................................................................4
1.1. Congratulations............................................................................................................................. 4
1.2. Safety / Warning Information....................................................................................................... 4
Blasting Caps and Blasting Areas .......................................................................................... 4
Potentially Explosive Atmospheres.......................................................................................4
1.3. Safety Training Information ..........................................................................................................4
2. Overview ...............................................................................................................................................5
2.1. Input and Output .......................................................................................................................... 5
Universal Wireless OEM Radio Connector............................................................................5
LED ........................................................................................................................................ 6
RF Antenna Connection ........................................................................................................6
GPS Antenna Connection...................................................................................................... 6
3. Configuring the Daisy ISM..................................................................................................................... 6
3.1. Overview .......................................................................................................................................6
3.2. Command Mode ........................................................................................................................... 7
Command Mode Encoding and Line Format ........................................................................7
Entering Command Mode..................................................................................................... 7
3.3. Reading a Parameter.....................................................................................................................7
Exiting Command Mode........................................................................................................8
3.4. Using Commands .......................................................................................................................... 8
3.5. Configuration Commands .............................................................................................................8
Standard Commands.............................................................................................................8
Radio Frequency related Commands.................................................................................. 10
3.6. ptr_COM1 Factory Commands ...................................................................................................10
3.7. Factory Default Settings.............................................................................................................. 10
Default Factory Settings......................................................................................................10
4. Operational Modes and Configuration ...............................................................................................11
4.1. LoRa Lite Pier to Pier Configuration:...........................................................................................11
Channel Configuration and Virtual Channelization.............................................................11
RV-M50-E Technical Manual
3
General Configuration.........................................................................................................11
4.2. Channel Center Frequency..........................................................................................................12
4.3. Channel Bandwidth and Transmit Power ................................................................................... 12
Channel Data Rate...............................................................................................................12
Channel Occupancy.............................................................................................................12
4.4. Data Transmission....................................................................................................................... 13
4.5. Data Reception............................................................................................................................ 13
Serial Port Data ...................................................................................................................13
4.6. Device Addressing.......................................................................................................................13
ID Addressing Basics............................................................................................................13
Addressing Examples: .........................................................................................................14
5. Troubleshooting..................................................................................................................................15
5.1. Symptom: Unit will not receive..................................................................................................15
5.2. Symptom: Receive light blinks, but no data is received ............................................................15
5.3. Symptom: Long delay before transmitting ................................................................................15
5.4. Symptom: Cannot enter Command Mode................................................................................. 15
6. Mechanical.......................................................................................................................................... 16
7. NOTICE ................................................................................................................................................16
7.1. Safety Training information ........................................................................................................16
8. FCC Compliance Information ..............................................................................................................16

RV-M50-E Technical Manual
4
1. General Information
1.1. Congratulations
Congratulations on your purchase of an RV-M50 Daisy Radio. Please take a few minutes to read this
manual carefully. The information presented here will allow you to derive maximum performance from
your radio modem base station. After reading it, keep the manual handy for quick reference, in case
questions arise later on.
1.2. Safety / Warning Information
Blasting Caps and Blasting Areas
To avoid possible interference with blasting operations, turn off this device when you are near electrical
blasting caps, in a blasting area, or in areas posted: “Turn off two-way radio.” Obey all signs and
instructions.
Potentially Explosive Atmospheres
Turn off your radio prior to entering any area with a potentially explosive atmosphere. Do not install this
product for use in areas with potentially explosive atmospheres. Sparks in a potentially explosive
atmosphere can cause an explosion or fire resulting in bodily injury or even death.
Note: The areas with potentially explosive atmospheres referred to above include fueling areas such as
below decks on boats, fuel or chemical transfer or storage facilities, areas where the air contains
chemicals or particles, such as grain, dust or metal powders, and any other area where you would
normally be advised to turn off your vehicle engine. Areas with potentially explosive atmospheres are
often but not always posted.
1.3. Safety Training Information
This radio is restricted to occupational use. Work related operations are permitted only when the radio
operator has the knowledge to control the exposure conditions of its passengers and bystanders by
maintaining the minimum separation distance. Failure to observe these restrictions may result in
exceeding the regulatory exposure limits.

RV-M50-E Technical Manual
5
2. Overview
The Daisy Wireless Modem is a secure, high-performance, long-
range wireless access card and GPS transponder. It is FCC approved
as a Direct Sequence Spread Spectrum (DSSS) data radio modem.
Two data interfaces are available, transparent-link mode and
Raveon’s WMX Wireless Packet Format. Modem operation is
virtually transparent to the user and the configuration of the
modem is done easily through the user serial port.
As a GPS transponder, configuration is as simple as setting a report rate. Many options are available to
create a customized GPS transponder by adjusting reporting rules and detail levels of GPS reports.
For security, AES-128 encryption is available as an option to order with the radio.
While easy to use out-of-the-box, the Daisy Modem’s programmability makes it extremely versatile.
Most parameters may be reconfigured to optimize for specialized operations, extended range or higher
data throughput.
2.1. Input and Output
The RV-M50 uses the Universal Wireless OEM Radio Connector (UWORC) which is the same as every
connector on every Raveon OEM data radio modem.
Universal Wireless OEM Radio Connector
Raveon utilizes a universal connector configuration on many of its radio modem modules, so the Z50 is
plug-in compatible with dozens of other radio modems. The UWRC connector pint-out is as shown
below. See Application Note AN224 for more information about the UWORC interface.
20- Pi n U W O RC I n te r f a ce P o rt
Pin #
Function
Description
1
GND
Ground
2
VCC
DC Input
3
CD
Carrier Detect Out. DCD
4
TX On
Pin is High when module is transmitting. Low when off,
receiving, or sleeping.
5
Data In (TXD)
Serial UART transmit data input.
6
Data Out (RXD)
Serial UART receive data output.
7
Enable
Low to shut down the module. High to enable it.
8
Sleep
CPU Sleep input. Put in low-power fast-startup mode.
9
CTS
Clear to send output. Indicates state of internal buffers.
10
RTS
RTS input for serial flow control.
11
NC
No Connection
12
VDIG
3.3V output. Limit current draw on this power source to 50mA.
13
IOA
IO port A, USB DP
14
IOB
IO port B, USB port, DM
15
IOC
IO port C
16
STAT1
Status IO 1
17
NC
No Connection
18
STAT2
Status LED out

RV-M50-E Technical Manual
6
19
GND
System Ground
20
V-BACK
Optional Backup Battery In
The primary connector is fully pin-for-pin compatible with M8 UHF, VHF, 220MHZ modems. V50 ISM
band radio modems.
LED
By default, the LED will indicate the following:
Green: Radio has received a packet
Red: Radio is transmitting a packet
Flashing Orange: GPS is locking (flashing will cease when GPS has locked)
Many commands modify the operation of the LED, including disabling it entirely.
RF Antenna Connection
The RF Antenna Connection is an MMCX connector.
GPS Antenna Connection
If GPS feature is installed, the GPS Antenna Connection is a u.FL (sometimes known as IPEX)
3. Configuring the Daisy Radio
3.1. Overview
The UART serial port on the unit is used to send and receive data over the air, as well as to configure the
RF modem. In standard transparent-link operation, the user sends serial data into the TXD pin of the
user port, and this data is transmitted over the air. Received data from another RF modem is output to
the user via the RXD pin of the user port. This is the default operating condition of the RF modem. No
special characters, hardware control lines, or timing is required to operate the Daisy Modem.
By default, the serial port is set to: 38400 baud, 8 data bits, 1 stop bit, no parity bit.
If the M50 is configured as a GPS transponder, the serial port need not be connected to anything. The
internal GPS will initiate the transmissions of position and status. The serial port may be connected to
receive other GPS reports or send and receive additional data.

RV-M50-E Technical Manual
7
There is also a Command Mode used to program and configure the modem. In the Command Mode, the
modem accepts commands via the serial port TXD pin. The commands can be used to change certain
internal parameters of the modem as well as to read-out the current configuration and diagnostic
statistics.
The modem also supports Raveon’s Wireless Modem Exchange (WMX) protocol for commanding and
messaging. WMX is ideal for fully automated control and integration. For more information, see the
WMX Protocol Description document and the Raveon Tech Note “Rapid Radio Configuration using
WMX”.
3.2. Command Mode
Command Mode is used to program and configure the modem. This mode is separate from data mode
and will not transmit received data over-the-air, instead executing commands detailed in this manual.
Command Mode Encoding and Line Format
In Command Mode, all characters are ASCII encoded. All output lines will use the standard network line
ending, CR+LF (ASCII 0x0D followed by ASCII 0x0A).
Inputs lines may use either CR, LF or CR+LF line endings.
Entering Command Mode
The modem may be put into a Command Mode, by entering a sequence of three plus characters (+++),
called the Entry Sequence.To keep the modem from unintentionally entering the Command Mode
because of the Entry Sequence occurring in a stream of data entering the modem, there must be a
pause in the data stream before the Entry Sequence as well as a pause afterwards. If either pause is
missing, the modem will not enter the command mode. The pause length is configurable, by default it is
500ms.
When the modem first enters the Command Mode, it will output the base model number along with the
OK sequence:
RV-M50
OK
Once in command mode, the instructions in the following sections can be followed to continue radio
configuration.
3.3. Reading a Parameter
To read the value of a particular setting, issue the command, with no parameter. The modem will return
the value followed by an “OK”. The modem’s OK response is:
The value in ASCII decimal format.
A <CR> <LF> (<CD> = ASCII 0D, <LF> = ASCII 0A).
An “O”, “K”, <CR>, and <LF> sequence.

RV-M50-E Technical Manual
8
For example, if the user enters the command to read the radios modem address and its address was
1234, the user would issue the following command:
MYID<cr>
and the modem will respond with:
1234 <CR> <LF>OK <CR> <LF>
Exiting Command Mode
To exit command mode and return to data mode, the command EXIT may be used.
Alternatively, command mode will timeout after a configurable amount of time, by default 60 seconds.
3.4. Using Commands
To execute a command, send the command name and any parameters separated by spaces, followed by
a line ending. For example, to use the ATDT command to set the destination address to 1234, send:
ATDT 1234<LF>
Some commands may output result information on lines following the command, but the output will
always terminate with either the OK sequence (introduced in the previous section) or the ERROR
sequence (ERROR<CR><LF>). Always put a space after the command code, before entering a parameter.
Some commands may have different results depending on the number of parameters. In general, a
command that sets a parameter(s) can read back its values by issuing the command with no parameters.
To get on-line help with a command, enter the command with a question mark at the end.
To see a list of all commands, use the HELP command.
3.5. Configuration Commands
Standard Commands
The following commands are standard Raveon commands implemented by the radio modem.
Command
Command Description
Parameters
Factory
Default
ATAT
Silence AFTER Sequence - Sets period of silence after the command
sequence characters in mS.
Range:10 –1000
(mS)
500
ATBT
Silence BEFORE Sequence –Sets period of silence before the
command sequence character in mS.
Range: 0-1000
mS
500
ATBD
Baud Rate –Sets serial com port baud rate (bps).
If a PC’s serial baud rate is set higher than the fixed over-the-air baud
rate of the module, hardware handshaking may be required. 0 = 1200
1=38400 1=2400 2=4800 3=9600 4=19200 5=38400
6=57600 7=115200
0 –7
5

RV-M50-E Technical Manual
9
ATCT
Command Time Out –If no valid commands have been received via
the serial port within this time period (in milliseconds), modem returns
to normal operation mode from Command mode.
Range: 100-
120000mS
60000
ATHW
Returns the hardware PCB number
Range: 0-1000
mS
N/A
ATE
Set/Show Echo –Turn Echo on or off
0: off
1: on
1
ATL
Enable/Disable the LEDs –1 = LEDs always off. This reduces some
power consumption. 0 = LED operate normally.
0 or 1
0
ATJF
Read/set the CTS threshold –Set the serial buffer
threshold where the CTS line is negated. By default the
ATJF level is at 80% of the internal buffer size.
4000
ATMK
Address Mask –Configures local and global address space. Each
digit may be a 0,1,2,3,4,5,6,7,8,9,A,B,C,D,E,or F. In most
applications, this is kept at FFFF.
Range: 0000 -
FFFF
FFFF
ATLA
Alternate Listen Address–Set an alternate listen address
FFFF
ATMY
Unit Address –Configures the individual; address for this unit. Each
digit may be a 0,1,2,3,4,5,6,7,8,9,A,B,C,D,E,or F. Note: FF is
interpreted as a group. See addressing section.
Range: 0000 -
FFFF
1234
ATNS
Stop Bits –Set/read the number of stop bits for serial communication
1,2
1
ATSF
ATSF X Over-The-Air spreading Factor. X is the code for the
spreading factor. In 500kHz channel, 7 is 21.87kbps. See section 4
for more information.
See section 4
10
ATR3
Serial Port Time Out –The time in milliseconds for the serial port to
time out. When data is entering the serial port, and this amount of time
passes with no more data, the modem will begin to transmit the data
over the air.
Range: 1 –999
(ms)
20
ATSL
Serial Number –Reads and returns a unique serial number for this
unit.
Read Only
1 - 999999999
unique
ATSH
Show –Display the configuration of the modem. This will return a
page of ASCII characters, showing the main configuration parameters.
none
None
ATIO
ATIO X IO Configuration –Set the IO mode X. 0: RS232 1: MIMIC
5:OEM board, TTL IO, 8: Tech Series Enclosure
0-8
5
ATVR
Firmware Version –Returns firmware version currently loaded on the
module.
Read Only, 3
characters
none
AT&F
Restore Factory –Restore to the factory defaults
None
SHOW
Show/display an overview of the radio’s configuration.
None
-
MODEL
Read Model number –Read the model number.
None
RV-M50
WMX
WMX –Enable/disable WMX commands
0: off
1: on
0
TOID
Set Destination Address. Set ID of the destination radio
0000-FFFF
1234
CONFIG
Show Configuration. Display the settings of every parameter in the
unit. If the parameter is 1, then the help text is not displayed, If the
parameter is 2, the configuration is output in strictly the format used to
program another unit.
None, 1, 2
-

RV-M50-E Technical Manual
10
HELP
Help Menu
-
-
When configuration s are changed, it is a good idea to re-boot the radio by powering off and back on.
Radio Frequency related Commands
The following commands are commands to set, manage, and read RF technology in this product.
Command
Command Description
Parameters
Factory
Default
ATHP
Channel Number –Select channel number to configure
1-5
1
ATBW
Set/Read Channel Bandwidth in kHz
125,250,500 (kHz)
500 (kHz)
ATF
Display frequencies –Display all of the frequencies programmed into
all of the channel memories.
N/A
ATFX
Frequency –sets both Tx and Rx frequency
See section 3
ATFEC
Error Correction Coding Rate –For forward error correction, extra
bits are added to data to correct bit errors. 0=non, 1=4/5, 2=4/6, 3=4/7,
4=4/8.
0-4
1
3.6. ptr_COM1 Factory Commands
Commands used for calibration or factory testing. No need to work with these when setting up this
radio modem.
ATMP
Model Protocol –The over-the-air protocol to use.
13 = Lora Pier-Pier
13
3.7. Factory Default Settings
Default Factory Settings
Serial port ................................................................................38400 baud, N/8/1
ID (ATMY) ................................................................................1234
TOID (TOID) .............................................................................1234
ISM band 902-928 (Radio Type 0)
Channel
Frequency
MHz
Bandwidth
Spreading
Factor
Symbol
Rate
1
903.5
500kHz
10
3.90 kbps

RV-M50-E Technical Manual
11
2
906.5
500kHz
10
3.90 kbps
3
910.5
500kHz
10
3.90 kbps
4
914.3
500kHz
10
3.90 kbps
5
925.3
500kHz
10
3.90 kbps
ETSI Sub bands 863-870 (Radio Type 1)
Channel
Frequency
MHz
Bandwidth
Spreading
Factor
Symbol Rate
1
864.1
500kHz
10
3.90 kbps
2
865.2
500kHz
10
3.90 kbps
3
866.5
500kHz
10
3.90 kbps
4
867.2
500kHz
10
3.90 kbps
5
868.9
500kHz
10
3.90 kbps
The ATSF Spreading factor command can be used to set a channel’s SF to the level you would like.
4. Operational Modes and Configuration
4.1. Pier to Pier Configuration:
This is the default configuration for the RV-M50 LoRa Daisy Radio. The RV-M50 radios can communicate
to each other in a pier to pier mode without any base station required. Set your frequency and the
spreading factor sets the over-the-air data rate.
Channel Configuration and Virtual Channelization
With Virtual Channelization, the M50 will operate in a proprietary, decentralized, 1-5 channel
frequency-agile manner. This unique feature allows networks of M50 radios to operate with no central
network controller and no requirement that all radios are in range of each other. This enables the
reliability of multiple channels in the ISM band while allowing free-form network architectures as
required.
General Configuration
For regulatory compliance, stay within your frequency range of our regulator requirements, and keep
the bandwidth at 500kHz unless the radio is in frequency hopping mode.
1. Channel frequencies
2. Channel bandwidth
3. Channel data rate
To configure any individual channel, issue ATHP <channel>, where <channel> ranges to select the
channel. SHOW command will list the configuration of all channels. Once a channel to configure is
selected, the commands below will modify the parameters of the channel.
Every channel has settable frequency, bandwidth and over the spreading factor.

RV-M50-E Technical Manual
12
FCC regulations require that the M50 not allow certain modes of operation. If the radio is placed in a
non-compliant configuration, this will be indicated upon entering Command Mode or when issuing the
SHOW command.
4.2. Channel Center Frequency
Channel frequency is set with ATFX <frequency>, where <frequency> is expressed in MHz, e.g. 915.5. In
North America, channel center frequency may be set between 902.5 - 927.8MHz for 125kHz channels
and between 902.7 - 927.5MHz for 500kHz channels.
4.3. Channel Bandwidth and Transmit Power
Channel bandwidth is set with ATBW <bandwidth>, where <bandwidth> is set according to the table
below:
To comply with FCC regulations, the RV-M50 in pier-to-pier mode uses 500kHz channel bandwidth.
Direct Sequence Spread Spectrum (DSSS) they call Chirp Spread Spectrum (CSS). Each bit is spread by a
chipping factor. The number of chips per bit is called the spread factor.
Channel Data Rate
Channel data rate varies by spreading factor, spreading factor can be set with ATSF <val>, where <val> is
set according to the table below: For the SCFHSS 500kHz channels, the settings are:
ATSF
Setting
Bit Rate for
500kHz
Channels
Duration for 20 Data Bytes
Dur. 100 Bytes
Typical Packet
FEC=0(4/4)
FEC=1(4/5)
FEC=4(4/8)
FEC=1(4/5)
7
21.87 kbps
20mS
25mS
30mS
52mS
8
12.50 kbps
44mS
44mS
56mS
92mS
9
7.03 kbps
64mS
78mS
100mS
160mS
10
3.90 kbps
125mS
144mS
184mS
310mS
11
2.14 kbps
240mS
265mS
340mS
580mS
12
1.17 kbps
480mS
520mS
680mS
(Don’t Use)
1020mS
(do not use)
Note that adjusting ATSF will affect maximum allowable packet size. For packets greater than 10-20
bytes, we recommend not to use Forward Error Correction FEC 4(4/8) with the Spreading Factor ATSF of
12, because packets are too long for the system.
Channel Occupancy
Regardless of the number of channels employed, a channel may not be used for longer than 400mS in a
period of 400mS * channel count, to comply with FCC 15.247(f). The modem automatically enforces this,
and may temporarily delay a transmission to comply as needed.
ATBW Setting
Channel Bandwidth
125
125kHz
250
250kHz
500
500kHz

RV-M50-E Technical Manual
13
4.4. Data Transmission
To transmit data, send one or more bytes of data into the serial port of the modem. When a full packet
of data has been collected into the internal buffer of the modem; there is a pause in the data per ATR3;
or the maximum packet size is reached, the modem will automatically key its transmitter, and send the
data over the air.
4.5. Data Reception
Serial Port Data
When the modem receives data over the air, it checks it for errors, and if it is error-free, it will send it
out the serial port. Again, the serial port may be set to any baud rate the user wishes, and the radio
receiver and transmitter will continue to operate independently of the baud rate.
4.6. Device Addressing
ID Addressing Basics
ID addressing is used to differentiate one modem from another. Each must have a unique number
programmed into them, so that when a position report is received, the modem that sent the message
can be identified. This is called the MYID of the unit that sent the message.
Each modem has a MYID programmed into it, and is represented as a 4 digit hexadecimal number.
Addresses between 0001-FFFF are valid. The Unit Address is programmed with the MYID xxxx
command, and the ID of the destination modem it sends its messages to (the Destination Address) is
configured with the ATDT xxxx command.
The factory default MYID in all modems is 1234, and 1234 is also the default for the Destination ID also.
The default Address Mask is F000, which means the modem will receive a transmission from any other
modem as long as the first digit of the destination address matches, in this case, is a 1.
Make sure you set the MYID of each modem in your system to a different number.
For example, to set the ID of your modem to 17, enter:
MYID 17 <enter>
To set your modem to send its position and status data to modem number 1, enter:
ATDT 1 <enter>
To set your address mask to receive all messages from units with IDs 1-999, and exclude 1000-9999,
enter
ATMK F000 <enter>
An alternate way to disable addressing altogether, is set the Address Mask to 0000 (ATMK 0000
command). This tells the radio to ignore the address, and receive every transmission.

RV-M50-E Technical Manual
14
Addressing Examples:
Example 1 (default configuration)
Sending Destination Address = 1234
Receiving Unit Address = 1234
Receiving Unit’s Address Mask = FFFF
Result: Unit will receive the data, because the addresses identically match. When the addresses are
identical, the value of the mask is not important.
Notes: This is the default configuration. All units have address 1234, and all modems will talk to all other
modems with address 1234.
Example 2 (a configuration that won’t work)
Sending to Destination Address = 1236
Receiving Unit Address = 1234
Receiving Unit’s Address Mask = FFFF
Result: No data will be received, because the address do not match, and the address mask of FFFF
requires that all digits in the address match. .
Example 3 (able to receive a data from a group, 1230 –123F)
Sending to Destination Address = 1236
Receiving M8S Unit Address = 1234
Receiving M8S Address Mask = FFF0
Result: Data will be received. 1236 ANDed with FFF0 is 1230. 1234 ANDed with FFF0 is 1230. The results
of the ANDing match, and thus the data will be received.
Example 4 (able to receive from a group, xx34 where xx is any two digits)
Sending Destination Address = 2234
Receiving M8’s Unit Address = 1234
Receiving M8’s Address Mask = 00FF
Result: Data will be received. 2234 AND 00FF equals 0034. 1234 AND 00FF equals 0034, therefore they
match. The results of the ANDing match, and thus the data will be received.

RV-M50-E Technical Manual
15
5. Troubleshooting
5.1. Symptom: Unit will not receive
Solution #1: Verify that the unit is on the correct RF channel. If it is, the Status LED should blink green
every time another modem tries to transmit to it. If the Status LED does not blink when it should be
receiving, it is on the wrong RF frequency.
Solution #2: If the Status LED blinks green, verify that the Unit Address of the sending modem matches
the unit address of the receiving modem. If this is OK, verify that the over-the-air baud rate and
spreading factor of all modems is the same (ATSF command).
Solution #3: Verify the KEYPHRASE is correct. If encryption is used, the KEYPHRASE is set to a unique
word, and must be the same in all radios in the system. If it is not used in the radio system, then the
KEYPHRASE in all units must be disabled or left at the factory default. To disable encryption, use the
KEYPHRASE 0 command. The factory default KEYPHRASE is RAVEON, in all capital letters.
Solution #4: Verify the Receiver circuits are powered. The receiver circuitry by default is disabled (ATSM
4). If you wish to receive data with the modem, you must enable the receiver circuits, increasing the
current draw a little bit. ATSM 0 enables the receiver circuits.
5.2. Symptom: Receive light blinks, but no data is received
Solution #1: Verify the serial port baud rate. This is difficult if it is set wrong, because you cannot enter
the command mode to check it. Try all possible baud rates, and see if one of them works with the
modem. Alternately, remove the rear cover of the modem, and press the CONFIG button. This will
force the modem into Command Mode, as well as set the serial port to 9600 baud, 8 data bits, one stop,
and no parity. If the baud-rate was OK, verify the AT, BT and CT times, that they are long enough for you
to enter the +++ string.
Solution #2: Verify the KEYPHRASE is correct. If encryption is used, the KEYPHRASE is set to a unique
word, and must be the same in all radios in the system. If it is not used in the radio system, then the
KEYPHRASE in all units must be disabled or left at the factory default. To disable encryption, use the
KEYPHRASE 0 command. The factory default KEYPHRASE is RAVEON, in all capitol letters.
5.3. Symptom: Long delay before transmitting
Solution #1: Verify that serial port timeout is OK. The ATR3 command sets the number of milliseconds
that the modem will look for in the serial input data stream. If a pause greater than this value happens,
the modem will transmit. If the ATG0 parameter is set very large, say 2000, this means 2 seconds, and
the modem may simply be waiting a long time. Typical settings for this parameter are 20 (20mS).
5.4. Symptom: Cannot enter Command Mode
Solution #1: Verify the serial port baud rate. This is difficult if it is set wrong, because you cannot enter
Command mode to check it. Try all possible baud rates, and see if one of them works with the modem.
Alternately, remove the rear cover of the modem, and press the CONFIG button. This will force the

RV-M50-E Technical Manual
16
modem into Command mode, as well as set the serial port to 9600 baud, 8 data bits, one stop, and no
parity. If the baud-rate was OK, verify the AT, BT and CT times, that they are long enough for you to
enter the +++ string.
Solution #2: Handshaking. You may have hardware handshaking enabled on your terminal program, but
the hardware or cable may not support it. Disable hardware handshaking on your terminal program to
verify this is the issue.
Solution #3: Deep Sleep. If the TXRATE is greater than 60 seconds, the unit may be put into a very deep
sleep mode, and will not enter the command mode. You must first turn the unit off, and back on to put
it into Command mode.
6. Mechanical
7. NOTICE
There are no user-serviceable points inside this transceiver. All service work must be referred to your
Authorized Service Center or Raveon Technologies Service Department.
7.1. Safety Training information
Always use this radio with the antenna supplied with it. This radio is restricted to occupational use.
Work related operations are permitted only when the radio operator has the knowledge to control the
exposure conditions of its passengers and bystanders by maintaining the minimum separation distance.
Failure to observe these restrictions may result in exceeding the FCC RF exposure limits.
8. FCC Compliance Information
This device complies with part 15 of the FCC Rules. Operation is subject to the following two conditions:
(1) This device may not cause harmful interference, and (2) this device must accept any interference
received, including interference that may cause undesired operation.

RV-M50-E Technical Manual
17
Changes or modifications not expressly approved by the party responsible for compliance could void the
user’s authority to operate the equipment.
NOTE: The manufacturer is not responsible for any radio or TV interference caused by unauthorized
modifications to this equipment. Such modifications could void the user’s authority to operate the
equipment.
The Federal Communications Commission (FCC), with its action in ET Docket 93-62, has adopted a safety
standard for human exposure to Radio Frequency (RF) electromagnetic energy emitted by FCC-certified
equipment. This product meets the uncontrolled environmental limits as stated in OET-65C (01-01)
when operated in accordance with the operation guidelines described in this manual. Proper operation
of this radio device according to the instructions in this publication will result in user exposure
substantially below the FCC recommended limits.
This equipment generates, uses, and radiates radio frequency energy, and if not installed and used in
accordance with the instructions, may cause harmful interference. However, there is no guarantee that
interference will not occur. If this equipment does cause interference to radio or television reception,
which can be determined by turning the equipment off and on, the user is encouraged to correct the
interference by one of the following measures:
•Reorient or relocate the receiving antenna.
•Increase separation between the equipment and receiver.
•Connect the equipment to an outlet on a circuit different from which the receiver is connected.
•Consult the dealer or an experienced radio/TV technician.
For more inform about this RV-M50 Daisy Radio modem that utilizes LoRa technology, please contact Raveon
sales support team sales@raveon.com . And if you need some custom features in a product like this, please
contact Raveon sales team also because Raveon makes many custom OEM data radio modems to help
companies be successful with RF technology.
Raveon Technologies Corp.
2320 Cousteau Ct.
Vista, CA 92081
(760) 444-5995
Table of contents
Other Raveon Modem manuals

Raveon
Raveon RV-M8-UC series User manual

Raveon
Raveon Tech Series User manual

Raveon
Raveon RV-Z50 User manual

Raveon
Raveon RV-M7 User manual

Raveon
Raveon RV-Z50 User manual

Raveon
Raveon RV-D80-EB User manual

Raveon
Raveon RF Neulink NL900PRO User manual

Raveon
Raveon RV-M80-EA2 User manual

Raveon
Raveon FireLine Ethernet User manual

Raveon
Raveon RV-M7 User manual