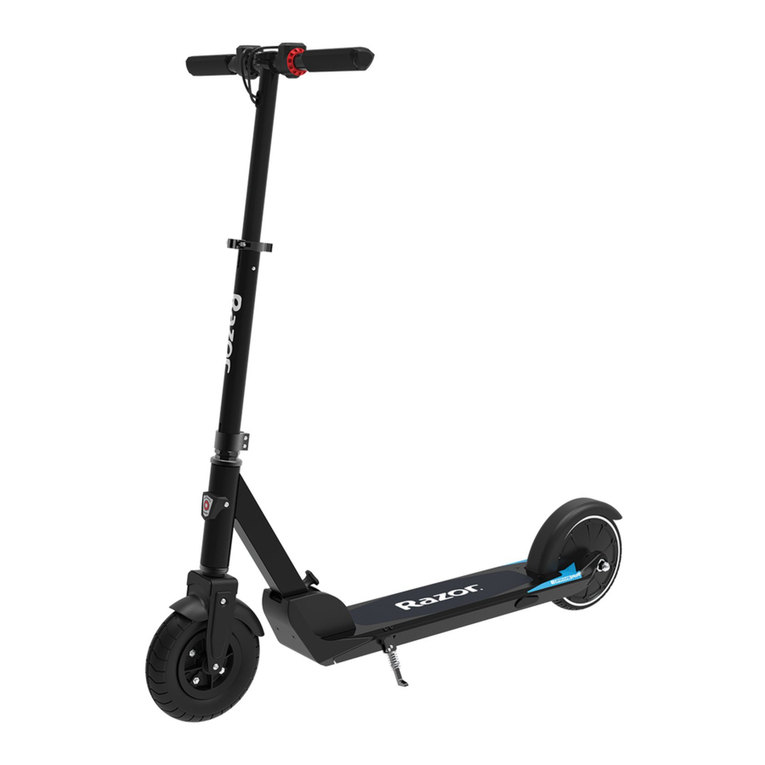
Razor E250A User manual

E250A User Manual
Thank you for purchasing our product. For your safety and for the reliable
operation of this product, please carefully read this User Manual and
Limited Manufacturer Warranty before using this product.
!WARNING!: Whenever you ride the motorized scooter, you risk
death or serious injury from loss of control, collisions, and falls. To
ride safely, you must read and follow all instructions and warnings in
this User Manual.
Safety
1. This device does not conform to Federal Motor Vehicle Safety standards
and is not intended for operation on public streets, roads or highways.
Please familiarize yourself with applicable laws and regulations. Your
police department or local department of motor vehicles may be able to
answer your questions or direct you to a reliable authority.
2. Safety helmet, goggles, gloves, elbow and knee pads, appropriate shoes,
and bright clothing must be worn while operating this scooter.
3. Do not operate this scooter in traffic, or on wet, frozen, oily or unpaved
surfaces. Avoid uneven surfaces, chuckholes, surface cracks,
obstacles and night conditions or conditions of poor visibility.
4. Never carry passengers and objects that can hinder your abilities to
safely operate the scooter.
5. Pregnant persons should not operate this scooter.
6. Never use alcohol or drugs before or while operating this scooter. They
slow reaction time and impair judgment.
7. High speeds, jumps, trick maneuvers are dangerous and could result in
loss of control and other accidents.
8. When accelerating or climbing hills, you will need to lean forwards; under
braking conditions you will need to lean back, to keep wheels in contact
with the ground. When descending a hill, be ready to apply the rear

brake for additional stopping force. When first riding the scooter,
familiarize yourself with braking distance using the front electronic
magnetic brake and the rear friction brake in a controlled environment,
away from vehicles, obstacles and other hazards. Always allow
enough distance and time for braking. Drive the scooter defensively.
9. Never permit a guest to use this device unless the guest has read the
user manual and all warnings.
10.Always provide your guest with helmet, safety goggles, elbow pads and
knee pads before permitting the guest to operate the scooter.
11.This product should not be used by persons unwilling or unable to take
responsibility for their own actions.
12.Read this manual and all warnings before operating this product. (See
first sentence of first page.)
13.Homeowners or other insurance may not cover either direct or third
party liability claims arising from use of this scooter. To determine if
coverage is provided, you should contact your insurance company or
agent.
14.Do not allow anyone under the age of 16 (sixteen) to operate this
scooter. The scooter is designed for operation by and the transport of
only one person age 16 or older.
15.Please ride your scooter in a controlled environment, away from
vehicles, obstacles and other hazards.
16.For your safety, do not jump, perform wheelies or other stunts while
riding the scooter. Keep both hands on the handle bar and both feet on
the standing board when riding the scooter.
17.The scooter’s maximum speed is 23 km/h (15 mph). For your safety,
please limit the speed to not more than 20 km/h (13 mph).
18.Do not ride your scooter at night or in conditions of poor visibility. If
night riding or riding in conditions of poor visibility is unavoidable, please

limit your speed to 15km/h (10 mph) or less, turn on the headlight and
wear reflective clothing. !WARNING!: Riding at dawn, dusk, or at
times of poor visibility without a lighting system which meets state
and local laws and without approved reflectors is illegal, dangerous
and can result in serious injury or death.
19.Do not use the scooter when the temperature is below -5 ℃(23
degrees F).
20.Please stop the scooter and walk it across rough or slippery road
conditions.
21.Avoid riding in wet or icy conditions. !WARNING!: Wet or icy
weather impairs traction, braking and visibility for riders and others.
The risk of accidents increase in wet or icy conditions.
22.Although some water resistance measures have been made, your
electric scooter is not water resistant. Riding the scooter through
standing water, wet or muddy conditions runs the risk of severely
damaging it. Do not immerse the scooter in the water or directly spray
the scooter with water when cleaning.

Fold/Unfold Instructions
a. Fold
1. Open the quick release lever according to the arrow direction shown on figure
<1>.
2. Press the button (in the red circle) shown in figure <2> and at the same time

push down the handlebar to the location shown in figure <3>. Lock the quick
release lever to the original position shown in figure <1>.
3. Hold the handlebar grips with both hands and press the left and right buttons (in
the red circle) down firmly as shown in figure <4>. The button is located
underneath the rubber handle bar grips. While continuing to press the handle grip
release buttons, pull out the handlebar grips according to the arrow direction shown
in figure <4> and then fold them downward. The handle grips will be folded as
shown in picture (B).
4. Push the handlebar forward slightly to release tension on the folding mechanism
and at the same time press the silver folding lever according to the direction shown
in Figure <6>, then fold the handlebar down to the position shown in picture C.
b.Unfold
1. Push the silver folding lever according to the direction shown in figure <7> and
then lift the handlebar forward until the hook plate of the folding mechanism securely
locks into place.
2. Lift the handlebar grips according to the arrow direction shown in figure <8>.
The handle grips will lock into place automatically.
3. Push the quick release lever according to the arrow directionshown in figure <9>.
Raise the handlebar height to either of the two handlebar height limiting holes shown
in figure <10>. Once the handlebar height limiting hole locks into place, lock the
quick release lever securely to the position shown in figure <9>.

Control Panel
1. Introduction to Control Panel.
1 Thumb Accelerator
2 Thumb Electronic Magnetic Brake
3 On/Off switch
4 Setting Button
5 Mode Button
6 Horn Button
7 Led Headlight Button
8 Handlebar Fold Buttons (Hidden underneath the grip cover)
9 Display
2. Operating Instructions
a. ON/OFF <Figure D>
Press the on/off switch, and the display lights will indicate power on. The scooter
will automatically turn off after it is unused for 3 minutes.
b. Speed control <Figure D>
Press down the right thumb accelerator to accelerate the scooter (1-23km/h). The
greater you press down the right thumb accelerator, the faster the scooter will travel.
c. Brake Control <Figure D>
Press down the left thumb control to apply the electronic magnetic brake located

within the front wheel. The greater you press down the left thumb control, the
greater the braking force applied. The electronic brake slowly stops the scooter.
Apply the emergency brake for faster stops.
d. Horn <Figure D>
Turn on the power, press the horn button and it will sound.
e. LED Headlight <Figure D>
Press the red LED headlight button to turn the light on. The display will indicate the
light is turned on. Press the LED headlight button again to turn the light off. Do
not operate the scooter at night or in conditions of poor visibility.
f. Display
-When power is off, the display shows the time.
-When power is on, the display has three modes: total, trip and time. You can press
the mode button to change it. When it displays the ‘trip’mode, press the setting
button for 3 seconds and it will reset the trip.
-To set the time, press the power button on, then press the setting button for 3
seconds-12 hr or 24 hr will begin to flash, use the mode button to select either 12 or
24 hour time, press the setting button to toggle next to set the hour, use the mode
button to select the correct hour, use the setting button to toggle next to set the
minutes, use the mode button to select the correct minutes. When the time is set,
press the setting button a final time.
g. Emergency Brake
For quick stops or additional braking force, push the rear foot friction brake.
Applying the rear friction brake also engages the front wheel electronic magnetic
brake. Please note, applying the rear friction brake under high speeds may damage
the rear wheel. The manufacturer will not be responsible for this damage.
3. Display Factory Setting for Kilometers or Miles.
Press setting button and mode button at the same time for 3 seconds. Four
numbers will flash at the bottom right of display. Press the setting button to change
the number location and press the mode button to change the number from 0-9.

Set the number to 0624 according to this method (front wheel perimeter is 0624mm).
After this, press the setting button again and ‘km/h’will flash, press the mode button
to change ‘km/h’to ‘m/h’. Press the setting button a final time and the settings will
be finished.

Riding Operation
Getting Ready
1. Fully charge the battery.
2. Choose a controlled environment, away from vehicles, obstacles and other
hazards for riding. Even if you have previous experience with motorized scooters,
vehicles, bicycles, etc., you must familiarize yourself with the function, handling,
performance and safety of this scooter in a safe and controlled environment.
3. Unfold the scooter.
4. Adjust the handlebar to the correct height according to your height.
Start
1. Press the power button to turn on the scooter.
2. Stand one foot on the scooter and leave your second foot on the ground.
3. Slowly press down on the right thumb accelerator, the scooter will begin to move
forward. Place the foot which was on the ground on the riding board. Press the
right thumb control to accelerate, the further you press it down, the faster the scooter
will travel.
Stop
1. Under normal circumstances, press the left thumb electronic magnetic brake, the
electric motor will de-energize and then brake slowly. The further you press down
the brake thumb control, the greater the braking force applied. !WARNING!: Take
time to familiarize yourself with the electronic brake and the distance it takes
to come to a complete stop using the electronic brake. The electronic brake
slowly stops the scooter.
2 For quicker emergency stops, press the rear foot brake. The foot brake applies
the electronic magnetic front brake and the rear wheel friction brake. Please note,
applying the rear friction brake under high speeds may damage the rear wheel.
The manufacturer will not be responsible for this damage.

Battery and Charger
Each electric scooter is equipped with a lithium battery and smart charger designed
specifically for each other. Only use the charger supplied by the manufacturer to
charge the scooter. Do not charge the battery with any charging system other than
what is provided. If the battery or charger is damaged due to improper use, the
manufacturer warranty shall be void.
Battery
-The electric scooter batteries should be fully charged before the first use. Always
charge the battery in a clean, dry location, free of debris.
-The battery can be recharged at any time. You do not need to fully deplete the
battery before recharging it.
-When not in use, please fully charge the battery once every two months.
Battery damage due to water, collision, and other non-normal factors that lead to
battery damage is not covered under warranty.
Charger
-The company provided charger has a charging protection function. When the
battery is 100% charged, the charger will automatically stop charging.
-Charging time is no more than 3 hours.
-Charger damages due to water, collision, or other non-normal factors is not covered
under warranty.
Charge Description
-The charge port is located on the frame of the scooter above the folding mechanism.
Open the charge port rubber protective cover and securely plug the charger into the
charge port.
-Plug the charger into the power socket.
-A solid red light on the charger indicates the battery is charging. Asolid green light
indicates the battery is fully charged.

Maintenance
Mechanical
-Please add a small amount of light oil (eg. petroleum jelly) to the handlebar grip
folding mechanisms every six months.
-Due to vibration, nuts and bolts can become loose. Make sure that all nut and
bolts are securely fastened and tighten if necessary. Pick your scooter off the
ground a few inches and bounce it off the ground. Do a quick visual inspection and
tactile inspection of the whole scooter. Make sure you look at all visible nuts, bolts
and structural welds. If anything sounds, feels or looks loose or shows signs of
stress, then replace or secure them.
Battery
The lithium battery provided by the manufacturer can be recharged at least 500
times, the normal use can reach more than 1,000 times. If you notice your travel
distance becomes significantly diminished despite having a full charger, it is a sign
that the lithium battery needs to be replaced.
TIRES
Tire wear or damage may affect operation and cause serious bodily injury or damage.
Inspect the front and rear tires regularly and replace them when tread is worn to 1/16”
tread depth.
Storage and daily care
Do not store the scooter in direct sun light, in damp places, in temperatures below
-5 ℃(23 degrees F).
Fully charge the battery every two months if not in use.
Please keep the scooter clean. Do not directly spray the scooter with water.

General Troubleshooting
Checklist. When the product has any problems, please first refer to the
following troubleshoot guide.
1. LED display black screen
Reason:Exposure under the sun for too long.
Solution:Place scooter in shadows and it should return to normal.
2. Incorrect speed and distance displayed
Reason: Incorrect setup.
Solution: Please reset the display to factory settings. See section 3 above.
3. Digital display dim
Reason: Bad battery contacts or display battery is dead.
Solution: Turn off the power then restart again, if the problem still occurs; please
contact your local reseller. The display has a separate battery. The display
battery may need to be replaced.4. When the scooter does not operate, check the
following:
a. Is the scooter turned on?
b. Is the battery charged?
c. Is the left thumb electronic brake or rear brake locked on?
d. Are all wire jacks securely connected?
If the above steps are completed, and the product still does not properly operate ;
please contact your local vendor or retailer.

Product Specification Sheet
Specifications
Item
E250A Scooter
Overall Expand Size
940x1160x135mm
Overall Fold Size
945x300x135mm
Scooter Weight
9.8KG
Capability
Maximum load
100KG
Top Speed
23km/h
Grade Ability
15 degree slope
Single Charge
20km(varies based on weight, windspeed,
temperature and other factors)
Battery parameters
Standard Voltage
24V
Battery Type
Li-po Lithium Battery
Battery Capacity
5.8AH
Motor parameters
Motor type
Brushless DC Motor
Rated Output Power
250W
Maximum Rotational Speed
700r/min
Rated voltage
24V
Maximum output torque
13.3N.m
Charger parameters
Input Voltage
100-240V
Charging time
2.5-3h

LIMITED MANUFACTURER WARRANTY
The E250A Electric Portable Scooter is manufactured by Shanghai
LongLeiHui Electric Vehicle Company DBA E-Twow.
This Limited Manufacturer Warranty is the only warranty for the Scooter.
There is no other express or implied warranty.
The manufacturer warranties its electric scooter to be free of
manufacturing defects for a period of ninety (90) days from date of
purchase. This Limited Warranty does not cover normal wear and tear,
or any damage, failure, orloss causedby improper maintenance, storage,
or use of the electric scooter.
Check local laws and regulations to see where you can ride your scooter
legally. The manufacturer is not liable for incidental or consequential
loss or damage due directly or indirectly to the use of this product.
To obtain service under this warranty you must, within the warranty
period, contact EZ-Muv at support@ez-muv.com. Purchase additional
parts and replacements at www.ez-muv.com. Ez-Muv will provide
warranty replacements at its sole discretion. Authorized warranty
services are ONLY available from Ez-Muv. Specifications are subject to
change without notice.
For questions regarding your warranty or part information please contact
us at support@ez-muv.com.

E-Scooter Operating Rules:
-Always wear your safety gear.
-Never ride under the influence of alcohol or drugs.
-Learn the local laws and regulations.
-Ride defensively.
-Wear bright colored and/or reflective clothing.
-Never ride your scooter at night or in conditions of poor visibility.
-Observe and yield the right of way.
-Do not dart out of driveways or from between parked cars.
-Obey all traffic laws.
-Be careful when checking traffic and don’t swerve when looking over your
shoulder.
-Always go with traffic flow and keep to the far side of the road.
-Never ride on sidewalks.
-Avoid riding in bad weather, wet, muddy, icy conditions or when visibility is
obscured.
-Do not do stunts, wheelies or jumps. They will increase your chances of
injury and damage to your scooter.
-You are sharing roads, trails and riding areas with others. Respect their
rights and be tolerant if they inconvenience you.
-Always yield right of way to pedestrians and animals. Ride in a way that
does not frighten or endanger them and avoid riding near them as much as
possible.
-Keep your speed consistent with the conditions, and keep in mind that
speed has a direct relation to control and component stress.
-Never carry passengers.

-Never carry anything that can obstruct your version or interfere in the
control and balance of your scooter.
-Everyone must be responsible for the environment and ride accordingly.
Table of contents
Other Razor Scooter manuals

Razor
Razor Spark User manual

Razor
Razor Turbo A User manual

Razor
Razor RX200 User manual

Razor
Razor PowerRider 360 User manual

Razor
Razor E-PUNK User manual

Razor
Razor Ecosmart metro 13114501 User manual

Razor
Razor E200s User manual

Razor
Razor Cruiser User manual

Razor
Razor RipStik Electric User manual

Razor
Razor LIL User manual

Razor
Razor UB1 User manual

Razor
Razor Pocket Mod Motor Scooter User manual

Razor
Razor Kiddie User manual

Razor
Razor E Prime User manual

Razor
Razor C25 User manual

Razor
Razor Berry User manual

Razor
Razor Pro Series User manual

Razor
Razor Wild Ones User manual

Razor
Razor R Tec User manual

Razor
Razor eSpark User manual