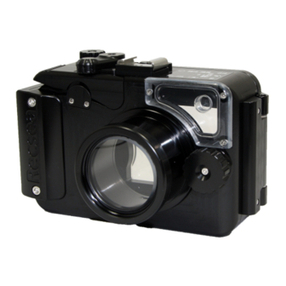
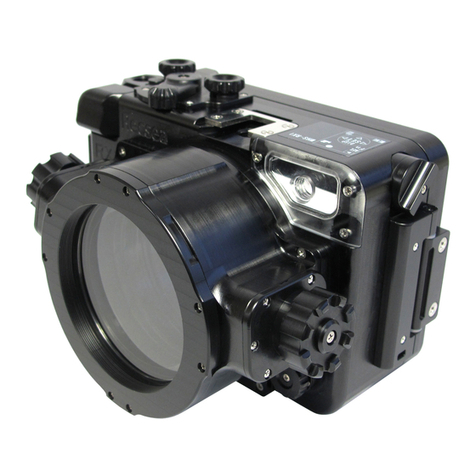
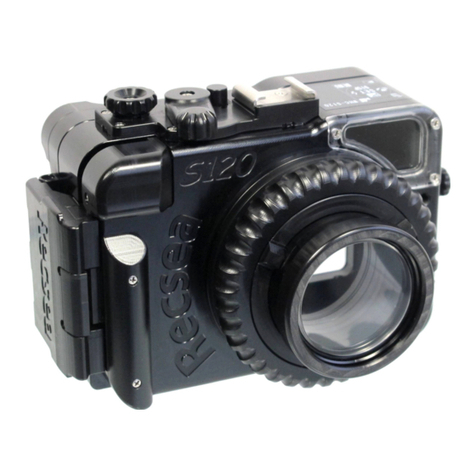
Recsea WHG-HERO3 User manual

GOPRO HERO4 HERO3+ HERO3 200 Meter Waterproof Housing
Recsea WHG-HERO3
MANUAL
Please rea this manual before use.
NTF CORPORATION UH Division
http://www.seatool.net

INTRODUCTION
GOPRO HERO4 HERO3+ an HERO3 Waterproof Housing WHG-HERO3
※Thank you for purchasing the WHG-HERO3 Waterproof Housing.
※ To ensure proper an safe use, please thoroughly rea this manual.
※ Improper use may cause leakage causing irreparable amage to your igital camera.
※ Please check, an test the housing accor ing to this manual prior to use.
※Neither NTF Corporation, Seatool/Resea nor their agents shall warrant or bear any
responsibility for any inci ent relate to water leakage, amage or loss of ata,
unauthorize mo ification, isassembly an repair; or any acci ent causing physical or
material amage while using this pro uct.
※This pro uct is manufacture by machining metho s. As a result, there may be minor
scratching or tool marks. These are a normal part of the manufacturing process, o not
effect operation of the housing or camera, an are not subject to warranty or any other
claims.
WARNING!
※ Do not store or leave housing in reach of infants or small chil ren. Small parts may be
swallowe causing injury.
※Please remove igital camera from housing when not in use. Battery malfunction or
amage may cause fire.
※The housing bo y is ma e of corrosion-resistant aluminum. However, saltwater can cause
rusting so be sure to rinse thoroughly using fresh water without fail.
CAUTION!
※ To prevent water leakage an amage, DO NOT isassemble or mo ify this housing.
※ Do not store the housing in areas of high humi ity, high or low temperatures, or areas of
extreme temperature fluctuation. Doing so may cause eterioration of parts.
※ When iving, use a metho of water entry that protects the housing from shock, which can
cause water leakage. If at all possible have housing han e to you after entering the
water.
※ This housing is esigne to withstan epths of 200 meters (656 feet). Using the housing
at eeper epths may cause amage an water leakage. Use caution an monitor epth.
※Remove O-ring or leave housing slightly open when transporting by plane. Pressurization
of a seale housing uring transport may cause amage or make it ifficult to open.
※ When opening an closing the housing be min ful of ust an other contaminants, which
may a here to the O-ring, possibly causing water leakage an amage.
※ Always check O-ring prior to each use. Pay special attention to the grease con ition an
that the O-ring is seate uniformly in the O-ring groove with no twists or bulges. Neglecting
to check the O-ring prior to each use may result in water leakage an amage.
FEATURES OF THIS PRODUCT
※Compact an urable, precision machine corrosion-resistant aluminum housing.
※Lightweight esigne to withstan epths of 200 meters (656 feet).
※Original Secure-Latch locking mechanism for easy opening an closing.
※Double-wi e O-ring an Back Cover contact surface for a e protection at greater
epths.
※Complete camera function control.
※Variety of supporte options.
1.
PACKAGE CONTENTS
Be sure all items liste here were inclu e with your housing:
・Housing
・O-ring Removal Pick
・Reserve O-ring
・O-ring Grease
GETTING TO KNOW YOUR WHG-HERO3 HOUSING
NOTE: The RECSEA WHG-HERO3 UW Housing is esigne for use with the GoPro HERO4
HERO3+ or HERO3 series action cameras with GoPro LCD Touch BacPac or GoPro Battery
BacPac.
2.

WARRANTY INFORMATION
Warranty Perio Two years from purchase
Purchase Date Year Month Day
Pro uct Name GOPRO HERO4 HERO3+ HERO3 Waterproof Housing
Pro uct Number WHG-HERO3
Dealer Name
Serial Number
※Dealer: Stamp your company name an contact information, purchase ate, mo el an serial
number.
Recsea/Seatool Manufacturing & Sales
NTF CORPORATION UH Division
390-1 Mii, Mi ori-Ku, Sagamihara-Shi
Kanagawa 252-0151, Japan
T: +81 (0)50-7541-0294 F: +81 (0)42-780-5720
http://www.seatool.net E-mail: info@seatool.net

OPENING AND CLOSING THE BACK COVER
※Please o the following operations in a clean area with low humi ity an ust.
To OPEN, press Lock Lever while pulling Secure-Latch away from housing main bo y.
To CLOSE, press Secure-Latch into place making sure the latch on the un ersi e is properly
place in the Secure-Latch groove attache to the main housing bo y. Push into the locke
position. Double check to make sure it is firmly locke into place.
INSTALLING CAMERA
CAUTION! Before using, please be sure the test the housing (without camera) in bucket or
aquarium if available. After use in salt water, rinse thoroughly in a bucket of fresh water
without fail, pressing all buttons several times to flush out salt eposits an other
contaminants. Allowing saltwater an contaminants to ry on housing can amage functions
an O-ring. Clean with fresh water only, using a soft, ry cloth to wipe away water.
※Also perform proper O-RING MAINTENANCE.
※Please con uct the following operations in a clean area with low humi ity an ust.
1. Check camera settings, battery is charge an me ia storage capacity is sufficient.
Slowly an carefully install camera making sure camera oes not to hit housing's internal
controls. If the camera is not inserte correctly buttons may not function properly.
2. After performing O-ring Maintenance, carefully close back cover making sure nothing is
caught between the Secure-Latch an housing. Push Secure-Latch into the locke
position making sure the Lock Lever is also in the locke position. Double check to make
sure the Secure-Latch is securely locke into place.
IMPORTANT! Perform pre- ive check by immersing housing several times, starting with short
intervals, gra ually lengthening time, checking for water leakage after each interval. When
entering water use a metho of water entry that protects the housing from shock, which can
cause water leakage. If at all possible have housing han e to you after entering the water.
REMOVING CAMERA
CAUTION! After use in water, water will remain along the seams between housing, back
cover an Secure-Latch. Wipe any water off housing with a soft ry towel to prevent water
from falling into housing an onto camera.
1. Pull Mo e Dial upwar away from housing.
2. Press Lock Lever while pulling Secure-Latch away from housing main bo y an open
back cover.
3. Tip housing backwar s, gently sli ing camera out of housing into han .
HANDLING PRECAUTIONS
The Port Lens / LCD Status Screen / Status - Wi-Fi In icator Win ow an rear LCD Win ow
are manufacture using har coat acrylic. When cleaning use a clean soft cloth taking care
not to scratch them.
EXTERNAL LIGHTING
※The optional Accessory Shoe can be use for installation of a target light. Please be
min ful of the weight of the light(s) you inten to use. For heavy lights an strobes please
use optional Grip & Tray Assembly an compatible connector.
3.

※Please refrain from using lights attache to the Accessory Shoe as a carrying han le.
CAUTION! Damage is irreparable.
※Two (2) screw holes are provi e at the bottom of the housing for use in attaching
Seatool/Recsea genuine tray an grip assemblies.
CAUTION! Seatool or Recsea genuine options STRONGLY recommen e . Leakage or
amages ue to the use of non-genuine options are NOT covere un er warranty.
MAINTENANCE
CAUTION! Allowing saltwater an contaminants to ry on housing can amage functions an
O-ring possibly causing water leakage. Clean with fresh water only, using a soft, ry cloth to
wipe away water.
※A complete housing overhaul is recommen e at least once every year.
1. After use in salt water, wash off salt an other contaminants by soaking empty housing
thoroughly in a bucket of fresh water (lukewarm) for 10 to 20 minutes.
2. Manipulate all buttons an ials several times to flush out salt eposits an other
contaminants.
3. Wipe any water off housing with a soft ry cloth.
4. Open Back Cover.
5. Using the O-ring Removal Pick, remove O-ring.
6. Clean O-ring grooves an contact surfaces using a clean cotton swab. DO NOT clean
housing or Lens Port with volatile organic solvents or chemical cleaning agents such as
thinner, gasoline, an benzine, etc.
7. Perform O-RING GREASING & MAINTENANCE as instructe below before re-installing.
O-RING GREASING & MAINTENANCE ( 1)※
CAUTION! This housing uses one (1) O-ring. Please be sure to install O-ring as shown
below. Failure to o so will result in water leakage.
1. Using the O-ring Removal Pick, remove O-ring.
2. Clean san , salt, other contaminants an ol grease from O-ring.
3. Clean O-ring Groove an O-ring Contact Surface using a clean cotton swab an /or cloth.
4. Visually an physically check O-ring by running it through finger tips, feeling for cuts,
cracks or any other efects that may cause leakage. Such efects will cause water
leakage, so be sure to replace the O-ring. Be careful not to stretch or pull the O-ring too
much.
5. Squeeze a rice grain size bea of silicone grease between thumb an forefinger. Taking
care not to pull or stretch the O-ring too much, uniformly sprea grease on O-ring. Too
little grease may cause O-ring to twist in the groove, possibly causing water leakage.
6. Place O-ring in the O-ring groove, making sure it is uniform, not twiste or bulging out,
possibly causing water leakage.
7. Lightly grease Contact Surface.
4.

8. Before closing back cover, visually check O-ring an O-ring Contact Surface to making
sure no hair, lint or other contaminants are present.
IMPORTANT NOTES:
※When housing is not use for long perio s, remove O-ring an place in a plastic bags to
keep it free of ust an other contaminants an store in a place out of irect sunlight.
Please also be careful of prolonge exposure to irect sunlight uring use. The O-ring an
certain parts of the housing may become eforme , causing water leakage.
※After exten e perio s of non-use, soak close empty housing in lukewarm for half a ay.
Manipulate all buttons. Using a soft ry cloth wipe away water.
CAUTION!
※The O-ring is an essential part of waterproofing for this housing. Not properly greasing the
O-ring as irecte may cause the O-ring to twist in the O-ring groove, possibly causing
water leakage.
※Always perform the above O-ring, O-ring groove an O-Ring Contact Surface maintenance
an greasing every time you open/close the housing.
※Please pay close attention an make sure the O-ring is not twiste or bulging, free of any
contaminants ( irt, hair, etc.), an that foreign objects o not obstruct proper closing of the
housing back cover.
※DO NOT clean the housing with volatile organic solvents or chemical cleaning agents such
as thinner, gasoline, an benzine, etc.
※Housing Port Lens an LCD Win ow are manufacture using har coat acrylic. When
cleaning use a clean soft cloth taking care not to scratch them.
SPECIFICATIONS
Compatible Camera GOPRO HERO4 HERO3+ an HERO3 Series Action
Camera with GoPro LCD Touch BacPac or GoPro Battery
BacPac, an HERO4 Silver with Spacer AD-H3-S
Maximum Depth 200 meters (656 feet)
Material Main Bo y: Corrosion-resistant aluminum alloy,
ano ize an POM
Buttons: POM
Lens/Monitor: Har Coat Acrylic
Screws, Springs: Stainless Steel, Galvanize
Size (Housing) Dimensions: W90.5mm x D57.5mm x H62.5mm
Weight: Approx. 300g (Lan ) / 150g (Freshwater/
Camera with LCD BacPac)
Accessories Reserve O-ring, O-ring Removal Pick, O-ring Grease
INSURANCE INFORMATION
※Seatool/Recsea strongly recommen s insuring your camera. For more information please
contact your ealer.
CONSUMABLE PARTS
※For replacement of consumable parts such as O-rings please contact your ealer or
Seatool/Recsea.
5.

AFTER-SALE SERVICE
Warranty perio is two (2) years from purchase for general users, six (6) months for
commercial or in ustrial users. Seatool/Recsea will repair manufacturing efects free of
charge uring the warranty perio when pro uct is use in accor ance with this manual. This
warranty is only vali for Housings purchase from authorize Seatool/Recsea international
ealers. Damage ue to customer use, an for any consumable parts, the repairs will be
charge at normal rates. Shipping costs to an from ealer, or Japan if necessary, shall be
born by the customer for warranty an all other cases. This warranty oes not cover any
amage to igital camera for any reason, inclu ing amage cause by water intrusion.
Please obtain insurance for all your equipment. Any repairs ue to the following will be
charge at normal rates:
1) Repaire , mo ifie or issemble by person or company other than Seatool/Recsea;
2) If amage in fire, natural isaster such as earthquake, floo , lightning, etc.;
3) Damage cause by ropping, impact, vibration;
4) When returne for warranty service not accompanie with Warranty Information copy, or if
Warranty Information is altere .
※Warranty oes not cover any losses resulting from inoperability of this pro uct, inclu ing
those relate to lost profits or any relate expenses.
※Seatool/Recsea will stock parts necessary for repair for five (5) years from stop of
pro uction.
※This pro uct uses some egra able parts, such as buttons an O-rings. Seatool/Recsea
recommen s overhauling the housing once per year, more frequently if use often.
Overhaul service is charge at normal rates.
OPTIONS
The following items are optional. Please contact Seatool/Recsea or your local ealer if you
wish to purchase.
・HERO4 Silver Spacer AD-H3-S
・WHG-HERO3 Fresh & Salt Water Color Filter Set w/Filter Rails
・WHG-HERO3 Accessory Shoe
・WHG-HERO3 GoPro Mount A apter
・WHG-HERO3 M10 Ball Joint A apter
・WHG-HERO3 O-ring
・Seatool O-Ring Grease 3 ml Tube
・Left Han Single Grip & Tray Assembly STG-06L2 (POM)
・Dual Grip & Tray Assembly STG-06W2 (POM)
・Left Han Single Grip & Tray Assembly STG-05L2 (AL)
・Dual Grip & Tray Assembly STG-05W2 (AL)
・Left Han Single Grip & Tray Assembly STG-05JL2 (AL)
・Dual Grip Extension STG-05JWEP (AL)
・INON Tray A apter ADT-1S (Single To Double Tripo Base, POM)
・Tray Knurle Knob Screw
6.

MEMO
Table of contents
Other Recsea Camera Accessories manuals

Recsea
Recsea WHOM-TF3/4 User manual

Recsea
Recsea CWS-RX100IV User manual

Recsea
Recsea RVH-BMPCC User manual

Recsea
Recsea WHS-RX1 User manual

Recsea
Recsea WHS-RX100Mk 3 User manual

Recsea
Recsea WHC-G1XMkIII User manual

Recsea
Recsea CWP-TZ70-30 User manual

Recsea
Recsea WHR-WG50 P User manual

Recsea
Recsea WHC-S95D User manual

Recsea
Recsea RVH-X1000 User manual

Recsea
Recsea WHG-HERO4S User manual

Recsea
Recsea CWC-G7X User manual

Recsea
Recsea RVH-AX100 SD User manual

Recsea
Recsea RDH-PG7 User manual

Recsea
Recsea WHC-G7X User manual

Recsea
Recsea CWOP-SH2 User manual

Recsea
Recsea RDH-OMEM1 User manual

Recsea
Recsea CWC-G7X User manual

Recsea
Recsea WHS-RX100Mk II User manual

Recsea
Recsea WHC-G1XMKII User manual