RedBack Lasers XLG44 User manual


CONTENTS
User Safety 2
Introduction and XLG44 Accessories 3
XLG44 Diagram 4
Operating Instructions 6
Batteries 6
Selecting Modes 7
Auto Track Base (XLG44AT, XLG44XXL) 8
LLR705 Receiver Instructions (XLG44+) 9
Calibration Self Check & Technical Specications 10
Warranty 12
User Safety
• Laser output sign lies near the output aperture.
• Do not stare directly into laser beam.
• Do not disassemble the instrument or attempt to
perform any internal servicing. Repairs and service
should be performed only authorised service
centres of Redback Lasers.
• This instrument complies with the safety
Classication standards of laser radiation.
2
CAUTION: Class 3r laser <5mW at 522nm.
Do NOT stare into laser beam or aim at
another person.
Follow relevant Australian Standards
Copyright © CMI LasersTM RedBack lasersTM and Level1LasersTM . All rights reserved CMI Industries Pty Ltd 2022Copyright © CMI LasersTM RedBack lasersTM and Level1LasersTM . All rights reserved CMI Industries Pty Ltd 2022
No artwork or photographs produced by CMI Industries Pty Ltd may be used copied or reproduced without the written consentNo artwork or photographs produced by CMI Industries Pty Ltd may be used copied or reproduced without the written consent
from CMI Industries Pty Ltdfrom CMI Industries Pty Ltd
XLG44 Included Accessories
• XLG44 Laser Unit
• Protective Carry Case
• Rechargeable Li-ion Batteries
• Charger
• “AA” battery Holder
• Magnetised Target
• Glasses to Assist Viewing of Laser
• Instruction Manual
XLG44+ Included Accessories
• As the XLG44 plus
• LLR705Receiver&StaClamp
XLG44
XLG44+

3
XLG44TM INTRODUCTION
Congratulations on purchasing the XLG44. An Electronic self levelling Ultra Bright
builders multi-line laser level.
Thismodelsisidealforallmannerofinternaltoutandinstallationapplications.The
XLG44 can be purchased in a number of versions with extra options.
The XLG44+ includes an outdoor receiver making general outdoor levelling a breeze.
The XLG44AT includes the AT1 auto tracking base and receiver, making site square a
snap.
The XLG44+MM includes a millimetre display receiver. The XLG44XXL
includes both the Millimetre receiver and the Auto Tracking Base.
Other features of the XLG44 include rechargeable Li-ion and Std “AA” Size battery
operation. Integrated Highly visible dots in the lines. Warranty of the laser is Two
Years. (See page 12)
www.redbacklasers.com.au
XLG44AT Included Accessories
• As the XLG44 plus
• Auto Track Motorised Base
• Tracking Receiver
XLG44+MM Included Accessories
• As the XLG44 plus
• LLRMM30 Millimetre Receiver with
LaserDistanceMeasure&Sta
Clamp
XLG44XXL Included Accessories
• As the XLG44AT plus
• LLRMM30 Millimetre Receiver with
LaserDistanceMeasure&Sta
Clamp
XLG44AT
XLG44+MM
XLG44XXL

4
XLG44 DIAGRAMS
XLG44 Laser Unit
1
3
5
7
1. Rubberised Casing
2. Control panel & Display
3. Laser Output
4. Fine Rotation Knob
5. Rough Level Vial
6. Charging Socket/LED
7. Levelling Feet
www.redbacklasers.com.au
2
4
6

5
Keypad
www.redbacklasers.com.au
Optional Receivers - LLR705 or LLRMM30
Reception
Sensors
Near/Far
Mode
Speaker
Control
LCD Display
Power
Button
Pulse / Dim Mode
(each press toggles
through; Pulse for
OPTIONAL receiver, Dim
for dull conditions and
back to normal visible
mode)
Power Button
Horizontal
(each press toggles
through each of the 4
horizontal lines)
Vertical
(each press toggles
through each of the 4
vertical lines)
Display also indicates
Battery power and
Pulse/Dim Mode
Display showing
activated lines
LLRMM30 See Separate
Instruction Book

6www.redbacklasers.com.au
XLG44 OPERATING INSTRUCTIONS
Battery Instructions & Powering Up
Place the XLG44 laser on a surface and roughly level the unit using the
adjustment feet and bubble vial. This gets the laser into electronic self
levelling range, you do not need to have the bubble perfectly central for
the laser to accurately self level.
Power up the laser by pressing the Red Power button the LED display will
light up indicating battery level and any laser lines that where previously
selected. You will hear an electronic motor sound as the laser levels and
the front vertical will light up indicating self levelling. Once levelled the
front vertical will power down (if not selected) and the selected lines will
illuminate.
Select your desired Horizontal and Vertical Lines using the “H” and “V” toggle
buttons. Each press will increase the number of lines, the next press after
all four are selected will return to 0 lines for either the Horizontal or Vertical
axis.
The Display indicates which lines have been selected. Note the red plumb
dot down automatically powers on when one or more vertical lines have
been selected.
If you rotate the laser or move it when powered up the laser will need to re-
levelandtheselectedlinesashmomentarilywhilethlaserquicklyre-levels.
Handy Hints
•
Prior to initial use, charge the rechargeable batteries for at least 4
hours.
•
Remember the XLG44 can operate using standard “AA” batteries when
rechargeable pack is out of charge, or charging outside of the laser.
•
When using the standard “AA” batteries remove from laser if not being
used for some time to prevent leakage.
TooperaterstplaceeithertheLi-ionbatteryor“AA”batteryholder
complete with “AA” batteries into the battery compartment and lightly
tighten the screw.

7
www.redbacklasers.com.au
Selecting Modes (Pulse/Dim)
Tripods & Charging
The XLG44 can be mounted on an indoor tripod with survey thread such as
the IET150. Note that the adjustment feet will not help to level the laser,
you will need to use the tripod legs.
The Li-ion battery can be charged either when attached to the laser or
when detached using the charger supplied, Do not use any other charger
or power adaptor.
Laser Lines with Embedded Dots
One of the outstanding features of the RedBack XLG44 apart from its ultra
bright Laser Lines is its even brighter integrated laser dots.
Each of the Vertical and Horizontal lines has an embedded dot which
corresponts with the laser lines. These dots are more visible when trying to
use the XLG44 visibly outdoors.
When you cannot see the lines or dots outside thats were using a laser
receiver comes in handy.
The “M” Mode button toggles through Pulse Mode, Dim Mode and back to
Normal Mode.
Pulse mode allows you to use an OPTIONAL line receiver such as the LLR705
receiver or LLRMM30 Receiver for use outdoors up to a range of 40m in all
light conditions. Ideal for Decking, Stumps etc when the ambient light is too
bright to visibly see the lines. When pulse mode is active the letter “P” will
show in the display. Note: the LLR705 is included in the XLG44+ package
and the LLRMM30 is included in the XLG44+MM and XLG44XXL packages.
Dim mode diminishes the intensity of the beam making it more comfortable
to use in low light conditions and saving battery power. When this mode is
active the letter “D” with a line through it will show on the display.

8www.redbacklasers.com.au
Using the Auto Track base for Site Layout
XLG44AT/XXL OPERATING INSTRUCTIONS
• If you have purchased the XLG44AT or XLG44XXL you will also receiver
the AT1 Auto Trackoing Base and Tracking Receiver. The following are
the instructions for this.
Laser Mounting Thread
(supplied with 5/8” and 1/4”)
Power Button
powered by 4x “AA” batteries
Laser Sensors
LED Level Indicator
Level Sensitivity (short press
and Green LED) / Sound on/
o(longpress)
Power Button
IR Send/Receive window

9
First insert batteries in both the motorised base and receiver. Next
determinewhichthreadtsthelaseryouareusingandscrewitintothe
base of the laser. The laser can now be mounted onto the motorised base
and the locking nut tightened.
The motorised base is powered up by pressing the power button on one of
its corners and the red LED should indicate it is powered up. Next power
up the required vertical laser lines on your laser as per the instructions for
your laser. Also put your laser into outdoor pulse mode.
Next power up the tracking receiver by pressing the red power button on
the receiver. The receiver will now operate like a standard line receiver
picking up both the horizontal line when up right and vertical lines when
the receiver is placed on its side. For vertical auto alignment whilst using
the rotating base the receiver needs to be on its side.
To activate the tracking feature on the receiver press the “AUTO” button on
the side of the receiver the LED next to it should light up. If the LED does
not illuminate when you press it then make sure that the tracking control
panel is upright and try again. To start the tracking feature press either of
the arrow buttons and the rotation base will begin to rotate.
Auto Track INSTRUCTIONS
Auto Button
starts tracking feature
Base Rotation Buttons
www.redbacklasers.com.au
IR Send/Receive window
As one of the vertical laser lines on your laser level passes the receiver’s
sensor the receiver will begin beeping and the rotation base will either
slowdown, stop or change rotation direction. Over a number of seconds
the base will align up with the receiver and lock on, this will be indicated by
the receiver having a solid tone followed by a double beep before returning
to the solid tone again. Once locked on, the receiver can be picked up
and moved around your site for alignment or squaring. Note to be able to
square your laser you will require at least two vertical lines at 90 degrees
to each other.

10 www.redbacklasers.com.au
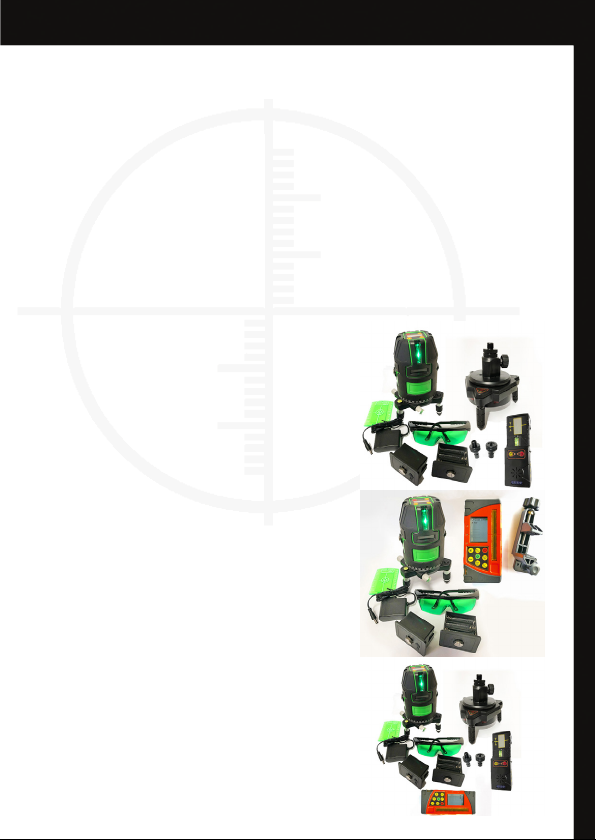
LLR705 Receiver (Supplied with the XLG44+)
INSTRUCTIONS
Thereceivercomeswithastaclampforhorizontaluseforlevellingwhich
isusedinconjunctionwithalevellingstamuchthesamewayasusinga
rotating laser with a rotating receiver. The receiver also features a button
forturningothesoundthisistogglewithalongpressofthatbutton(2
second hold). This same button when pressed with a short press toggles
throughneandcoarsesensitivityonlevel,thisisindicatedbyagreenLED.
Specications.Therangeforcommunicationbetweenthereceiverand
motorised base is up to 15m depending on environmental conditions. Note
both the laser pickup and infra red communication need line of site to the
base/laser level. Warranty is Two Years.
Note: Instructions for the LLRMM30 are separate (XLG44+MM/XXL)
Thereceivercanbeusedhandheldortogetherwiththestaclampwitha
sta.TheLLR705hasa1mmlevelzoneformaximumaccuracy.
• ApressofthePowerbuttononthereceiverwillturnonando
the receiver.
• PressingtheSpeakerbuttontogglesspeakeronando.Notethe
soundisdierentforabove,belowandonlevel.
• Pressing the Near/Far button enables the receiver to best work
within5mforNearandover5mforFar.Notedefaultmodewhenrst
powered up is Near (under 5m) Mode as indicated on the LCD display by
a symbol of two triangles and a line between . If you are using the
receiver beyond 5m switch to far mode indicated by a line symbol .
The LLR705 has 3 LED light displays which indicate laser is above, below and
on level and a large LCD display which has a progressive display indicating
when the laser gets closer to the level mark. If the receiver is left turned on
without a laser being received it will auto power down after 10 minutes.
The RedBack LLR705 is an OPTIONAL receiver for the 360R & 360G models.
It allows the laser beam to be picked up outside at up to 80m 306R and 30m
306G in any lighting conditions. Ideal for decking, sheds, slabs, framing and
much more.

11
ARL509TM SPECIFICATIONS
• Keep laser and accessories stored in protective case.
• Make sure laser is stored dry, dry out before storage to prevent damage.
• Remove batteries when not used for an extended period of time to prevent
leakage.
• The XLG44 is a precision instrument and should not be subjected to excessive
knocks, drops or vibrations.
• Self check calibration from time to time.
• For service contact Redback Lasers. www.redbacklasers.com.au
Care & Maintenance
Laser Wavelength 522nm <5mW Green
Laser Class 3r
Visible Range Up to 40m
Range with Receiver 50m
Accuracy ±2mm/20m
Self Levelling Range ±3.5o
Temperature Range -10oC - +45oC
IP Dust Water Resistance IP54
Power 4 x “AA” Alkaline or Li-ion pack
Low Power Power LED Flash
Levelling Electronic
Carry Case Hard plastic clam shell
Technical Specications
AllRedbackLasershavebeencheckedforcalibrationandcertiedbyone
of our technicians here in Australia prior to despatch and should under
normal conditions not go out of calibration. A calibration certied sticker
with the date and name of technician is located on the laser itself. It is
worth checking calibration from time to time particularly after any known
knocks or drops. An easy way to continually check calibration is to always
doublecheckyouworkwiththelaserlocatedinadierentpositionoruse
an alternate vertical line. Various other methods for checking calibration can
be found at www.redbacklasers.com.au/downloads or the laser can
be returned to our service department for checking and re-calibration. We
atRedbackLasersprovideaonceofreecalibrationandcheckwithinthe
duration of the warranty period see page 12 for details.

Durationofwarrantyisxedandautomatic,whenweadvertise2yearsonaparticularmodel,
its TWO years. No drop down to a lesser time if you forget to register, registration is NOT
required just proof of purchase showing date.
Although the duration of our warranties are for a particular period it does not mean we will
charge you for a genuine warranty failure a month or two outside that warranty period, we
believe in a fair go.
Even though a product shows signs of accidental damage, scratches and the like, we will not
automatically fail the warranty claim, if the fault is NOT caused by a drop or misuse and is a
genuine warranty failure then we will cover it.
Calibration is not covered by warranty much the same as the wheel balance on your car is not
coveredbywarranty,wedohoweveroeraoneofreere-calibrationserviceduringtheperiod
of warranty, conditions and details below.
REDBACK LASERS WARRANTY
RedBack LasersTM distributed by CMI Industries Pty Ltd
P.O. Box 7324 - Geelong West - Victoria - 3218 - Australia
CMI Industries Pty Ltd provides consumers with a warranty to our products, this is in addition to requirements of any
relevantlegislationsuchastheCompetitionandConsumerAct2010.Denitions:
“CMI”, “We” or “Our” refers to CMI Industries Pty Ltd (ABN 29 102 713 922) of Thompson Rd, Bell Park, Victoria 3215
ph 1800 769 858
“You” or “Consumer” refers to the initial purchaser of the product.
“Product” refers to goods manufactured by or for CMI Industries Pty Ltd under the brands of RedBack Lasers,
Level1Laser and CMI Lasers.
“Material” refers to material or component used in the construction and manufacture of the product.
“Workmanship” refers to handling, assembly and manufacturing processes done by or for CMI Industries Pty Ltd in
order to manufacture the products.
“Warranty Period” For the XLG44 Two Years. Warranty period is from original purchase date, no extension is made in
the event of warranty replacement products supplied or time spent being repaired.
Our goods come with guarantees that cannot be excluded under the Australian Consumer Law. You are entitled to a
replacement or refund for a major failure and for compensation for any other reasonably foreseeable loss or damage.
You are also entitled to have the goods repaired or replaced if the goods fail to be of acceptable quality and the failure
does not amount to a major failure. Ni-Mh Battery & Charger if supplied have 1 Year Warranty.
CMI warrants that our products will be free from defects in material and workmanship for the warranty period.
CMI promises to repair or replace, free of charge, the product or part of product if found to be faulty due to defective
workmanship or materials within the duration of the warranty as long as the following terms and conditions are met;
• Product must not have been misused or abused, must not have incurred accidental damage or had un-authorised
repair or tampering that has caused or contributed to its fault or failure.
• You must contact CMI by phone, mail or email immediately when a fault or defect has become apparent and within
the warranty period.
• Product must be returned to store of purchase or directly to CMI, we will cover cost of postage only when sent by
our reply paid Australia Post service (Australian Main land and Tasmania only) details will be provided upon phone, post
or email communications with us.
• CMI will cover cost of freight back of repaired or replaced product to original purchase store or you directly
(depending on how it was sent Australian Main Land and Tasmania only).
• CMI will determine whether to repair or replace the product or part of product on a case by case basis.
• Further exclusions in this warranty include damage or defect caused by use of non-original accessories or parts,
damage in transportation, normal wear and tear, damage through moisture, damage due to electric surge, failure due
to neglect or damaged caused by adjustments not outlined in CMI’s instructions.
Subject to the requirements of all applicable Australian Acts or legislation and to the extent permitted by law, CMI
accepts no liability (whether expressed or implied) of any nature whatsoever for any loss of earnings, hiring of
replacement equipment, Inaccurate work carried out by the consumer or agent, damage or injury arising as a result of
any fault in the product. It is the consumers responsibility to maintain good working practices and regularly test their
tools for accuracy and serviceability.
Calibration of the product is not covered by warranty subject to the requirement of all applicable Australian Acts or
legislationandtotheextentpermittedbylaw,CMIdoeshoweveroerafreere-calibrationservice(oncewithinthe
period of the warranty) you are liable for the cost to send the product to us then we will recalibrate and return the
producttoyoufreeofcharge.Notethisoerisinvalidiftheproductshowssignsofmisuseoraccidentaldamagethat
has caused it to go out of calibration.
A CMI product returned that fails to fall within the terms and conditions of this warranty will be quoted for repair.
Other manuals for XLG44
1
Table of contents
Other RedBack Lasers Laser Level manuals

RedBack Lasers
RedBack Lasers D27 Series User manual

RedBack Lasers
RedBack Lasers 3L360 Series User manual

RedBack Lasers
RedBack Lasers AT1 User manual

RedBack Lasers
RedBack Lasers BASIC614 User manual

RedBack Lasers
RedBack Lasers PRO5 User manual

RedBack Lasers
RedBack Lasers Unilevel UNG6631 User manual

RedBack Lasers
RedBack Lasers Unilevel UNL59 User manual

RedBack Lasers
RedBack Lasers 3D3XR User manual

RedBack Lasers
RedBack Lasers EL614 User manual

RedBack Lasers
RedBack Lasers LSR Series User manual