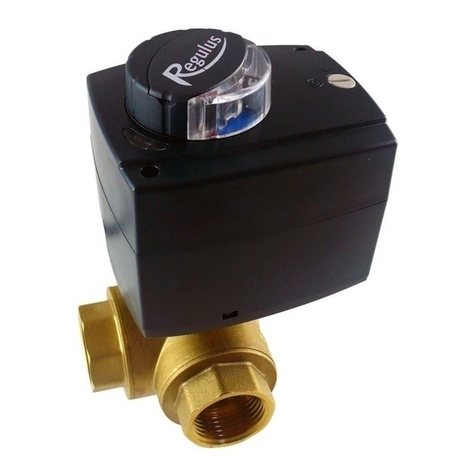
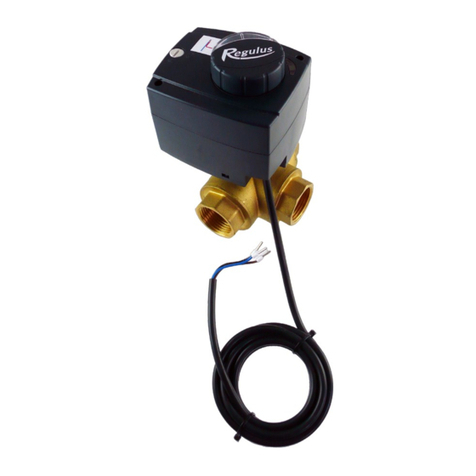
Regulus VZK R 3 230-1P Series User manual

www.regulus.eu
VZK R 3xx-230-1P
VZK R 3xx-230-1P
EN
Installation and Operation Manual
THREE-WAY ZONE BALL VALVE
VZK R 3xx-230-1P

│2
THREE-WAY ZONE BALL VALVE - www.regulus.eu
CONTENTS
1. Introduction ................................................................................................................... 3
2. Technical Data .............................................................................................................. 3
3. Actuator.......................................................................................................................... 5
3.1. Actuator Electrical Wiring ................................................................................ 5
3.2. Actuator Control .............................................................................................. 6
3.3. Actuator Placing .............................................................................................. 6
4. L-bore Valves ................................................................................................................ 7
4.1. Valve Adjustment Options ............................................................................... 7
5. T-bore Valves ................................................................................................................ 9
5.1. Valve Adjustment Options ............................................................................... 9
6. Changing the direction of rotation of the actuator ......................................................... 13
7. Permissible and prohibited positions ............................................................................ 14

3 │
THREE-WAY ZONE BALL VALVE - www.regulus.eu
1. Introduction
A 3-way zone valve with electric actuator (230V, 50Hz), permitting manual control. It is usually
used in heating and solar thermal systems. The actuator is attached to the valve with four M5 nuts
(spanner size 8) and can be removed without the need to remove the valve. The valve does not
interrupt the ow of uid through the common port during switching. The direction of uid ow is
indicated by the actuator control lever. Fluid can ow in either direction through the valve (common
port can be used either as inlet or outlet).
2. Technical Data
L-bore Valves
Marking
Code
Connecting thread A
(3x)
Dimension B
Dimension C
Open/close time [s]
Kvs [m3/h]
Weight [kg]
VZK R 325-230-1P L 3/4F 13603 3 x G 3/4" F 104 52 60 13,1 1,6
VZK R 325-230-1P L 1F 13604 3 x G 1" F 104 52 60 14,3 1,7
VZK R 325-230-1P-15 L 1F 19000 3 x G 1" F 104 52 15 14,3 1,7
VZK R 325-230-1P L 5/4F 18671 3 x G 5/4" F 104 52 60 14,3 1,8
VZK R 325-230-1P-15 L 6/4M 19005 3 x G 6/4 "M 128 64 15 14,3 1,8
T-bore Valves
Marking
Code
Connecting thread A
(3x)
Dimension B
Dimension C
Open/close time [s]
Kvs straight [m3/h]
Kvs angled [m3/h]
Weight [kg]
VZK R 325-230-1P T 3/4F 18673 3 x G 3/4" F 104 52 60 20 13,1 1,6
VZK R 325-230-1P T 1F 18550 3 x G 1" F 104 52 60 28,3 14,3 1,7
VZK R 325-230-1P-15 T 1F 19001 3 x G 1" F 104 52 15 28,3 14,3 1,7
VZK R 325-230-1P T 5/4F 18676 3 x G 5/4" F 104 52 60 28,3 14,3 1,8
VZK R 325-230-1P-15 T 6/4M 19006 3 x G 6/4 "M 128 64 15 28,3 14,3 1,8

│4
THREE-WAY ZONE BALL VALVE - www.regulus.eu
Technical Data
Max. working pressure 10 bar
Max. uid working temperature 110 °C
Valve open/close time 15 s or 60 s (depending on the actuator)
Angle of rotation 90°
Ambient working temperature 5 °C to 40 °C
Max. relative humidity 80% non condensing
Max. pressure dierence 10 bar
Electric Data
Power supply 230 V 50 Hz
Max. power consumption 4 VA
Max. current 17 mA
Torque 5 Nm
IP rating IP42
Protection class II
Power cable cross section 3 x 0.5 mm2
Power cable length 2 m
Power cable length
Valve housing brass CW617N
Valve spindle brass CW617N
Valve ball chrome-plated brass
O-rings EPDM, FPM
Seal PTFE
Power cable PVC

5 │
THREE-WAY ZONE BALL VALVE - www.regulus.eu
Direction of ow through the valve
Direction of ow through the valve is indicated by the actuator control lever or by the groove on the
valve spindle visible after removing the actuator:
L-bore Valve T-bore Valve
More info can be found in Chapters 4 and 5.
3. Actuator
3.1. Actuator Electrical Wiring
The actuator is controlled by the switching contact of the controller or thermostat (single-pole
connection) 230V, 50Hz. Permanent power supply is applied to terminals 1 and 2. The switched live
is connected to terminal 3.
Wiring diagram
blue
controller or
thermostat
black
brown

│6
THREE-WAY ZONE BALL VALVE - www.regulus.eu
3.2. Actuator Control
The actuator can be switched between automatic and manual mode. In automatic mode, its direction
of rotation is indicated by light indicators. In manual mode, the valve can be turned using the control
lever.
The control lever shows the position of the valve using the coloured eld. The colour of the uid ow
direction on the label corresponds to the colour indicated by the control lever.
Indicators
Control lever
Label
Automatic mode
Manual mode
3.3. Actuator Placing
The default position of the actuator is such that the valve can be installed in the piping without
removing the actuator. If required, the actuator can be removed and tted in a dierent position
(in quarter turns) - see the g. The label shall be then carefully removed and rotated to the correct
position according to the ports arrangement.
Default position
of the valve
actuator

7 │
THREE-WAY ZONE BALL VALVE - www.regulus.eu
4. L-bore Valves
4.1. Valve Adjustment Options
A) Factory adjustment
The default setting of the actuator is with the lever turned into the blue eld (OFF position). After the
switched live is connected (ON), the valve turns clockwise and the red eld is shown by the lever. Af-
ter the switched live is disconnected (OFF), the valve returns to its default position. A label showing
the uid ow direction in colour corresponding to the lever position is placed on the actuator.
Default position
(OFF)
Direction of rotation
when switched live
voltage is applied to
terminal No. 3
Position after turning
(ON)
Label
on the actuator
Blue indicator Red indicator

│8
THREE-WAY ZONE BALL VALVE - www.regulus.eu
B) Swapping the ON and OFF positions of the valve
If necessary, the ON and OFF valve positions can be swapped. In the default position (OFF) the
lever will be turned to the red eld. After the switched live is connected (ON), the valve turns anti-c-
lockwise and the blue eld is shown by the lever. After the switched live is disconnected, the valve
returns to its default position (OFF).
How to change the default position of the valve
1. Switch the actuator to manual mode and turn the lever by a quarter turn into the red eld.
2. Change the direction of rotation of the actuator according to Chapter 6.
3. Switch the actuator to automatic mode.
4. Remove the label from the actuator and replace it with the enclosed label showing the
corresponding setting.
Default position
(OFF)
Direction of rotation
when switched live
voltage is applied to
terminal No. 3
Position after turning
(ON)
Label
on the actuator
Red indicator Blue indicator

9 │
THREE-WAY ZONE BALL VALVE - www.regulus.eu
5. T-bore Valves
5.1. Valve Adjustment Options
A) Factory adjustment
The default setting of the actuator is with the lever turned to the blue eld (OFF position) and the uid
ows straight through the valve. After the switched live is connected (ON), the valve turns clockwise.
The lever is turned to the red eld and the uid is directed through 90 degrees in the valve. After the
switched live is disconnected (OFF), the valve returns to its default position. A label showing the uid
ow direction in colour corresponding to the colour corresponding to the lever position is placed on
the actuator.
Default position
(OFF)
Direction of rotation
when switched live
voltage is applied to
terminal No. 3
Position after turning
(ON)
Label
on the actuator
Blue indicator Red indicator

│10
THREE-WAY ZONE BALL VALVE - www.regulus.eu
Other Adjustment Options
The default valve adjustment can be changed in three dierent ways.
B) Swapping the ON and OFF positions of the valve
If necessary, the ON and OFF valve positions can be swapped. In the default position (OFF) the
lever is turned to the red eld and the uid will be directed through 90 degrees in the valve. After the
switched live is connected (ON), the valve turns anti-clockwise, the blue eld is shown and the uid
will ow straight through the valve. After the switched live is disconnected, the valve returns to its
default position (OFF).
How to change the default position of the valve
1. Switch the actuator to manual mode and turn the lever by a quarter turn to show the red eld.
2. Change the direction of rotation of the actuator according to Chapter 6.
3. Switch the actuator to automatic mode.
4. Remove the label from the actuator and replace it with the enclosed label showing the
corresponding setting.
Default position (OFF)
Direction of rotation
when switched live
voltage is applied
to terminal No. 3
Position after turning
(ON)
Label
on the actuator
Red indicator Blue indicator

11 │
THREE-WAY ZONE BALL VALVE - www.regulus.eu
C) Changing the common port of the valve
If necessary, the common port of the valve can be changed. In the default position (OFF) the lever
is turned to the red eld and the uid will ow straight through the valve. After the switched live is
connected (ON), the valve turns anti-clockwise. The blue eld will be shown and the uid will be
directed through 90 degrees in the valve. After the switched live is disconnected, the valve returns
to its default position (OFF).
How to change the default position of the valve
1. Switch the valve to manual mode and turn the lever to the default factory position (blue eld).
2. Unscrew the four M5 nuts (spanner size 8) and remove the actuator from the valve.
3. Turn the lever by a quarter turn to show the red eld.
4. Fit the actuator on the valve and tighten it with the four M5 nuts.
5. Change the direction of rotation of the actuator according to Chapter 6.
6. Switch the actuator to automatic mode.
7. Remove the label from the actuator and replace it with the enclosed label showing the
corresponding setting.
Default position
(OFF)
Direction of rotation
when switched live
voltage is applied to
terminal No. 3
Position after turning
(ON)
Label
on the actuator
Red indicator Blue indicator

│12
THREE-WAY ZONE BALL VALVE - www.regulus.eu
D) Changing the ON and OFF positions and common port of the valve
If necessary, the ON and OFF valve positions and the common port of the valve can be changed. In
the default position (OFF) the lever is turned to the blue eld and the uid will be directed through
90 degrees in the valve. After the switched live is connected (ON), the valve turns clockwise. The
red eld will be shown and the uid will ow straight through the valve. After the switched live is
disconnected (OFF), the valve returns to its default position.
How to change the default position of the valve
1. Switch the valve to manual mode and turn the lever to the default factory position
(blue eld).
2. Unscrew the four M5 nuts (spanner size 8) and remove the actuator from the valve.
3. Turn the lever by a quarter turn to point to the red eld.
4. Fit the actuator on the valve and tighten it with the four M5 nuts.
5. Turn the lever by a quarter turn to point to the blue eld.
6. Switch the actuator to automatic mode.
7. Remove the label from the actuator and replace it with the enclosed label showing the
corresponding setting.
Default position
(OFF)
Direction of rotation
when switched live
voltage is applied to
terminal No. 3
Position after turning
(ON)
Label
on the actuator
Blue indicator Red indicator

13 │
THREE-WAY ZONE BALL VALVE - www.regulus.eu
6. Changing the direction of rotation of the actuator
In the factory setting, the actuator without control voltage shows the blue eld. After the control volt-
age is applied, the actuator starts turning clockwise and the red eld is shown. The jumper is placed
vertically.
After the jumper is turned to a horizontal position, the actuator without control voltage will show the
red eld. After the control voltage is applied, the actuator starts turning anti-clockwise and the blue
eld is shown.
1. Switch o the supply voltage, set the manual
control, unscrew and remove the actuator cover.
2. Locate the jumper - see the red
marked area in the picture.
3. In the factory setting, the jumper is placed
vertically. The actuator turns clockwise.
4. Turning the jumper by 90 deg. to the
horizontal position will change the
direction of rotation. The actuator now
turns anti-clockwise.
Having placed the jumper to the desired position, re-install the actuator cover and switch
the actuator to automatic mode.

7. Permissible and prohibited positions
WARNING - Important
Installation of the valve in a position where the actuator is located below the valve is prohibited.
©2021 We reserve the right to errors, changes and improvements without prior notice.
REGULUS spol. s r.o.
E-mail: [email protected]
Web: www.regulus.eu
v1.1-11/2021
This manual suits for next models
10
Table of contents
Other Regulus Control Unit manuals