REMEHA MCBA User manual

Interface (MCBA / Appl. Bus)
Montage instructie
Assembly instruction
Instruction de montage
Montageanleitung

2
Montage instructie voor Interface (MCBA / Appl. Bus)
Assembly instruction for Interface (MCBA / Appl. Bus)
Instruction de montage pour Interface (MCBA / Appl. Bus)
Montageanleitung für Interface (MCBA / Appl. Bus)

3
1:
Interface plus aansluitkabels
Interface and connecting cables
Interface avec les câbles de connection
Interface mit Anschlusskabel
Voer de volgende handelingen uit:
1. Schakel de voedingsspanning van de ketel uit
2. Volg de montageaanwijzingen, zoals getoond in
foto’s 2 t/m 11
Proceedings:
1. Switch off power supply to boiler
2. Follow the fitting instructions as shown in photos
2 till 11
Procédure:
1. Couper l’alimentation électrique vers la chaudière
2. Suivre les instructions de montage selon les photos
2 à 11
Arbeitsvorgang:
1. Elektrische Zuleitung zum Kessel abschalten
2. Montageanleitung gemäss Abb. 2 bis 11 folgen
X18A
X19A

4
4:
• Voer kabel met connector X18A door voorzijde van het
bedieningspaneel en laat kabel met connector X19A
aan achterzijde
• Feed cable with connector X18A through front of the
control panel and leave cable X19A on the backside
• Passer le câble avec connecteur X18A à travers la
facade du tableau de bord; laisser le câble X19A à sa
place
• Kabel mit Konnektor X18A durch Frontplatte des
Schaltfeldes führen, Kabel X19A nicht berühren
5:
• Plaats Interface op de aangegeven plek en voer
kabels door de aanwezige uitsparingen
• Insert Interface as shown and pass cables through
recess
• Positionner l’ Interface comme indiquée et assurer les
passage des câbles à travers les évidements
• Interface einbringen und Kabel durch Aussparungen
führen
2:
• Losschroeven (2x)
• Unscrew two screws
• Dévisser deux vis
• Zwei Schrauben lösen
3:
• Zwaai paneel open; trek front los
• Pull forward to open; release front
• Tirer vers l’avant pour ouvrir; détacher la façade
• Vorwärts ziehen zum Öffnen; Front lösen
X19A
X18A

5
6:
• Interface inschuiven en dan vastklikken
• Shove Interface into its lodgings and click to tighten
• Pousser l’ Interface dans ses logements et presser
pour fixer
• Interface einschieben und festdrücken
7:
• Positie kabels
• Cable positions
• Position des câbles
• Kabelposition
8:
• Maak connector X19 (met zwarte en groene draad)
los
• Disconnect connector X19 (with black and green wire)
• Déconnecter le connecteur X19 (avec fils noir et vert)
• Konnektor X19 (mit schwarzem und grünem Kabel)
lösen
9:
• Verbind connector X19A (zwarte en groene draad) van
Interface met de vrijgekomen contra-connector X19 in
de ketel
• Connect X19A (black and green wire) of Interface
with free boiler connector X19
• Connecter le connecteur X19A (fil noir et vert) de
l’ Interface avec le connecteur libre X19 de la
chaudière
• Konnektor X19 (schwarzes und grünes Draht) des
Interface mit dem freien Konnektor X19 des Kessels
verbinden
X19A
X18A
X19 X19 X19A

6
10:
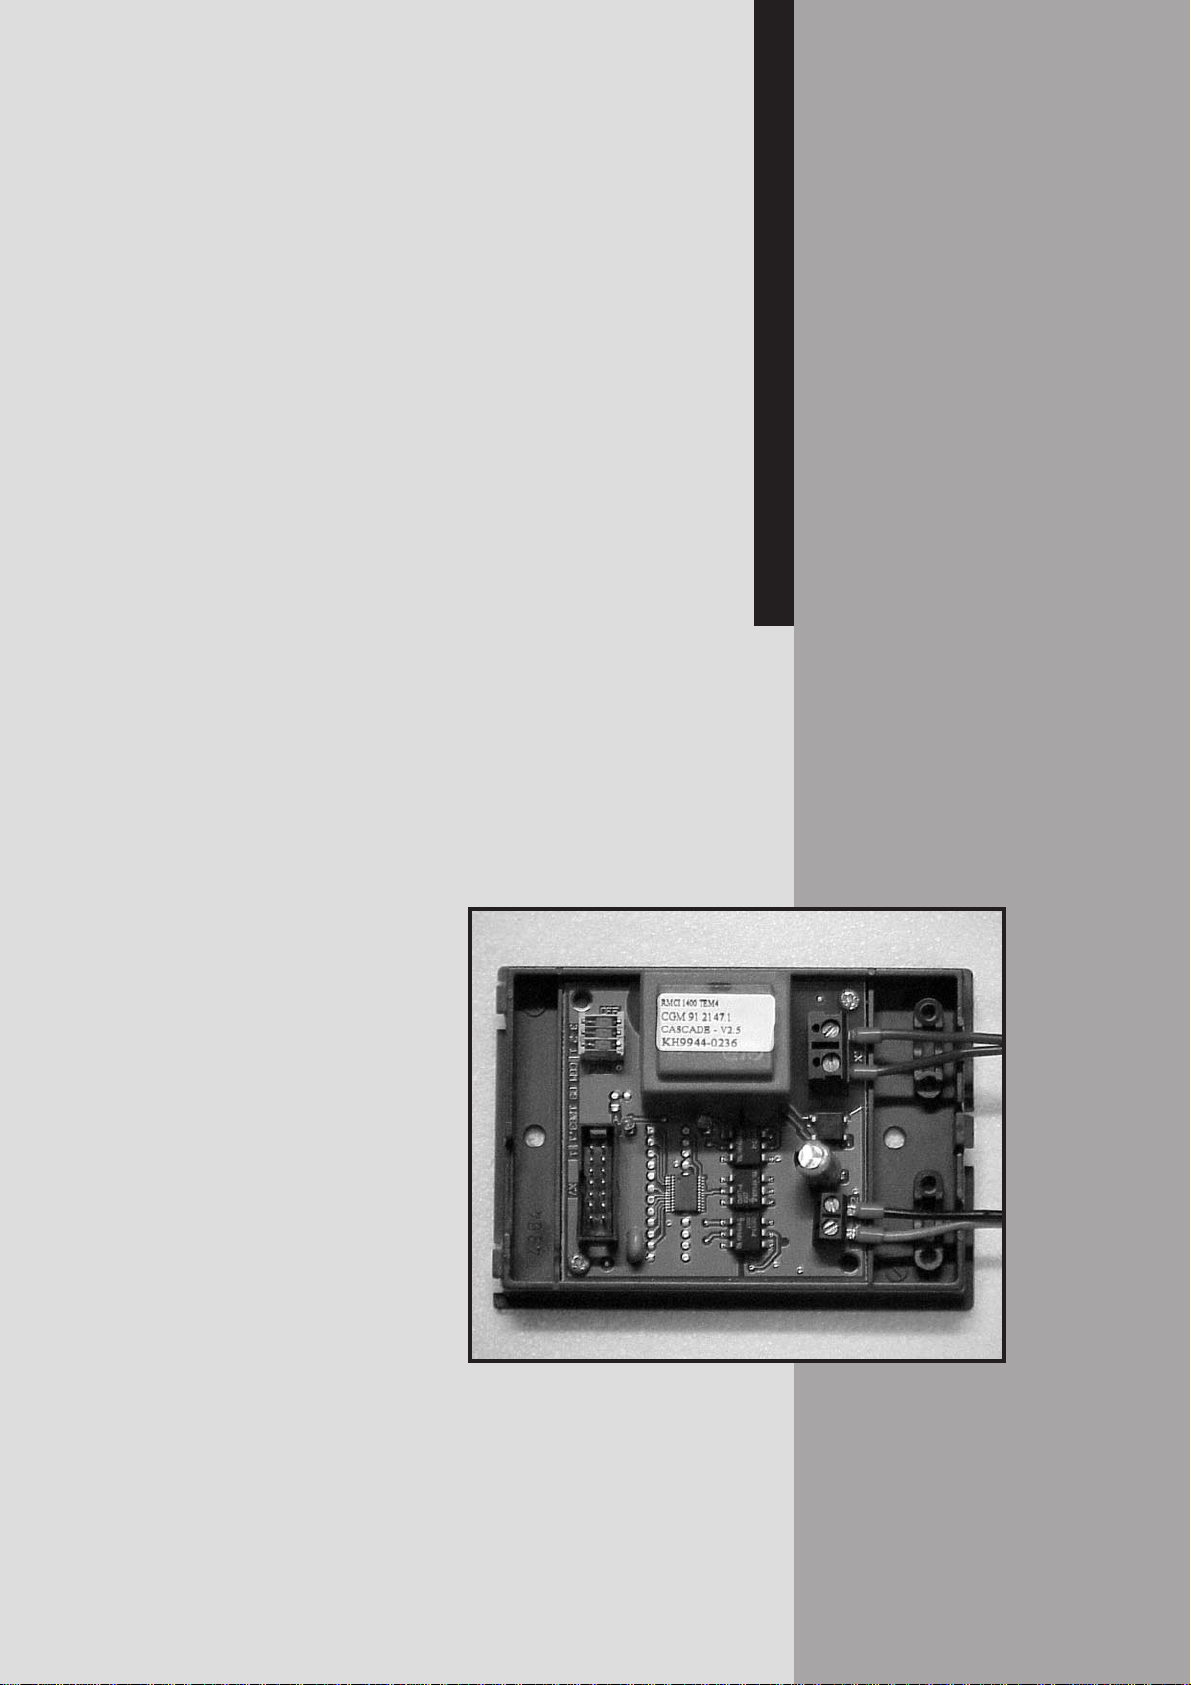
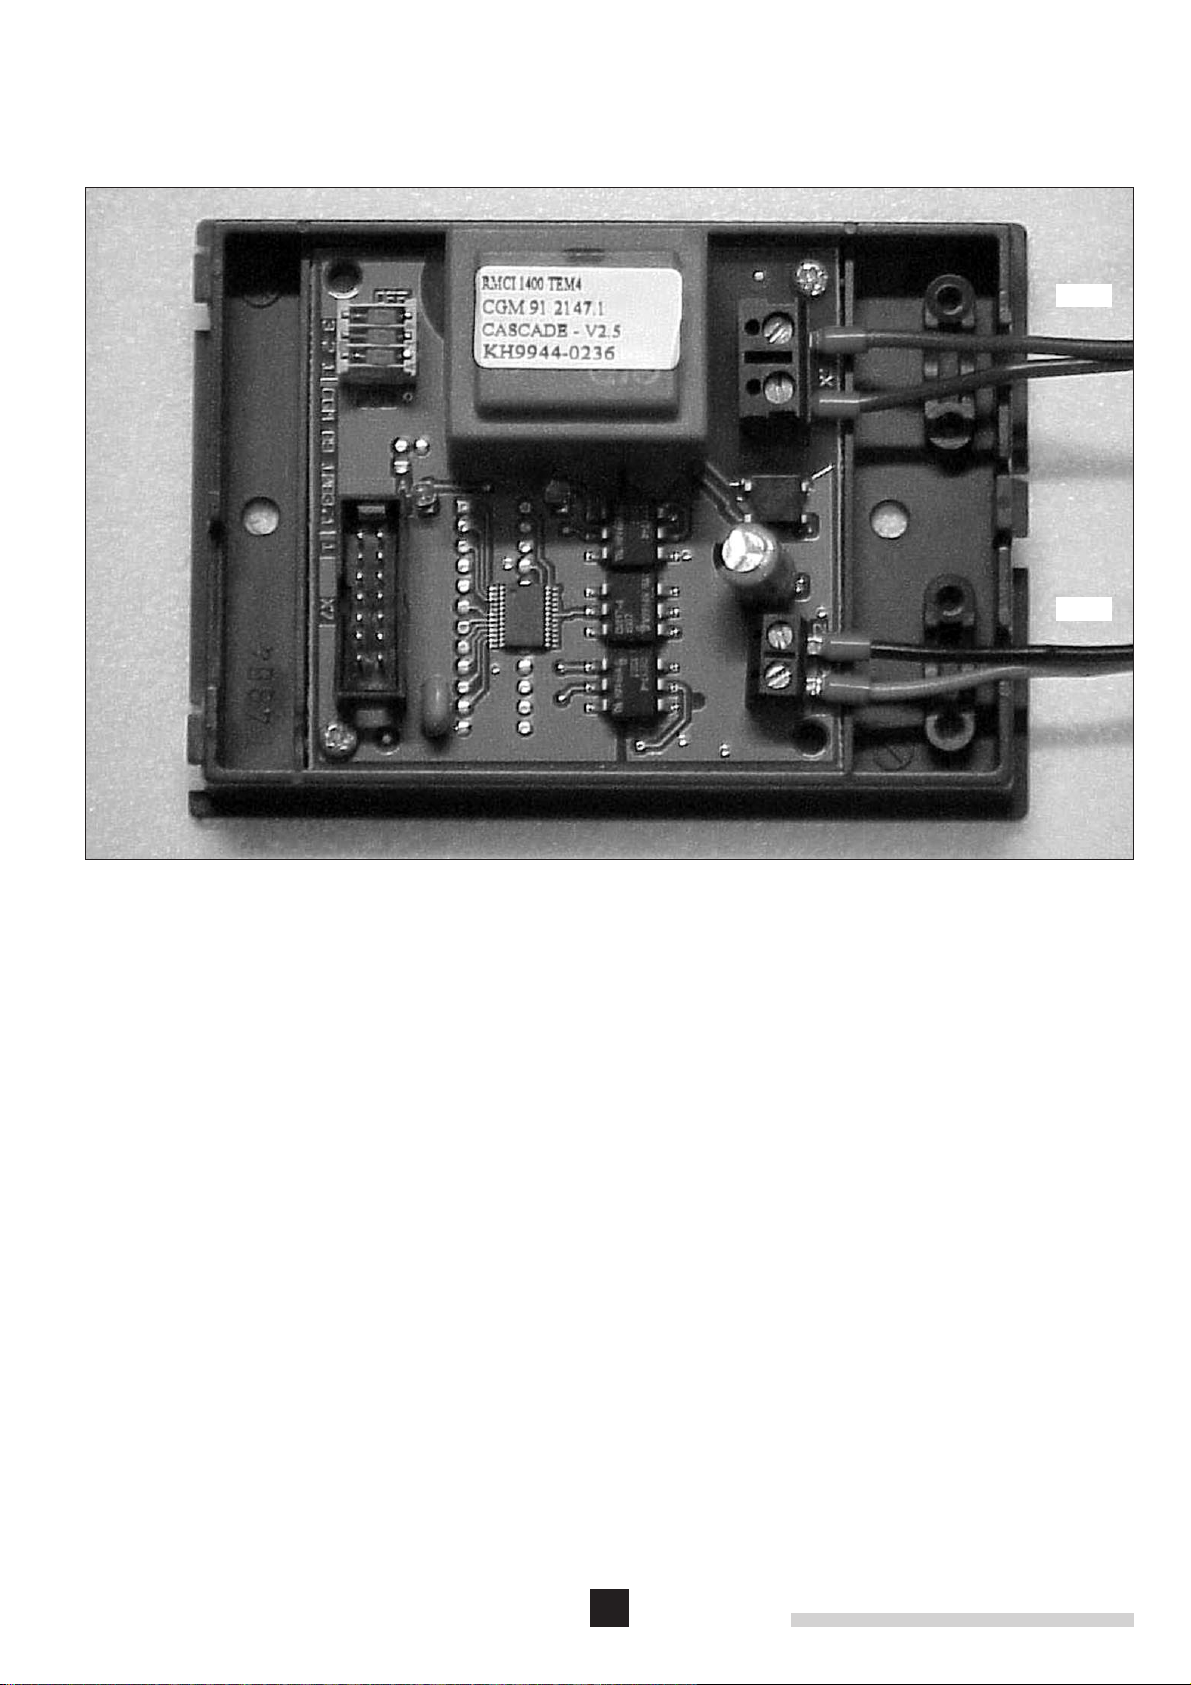
• Verbind connector X18A (bruine en blauwe draad) van
Interface met de contra-connector X18 in de ketel.
Na deze handelingen kunt u onze regelaar plaatsen,
volgens de desbetreffende montage instructie
• Connect X18A (brown and blue wire) of the Interface
with boiler connector X18. After completion of above,
our controllers can be mounted in accordance with the
instructions supplied
• Connecter le connecteur X18A (fil brun et bleu) de
l’ Interface avec le connecteur X18 de la chaudière.
Après avoir complété les travaux ci-hauts, notre
régulateurs peuvent être montés selon les instructions
y relatives
• Konnektor X18A (blaues und braunes Draht) des
Interface mit dem Konnektor X18 des Kessels
verbinden. Nach diesen Vorgängen können unsere
Regler gemäss beigelegter Einbauanleitungen
montiert werden
11:
• Sluit het paneel en zet de twee schroeven weer vast
• Close panel and secure with two screws
• Refermer le tableau et fixer à l’aide de deux vis
• Türen schliessen und mit zwei Schrauben festsetzen
• Let op: De interface selectie (parameter () van de
ketel dient op 01 (extern) te worden geprogram-
meerd. Zie technische informatie van de betreffende
ketel.
• Attention: The boilers interface selection (param-
eter() must be set at 01 (external). More informa-
tion can be found in the Technical information of the
boiler.
• Attention: Programmer le sélection d’interface (para-
mètre () de la chaudière à 01 (externe). Consulter
notre notice technique de la chaudière.
• Achtung: Der Interface Wahl (Parameter () des
Kessels soll auf 01 (extern) programmiert werden.
Siehe dazu die Installationsanleitung des Kessels.
X18
X18A


© Copyright
All technical and technological information contained in these technical instructions,
as well as any drawings and technical descriptions supplied, remain our property and
shall not be multiplied without our prior consent in writing.
Ours is a policy of continuous development. We reserve the right to alter
specifications without prior notification.
Subject to alterations
57947-1002
Other REMEHA Boiler Supplies manuals
Popular Boiler Supplies manuals by other brands

Immergas
Immergas VICTRIX SUPERIOR KIT quick start guide

JJM Boiler Works
JJM Boiler Works JM-2 Installation operation & maintenance

Miura
Miura CMU-324HE Operation manual

Detandt-Simon
Detandt-Simon 200 Instructions for use and maintenance

Immergas
Immergas Victrix Superior KW X Warnings and instruction sheet