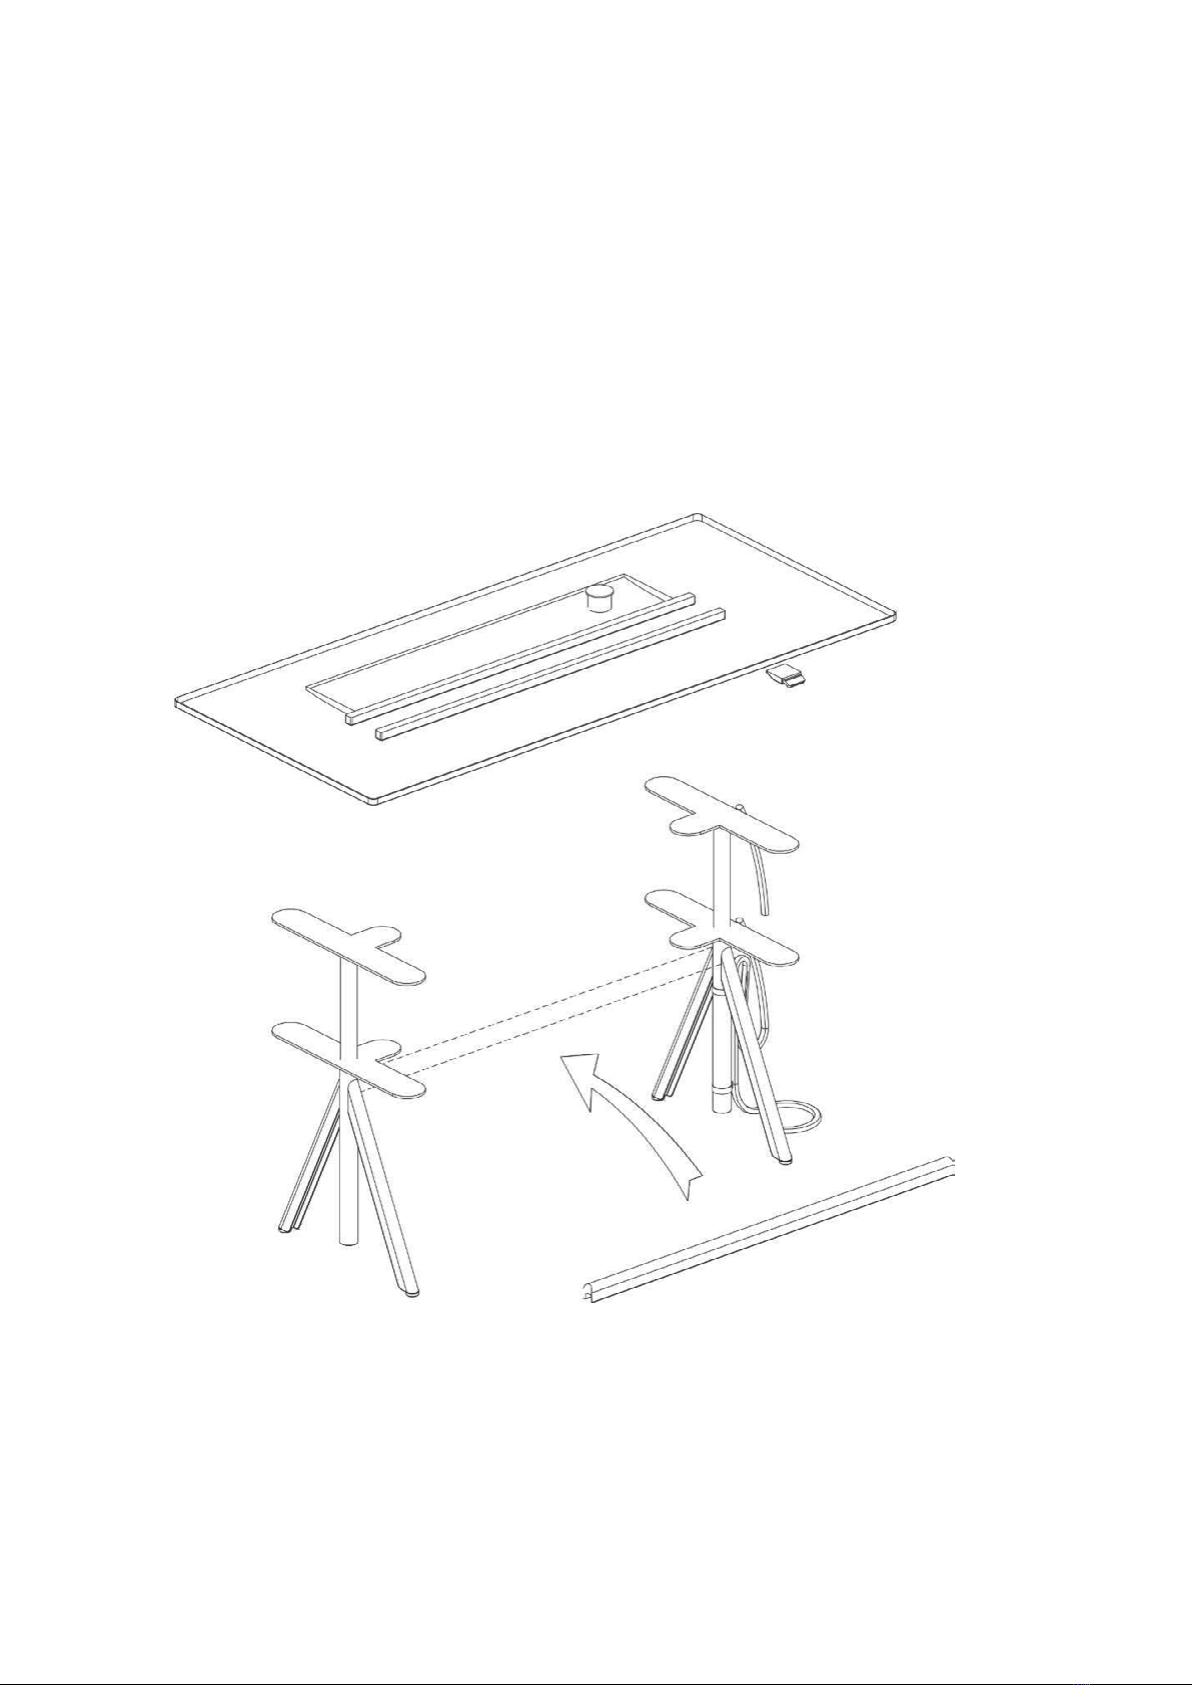
Renz Slide D01 User manual

Slide
Assembly and operating instructions

Slide
Electrically height-adjustable desks
Assembly and operating Instruction for electrically height-adjustable desks, model:
D01 (Frame type 1300 / TP Format 01 (1600 x 800mm, Rectangle)
Product version 1300/01 dated March 20, 2021
D03 (Frame type 1300 / TP Format 03 (1800 x 900mm, Rectangle)
Product version 1300/03 dated March 20, 2021
D05 (Frame type 1300 / TP Format 05 (2000 x 1000mm, Rectangle)
Product version 1300/05 dated March 20, 2021
D07 (Frame type 1500 / TP Format 07 (2200 x 1000mm, Rectangle)
Product version 1500/07 dated March 20, 2021
D09 (Frame type 1500 / TP Format 09 (2400 x 1000mm, Rectangle)
Product version 1500/09 dated March 20, 2021
D11 (Frame type 1500 / TP Format 11 (2400 x 1000mm, „Pill form“)
Product version 1500/11 dated March 20, 2021
2
Dear customer,
Thank you very much that you have chosen a product from our company.
This instruction will explain how to assemble, use, and maintain the sit-and-stand-up
desk SLIDE. The assembly of the frame must be done as instructed.
Changes to the frame or an improper use may affect safety, functionality, and
lifetime of the product! Please read the assembly and operating instruction before
initial operation of the height-adjustable workplace. Further, please keep this
instruction together with the product.
Wilhelm Renz GmbH + Co. KG

3
Slide
Content
Content
1. Intended use 4
2. Previous knowledge 4
3. Symbols in safety instructions 4
4. Safety instructions 4
5. Before installing, uninstalling or trouble shooting 5
6. Before operating 5
7. During operation 6
8. Important information for resellers 6
9. Repairs / service / CE conformity 6
10. Maintenance / cleaning 6
11. Assembly 7
1) Schematic overview table (basic version) 7
2) Schematic overview table (extension version) 8
3) Assembly of table frame 9
4) Convert cable guide „RIGHT“ (= as supplied) to „LEFT„ 10
5) Assembly cable covers correctly 11
6) Assembly of hand switch 11
7) Assembly of table top / frame 12
8) Cabling 12
9) Cabling at the table without additional modules 13
10) Cabling at the table with power box 14
11) Cabling at the table with distributor / multiple modules 14
12) Information on power cable 15
13) Close cable net 15
14) Assembly of the modesty panel 15
15) Manual switch = toggle switch 16
12. Installation 16
1) Installation / Initialization / (RESET) 16
2) Setting desk height limits upper / lower 17
3) Saving / erasing favourite positions 17
4) Driving to favourite positions 17
5) Reminder 17
6) Connecting Bluetooth® / LINAK - Desk Control ™ 18
7) Factory reset of manual switch 19
8) Automatic operation not allowed 19
13. Technical data 19
14. Environmentally friendly disposal 20
15. Ergonomics 20
16. EC Declaration of Conformity 21

Slide
Intended use, safety instructions
4
1. Intended use
This sitting/standing desk may only be used as an office desk in a professional work environment. The electrically
height-adjustable table can be adjusted with the hand control to an individual working height for a seated or standing
user in the height range between 740 and 1140mm. The system can only be used safely if the following assembly inst-
ructions have been completely read.
The sitting/standing desk may not be used improperly. Modifications to the table frame or electrification are not allowed,
otherwise the warranty and the declaration of CE conformity by RENZ will be voided.
2. Previous knowledge
The following knowledge is required for commissioning and assembly of the height-adjustable office desks:
- Basic knowledge of mechanical and electrical engineering
- Reading the operating instructions
3. Symbols in safety instructions
Danger: This safety note indicates an imminent danger to the life and health of persons!
Attention: This safety note indicates possible dangers due to electric current!
Danger: This safety note indicates a possible danger of crushing, which may occur in exceptional cases.
Note: The mains plug must be disconnected before the next operation!
Non-observance of these instructions may have health effects, result in life-threatening injuries and may
result in death. and damage to property!
4. Safety instructions
These operating instructions contain safety instructions which draw your attention to possible dangers and thus
enable safe operation of the sit-stand table. Please observe these safety instructions!
It is essential to read and observe the operating instructions before assembling/commissioning the
sitting/standing desk!
Modifications to the components of the table frame, including the motor control and the manual switches,
are prohibited! Before connecting or disconnecting drives, hand switches or other accessories to or from
the motor control unit, always disconnect the power supply cable from the mains.
The height-adjustable office desks are not designed for continuous operation. The table top height must not be
adjusted without interruption for longer than the duty cycle specified on the type plate.
This device can be used by children aged from 8 years and over and by persons with reduced physical,
sensory or mental abilities or lack of experience and knowledge if they have been supervised or
instructed in the safe use of the device and understand the resulting dangers. Children must not play with
the device! Cleaning and user maintenance must not be carried out by children.
Cables on the table must not be laid freely across the floor (danger of tripping). Use cable thresholds
connected to the floor.

Slide
Safety instructions
5
Moving the furniture can damage cables leading into the floor (shearing, squeezing)! Cleaning personnel and
operators must be informed of these dangers.
Be sure to use the supplied power supply cable! Make sure that the power supply cable is not damaged.
Operating the sit-stand table with a damaged power supply cable is prohibited.
Attention: If the power cord of this device is damaged, it must be replaced by the manufacturer or its
customer service or a similarly qualified person in order to avoid hazards.
In the event of trouble, disconnect the power plug immediately! The mains plug serves as an electrical
disconnecting device and must be easily available at all times. The total connected load of the table
including all consumers must not exceed 3500 watts in Germany at 220 volts AC and a fuse protection of
16A. A maximum of 3000 watts remains for consumers plugged into the table.
Non-German power supply systems may be different from these values.
There is a danger of crushing when changing the table top position! Therefore, make sure that there are
no objects or persons in the danger area and that you do not reach into the danger area!
Make sure that movable furniture does not get into the lifting area. The integrated collision protection is a
system protection and NOT a personal protection!
All moving parts of the table frame must have the required safety clearance of at least 25 mm from
adjacent components.
Protect the table frame and in particular all electrical components on the table including connection
panels, fixtures and the hand switch from moisture (dripping and splashing water, beverages, etc.).
The table must not be operated in damp rooms. Use the system only in in enclosed rooms. Electrical
dangers are possible in case of contact with moisture / liquids.
The electric motor-driven sit-stand table must not be operated in an explosive atmosphere!
In the event of a fault, it may happen that the table top moves a little during each attempt to move away
before the safety switch-off starts. Please note a possible danger of crushing.
Collision protection is not active for all reset processes (section Initialization / Reset). The inner and outer
tubes move completely into each other directly under the table top. Note the possible danger of crushing
in the rack area.
If the product is visibly damaged, makes unusual noises or causes an odour, it must no longer be installed
or used
Lifting persons and / or objects with the aid of the table is prohibited! The table must not be used as a
climbing aid! The load capacity of the height-adjustable table is max. 50kg.
During operation, do not sit or stand on the system (risk of injury).
5. Before installing, uninstalling or trouble shooting
•Stop the height-adjustable desk.
Note: Turn off the power and unplug the power cord!
•Unload the height-adjustable office desk from any weight.
6. Before operating
•Makesurethatthetablehasbeenassembledinaccordancewiththeseinstructions.
•Checkthattheoperatingvoltageofthetablecorrespondstothelocalpowersupply.Thetablemayonly
be operated with the voltage specified on the control unit.

Slide
During operation, repairs / service / CE conformity
6
7. During operation
•Iftheactuatorsorthecontrolunitcauseunusualnoisesorodoursduringoperation,disconnectthe
power supply.
•Makesurethatthecablesarenotdamaged.
8. Important information for resellers
Note: For each resale, be sure to include this manual with all safety instructions that every user needs to
handle the product safely.
9. Repairs / service / CE conformity
In case of a technical defect on this device, please contact us or our authorized after-sales service. You can find the
solution for simple possible error cases in the section Error Messages!
To avoid malfunctioning, all repairs must only be made by authorized service personnel. To repair the sit-stand
table only original spare parts are allowed.
The sit-stand table must not be handled or used improperly and no modefications may be made to the table frame
or electrification, otherwise Renz‘s warranty and declaration of CE conformity will lapse.
10. Maintenance / cleaning
At regular intervals, remove dust and dirt from the table frame, especially from the guide tubes, and make sure
that there are no damages or cracks. Please note the following for the Care of the wooden parts our care
The control unit, the hand control and the table frame may only be cleaned with a dry or slightly damp
cloth. moistened cloth. No liquid may get into the system (control unit, handset, electrical installations,
distributors, plug connectors, cables and frame). Danger to persons!
Aggressive cleaning agents can cause damage or color changes to the table frame. Therefore, only
agents with a pH value of 6-8 may be used. For cleaning and care of the wooden parts (table tops etc.),
please observe our care instructions under:
http://www.renz.de/files/renz.de/download/QP_E.pdf

Slide
Assembly
7
11. Assembly
Use only screws for mounting the table frame in accordance with the assembly drawing!
Wrong screws may cause damage to the desk!
During assembly of the table frame, the power cable of the motor control must be disconnected from the mains
supply !
Before installing and commissioning the sit-stand table, make sure that the product is acclimated to the
values for temperature and humidity for operation!
1) Schematic overview table (basic version)
→ with a cable net, with or without electric module
Lifting column 1 x # 1A
Lifting column with pre-mounted cable duct 1 x # 1B
Cross frame 1 x # 2
Table top with pre-mounted
frames, cable net
control, cabling 1 x # 3
Electric module Evoline Circle 80 1 x # 4A
Hand switch 1 x # 5
#1A
10 x M6 x 20
black
#1B
10 x M6 x 20
black
# 4A # 3
# 2
2 + 2St. M8 x 30 cylinder head
# 5
2 x Ø 4,0 x 35 mm
2 x Cable clip

Slide
Assembly
8
2) Schematic overview table (expansion version)
→ without cable net, with power box, with modesty panel height 75mm
Lifting column 1 x # 1A
Lifting column with pre-mounted cable duct 1 x # 1B
Cross frame 1 x # 2
Table top with pre-mounted
frames, control unit, cabling 1 x # 3
Power box with power strip 1 x # 4B
Hand switch 1 x # 5
Modesty panel (only 75 mm allowed) 1 x # 6
#1A
10 x M6 x 20
black
#6
5 x M6 x 20 +
5 x Washer 8 mm
#1B
10 x M6 x 20
black
# 4B # 3
# 2
2 + 2St. M8 x 30 cylinder head
# 5
2 x Ø 4,0 x 35 mm
2 x Cable clip

Slide
Assembly
9
3) Assembly of table frame
Check on which side of the table the cable entry should be. Position the lifting column with the pre-mounted cable
guide there. Do not disassemble the cable guide ( clamps, cable covers, guide)!
Prepare both leg sides with the „nose“ of the screw-on plates facing the center of the table. Remove the transport
lock, do NOT twist the UPPER PART. If the UPPER PART is twisted (recognizable by different heights), turn the
UPPER PART back to delivery height. Both table legs must have the same height at the beginning!
Mount the frame (#2) to the two lifting columns (#1A and #1B) one after another.
To do this, place the cross frame on the adapter of the lifting column.
Bolt through pressure lug and mandrel adapter from below with 2 x 2 pieces of M8 x 30 cylinder head.
Max. tightening torque 20 Nm.
All parts must be screwed tightly, CHECK PARALLELITY OF LIFTING COLUMNS!
#1A
#1B
# 2
2 + 2St. M8 x 30 cylinder head

4) Convert cable routing „RIGHT“ (= as supplied) to „LEFT
A. The cable guide is pre-mounted „RIGHT“ (for the manual switch) at the factory.
For cable management „LEFT“, you have first assembled the leg with the cable management on the left side.
IMPORTANT: change the metal bracket with strain relief from „R“ (orange arrow) to „L“ (green arrow).
Do not dismantle the strain relief (clamp)!
B. Mains connection cables in the shearing / clamping area between moving parts are not allowed!
Never lead the cable across the strut of the table frame!
Slide
Assembly
10
R = as delivered!
L = Convert

Slide
Assembly
11
5) Assembly cable covers correctly
For cable cover on the left: Change mounting position, see illustration.
- Unscrew mounting bracket with ball-head hex from scope of delivery
- Change side
- Screw on untwisted (2 pieces M5 x10 with spring washer) as loose loop =as supplied.
- Additional cables can be inserted in the hose (zipper, do not overfill)
- Check function and stroke, do not twist / squeeze cable)
Metal bracket with strain relief for mains supply cable:
„R“ for cable guide „RIGHT“ (= orange arrow, delivery condition)
„L“ for cable routing „LEFT“ (= green arrow, CONVERSION !)
6) Assembly of hand switch
Screw the switch onto the pre-drilled position at the front / on the right with 2 wood screws Ø 4.0 x 30 mm from
below. Hand switch must fit tightly to table top for correct function.
Place the cable in the groove in the tabletop and fix at the provided points. Do not tighten the cable but guide it
loosely. The function of the hand switch is otherwise impaired.

7) Assembly of table top / frame
Do not clamp or squeeze the cable of the device when placing the table top.
Place the table top on the table frame from above. The „noses“ of the screw-on plates engage between the
lengthwise frames (blue arrow). The position of the screw-on plates is defined by the lengthwise frames.
Both lifting columns must be parallel - measure or check!
Screw the table top to the table frame from below (M6 x 20 flat head, black) at all screw fixing points.
The cellular rubber washers on the top absorb vibrations.
8) Cabling
Note: Before the next activity, the mains plug must be disconnected!
When all components are internally connected, the table can be connected / plugged to the electrical
supply. Open the cable net by removing the tensioning loops.
Slide
Assembly
12
Main plug
Hand switch
Stain relief
Cable

Slide
Assembly
13
Connect the left / right motor cable from the columns to the relevant connection cable to the control.
The plug connection must engage firmly.
Always lead all cables through the Velcro cable holders on the left or right of the table into the cable network or to
the control unit:
Fix the cables in the cable holder by passing the strap through the free duct in the base. Tighten the loop firmly
and velcro the fastener.
9) Cabling at the table without additional modules
In tables without further installations, connect the mains connection cable (1) with the connection cable (2) to the
control. Secure the plug-in connection between the cables (1/2) with the enclosed safety clips.
(1)
(2)

10) Cabling at the table with power box
In tables with an additional power box, connect the mains connection cable (1) to the power strip, and the power
strip to the connection cable (2) to the control unit. All plug connections must engage.
11) Cabling at the table with distributor / multiple modules
In tables with central distributor (RENZ article #0Z91 1005), connect the network connection cable (1) to the
distributor box; this to the connection cable (2) to the control. All plug connections must engage.
Additional equipment such as Evoline Circle 80 or table top modules with electrical strips are also connected to
the distributor or data cables.
Slide
Assembly
14
(1)
(1)
(2)
(2)

Slide
Assembly
15
12) Information on power cable
Use only the supplied 3-pin power supply cable or mains connection cable!
The mains connection cable is secured by a pre-mounted strain relief on the upper mounting bracket. The strain
relief must not be changed or removed.
If the power supply cable of this device is damaged, it must be replaced by the manufacturer or its customer
service or a similarly qualified person to avoid hazards.
13) Close cable net
Using the loops, hang the cable net on the round knobs of the crossbars.
The transparent cord stoppers regulate the size of the hanging loops. The red cord stopper can be used to adjust
the net wider or tighter.
14) Assembly of the modesty panel
The modesty panel on the electrically height-adjustable table is mounted with screws M6x20 flat head black and
spacer rings on the M6 sleeves provided under the tabletop.
Only panels with a height of 75mm are permitted on the electrically height-adjustable table (risk of collision with
containers in the case of higher panels).
In addition, the matching panels are coded via the screw holes.
If the hole pattern does not match, the component must not be used.

14) Manual switch = toggle switch
The control is operated via a toggle switch. Become familiar with the operation of the table (item 12) before
putting it into operation. Make sure that you do not press any of the function keys (see picture below) by mistake.
1. Push and hold the toggle switch up to move the table up.
2. Push and hold the toggle switch down to move the table down.
3. Let the toggle switch go when you have reached your desired position.
The hand switch has three additional operating keys in addition to the toggle function:
12. Installation
Commissioning includes all activities required to adjust the height of an electrically height-adjustable sitting/
standing table using the motor control.
Do not plug in the power supply cable/mains cable until all other electrical components are connected!
Check whether the mains voltage corresponds to the type plate of your control.
1) Installation / Initialization / (RESET)
a.) Initialization is necessary for commissioning. The system will be initialized by pressing the „down key“ (hand
switch). The table stops moving downwards initially at 79 cm table height (safety area).
Move down to 74 cm lowest table height by pressing the down key again!
b.) Keep the key pressed until the drives have reached the lower end position.
c.) When all drives stopped in the lowest end position, release button and wait 2 to 3 seconds.
d.) Press the key down again for 6 to 8 seconds + hold.
e.) After that, the initialization is completed. The system is lowered and lifted again during initialization.
Do not release the down key under any circumstances during initialization.
f.) If the key is released too early, the initialization is interrupted and must be restarted.
In case of an aborted initialization no upward movement of the system is possible.
g.) If a safety stop has been implemented, the system must be moved to the lowest end position before an
initialization can be started.
h.) Note: The first two times the system is moved to the upper end position, it automatically retracts by
approx. 3 mm.
Slide
Assembly / Installation
16

Slide
Commissioning
17
2) Setting desk height limits upper / lower
If the table cannot be operated in its entire travel range because, for example, there is a collision with a shelf
above or a container below, you can:
- set an upper limit („shelf stop“)
- set a lower limit („container stop“)
Set an upper limit
Set the table to the maximum allowed height:
1. Press and simultaneously the hand switch (toggle switch) upwards until the light flashes.
2. Release and hand switch (toggle switch).
Set lower limit
Set the table to the minimum permitted height.
1. Press and simultaneously the hand switch (toggle switch) down until the light flashes.
2. Release and hand switch (toggle switch).
3) Saving / erasing favourite positions
Favorite positions are freely adjustable positions at the desired table height. If you have found a suitable table
height for yourself, this can be saved.
Saving Favorite Positions
Adjust the desk to a preferred height.
1. Press the button for two seconds.
A. The light bar flashes white twice = the position is executed.
B. Static white light bar = position saved.
If the user adjusts the desk to a different position and saves this position, he will overwrite the favorite position
that is closest to the current position.
Delete favorite positions
By pressing the button for 8 seconds, will delete all stored positions.
C. The LED will flash red to indicate when the process is complete.
4) Driving to favourite positions
After saving the favorite positions, you can move to them with the toggle switch as follows:
1. Press and hold - when a saved position has been reached, the table stops.
2. Release the hand switch within one second.
When the table stops at a saved position, the user can:
3. Hold down the hand switch for one second
4. Release the hand switch and press it again.
The table moves past the saved position in the direction in which it is pressed.
5) Reminder
The reminder LED is located in the lower left corner of the hand switch.
1. for sitting in the selected interval: LED GREEN pulses quietly over def. period.
2. when the sitting interval has ended, a pulsating orange follows, then changes to static orange to indicate,
that the user should adjust the desk to the standing height.
The Reminder will restart automically when the desk is moved down to sitting height.

Reminder intervals
You will find a „reminder button“ marked with on the left-hand side.
Here you can set how often you will receive a reminder. The LED lights up in three different intensities.
- Interval 1 = reminder after 55 minutes sitting
- Interval 2 = reminder after 50 minutes sitting
- Interval 3 = reminder after 45 minutes sitting
Setting the reminder interval:
1. Press the button to set the interval.
2. Switch through the intervals by pressing the button.
3. If the LED is off, the reminder is deactivated.
Reset the reminder:
Press the icon for 8 seconds to reset the reminder to the default values.
The LED flashes red when the reminder has been reset.
6) Connecting Bluetooth® / LINAK - Desk Control ™
In addition to the table system, the software (APP) LINAK - DESK CONTROL ™ is optionally available.
It offers various comfort functions and allows the readout of error codes. It is recommended to install
the app before pairing with the device. You can find the free app on iTunes, in the Apple App Store,
Google Play Store and Microsoft Store.
Press the button on the on the manual switch for 2 seconds to activate the pairing mode. The LED flashes blue
when the desk panel is in pairing mode. Follow the instructions on your mobile phone, tablet or similar device.
Disclaimer:
The mentioned Desk Control ™ APP / software is a complementary offer of LINAK, the manufacturer
of our lifting system. Wilhelm RENZ GmbH + Co. KG is not the supplier / developer and in case of damage
neither responsible nor liable for possible malfunctions of software and device.
Slide
Commissioning
18
Download the app
The apps are called „Desk Control ™“ and have the following
App logo in iTunes and the Apple App Store, Google Play Store
and Microsoft Store.
Download the app for iOS
Step 1. Please log in to the App Store with your iPhone or iPad.
Step 2. Enter „Desk Control“ in the search box.
Step 3. Select the „Desk Control ™“ app.
Step 4. Click „Install“ to download the app to your device.
You can also scan this QR code
to go to the Apple App Store
Download the app for Windows
Step 1. Click the Windows icon on your computer and go to the
Microsoft Store.
Step 2. Enter „Desk Control“ in the search box.
Step 3. Select the „Desk Control ™“ application.
Step 4. Click „Download“ to download the application to your
computer.
Download the app for Android
Step 1. Please log in to the Google Play Store with your Andriod
device.
Step 2. Enter „Desk Control“ in the search box.
Step 3. Select the „Desk Control ™“ app.
Step 4. Click „Install“ to download the app to your device.
You can also scan this QR code
to go to the Google Play Store.

7) Factory reset of manual switch
Press and hold the and keys for eight seconds to reset to factory settings.
The LED/light bar will flash red three times to indicate that the reset is complete.
When a factory reset is performed, only the settings that were changed directly on the DPG or in the app by the
end user are reset.
8) Automatic operation not allowed
The height-adjustable desk RENZ „SLIDE“ may only be adjusted manually with the attached hand switch
(in „ tip - mode“). Any remote control, height adjustment or time control with the help of an app / software on
smartphone, tablet, PC or other devices is N O T permitted !
13. Technical data
General / Table frame with 2 drivers (built-in columns o. side panels) with COMPACT-e-2
Slide
Commissioning / Technical data
19
Supply voltage
Power consumption in standby
P In, max
Ambient operating temperature
Permissible relative humidity (for operation + storage)
Storage and transportation temperature
Air pressure
Max. Duty cycle
Nominal lifting speed of the drive columns
(decreases under load)
Max. Load
Max. stroke length
+ 5 to + 40° C
100 - 240 V A.C m / 50 - 60 HZ
0.1 W
450W
20 to 80% at 30° C
-10° C to + 50° C
700 to 1060 HPA
10% (~ 6 minutes per hour or
2 minutes of continuous operation at
full load)
38 mm/s
500 N (≈ 50 kg)
400mm (740 to 1140mm table height)

14. Environmentally friendly disposal
Your product is designed for durability and sustainability. When disposing of this product and its packaging,
please always observe your country-specific regulations and dispose of the product in an environmentally friendly
manner or recycle it.
The height-adjustable table can be dismantled in reverse order using these assembly instructions.
The following applies to all work on the table:
•Stopthesit-standtableandrelievethetableofweight
•Switchoffthepowersupplyandunplugthepowercord
15. Ergonomics
Always adjust the table height to your current working position. When working on a computer screen, make sure
that the top line of the screen is not above your horizontal viewing axis. A favorable posture is achieved when the
viewing axis is tilted downward at an angle of 35° from the horizontal. Screen top. The screen surface and viewing
axis should form a right angle.
The working height should be at about elbow height when sitting or standing with the arms hanging loosely.
For further information, please refer to the guidelines of the German Employer‘s Liability Insurance Association
(BG) for the design of office and VDU workplaces in Germany, and to the respective country-specific requirements
f or use outside Germany.
Slide
Environmentally friendly disposal / Ergonomics
20
This manual suits for next models
5
Table of contents
Other Renz Indoor Furnishing manuals
Popular Indoor Furnishing manuals by other brands

YitaHome
YitaHome FTLFCT-0026 quick start guide

Argos
Argos Kensington 424/7429 Assembly instructions

Amart Furniture
Amart Furniture CLOUDS 58422 Assembly instruction

SARAH ELLISON
SARAH ELLISON MUSE OUTDOOR ARMLESS MODULE Assembly instructions

Naterial
Naterial LYCO STEEL 3276007277517 Assembly, Use, Maintenance Manual

World Market
World Market VIVIAN CHAIR 556233 Assembly instructions