manuals.online logo
Brands
  1. Home
  2. •
  3. Brands
  4. •
  5. REVELL
  6. •
  7. Toy
  8. •
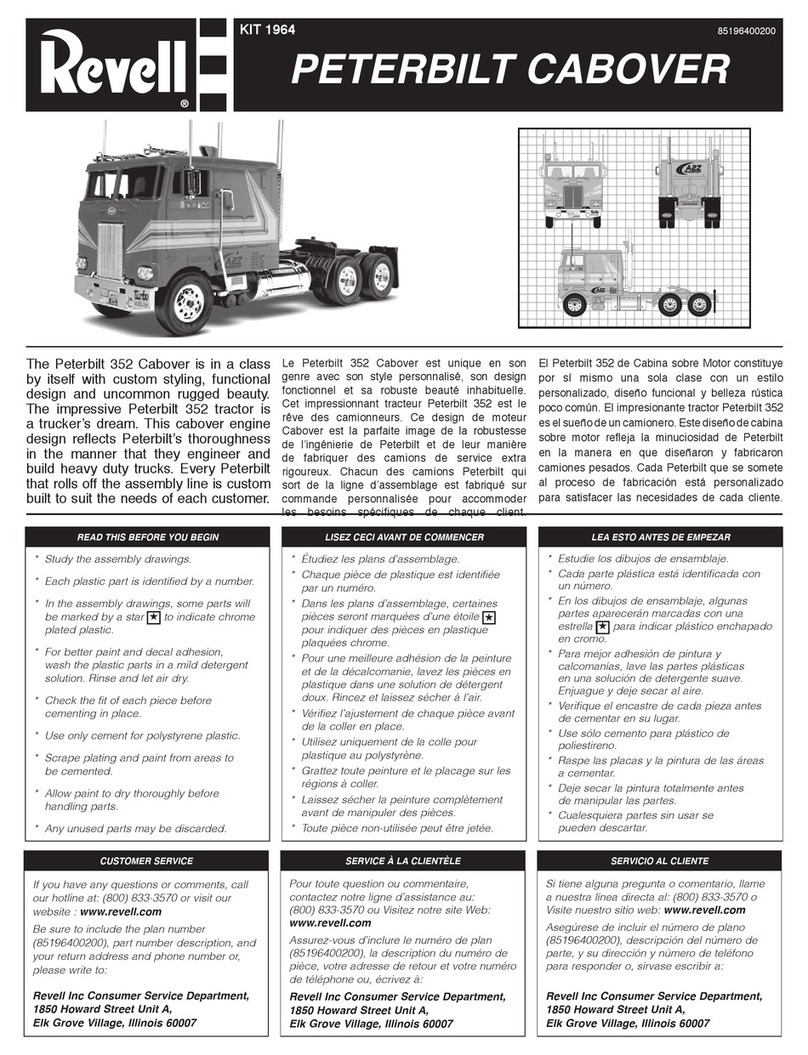
  9. REVELL FERRARI 360 MODENA SPIDER User manual

REVELL FERRARI 360 MODENA SPIDER User manual

18, 21 17, 21
8 11 8
8 11 8
6
6
3
15 16
14
KIT 2365 85236510200
FERRARI 360 MODENA SPIDER
Lessons learned on the race track provided the motivation
for the stunning Ferrari 360 Spider. Racing inspired
features include twin integral rollbars behind the seats and
a special air dam designed to increase cooling airflow. The
360 Spider corners on 18 inch diameter high performance
Pirelli radial tires same as those used on the racing version.
The driver has a choice of a six-speed manual gearbox, or
the racing derived F-1 transmission, which has a steering
wheel mounted paddle to conveniently change gears
The Ferrari 360 spider tested at just over four seconds
0 to 60 mph, just under a thirteen second quarter
mile, and a top speed of almost two hundred miles per
hour. With its huge Brembo four wheel disc brakes, it
is also one of the shortest stopping cars ever driven.
Les leçons apprises sur les pistes de course ont conféré
la motivation de cette magnifique Ferrari 360 Spider. Les
caractéristiques inspirées de la course comprennent des
arceaux de sécurité doubles intégrés derrière les sièges
et une jupe avant spéciale conçue pour augmenter le
débit d’air de refroidissement. La 360 Spider est livrée sur
des pneus radiaux de 18 po de haute performance Pirelli
semblables à ceux utilisés dans la version de course. Le
pilote choisit entre une transmission manuelle à six vitesses
et une transmission issue de la Formule 1, dont le volant
est muni de manettes pour les changements de vitesse.
La Ferrari 360 Spider a réussi le test de 0 à 100 km/h
en à peine plus de 4 secondes, tout juste moins de 13
secondes au quart de mile et une vitesse de pointe de
près de 322 km/h (200 mi/h). Avec ses énormes freins
à disque Brembo, elle est aussi l’une des autos offrant
la distance de freinage la plus courte jamais conduite.
Las lecciones aprendidas en la pista proporcionaron la
motivación para el impresionante Ferrari 360 Spider.
Características inspiradas en las carreras incluyen dos
barras antivuelco integrales detrás de los asientos y una
toma de aire especialmente diseñada para aumentar
el flujo de aire de refrigeración. El 360 Spider posee
neumáticos radiales Pirelli de alto rendimiento de 18
pulgadas de diámetro, iguales a los utilizados en la versión
de carreras. El conductor tiene la opción de una caja de
cambios manual de seis velocidades, o la transmisión
de carreras de la F-1, la cual tiene una paleta en el
volante para cambiar convenientemente las velocidades.
El Ferrari 360 Spider se probó a poco más de cuatro
segundos de 0 a 60 mph, un poco menos de una cuarta
de milla en trece segundos, y una velocidad máxima
de casi 200 millas por hora. Con sus enormes frenos
de disco Brembo de cuatro ruedas, es también uno
de los autos de parada más corta jamás conducidos.
READ THIS BEFORE YOU BEGIN
* Study the assembly drawings.
* Each plastic part is identified by a number.
* In the assembly drawings, some parts will
be marked by a star ★to indicate chrome
plated plastic.
* For better paint and decal adhesion,
wash the plastic parts in a mild detergent
solution. Rinse and let air dry.
* Check the fit of each piece before
cementing in place.
* Use only cement for polystyrene plastic.
* Scrape plating and paint from areas to
be cemented.
* Allow paint to dry thoroughly before
handling parts.
* Any unused parts may be discarded.
LISEZ CECI AVANT DE COMMENCER
* Étudiez les plans d’assemblage.
* Chaque pièce de plastique est identifiée
par un numéro.
* Dans les plans d’assemblage, certaines
pièces seront marquées d’une étoile ★
pour indiquer des pièces en plastique
plaquées chrome.
* Pour une meilleure adhésion de la peinture
et de la décalcomanie, lavez les pièces en
plastique dans une solution de détergent
doux. Rincez et laissez sécher à l’air.
* Vérifiez l’ajustement de chaque pièce avant
de la coller en place.
* Utilisez uniquement de la colle pour
plastique au polystyrène.
* Grattez toute peinture et le placage sur les
régions à coller.
* Laissez sécher la peinture complètement
avant de manipuler des pièces.
* Toute pièce non-utilisée peut être jetée.
LEA ESTO ANTES DE EMPEZAR
* Estudie los dibujos de ensamblaje.
* Cada parte plástica está identificada con
un número.
* En los dibujos de ensamblaje, algunas
partes aparecerán marcadas con una
estrella ★para indicar plástico enchapado
en cromo.
* Para mejor adhesión de pintura y
calcomanías, lave las partes plásticas
en una solución de detergente suave.
Enjuague y deje secar al aire.
* Verifique el encastre de cada pieza antes
de cementar en su lugar.
* Use sólo cemento para plástico de
poliestireno.
* Raspe las placas y la pintura de las áreas
a cementar.
* Deje secar la pintura totalmente antes
de manipular las partes.
* Cualesquiera partes sin usar se
pueden descartar.
CUSTOMER SERVICE
If you have any questions or comments, call
our hotline at: (800) 833-3570 or visit our
website : www.revell.com
Be sure to include the plan number
(85236510200), part number description, and
your return address and phone number or,
please write to:
Revell Inc Consumer Service Department,
1850 Howard Street Unit A,
Elk Grove Village, Illinois 60007
SERVICE À LA CLIENTÈLE
Pour toute question ou commentaire,
contactez notre ligne d’assistance au:
(800) 833-3570 ou Visitez notre site Web:
www.revell.com
Assurez-vous d’inclure le numéro de plan
(85236510200), la description du numéro de
pièce, votre adresse de retour et votre numéro
de téléphone ou, écrivez à:
Revell Inc Consumer Service Department,
1850 Howard Street Unit A,
Elk Grove Village, Illinois 60007
SERVICIO AL CLIENTE
Si tiene alguna pregunta o comentario, llame
a nuestra línea directa al: (800) 833-3570 o
Visite nuestro sitio web: www.revell.com
Asegúrese de incluir el número de plano
(85236510200), descripción del número de
parte, y su dirección y número de teléfono
para responder o, sírvase escribir a:
Revell Inc Consumer Service Department,
1850 Howard Street Unit A,
Elk Grove Village, Illinois 60007
Kit 2365 - Page 12 Revell Inc Elk Grove Village, IL. Copyright © 2011. All rights reserved.
11
NOTE: DO NOT DIP DECAL # 17, 18, 21 IN WATER. CAREFULLY CUT OUT AND USE WHITE GLUE TO ATTACH.
REMARQUE: NE PAS IMMERGER DANS L’EAU LES DÉCALCOMANIES # 17, 18 ET 21. DÉCOUPER SOIGNEUSEMENT ET
UTILISER DE LA COLLE BLANCHE POUR FIXER.
NOTA: NO SUMERJA LAS CALCOMANÍAS NO. 17, 18, 21 EN AGUA. RECORTE CUIDADOSAMENTE Y UTILICE COLA
BLANCA PARA SUJETAR.
MESH SCREEN
DECAL APPLICATION INSTRUCTIONS
1. Cut desired decal from sheet.
2. Dip decal in water for a few seconds.
3. Place wet decal on paper towel.
4. Wait until decal is movable on paper backing.
5. Place decal in position on model, face up and
slide backing away.
6. Press out air bubbles with a soft damp cloth.
7. Milkiness that may appear is for better decal
adhesion and will dry clear. Wipe away any
excess adhesive.
8. Do not touch decal until fully dry.
9. Allow the decals 48 hours to dry before
applying clear coat.
10. Decals are compatible with setting solutions
or solvents.
INSTRUCTIONS POUR L’APPLICATION DE DÉCALCOMANIE
1. Découpez la décalcomanie désirée sur
la feuille.
2. Trempez la décalcomanie durant quelques
secondes dans l’eau.
3. Placez la décalcomanie sur une serviette de
papier.
4. Attendez jusqu’à ce que la décalcomanie
puisse être retirée de l’endos en papier.
5. Placez la décalcomanie en position sur votre
modèle, face vers le haut, et retirez l’endos.
6. Pressez pour évacuer les bulles d’air avec un
chiffon doux humide.
7. La formation d’un voile blanchâtre qui pourrait
apparaître sert à la meilleure adhésion de la
décalcomanie et deviendra claire une fois
séchée. Nettoyez tout excès d’adhésif.
8. Ne touchez pas la décalcomanie tant qu’elle
ne sera pas entièrement séchée.
9. Laissez sécher la décalcomanie durant
48 heures avant d’appliquer un enduit
protecteur.
10. Les décalcomanies sont compatibles avec
les solutions de séchage et les solvants.
INSTRUCCIONES DE APLICACIÓN DE CALCOMANÍAS
1. Corte la calcomanía deseada de la lámina.
2. Sumerja la calcomanía en agua por unos
segundos.
3. Coloque la calcomanía húmeda sobre una
toalla de papel.
4. Espere hasta que la calcomanía se mueva en
la lámina posterior de papel.
5. Coloque la calcomanía en posición sobre el
modelo, con la cara hacia arriba y deslice la
lámina posterior hasta quitarlo.
6. Presione para quitar las burbujas de aire con
un trapo suave húmedo.
7. La lechosidad que puede aparecer es para
una mejor adhesión de la calcomanía y se
secará completamente. Limpie cualquier
exceso de adhesivo.
8. No toque la calcomanía hasta que esté
totalmente seca.
9. Deje secar las calcomanías 48 horas antes
de aplicar "clear coat".
10. Las calcomanías son compatibles con las
soluciones de fijación o los solventes.
PAINT GUIDE
This paint guide is provided to complete this
kit as shown on the box.
GUIDE DE PEINTURE
Ce guide de peinture est fourni pour compléter
cet ensemble tel qu’indiqué sur l’emballage.
GUÍA DE PINTURA
Esta guía de pintura se suministra para
completar este equipo tal como se muestra
en la caja.
A
Aluminum Aluminium Aluminio
B
Flat Black Noir mat Negro mate
C
Gloss Black Noir brillant Negro brillante
D
Gloss Red Rouge brillant Rojo brillante
E
Gunmetal Bronze Gris plomo
F
Light Gray Gris clair Gris claro
G
Semi Gloss Black Noir satiné Negro semibrillante
H
Silver Argent Plata
I
Transparent Red Rouge transparent Rojo transparente
J
Turn Signal Amber Feu clignotant de direction ambre Luz de giro ámbar
Body Color Couleur de carrosserie Color de carrocería
* STICKER DECAL
* DÉCALCOMANIE AUTOCOLLANTE
* CALCOMANÍA AUTOADHESIVA
* TRIM OFF
* DÉCOUPEZ
* RECORTE
* HEATED SCREWDRIVER END
* POINTE CHAUFFÉE DE TOURNEVIS
* EXTREMO DE DESTORNILLADOR CALENTADO
* OPEN HOLE
* LAISSEZ SÉCHER LES PIÈCES
* ABRA AGUJERO
* WEIGHT
* POIDS
* PESO
* REMOVE TAPE
* RUBAN AMOVIBLE
* CINTA DEMONTABLE
* RUBBER BAND TOGETHER
* SERRER ENSEMBLE AVEC UNE BANDE ÉLASTIQUE
* UNA CON BANDA ELÁSTICA
* DECAL
* DÉCALCOMANIE
* CALCOMANÍA
* CEMENT TOGETHER
* COLLER ENSEMBLE
* CEMENTAR Y UNIR
* REMOVE AND THROW AWAY
* RETIREZ ET JETER
* RETIRE Y DESCARTE
* DO NOT CEMENT
* NE PAS COLLER
* NO CEMENTAR
* REPEAT SEVERAL TIMES
* A RÉPÉTEZ PLUSIEURS FOIS
* REPITA VARIAS VECES
* ASSEMBLY CAUTION
* AVERTISSEMENT POUR L'ASSEMBLAGE
* PRECAUCIÓN DE ENSAMBLAJE
* REPEAT PROCEDURE
* RÉPÉTEZ LA PROCÉDURE
* REPITA EL PROCEDIMIENTO
* OPTIONAL PARTS
* PIÈCES OPTIONNELLES
* PARTES OPCIONALES
Kit 2365 - Page 2 Kit 2365 - Page 11
10
47
G
44
46
43
45
★
★
Kit 2365 - Page 10 Kit 2365 - Page 3
#PART NAME NOM DE PARTIE NOMBRE DE PARTE
1Chassis Pan Cuvette de châssis Soporte del chasis
2Taillight Feu arrière Luz trasera
3Rear Body Panel Panneau arrière de carrosserie Panel de carrocería trasera
4Engine Bottom Dessous du moteur Parte inferior del motor
5Front Axle Essieu avant Eje delantero
6Engine Top Dessus du moteur Parte superior del motor
7Exhaust Tip Bout d’échappement Punta del tubo de escape
8Engine Support Brace Entretoise du support de moteur Refuerzo del soporte del motor
9Lt. Front Spindle Tourillon avant gauche Husillo delantero izquierdo
10 Rt. Front Spindle Tourillon avant droit Husillo delantero derecho
11 Tie Rod Barre d'accouplement Barra de acoplamiento
12 Interior Intérieur Interior
13 Console Console Consola
14 Parking Brake Frein à main Freno de aparcamiento
15 Shifter Embrayage Cambiador de velocidades
16 Seat Siège Asiento
17 Lt. Door Panel Panneau de porte gauche Panel izquierdo de puerta
18 Rt. Door Panel Panneau de porte droite Panel derecho de puerta
19 Steering Column Colonne de direction Columna de dirección
20 Steering Wheel Volant Volante de dirección
21 Dashboard Tableau de bord Tablero
22 Intake Manifold Collecteur d’admission Colector de admisión
24 Body Carrosserie Cuerpo
9
36
CLEAR
30
CLEAR
32
G
31
G
35
H
20
19
G
G
2nd
1st
Kit 2365 - Page 4 Kit 2365 - Page 9
#PART NAME NOM DE PARTIE NOMBRE DE PARTE
25 Lt. Headlight Phare gauche Faro izquierdo
26 Rt. Headlight Phare droit Faro derecho
27 Front Body Panel Panneau de carrosserie avant Panel de carrocería delantero
28 Lt. Headlight Cover Couvercle de phare gauche Cubierta de faro reector izquierdo
29 Rt. Headlight Cover Couvercle de phare droit Cubierta de faro reector derecho
30 Windshield Pare-brise Parabrisas
31 Lt. Windshield Wiper Essuie-glace gauche Limpiaparabrisas izquierdo
35 Rear View Mirror Rétroviseur Espejo retrovisor trasero
36 Engine Cover Couvercle de moteur Cubierta del motor
37 Inner Wheel Roue intérieure Rueda interna
38 Disc Brake Frein à disque Freno de disco
39 Lt. Rear Brake Caliper Étrier de frein arrière gauche Mordaza de freno trasero izquierdo
39B Rt. Rear Brake Caliper Étrier de frein arrière droit Mordaza de freno trasero derecho
40 Outer Wheel Roue externe Rueda externa
41 Inner Wheel Roue intérieure Rueda interna
42 Front Brake Caliper Étrier de frein avant Pinza de freno delantero
43 Rt. Mirror Housing Châssis du miroir droit Carcasa del retrovisor derecho
44 Rt. Mirror Miroir droit Retrovisor derecho
45 Lt. Mirror Housing Châssis du miroir gauche Carcasa del retrovisor izquierdo
46 Lt. Mirror Miroir gauche Retrovisor izquierdo
47 Roll Bar Arceau de sécurité Barra antivuelco
-- Small Tire Petit pneu Neumático pequeño
-- Large Tire Pneu large Neumático grande
-- Mesh Screen Écran grillagé Pantalla metálica
8
29
CLEAR
26
CLEAR
25
CLEAR
28
CLEAR
G
G
NOTE: OPTIONAL SCREEN MESH. CAREFULLY CUT OUT ONE SHAPE AT A TIME USING THE 1:1
TEMPLATES SHOWN STEPS 8, 10. APPLY SCREEN WITH WHITE GLUE.
REMARQUE: FILET DE CAMOUFLAGE EN OPTION. DÉCOUPER SOIGNEUSEMENT UNE FORME À
LA FOIS EN UTILISANT LES GABARITS 1:1 MONTRÉS AUX ÉTAPES 8, ET 10. APPLIQUER LE FILET
AVEC DE LA COLLE BLANCHE.
NOTE: MALLA OPCIONAL. CORTE CUIDADOSAMENTE UNA FORMA A LA VEZ MEDIANTE EL USO
DE LAS PLANTILLAS 1:1 QUE SE MUESTRAN EN LOS PASOS 8, 10. APLIQUE LA MALLA CON COLA
BLANCA.
27
MESH SCREEN
2
2
1
3
3
21
3
2
1
4
H
6
A
5
G
1
B
37
G
42
E
42
E
39
E
39B
E
7
41
Kit 2365 - Page 8 Kit 2365 - Page 5
LARGE
TIRE
SMALL
TIRE
9 OR 10
9 OR 10
H
H
H
E
G
G
FH
E
H
F
B
J
J
D
D
D
D
FRONT
REAR
7 1
2
2
CLEAR I
2
CLEAR I
3
40 ★
A
40 ★
A
40 ★
A
38
H
38 ★
H
40 ★
A
★
★
★
Kit 2365 - Page 6 Kit 2365 - Page 7
3
4
5
6
10
G
9
G
14
G
18
G
17
G
12
G
16
G
8
E
19
G
22
F
22
21
G
SPRINGS
15
11
7
4
1
2
13
12
13
G
H
H
F
B
F
F
F
D
HGAG
A
G
F
B
A
B
NOTE: CAREFULLY CUT SIDE
WALLS ALONG OUTSIDE STEP
BEFORE ASSEMBLY. UPPER HALF
IS NOT REQUIRED.
REMARQUE: COUPER
SOIGNEUSEMENT LES
PAROIS LATÉRALES LE LONG
DE L’EXTÉRIEUR AVANT
L’ASSEMBLAGE. LA MOITIÉ
SUPÉRIEURE N’EST PAS REQUISE.
NOTA: CORTE CUIDADOSAMENTE
LAS PAREDES LATERALES POR
FUERA ANTES DE ENSAMBLAR.
LA MITAD SUPERIOR NO ES
NECESARIA.
13 ★
A
STEP
★
★
4
H
6
A
5
G
1
B
37
G
42
E
42
E
39
E
39B
E
7
41
Kit 2365 - Page 8 Kit 2365 - Page 5
LARGE
TIRE
SMALL
TIRE
9 OR 10
9 OR 10
H
H
H
E
G
G
FH
E
H
F
B
J
J
D
D
D
D
FRONT
REAR
7 1
2
2
CLEAR I
2
CLEAR I
3
40 ★
A
40 ★
A
40 ★
A
38
H
38 ★
H
40 ★
A
★
★
★
Kit 2365 - Page 4 Kit 2365 - Page 9
#PART NAME NOM DE PARTIE NOMBRE DE PARTE
25 Lt. Headlight Phare gauche Faro izquierdo
26 Rt. Headlight Phare droit Faro derecho
27 Front Body Panel Panneau de carrosserie avant Panel de carrocería delantero
28 Lt. Headlight Cover Couvercle de phare gauche Cubierta de faro reector izquierdo
29 Rt. Headlight Cover Couvercle de phare droit Cubierta de faro reector derecho
30 Windshield Pare-brise Parabrisas
31 Lt. Windshield Wiper Essuie-glace gauche Limpiaparabrisas izquierdo
35 Rear View Mirror Rétroviseur Espejo retrovisor trasero
36 Engine Cover Couvercle de moteur Cubierta del motor
37 Inner Wheel Roue intérieure Rueda interna
38 Disc Brake Frein à disque Freno de disco
39 Lt. Rear Brake Caliper Étrier de frein arrière gauche Mordaza de freno trasero izquierdo
39B Rt. Rear Brake Caliper Étrier de frein arrière droit Mordaza de freno trasero derecho
40 Outer Wheel Roue externe Rueda externa
41 Inner Wheel Roue intérieure Rueda interna
42 Front Brake Caliper Étrier de frein avant Pinza de freno delantero
43 Rt. Mirror Housing Châssis du miroir droit Carcasa del retrovisor derecho
44 Rt. Mirror Miroir droit Retrovisor derecho
45 Lt. Mirror Housing Châssis du miroir gauche Carcasa del retrovisor izquierdo
46 Lt. Mirror Miroir gauche Retrovisor izquierdo
47 Roll Bar Arceau de sécurité Barra antivuelco
-- Small Tire Petit pneu Neumático pequeño
-- Large Tire Pneu large Neumático grande
-- Mesh Screen Écran grillagé Pantalla metálica
8
29
CLEAR
26
CLEAR
25
CLEAR
28
CLEAR
G
G
NOTE: OPTIONAL SCREEN MESH. CAREFULLY CUT OUT ONE SHAPE AT A TIME USING THE 1:1
TEMPLATES SHOWN STEPS 8, 10. APPLY SCREEN WITH WHITE GLUE.
REMARQUE: FILET DE CAMOUFLAGE EN OPTION. DÉCOUPER SOIGNEUSEMENT UNE FORME À
LA FOIS EN UTILISANT LES GABARITS 1:1 MONTRÉS AUX ÉTAPES 8, ET 10. APPLIQUER LE FILET
AVEC DE LA COLLE BLANCHE.
NOTE: MALLA OPCIONAL. CORTE CUIDADOSAMENTE UNA FORMA A LA VEZ MEDIANTE EL USO
DE LAS PLANTILLAS 1:1 QUE SE MUESTRAN EN LOS PASOS 8, 10. APLIQUE LA MALLA CON COLA
BLANCA.
27
MESH SCREEN
2
2
1
3
3
21
3
2
1
Kit 2365 - Page 10 Kit 2365 - Page 3
#PART NAME NOM DE PARTIE NOMBRE DE PARTE
1Chassis Pan Cuvette de châssis Soporte del chasis
2Taillight Feu arrière Luz trasera
3Rear Body Panel Panneau arrière de carrosserie Panel de carrocería trasera
4Engine Bottom Dessous du moteur Parte inferior del motor
5Front Axle Essieu avant Eje delantero
6Engine Top Dessus du moteur Parte superior del motor
7Exhaust Tip Bout d’échappement Punta del tubo de escape
8Engine Support Brace Entretoise du support de moteur Refuerzo del soporte del motor
9Lt. Front Spindle Tourillon avant gauche Husillo delantero izquierdo
10 Rt. Front Spindle Tourillon avant droit Husillo delantero derecho
11 Tie Rod Barre d'accouplement Barra de acoplamiento
12 Interior Intérieur Interior
13 Console Console Consola
14 Parking Brake Frein à main Freno de aparcamiento
15 Shifter Embrayage Cambiador de velocidades
16 Seat Siège Asiento
17 Lt. Door Panel Panneau de porte gauche Panel izquierdo de puerta
18 Rt. Door Panel Panneau de porte droite Panel derecho de puerta
19 Steering Column Colonne de direction Columna de dirección
20 Steering Wheel Volant Volante de dirección
21 Dashboard Tableau de bord Tablero
22 Intake Manifold Collecteur d’admission Colector de admisión
24 Body Carrosserie Cuerpo
9
36
CLEAR
30
CLEAR
32
G
31
G
35
H
20
19
G
G
2nd
1st
MESH SCREEN
DECAL APPLICATION INSTRUCTIONS
1. Cut desired decal from sheet.
2. Dip decal in water for a few seconds.
3. Place wet decal on paper towel.
4. Wait until decal is movable on paper backing.
5. Place decal in position on model, face up and
slide backing away.
6. Press out air bubbles with a soft damp cloth.
7. Milkiness that may appear is for better decal
adhesion and will dry clear. Wipe away any
excess adhesive.
8. Do not touch decal until fully dry.
9. Allow the decals 48 hours to dry before
applying clear coat.
10. Decals are compatible with setting solutions
or solvents.
INSTRUCTIONS POUR L’APPLICATION DE DÉCALCOMANIE
1. Découpez la décalcomanie désirée sur
la feuille.
2. Trempez la décalcomanie durant quelques
secondes dans l’eau.
3. Placez la décalcomanie sur une serviette de
papier.
4. Attendez jusqu’à ce que la décalcomanie
puisse être retirée de l’endos en papier.
5. Placez la décalcomanie en position sur votre
modèle, face vers le haut, et retirez l’endos.
6. Pressez pour évacuer les bulles d’air avec un
chiffon doux humide.
7. La formation d’un voile blanchâtre qui pourrait
apparaître sert à la meilleure adhésion de la
décalcomanie et deviendra claire une fois
séchée. Nettoyez tout excès d’adhésif.
8. Ne touchez pas la décalcomanie tant qu’elle
ne sera pas entièrement séchée.
9. Laissez sécher la décalcomanie durant
48 heures avant d’appliquer un enduit
protecteur.
10. Les décalcomanies sont compatibles avec
les solutions de séchage et les solvants.
INSTRUCCIONES DE APLICACIÓN DE CALCOMANÍAS
1. Corte la calcomanía deseada de la lámina.
2. Sumerja la calcomanía en agua por unos
segundos.
3. Coloque la calcomanía húmeda sobre una
toalla de papel.
4. Espere hasta que la calcomanía se mueva en
la lámina posterior de papel.
5. Coloque la calcomanía en posición sobre el
modelo, con la cara hacia arriba y deslice la
lámina posterior hasta quitarlo.
6. Presione para quitar las burbujas de aire con
un trapo suave húmedo.
7. La lechosidad que puede aparecer es para
una mejor adhesión de la calcomanía y se
secará completamente. Limpie cualquier
exceso de adhesivo.
8. No toque la calcomanía hasta que esté
totalmente seca.
9. Deje secar las calcomanías 48 horas antes
de aplicar "clear coat".
10. Las calcomanías son compatibles con las
soluciones de fijación o los solventes.
PAINT GUIDE
This paint guide is provided to complete this
kit as shown on the box.
GUIDE DE PEINTURE
Ce guide de peinture est fourni pour compléter
cet ensemble tel qu’indiqué sur l’emballage.
GUÍA DE PINTURA
Esta guía de pintura se suministra para
completar este equipo tal como se muestra
en la caja.
A
Aluminum Aluminium Aluminio
B
Flat Black Noir mat Negro mate
C
Gloss Black Noir brillant Negro brillante
D
Gloss Red Rouge brillant Rojo brillante
E
Gunmetal Bronze Gris plomo
F
Light Gray Gris clair Gris claro
G
Semi Gloss Black Noir satiné Negro semibrillante
H
Silver Argent Plata
I
Transparent Red Rouge transparent Rojo transparente
J
Turn Signal Amber Feu clignotant de direction ambre Luz de giro ámbar
Body Color Couleur de carrosserie Color de carrocería
* STICKER DECAL
* DÉCALCOMANIE AUTOCOLLANTE
* CALCOMANÍA AUTOADHESIVA
* TRIM OFF
* DÉCOUPEZ
* RECORTE
* HEATED SCREWDRIVER END
* POINTE CHAUFFÉE DE TOURNEVIS
* EXTREMO DE DESTORNILLADOR CALENTADO
* OPEN HOLE
* LAISSEZ SÉCHER LES PIÈCES
* ABRA AGUJERO
* WEIGHT
* POIDS
* PESO
* REMOVE TAPE
* RUBAN AMOVIBLE
* CINTA DEMONTABLE
* RUBBER BAND TOGETHER
* SERRER ENSEMBLE AVEC UNE BANDE ÉLASTIQUE
* UNA CON BANDA ELÁSTICA
* DECAL
* DÉCALCOMANIE
* CALCOMANÍA
* CEMENT TOGETHER
* COLLER ENSEMBLE
* CEMENTAR Y UNIR
* REMOVE AND THROW AWAY
* RETIREZ ET JETER
* RETIRE Y DESCARTE
* DO NOT CEMENT
* NE PAS COLLER
* NO CEMENTAR
* REPEAT SEVERAL TIMES
* A RÉPÉTEZ PLUSIEURS FOIS
* REPITA VARIAS VECES
* ASSEMBLY CAUTION
* AVERTISSEMENT POUR L'ASSEMBLAGE
* PRECAUCIÓN DE ENSAMBLAJE
* REPEAT PROCEDURE
* RÉPÉTEZ LA PROCÉDURE
* REPITA EL PROCEDIMIENTO
* OPTIONAL PARTS
* PIÈCES OPTIONNELLES
* PARTES OPCIONALES
Kit 2365 - Page 2 Kit 2365 - Page 11
10
47
G
44
46
43
45
★
★
18, 21 17, 21
8 11 8
8 11 8
6
6
3
15 16
14
KIT 2365 85236510200
FERRARI 360 MODENA SPIDER
Lessons learned on the race track provided the motivation
for the stunning Ferrari 360 Spider. Racing inspired
features include twin integral rollbars behind the seats and
a special air dam designed to increase cooling airflow. The
360 Spider corners on 18 inch diameter high performance
Pirelli radial tires same as those used on the racing version.
The driver has a choice of a six-speed manual gearbox, or
the racing derived F-1 transmission, which has a steering
wheel mounted paddle to conveniently change gears
The Ferrari 360 spider tested at just over four seconds
0 to 60 mph, just under a thirteen second quarter
mile, and a top speed of almost two hundred miles per
hour. With its huge Brembo four wheel disc brakes, it
is also one of the shortest stopping cars ever driven.
Les leçons apprises sur les pistes de course ont conféré
la motivation de cette magnifique Ferrari 360 Spider. Les
caractéristiques inspirées de la course comprennent des
arceaux de sécurité doubles intégrés derrière les sièges
et une jupe avant spéciale conçue pour augmenter le
débit d’air de refroidissement. La 360 Spider est livrée sur
des pneus radiaux de 18 po de haute performance Pirelli
semblables à ceux utilisés dans la version de course. Le
pilote choisit entre une transmission manuelle à six vitesses
et une transmission issue de la Formule 1, dont le volant
est muni de manettes pour les changements de vitesse.
La Ferrari 360 Spider a réussi le test de 0 à 100 km/h
en à peine plus de 4 secondes, tout juste moins de 13
secondes au quart de mile et une vitesse de pointe de
près de 322 km/h (200 mi/h). Avec ses énormes freins
à disque Brembo, elle est aussi l’une des autos offrant
la distance de freinage la plus courte jamais conduite.
Las lecciones aprendidas en la pista proporcionaron la
motivación para el impresionante Ferrari 360 Spider.
Características inspiradas en las carreras incluyen dos
barras antivuelco integrales detrás de los asientos y una
toma de aire especialmente diseñada para aumentar
el flujo de aire de refrigeración. El 360 Spider posee
neumáticos radiales Pirelli de alto rendimiento de 18
pulgadas de diámetro, iguales a los utilizados en la versión
de carreras. El conductor tiene la opción de una caja de
cambios manual de seis velocidades, o la transmisión
de carreras de la F-1, la cual tiene una paleta en el
volante para cambiar convenientemente las velocidades.
El Ferrari 360 Spider se probó a poco más de cuatro
segundos de 0 a 60 mph, un poco menos de una cuarta
de milla en trece segundos, y una velocidad máxima
de casi 200 millas por hora. Con sus enormes frenos
de disco Brembo de cuatro ruedas, es también uno
de los autos de parada más corta jamás conducidos.
READ THIS BEFORE YOU BEGIN
* Study the assembly drawings.
* Each plastic part is identified by a number.
* In the assembly drawings, some parts will
be marked by a star ★to indicate chrome
plated plastic.
* For better paint and decal adhesion,
wash the plastic parts in a mild detergent
solution. Rinse and let air dry.
* Check the fit of each piece before
cementing in place.
* Use only cement for polystyrene plastic.
* Scrape plating and paint from areas to
be cemented.
* Allow paint to dry thoroughly before
handling parts.
* Any unused parts may be discarded.
LISEZ CECI AVANT DE COMMENCER
* Étudiez les plans d’assemblage.
* Chaque pièce de plastique est identifiée
par un numéro.
* Dans les plans d’assemblage, certaines
pièces seront marquées d’une étoile ★
pour indiquer des pièces en plastique
plaquées chrome.
* Pour une meilleure adhésion de la peinture
et de la décalcomanie, lavez les pièces en
plastique dans une solution de détergent
doux. Rincez et laissez sécher à l’air.
* Vérifiez l’ajustement de chaque pièce avant
de la coller en place.
* Utilisez uniquement de la colle pour
plastique au polystyrène.
* Grattez toute peinture et le placage sur les
régions à coller.
* Laissez sécher la peinture complètement
avant de manipuler des pièces.
* Toute pièce non-utilisée peut être jetée.
LEA ESTO ANTES DE EMPEZAR
* Estudie los dibujos de ensamblaje.
* Cada parte plástica está identificada con
un número.
* En los dibujos de ensamblaje, algunas
partes aparecerán marcadas con una
estrella ★para indicar plástico enchapado
en cromo.
* Para mejor adhesión de pintura y
calcomanías, lave las partes plásticas
en una solución de detergente suave.
Enjuague y deje secar al aire.
* Verifique el encastre de cada pieza antes
de cementar en su lugar.
* Use sólo cemento para plástico de
poliestireno.
* Raspe las placas y la pintura de las áreas
a cementar.
* Deje secar la pintura totalmente antes
de manipular las partes.
* Cualesquiera partes sin usar se
pueden descartar.
CUSTOMER SERVICE
If you have any questions or comments, call
our hotline at: (800) 833-3570 or visit our
website : www.revell.com
Be sure to include the plan number
(85236510200), part number description, and
your return address and phone number or,
please write to:
Revell Inc Consumer Service Department,
1850 Howard Street Unit A,
Elk Grove Village, Illinois 60007
SERVICE À LA CLIENTÈLE
Pour toute question ou commentaire,
contactez notre ligne d’assistance au:
(800) 833-3570 ou Visitez notre site Web:
www.revell.com
Assurez-vous d’inclure le numéro de plan
(85236510200), la description du numéro de
pièce, votre adresse de retour et votre numéro
de téléphone ou, écrivez à:
Revell Inc Consumer Service Department,
1850 Howard Street Unit A,
Elk Grove Village, Illinois 60007
SERVICIO AL CLIENTE
Si tiene alguna pregunta o comentario, llame
a nuestra línea directa al: (800) 833-3570 o
Visite nuestro sitio web: www.revell.com
Asegúrese de incluir el número de plano
(85236510200), descripción del número de
parte, y su dirección y número de teléfono
para responder o, sírvase escribir a:
Revell Inc Consumer Service Department,
1850 Howard Street Unit A,
Elk Grove Village, Illinois 60007
Kit 2365 - Page 12 Revell Inc Elk Grove Village, IL. Copyright © 2011. All rights reserved.
11
NOTE: DO NOT DIP DECAL # 17, 18, 21 IN WATER. CAREFULLY CUT OUT AND USE WHITE GLUE TO ATTACH.
REMARQUE: NE PAS IMMERGER DANS L’EAU LES DÉCALCOMANIES # 17, 18 ET 21. DÉCOUPER SOIGNEUSEMENT ET
UTILISER DE LA COLLE BLANCHE POUR FIXER.
NOTA: NO SUMERJA LAS CALCOMANÍAS NO. 17, 18, 21 EN AGUA. RECORTE CUIDADOSAMENTE Y UTILICE COLA
BLANCA PARA SUJETAR.

Other REVELL Toy manuals

REVELL KIt 1556 User manual

REVELL

REVELL KIt 1556 User manual

REVELL Harbour Tug Boat User manual

REVELL

REVELL Harbour Tug Boat User manual

REVELL KIT 5524 User manual

REVELL

REVELL KIT 5524 User manual

REVELL RAH-66 Comanche User manual

REVELL

REVELL RAH-66 Comanche User manual

REVELL 04546 User manual

REVELL

REVELL 04546 User manual

REVELL MAGIC GLOW User manual

REVELL

REVELL MAGIC GLOW User manual

REVELL M4 Sherman Tank (Hedgehog) User manual

REVELL

REVELL M4 Sherman Tank (Hedgehog) User manual

REVELL KIT 5480 User manual

REVELL

REVELL KIT 5480 User manual

REVELL 5512 User manual

REVELL

REVELL 5512 User manual

REVELL F/A-18E Super Hornet User manual

REVELL

REVELL F/A-18E Super Hornet User manual

REVELL 5256 User manual

REVELL

REVELL 5256 User manual

REVELL KIT 7856 User manual

REVELL

REVELL KIT 7856 User manual

REVELL JAPANESE A6M5 ZERO User manual

REVELL

REVELL JAPANESE A6M5 ZERO User manual

REVELL REXX User manual

REVELL

REVELL REXX User manual

REVELL 04839 User manual

REVELL

REVELL 04839 User manual

REVELL Eurocopter EC145 MEDSTAR/Police User manual

REVELL

REVELL Eurocopter EC145 MEDSTAR/Police User manual

REVELL KIT 5531 User manual

REVELL

REVELL KIT 5531 User manual

REVELL KIT 1365 User manual

REVELL

REVELL KIT 1365 User manual

REVELL KIT 5862 User manual

REVELL

REVELL KIT 5862 User manual

REVELL Control Power Bar 40300 User manual

REVELL

REVELL Control Power Bar 40300 User manual

REVELL Eurocopter EC135 User manual

REVELL

REVELL Eurocopter EC135 User manual

REVELL LEOPARD 1 A1A1-A1A4 User manual

REVELL

REVELL LEOPARD 1 A1A1-A1A4 User manual

REVELL Trilux AMG Mercedes C-Klasse DTM 2009 Ralf... User manual

REVELL

REVELL Trilux AMG Mercedes C-Klasse DTM 2009 Ralf... User manual

REVELL Norton Manx 500cc User manual

REVELL

REVELL Norton Manx 500cc User manual

Popular Toy manuals by other brands

MTHTrains RAILKING Hellgate Bridge instructions

MTHTrains

MTHTrains RAILKING Hellgate Bridge instructions

PARKZONE Vapor BNF instruction manual

PARKZONE

PARKZONE Vapor BNF instruction manual

Hasbro Playskool Heroes Transformers Rescue Bots Academy Electronic Hot... quick start guide

Hasbro

Hasbro Playskool Heroes Transformers Rescue Bots Academy Electronic Hot... quick start guide

Fisher-Price 78378 instructions

Fisher-Price

Fisher-Price 78378 instructions

Cranium Picture Studio instructions

Cranium

Cranium Picture Studio instructions

TobyRich SmartPlane quick start guide

TobyRich

TobyRich SmartPlane quick start guide

MTHTrains 20-65037 Maintenance instructions

MTHTrains

MTHTrains 20-65037 Maintenance instructions

Fisher-Price 71989 instructions

Fisher-Price

Fisher-Price 71989 instructions

SkyArtec MOSQUITO 3D PRO instruction manual

SkyArtec

SkyArtec MOSQUITO 3D PRO instruction manual

Tchibo 39202 Product information

Tchibo

Tchibo 39202 Product information

Traxxas Chaparral Villain IV 1508 Assembly manual

Traxxas

Traxxas Chaparral Villain IV 1508 Assembly manual

Fisher-Price C5843 Assembly

Fisher-Price

Fisher-Price C5843 Assembly

Kalt 20 Baron instruction manual

Kalt

Kalt 20 Baron instruction manual

Faller GUGLINGEN STATION manual

Faller

Faller GUGLINGEN STATION manual

Mega Bloks Collector Series instructions

Mega Bloks

Mega Bloks Collector Series instructions

bruder 02225 quick start guide

bruder

bruder 02225 quick start guide

Hasbro Brother Bear Singin' Koda 34904 instruction manual

Hasbro

Hasbro Brother Bear Singin' Koda 34904 instruction manual

The Learning Journey Techno Gears Off Road Racer instruction manual

The Learning Journey

The Learning Journey Techno Gears Off Road Racer instruction manual

manuals.online logo
manuals.online logoBrands
  • About & Mission
  • Contact us
  • Privacy Policy
  • Terms and Conditions

Copyright 2025 Manuals.Online. All Rights Reserved.