RGBlink Q16pro2022 User manual

Q16pro 2022
Quick Start
● Each module supports up to 8 layers
● Support 4K@60 inputs and outputs
● Each layer supports for overlying,crossing and roaming
● XPOSE visualization operation
● Dual OSD scrolling
● Genlock synchronization
● Support deinterlacing

© Xiamen RGBlink Science & Technology Co., Ltd.
1/28
Content
Overview......................................................................................................................................................................... 2
Hardware Orientation..................................................................................................................................................... 3
Front Panel.............................................................................................................................................................. 3
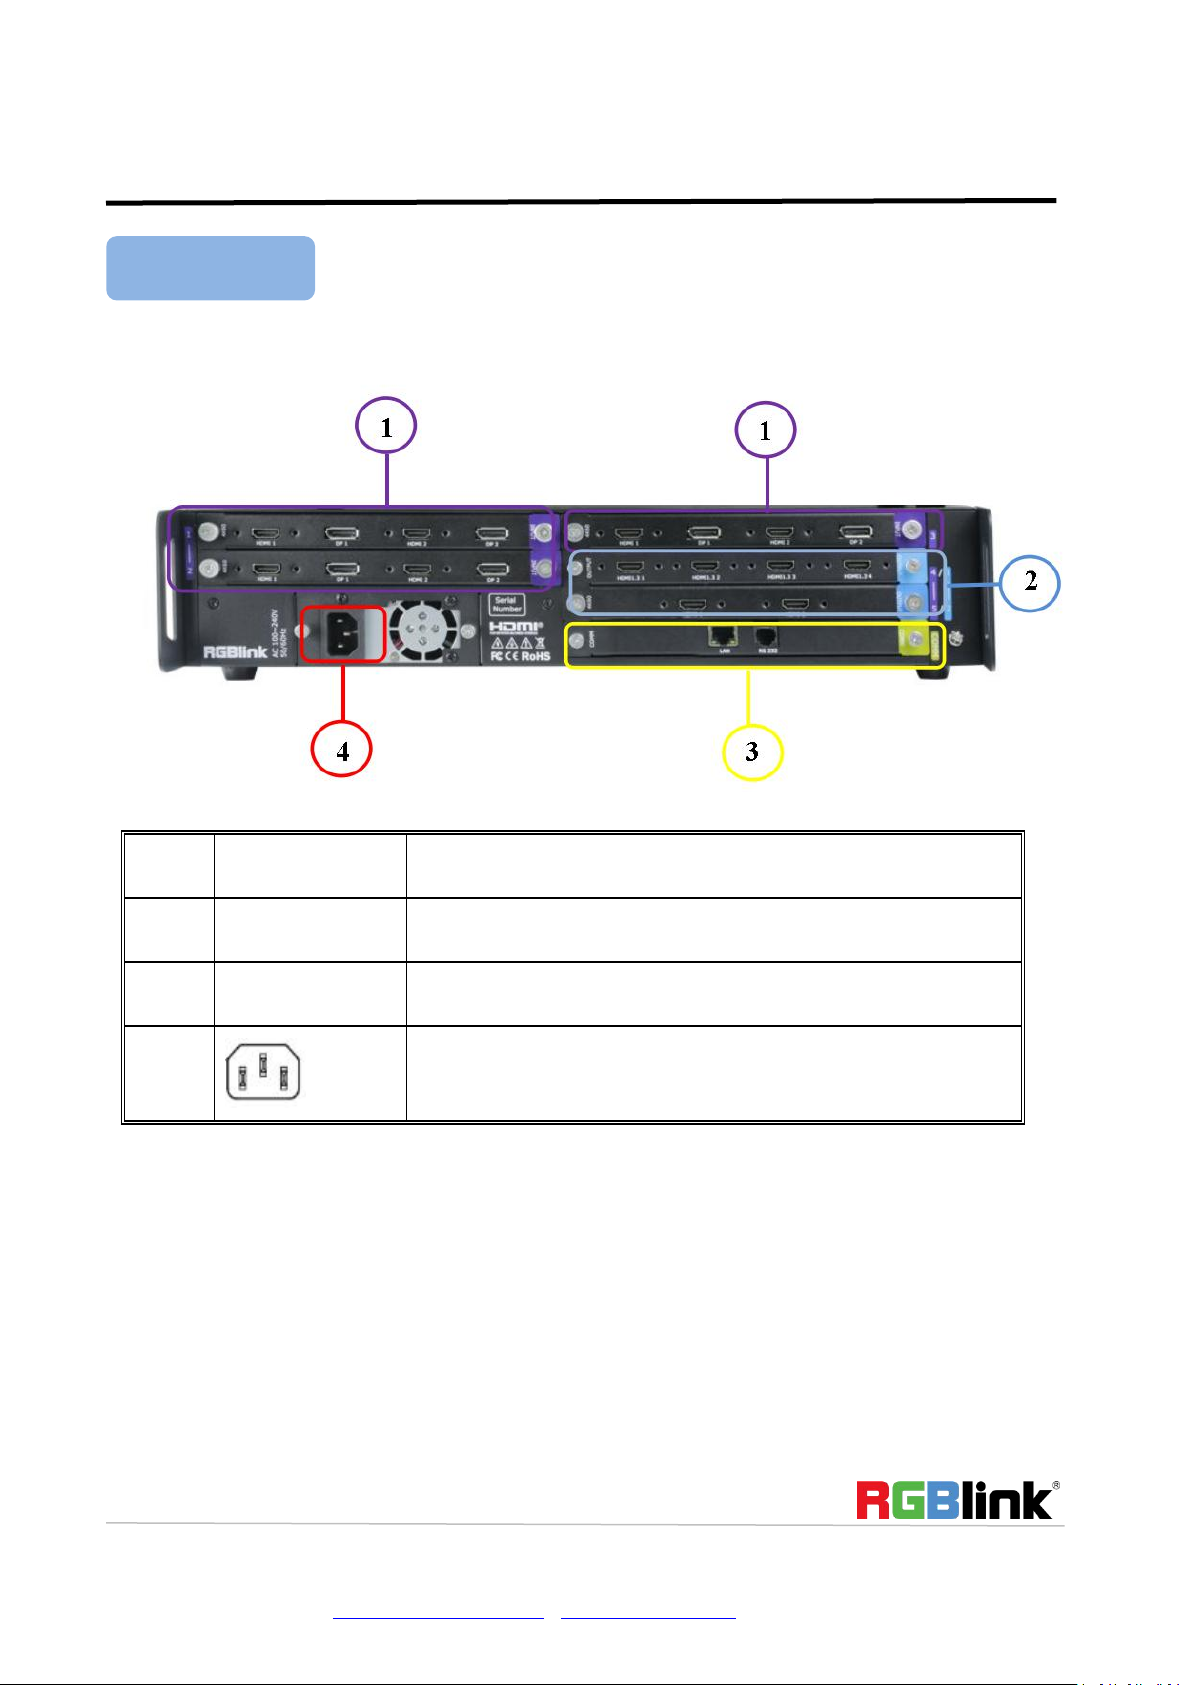
Rear Panel............................................................................................................................................................... 4
USE YOUR PRODUCT .............................................................................................................6
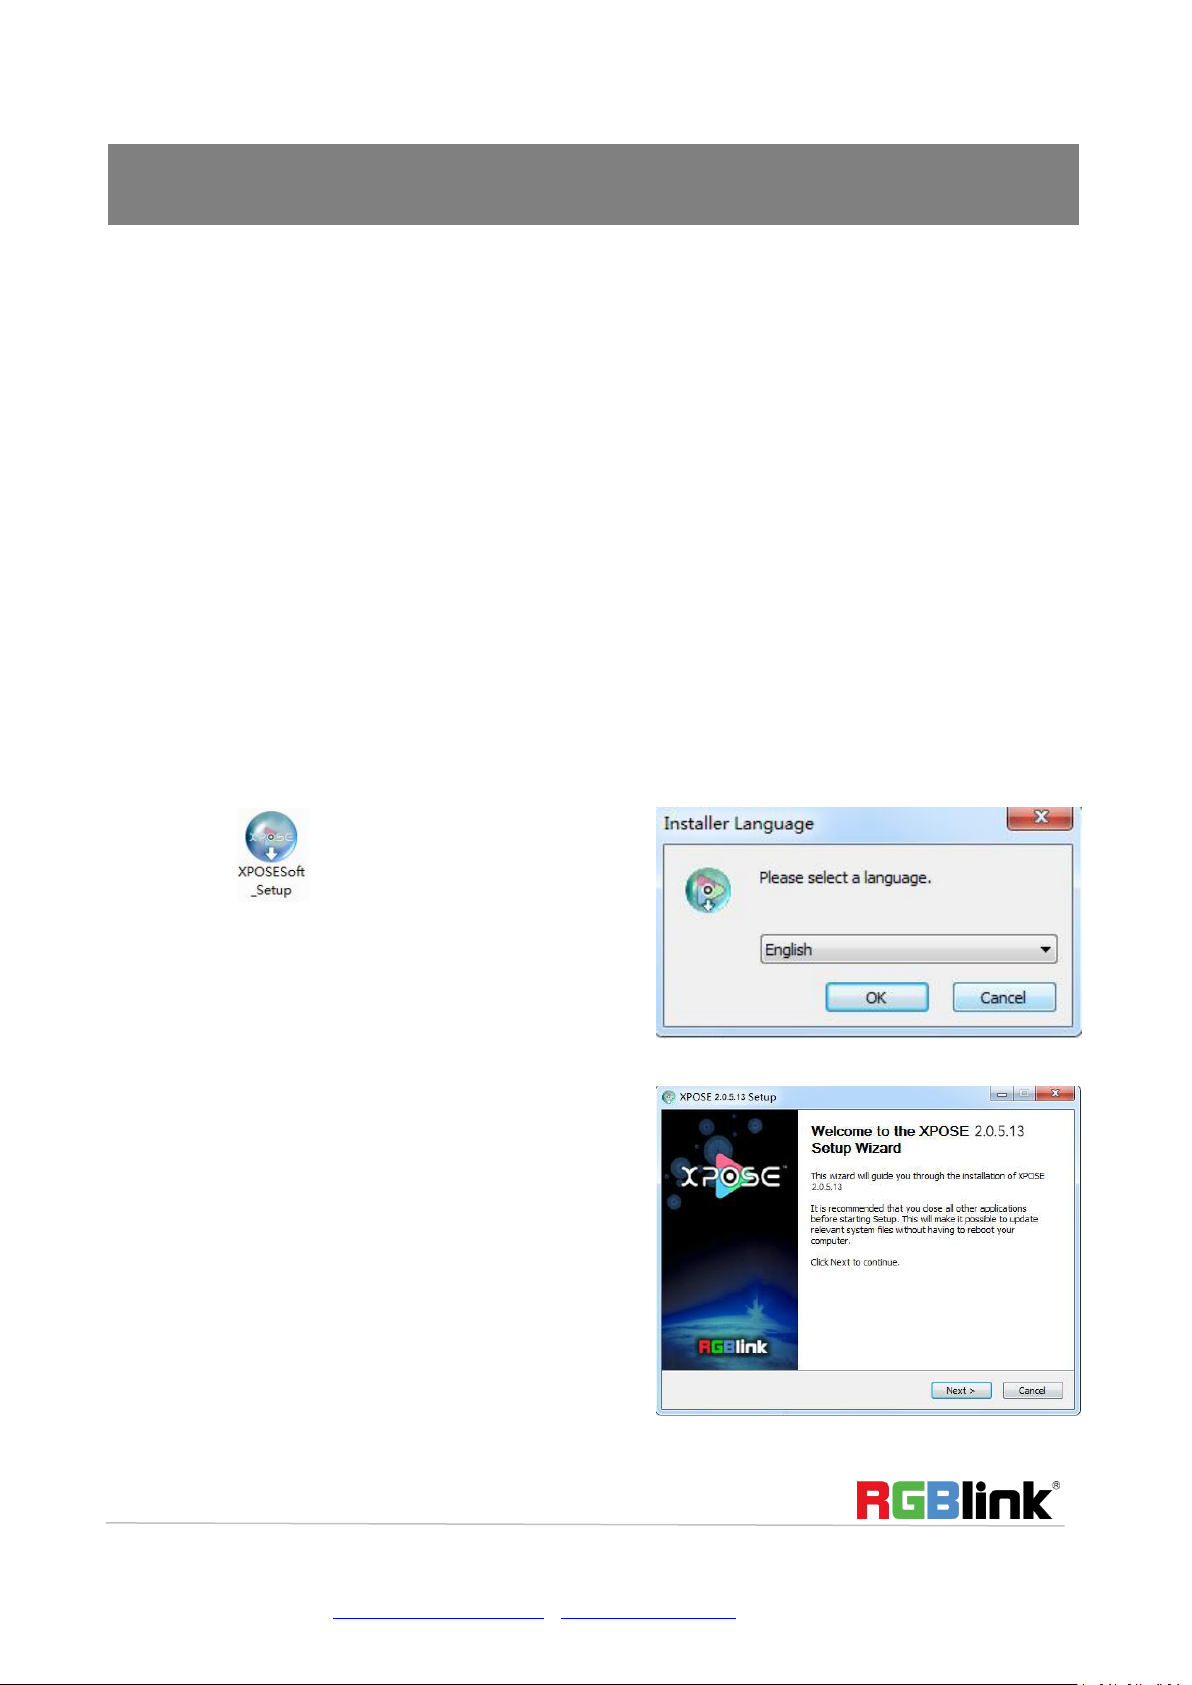
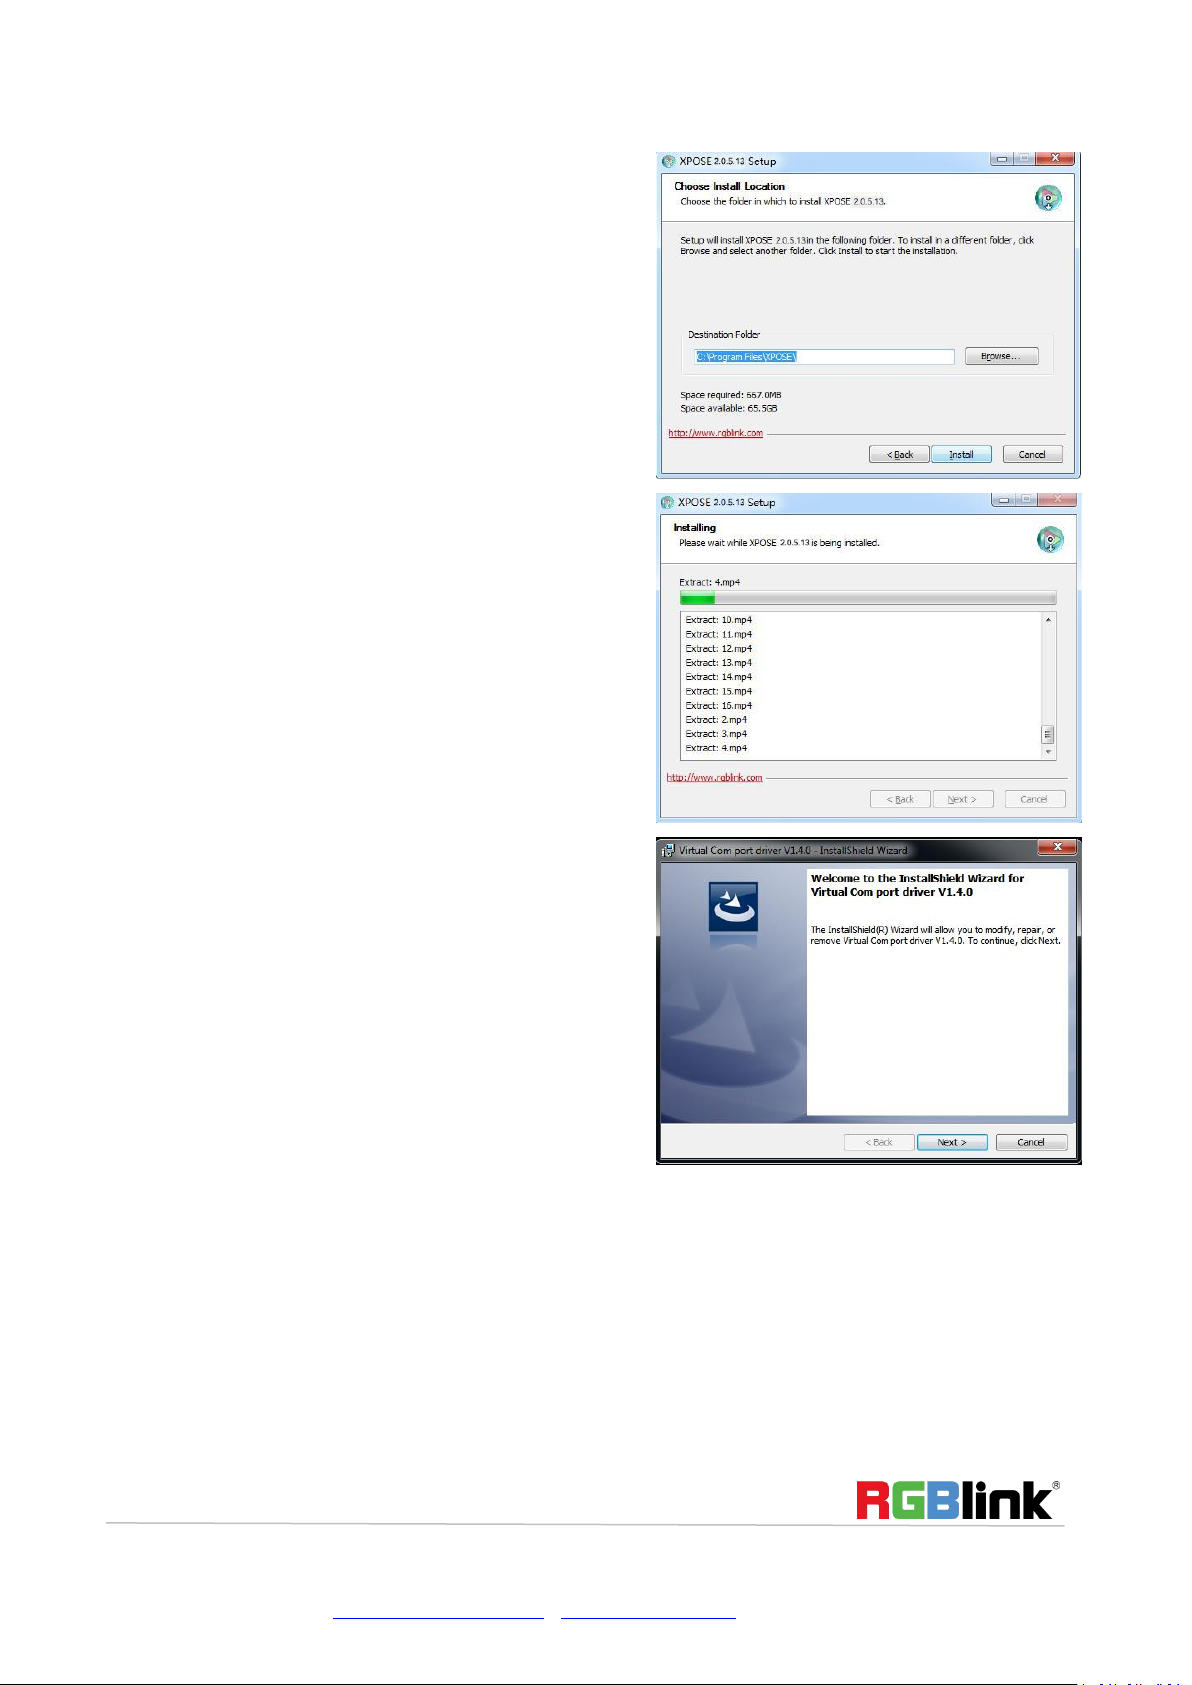
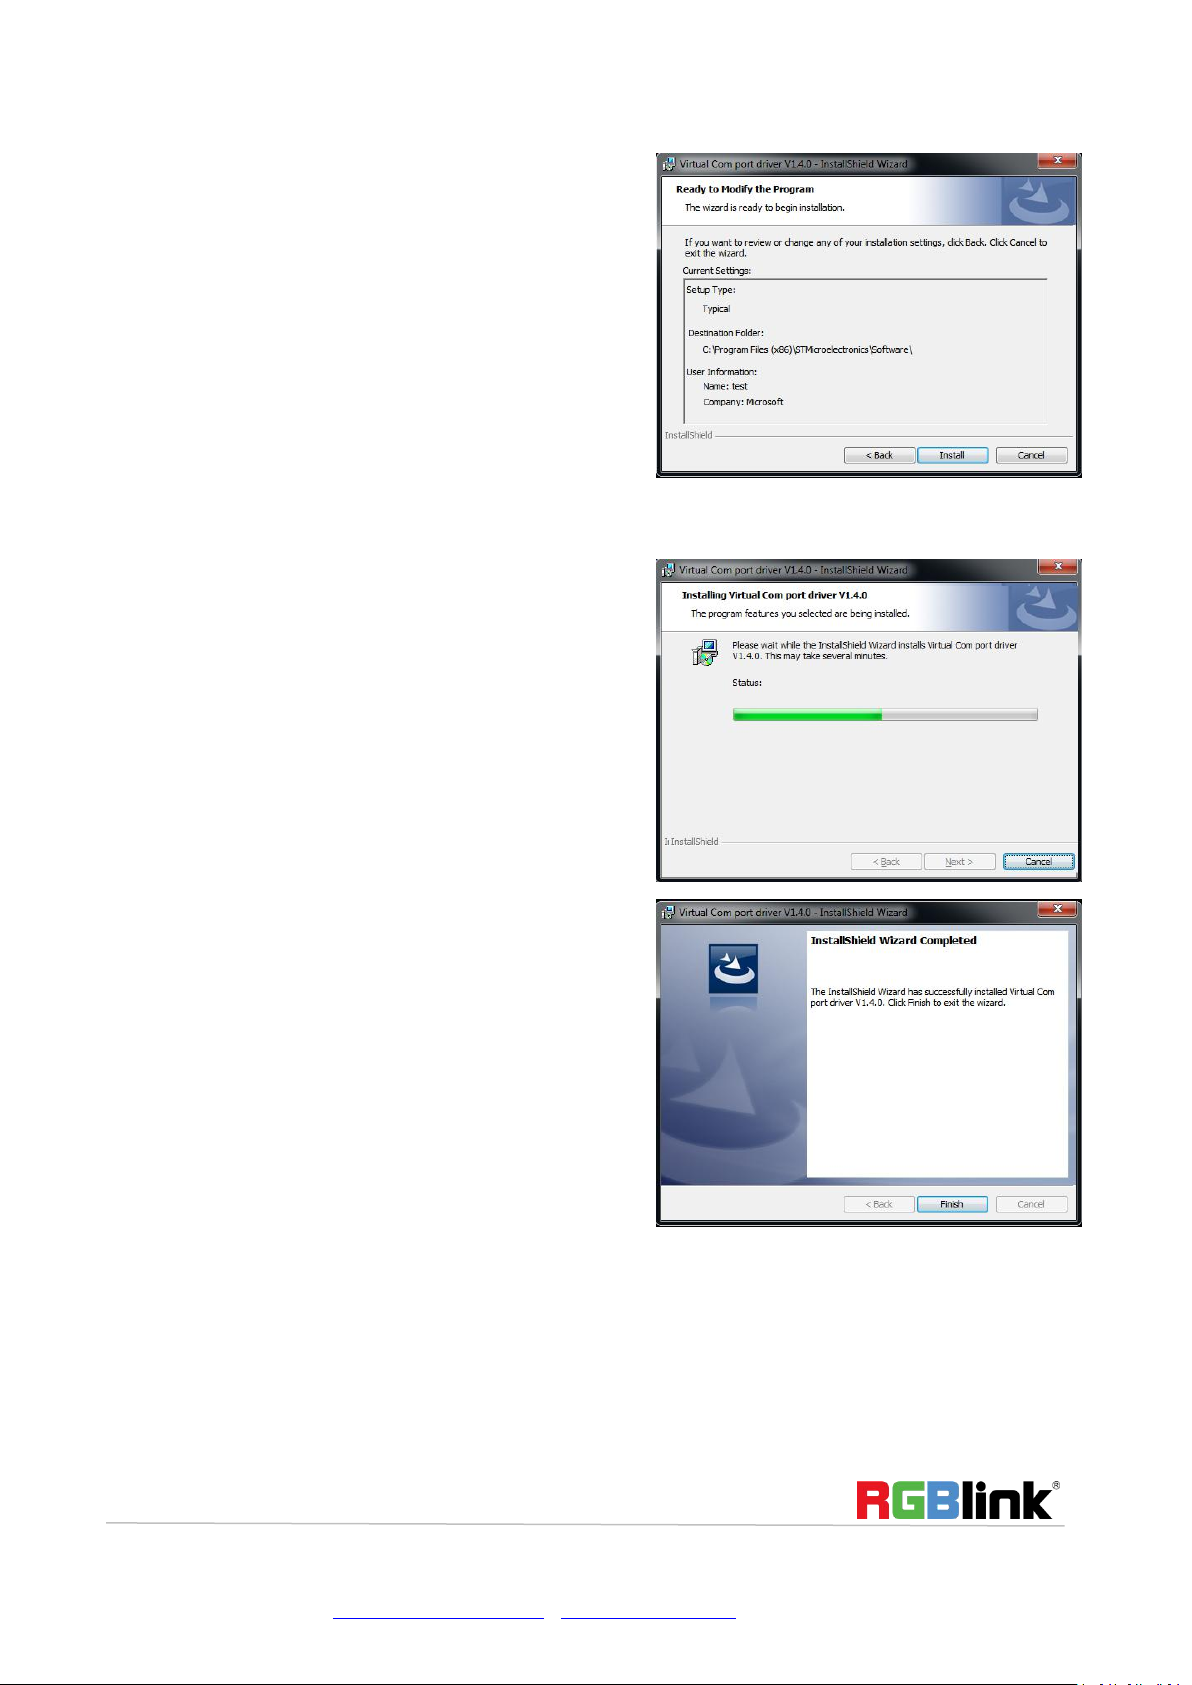
Install XPOSE........................................................................................................................................................... 6
Login in XPOSE...................................................................................................................................................... 10
System Setting.......................................................................................................................................................12
Find Device....................................................................................................................................................12
Keyboard Manager........................................................................................................................................13
Authorization Setting.................................................................................................................................... 14
Output| Input|Overview...................................................................................................................................... 15
Connect the Device.......................................................................................................................................15
Output Setting ...........................................................................................................................................16
Input Setting..................................................................................................................................................16
Device Overview........................................................................................................................................... 18
Display System.......................................................................................................................................................19
Layer Management............................................................................................................................................... 21
Preset Management..............................................................................................................................................24
CONTACT INFORMATION.......................................................................................................................................27

© Xiamen RGBlink Science & Technology Co., Ltd.
2/28
Overview
Q16pro is a high-performance video image processing system and high-performance video splicing server
using pure hardware and leading-edge FPGA processing architecture.
Offering a range of input and output signals via a card-based structure, and supporting hot swap of modules,
and options including redundant power supplies, Q16pro is a stable high-performance platform that can be
deployed in varied applications including corporate and visual messaging as well in retail and digital signage
applications。
The Q16pro models allow connection of 4K video sources as well as output to 4K, with outputs offering
multi-screen and multi-layer capabilities. A host of features are built in to Q16pro, including EDID management,
3D image processing, and highly configurable OSD features at high-definition
Q16pro SYSTEM CONNECTION DIAGRAM
System Connection
RGBlink offers solutions to demanding technical problem. Any application questions, or required
further information, please contact with our customer Support Engineers.

© Xiamen RGBlink Science & Technology Co., Ltd.
3/28
Hardware Orientation
Front Panel
Description
1
LCD Touch Screen shows LOGO and main menu. Main Menu include: Device, Settings,Load,
Upgrade, Language and Version.
2
USB Port: for device upgrade
3
Power Switch: to turn on/off device
1
2
3
Q16pro-4U

© Xiamen RGBlink Science & Technology Co., Ltd.
4/28
Rear Panel
1
Purple Input 1-3
Input slots 1-3, supporting HDMI, DP and other optional
modules.
2
Blue Output 1-2
Output slots 1-2, supporting HDMI,DP and other optional
output modules, supporting input modules.
3
Yellow COMM
Communication board with LAN and RS232 port, to connect
router or computer to realize software control.
4
Power Interface, support single power supply.
Q16pro-2U

© Xiamen RGBlink Science & Technology Co., Ltd.
5/28
1
Purple Input 1-4
Input slots 1-4, supporting HDMI,DVI,SDI,DP and other
optional modules.
2
Blue Output 1-5
Output slots 1-5, supporting HDMI,DVI,SDI,DP and other
optional output modules, supporting input modules
3
Yellow COMM
Communication board with LAN and RS232 port, to connect
router or computer to realize software control.
4
Power Interface, 2U supports single power supply, 4U and
above supports double power supply module.
Note:purple tip indicates input, blue tip indicates output, yellow tip indicates communication.
Q16pro-4U

© Xiamen RGBlink Science & Technology Co., Ltd.
6/28
USE YOUR PRODUCT
Install XPOSE
Environment Requirements:
Window
Processor: 1 GHz or above 32 bit or 64 bit processor
Memory: 4 GB or more
Graphics: Support Direct X9 128M or above (open AERO effect)
Hard disk space: Above 16G (primary partitions, NTFS format)
Monitor: Resolution must be 1920x1080 pixel or above (it can not display normally if the resolution is lower than
1920x1080)
Operating system: Windows 7 or above (full version, not Ghost version or compact version)
CPU:i5 and above
Mac
Monitor: Resolution must be 1680x1050 pixel or above (it can not display normally if the resolution is lower than
1680x1050)
CPU:i5 and above
Double click ,it will pop-up the installer
language box, select the language, for example,
select “English”, and click “OK” to confirm.
Click “Next” to install

© Xiamen RGBlink Science & Technology Co., Ltd.
7/28
Click “Browse...” to select the XPOSE software
install location
Click “Install”
During installation, it will pop up the window of
Install Shield Wizard for Virtual Com port
If user install the XPOSE software for the first
time, click “Next

© Xiamen RGBlink Science & Technology Co., Ltd.
8/28
Then click “Install", as shown in the figure below
Click “Finish” and complete the installation, as
shown in the figure below.

© Xiamen RGBlink Science & Technology Co., Ltd.
9/28
Click “Finish” and is ready to run the XPOSE.

© Xiamen RGBlink Science & Technology Co., Ltd.
10 /28
Login in XPOSE
Double click this icon ,and enter the log on
interface as follow
The initial language of XPOSE 2.0 is self adjusted based
on the operation system language of the computer.
Click Register and fill in the blank with first name, last
name, email, company and country and then click
Register Now.
Please note that the email shall be invalid and
complete otherwise Registration&Activation code
cannot be received.
Click Activate and scan the QR code
an email from RGBlink Registrations will be sent to the
Register email address.
Type in the activate code and confirm.
Keep the user name as “Admin” and password blank
and then click Start Now.
Note: If exact Name and Password are needed, users
can set up them in Authorization Setting under System
Setting.

© Xiamen RGBlink Science & Technology Co., Ltd.
11 /28
After login, users can find the management including:Topology Diagram,Search,Display System, Layer
Management, Preset Management, Keyboard Settings. The details of each hierarchy will be described hereafter.
In the following text, we are going to show how to use XPOSE 2.0 to control Q16pro.

© Xiamen RGBlink Science & Technology Co., Ltd.
12 /28
System Setting
Find Device
New version of XPOSE 2.0 is blank default in Find Device. Users are supposed to choose the device needed in
System Setting.
Then click icon and enter the interface, choose the device Q16pro in Find Device. Before system setting
make sure physical connection of Q16pro and XPOSE 2.0 is done, either by connecting Q16pro to the PC which
run XPOSE 2.0, or connect Q16pro to router which offer same network as the PC in.
System Info: show the current software version
Language:Chinese, English and Russian
Communication Setting: Search or Direct, Search default.
Serial port, Ethernet Communication, Both are Choose. Both are Chosen default.
Layer Management:Auto Cut On or Off
Prompt Message: Warning or Notice will show in yellow when Unlock Prompt and Guide Prompt are on.
Expanding Mode: If there is expanded display connected, turn on expanding mode, XPOSE interface will show
on the display.

© Xiamen RGBlink Science & Technology Co., Ltd.
13 /28
Keyboard Manager
Please note the keyboard area where allows to set short cut keys
click keyboard it will
redirected to keyboard setting window.
Keyboard setting is designed to fit for different
operation system such as Windows and Mac. Users can
set short cut keys.
Drag Input, Output, Layer and Preset from the list to
the keys you desired as follow:
Input, Output, Layer.
If the setting goes wrong or no need for short cut keys
any more, click to clear some keys or clear all.
Clear: is to clear some keys, the keys need to selected
before hand.
Clear all: is to remove all already set short cut keys.

© Xiamen RGBlink Science & Technology Co., Ltd.
14 /28
Authorization Setting
Click to open up the authorization entry.
Management
Slave Unit
Topology Diagram
Click Management
New:Add new USER NAME and PASSWORD
Edit: Edit user name and password already built.
Delete:Delete user name and password already built.
Permission: functions on this XPOSE 2.0 on this
computer that the users are allowed to operate.
Click the green block to remove the function not to be
permitted.
Click Slave Unit
Slave Unit is to control multiple devices simultaneously,
which are connected to same network. (“In the same
network” means the the the third section in the IP address
digits are the same ) XPOSE do operation on one device,
same operation synchronized to other devices. For example,
there is another devices linked to the same network, one
with IP IP192.168.0.45.
1. Set device numbers;
2. Select the IP of the device in the drop-down menu for
Device IP
3. click ON,the tow device are connected when the red
pot turns to be green one .
4. click OFF to disconnect, it could not control two device
at the same time.

© Xiamen RGBlink Science & Technology Co., Ltd.
15 /28
Output| Input|Overview
Connect the Device
After the device is selected in Find Device under System Setting, the device can be searched on XPOSE 2.0. Click
the and click refresh to check all available devices in the network.
Click to choose the device and in Chosen Device click the device to obtain the control of this device.
Following is 4U model for your reference,and the operation takes 4U as an example.
Q16pro-4U

© Xiamen RGBlink Science & Technology Co., Ltd.
16 /28
Output Setting
Input Setting
Click any output port, the board where the port locates
is selected. Users can do settings to the port now.
A red rectangle flashes around the chosen port when it
is clicked.
When a DVI or HDMI port is selected, users can do the
following settings in the edit section after clicking
icon , Resolution setting.
Resolution
Q16pro supports customizing resolution, and
users can also use standard output resolution.
Click any input port in purple area, the board where
the port locates is selected. Users can do settings to
the board now.
A red rectangle flashes around the chosen port when
it is clicked.
Different input modules port could have different
input setting on Q16pro subject to their features but
generally there are such input settings as: Property
Setting, EDID Setting.

© Xiamen RGBlink Science & Technology Co., Ltd.
17 /28
Property Setting
When HDMI or DVI port is selected
Input Port:Current port
Scale
X/Y:Vertical and horizontal position
Width/Height:Vertical and horizontal size
Crop:
Left:crop left
Top:crop top
Width:horizontal size after crop
Height:vertical size after crop
EDID
Input Port:chosen port
Basic Parameters:
EDID Template:RGB-DVI or RGB-HDMI
Monitor Name:type the monitor name
Width/Height/Frequency:type in custom parameters to
meet your needs.

© Xiamen RGBlink Science & Technology Co., Ltd.
18 /28
Device Overview
Click Return , there are overview, IP, Fan
Control,Backup, Power On, Factory Setting.
Overview: Show Device Info including current
temperature and Mac ,Main board info, Input modules
info and output module info
IP:Support auto/manual setting. Show IP Address,
Netmask, Gateway
Fan Control: Support auto/manual setting.
Fan Speed: 0-100
Backup: You can choose to turn on/off backup.
Backup Mode: Input Backup, Preset Backup
Power on: Set power-on time.
Factory Setting
Remove EDID: Clear the previous EDID parameter.
Save IP: No change of IP after reset.
Note:IP default:192.168.0.100.After IP address is
changed,re-plug the power and restart the

© Xiamen RGBlink Science & Technology Co., Ltd.
19 /28
Display System
Display System is for users to set layout of outputs.
Click this icon first and then click enter the interface.
Template
There are 16 types of basic “Display Area” which is used to contain output interface,and could be regarded as
layout of output. Drag a template to create a container in other word a display area.
Mode
XPOSE 2.0 allows multiple modes running on one same interface, to differentiate each mode, different color is
given to each mode based on different devices. Q16pro:Presentation Mode and Matric Mode optional.
Monitor Resolution
Choose the output resolution for monitors
Table of contents
Other RGBlink Media Converter manuals

RGBlink
RGBlink MSP 312 User manual

RGBlink
RGBlink D4 User manual

RGBlink
RGBlink FLEX 32 User manual

RGBlink
RGBlink FLEX 16 User manual

RGBlink
RGBlink FLEXpro 8 User manual

RGBlink
RGBlink IC2+ User manual

RGBlink
RGBlink VENUS X3 User manual

RGBlink
RGBlink FLEXpro 8 User manual

RGBlink
RGBlink FLEX 8 User manual

RGBlink
RGBlink VSP268S User manual

RGBlink
RGBlink VENUS X1 User manual

RGBlink
RGBlink Q16 User manual

RGBlink
RGBlink VSP 310 User manual

RGBlink
RGBlink VSP 516 Series User manual

RGBlink
RGBlink RGB-RD-UM-X8 E005 User manual

RGBlink
RGBlink FLEX RS1 User manual

RGBlink
RGBlink VENUS X1 User manual

RGBlink
RGBlink GX4 User manual

RGBlink
RGBlink GX4pro User manual

RGBlink
RGBlink VSP 9516S User manual