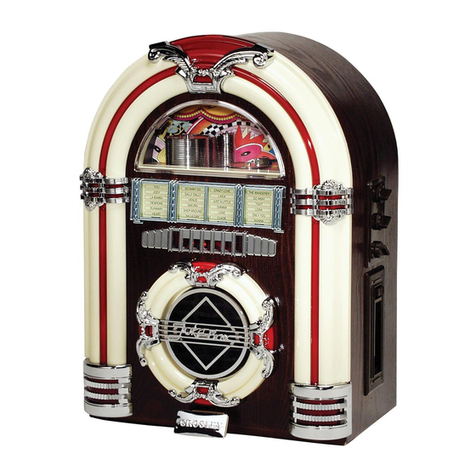
Ricatech RR900 Retro XXL User manual

USER MANUAL
GEBRUIKERSHANDLEIDING
MODE D’EMPLOI
BEDIENUNGSANLEITUNG
MANUAL DEL USUARIO
RR900 Retro XXL Jukebox

USER MANUAL
Should any trouble occur, disconnect the AC power cord and refer servicing to a qualied
technician. Do not place anything directly on the top of the unit. Damage to the unit can re-
sult. In case of malfunction due to electrostatic discharge the apparatus has to be reset by
disconnecting it from mains supply.
FCC Information (USA VERSION ONLY)
This device complies with Part 15 of FCC Rules.
Operation is subject to the following two conditions:
1. Device may not cause harmful interference, and
2. This device must accept any interference received, including interference that may cause unde-
sirable operation.
On Placement
Do not use the unit in places which are extremely hot, cold, dusty, or humid.
Place the unit on a at and even surface.
Do not restrict the air ow of the unit by placing it in a place with poor air ow,
by covering it with a cloth.
Do not place naked ame sources, such as lighted candles on the apparatus.
Do not place objects lled with liquids, such as vases, on the apparatus.
On AC Voltage
Before use, check that the rated voltage of your unit matches your local voltage.
The Lighting ash with an arrowhead symbol, within
the equilateral triangle, is intended to alert the user
to the presence of uninsulated “dangerous voltage”
within the product’s enclosure that may be of sufcient
magnitude to cause an electric shock.
The exclamation point within the equilateral triangle is
intended to alert the user to the presence of important
operating and maintenance(servicing) instructions in
this owner manual.
WARNING : TO REDUCE THE RISK OF ELECTRIC SHOCK,
DO NOT REMOVE COVER (OR BACK).
NO USER-SERVICEABLE PARTS INSIDE.
REFER SERVICING TO QUALIFIED SERVICE PERSONNEL.
WARNING : TO PREVENT FIRE OR SHOCK HAZARD,
DO NOT EXPOSE THIS APPLIANCE TO RAIN OR MOISTURE.
CAUTION : TO PREVENT ELECTRIC SHOCK,
MATCH WIDE BLADE OF PLUG TO WIDE SLOT,
FULLY INSERT. (USA AND CANADA ONLY)
1
On Safety
When connecting or disconnecting the AC cord, grip the plug and not the cord itself. Pulling the
cord may damage it and create a hazard.
When you are not going to use the unit for a long period of time, disconnect the AC power cord.
On Condensation
When left in a heated room where it is warm and damp, water droplets or condensation may form
inside the unit. When there is condensation inside the unit, the unit may not function normally. Let
the unit stand for 1 to 2 hours before turning the power on, or gradually heat the room up and dry
the unit before use.
ATTENTION SHOULD BE DRAWN TO THE EVIRONMENTAL ASPECTS OF BATTERY DISPOSAL.
LASER SAFETY
THIS UNIT EMPLOYS A LASER.
ONLY A QUALIFIED SERVICE PERSONNEL SHOULD OPEN COVER IN ATTEMPT TO SER-
VICE THIS DEVICE DUE TO POSSIBLE EYE INJURY.
CAUTION: USE OF ANY CONTROLS, ADJUSTMENTS, OR PROCEDURES OTHER THAN
THOSE SPECIFIED HEREIN MAY RESULT IN HAZARDOUS RADIATION EXPOSURE.
CLASS 1 LASER PRODUCT
APPAREIL A LASER DE CLASSE 1
PRODUCTO LASER DE CLASE 1
CAUTION
INVISIBLE LASER RADIATION WHEN OPEN AND
INTERLOCKS DEFECTED.
AVOID EXPOSURE TO BEAM
2

3

TO PLAY A CD
1. Press the POWER switch and select MODE SELECTOR to CD.
2. Flip open the semi circle “CD DOOR”.
3. Turn the “RESET” pointer to “OFF” position and insert a disc onto the disc tray.
**(Make sure the “RESET” pointer in “ON” position after disc loaded.)
4. Press the PLAY/PAUSE button to play the CD, press once again to temporarily stop disc play.
5. Press STOP to stop playing the CD.
6. Adjust listening level and sound effect with Volume,Treble and Bass knob
7. Press SKIP FORWARD to skip ahead to next track. Press SKIP BACKWARD to skip back to
previous track. The track number will be displayed in readout.
8. During disc play mode, press the FAST FORWARD or FAST REWIND to search a particular
point quickly.
NOTE:
If the disc is seriously scratched, or too dirty, disc play may not start.
If an improperly centered disc is played, noise can be heard in the mechanism. The use of such
discs should be avoided.
PROGRAMMED DISC PLAY
It is not possible to enter programs during disc play. Press the STOP button rst, then enter a pro-
gram.
1. Press the STOP button.
2. Press the PROGRAM button. Select a track number using SKIP FORWARD or SKIP BACK-
WARD button,press PROGRAM button again
3. Repeat step 2 until all the desired tracks are programmed in memory
NOTE:
To modify the program, press the STOP button and restart from step 2.
-To clear the program, press the STOP or power is switched off
REPEAT DISC PLAY
4

REPEAT DISC PLAY
1. Press REPEAT button once to repeat disc play of one track.
2. Press REPEAT button twice to repeat all the track on the disc.
3. Select the desired track for disc play using SKIP FORWARD or SKIP BACKWARD button.
4. Press the PLAY/PAUSE button to play
5. Press STOP button to cancel repeat mode.
RANDOM DISC PLAY
1. Press the RANDOM button to play CD in random order.
2. To cancel RANDOM, press STOP button
MUTE DISC PLAY
1. Press MUTE button to muting the sound while playing disc. *The MUTE indicator on the CD
control panel will be lighted up.
2. To resume press MUTE again and the MUTE indicator will goes off
5

RADIO OPERATION
1. Set the MODE selector to your desired band.
2. Adjust the sound with the VOLUME knob.
3. Tune to the desired radio station by using the TUNING knob.
4. To turn off the radio, press the POWER button.
LIGHT OPERATION
1. Press the LIGHT button to turn on all the light.
2. To Turn off the light, press the LIGHT button again.
NOTE:
1. (FOR “NEON LIGHTS” VERSION ONLY)
Please note that Neon lights will not work while in AM / MW radio mode. This is due to interfer-
ence caused by neon lighting and is a usual occurrence.
2. LIGHT MODE (IF EQUIPPED “BULB LIGHTS” VERSION ONLY)
Switch the MODE selector at back cover to change light mode.
3. LIGHT MODE (IF EQUIPPED AT BACK COVER “LED LIGHTS” VERSION ONLY)
The colors of the lights change overtime, switch to HOLD position to remain static to your favourite
color. Switch to PLAY position to resume
*IMPORTANT NOTE: (LED LIGHTS VERSION ONLY)
The changing colors sequences of lights are controlled by IC, the lights maybe turned off
when the light mode in HOLD position is normal.
EXTERNAL SPEAKER CONNECTION (IF EQUIPPED)
Connect each speaker wire to the speaker terminal at the back cover, switch the speaker switch to
extenal.
AUXILIARY CONNECTION “AUX IN” (IF EQUIPPED)
1. Connect your own device (i.e. MP3 player or IPOD) to the “AUX IN connection” (located at the
back of cabinet) with stereo plug and detachable rack (packed separately).
2. Adjust the ON / OFF switch next to the jack to the ‘ON’ position.
3. Rotate the mode selector to “CD-AUX”.
4. Adjust the sound with the VOLUME knob or the volume control of the device.
5. When change to another mode, the device will continue to play with no sound until the ON /
OFF switch is adjusted to ‘OFF’ position and switch off the device.
6

IMPORTANT NOTE:
1. Adjust the ON / OFF switch to the ‘OFF’ position when not in use.
2. The CD function will resume to normal only after the ON / OFF switch is adjusted to ‘OFF’ posi-
tion.
Warranty :
Ricatech BV covers all products (Excl. accessories) with a 2 year warranty applying to all faults
caused by a factory-error. External physical damage will not be covered by our warranty
Warranty :
All hardware errors occurring within 2 years after purchase unless caused by points mentioned
below.
No Warranty :
Faults caused by:
*Dismountal by any other service center then ours.
*Water and moisture damage
*Drop and bump damage
*Usage with non approved Ricatech accessories.
*Short-circuit or over-voltage
*Physical damage, loss or damage to accessories
Out of warranty repairs
Please be so kind to contact us for out-of-warranty repairs. We will provide you with a quotation
with the expected costs.
Goods out of warranty cannot be returned to your reseller.
7

CUSTOMER SUPPORT
You can contact the Ricatech customer service when you have a question or a problem with your
Ricatech product. You can contact us by telephone and email.
Email
that you mention the model number and serial number of the product, mention your name & ad-
dress and describe your question or problem clearly.
Telephone
For customer support by telephone, please dial +32 3 3265694. One of our service staff will be
ready to serve you.
For full procedure please visit the website of Ricatech at: www.ricatech.com
8

GEBRUIKERSHANDLEIDING
Mochten er problemen ontstaan koppel de AC kabel dan los en verwijs voor verdere be-
handeling naar een gekwaliceerde technicus. Plaats niks direct op de bovenkant van het
product. Schade aan het product kan hiervan het resultaat zijn.
In het geval van defect door middel van een statische lading moet u het apparaat herinstel-
len door het los te koppelen van de hoofd voorziening.
FCC Informatie (USA VERSIE)
Dit apparaat komt overeen met deel 15 van de FCC Regels.
Werking hangt af van de volgende twee voorwaarden:
1. Het apparaat mag geen schadelijke storing veroorzaken,en
2. Dit apparaat moet elke ontvangen interruptie accepteren onder andere interruptie die mogelijk
ongewenste werking kan veroorzaken.
Over Plaatsen
Gebruik het apparaat niet in plaatsen waar het extreem warm. koud, stofg, bedompt is.
Plaats het apparaat op een gelijke en platte oppervlakte.
Blokkeer de lucht aanvoer niet door het product ergens te plaatsen waar de lucht toevoer slecht is,
door het te bedekken met een doek.
Plaats het apparaat niet naast open vuur zoals aangestoken kaarsen dicht bij het apparaat.
Plaats het apparaat niet naast of op objecten gevuld met vloeistoffen zoals vazen.
Over AC Voltage
Voor gebruik controleer of de voltage van het product overeenkomt met uw locale voltage.
Over Veiligheid
Het bliksem vormige symbool in de zwarte driehoek is
bedoelt om gebruikers alert te maken op de aanwezig-
heid van gevaarliijke spanning in de binnenkant van
het product dat mogelijk genoeg kracht bevat om een
elektrische schok te veroorzaken
Het uitroepteken in de zwarte driehoek is bedoelt om
de gebruiker alert te maken op de aanwezigheid van
belangrijke instructies in deze handleiding.
WAARSCHUWING : OM DE KANS OP EEN ELEKTRISCHE SCHOK TE VERKLEIN
EN VERWIJDER NIET DE HOES (OF ACHTERKANT).
GEEN GEBRUIKERS BENODIGDE ONDERDELEN BEVINDEN
ZICH HIERBINNEN. VOOR SERVICE NEEM CONTACT OP
MET SERVICE PERSONEEL.
WAARSCHUWING : OM BRAND OF SCHOK GEVAAR TE VOORKOMEN MAG U
HET APPARAAT NIET BLOOD STELLEN AAN REGEN OF
VOCHT.
VOORZICHTIG : OM EEN ELEKTRISCHE SCHOK TE VOORKOMEN MATCH
WIDE BLADE OF PLUG OP WIDE SLOT, VOLLEDIG
INVOEGEN (ALLEEN USA EN CANADA)
8

Als u de AC kabel aan of af sluit pak dan de plug en niet de kabel zelf. Trekken aan de kabel kan schade
veroorzaken wat vervolgens lijd naar risico op gevaar.
Als u het apparaat voor een langere tijd niet gebruikt koppel de AC kabel dan los.
Over Condensatie
Als het apparaat in een verwarmde omgeving staat is het mogelijk dat er aan de binnenkant condensa-
tie begint te vormen. Als er condensatie in het apparaat ontstaat bestaat er een kans dat deze niet naar
behoren functioneert. Laat het apparaat 1 tot 2 uur rusten voordat u het gebruikt, verwarmd en droog het
apparaat geleidelijk voordat u hem weer aanzet.
AANDACHT VOOR HET EFFECT VAN BATTERIJ VERWERKING OP HET MILIEU.
LASER VEILIGHEID
DEZE UNIT HANTEERT DE LASER
ALLEEN EEN GEKWALIFICEERDE SERVICE MEDEWERKER MAG DE KAP OPENEN IN VER-
BAND MET MODELIJKE OOG SCHADE.
VOORZICHTIG: GEBRUIK VAN BESTURINGEN, AANPASSINGEN OF PROCEDURES AN-
DERS DAN GEMELD IN DEZE HANDLEIDING KAN RESULTEREN IN RISICOVOLLE RADIATE
BLOOTSTELLING.
CLASS 1 LASER PRODUCT
APPAREIL A LASER DE CLASSE 1
PRODUCTO LASER DE CLASE 1
VOORZICHTIG
ONZICHTBARE LASER RADIATIE WANNEER
GEOPENED. VOORKOM BLOOTSTELLING AAN
DE STRAAL.
9

10

OM EEN CD AF TE SPELEN
1. Druk op de POWER knop and selecteer MODE SELECTOR en dan CD.
2. Kantel de halve cirkel “CD DOOR”.
3. Draai de “RESET” knop op “OFF” plaats en leg een cd platelade.
**(Wees er zeker van dat de “RESET” knop “ON” aangeeft nadat de CD is ingevoerd.)
4. Druk op de PLAY/PAUSE knop om de CD af te spelen, druk er nogmaals op om de CD tijdelijk
te pauzeren.
5. Druk op STOP om het afspelen van de CD te stoppen
6. Pas het luister level en geluid effect aan met de Volume,Treble en Bass knop
7. Druk op SKIP FORWARD om door te spoelen naar het volgende nummer. Druk op SKIP
BACKWARD om terug te spoelen naar het vorige nummer. Het nummer van het lied wordt
weergegeven in de readout.
8. Tijdens het afspelen druk op FAST FORWARD of FAST REWIND om snel naar een bepaald
punt in het nummer te komen.
NOTITIE :
Als de CD te ernstig is beschadigt of vies is is het mogelijk dat hij niet afspeelt.
Als er een onjuist gecentreerde cd wordt afgespeeld kan er geluid voortkomen uit het apparaat.
Gebruik van zulke CD’s is afgeraden.
GEPROGRAMEERD AFSPELEN
Het is niet mogelijk om een programma in te voeren tijdens het afspelen. Druk eerst op de STOP
knop en voer daarna het gewenste programma in.
1. Druk op de STOP knop.
2. Druk op de PROGRAM knop. Selecteer een nummer door de knoppen SKIP FORWARD of
SKIP BACKWARD te gebruiken,druk nogmaals op de PROGRAM knop.
3. Herhaal stap 2 tot dat alle gewenste nummers zijn geprogrammeerd in het geheugen.
NOTITIE :
Om het programma aan te passen druk op de STOP knop en begin weer opnieuw met stap 2.
Om het prorgramma te verwijderen druk op de STOP knop of schakel de stroom uit.
11

HERHALEND AFSPELEN
1. Druk eenmaal op de REPEAT knop om een bepaald nummer te herhalen.
2. Druk twee keer op de REPEAT knop om alle nummers van de CD te herhalen.
3. Selecteer het gewenste nummer door de SKIP FORWARD of SKIP BACKWARD knop te
gebruiken.
4. Druk op de PLAY/PAUSE om af te spelen.
5. Druk op de STOP knop om het herhalen te stoppen.
WILLEKEURIGE AFSPELEN
1. Druk op de RANDOM knop om de CD in een willekeurige volgorde af te spelen.
2. Om het willekeurig afspelen te stoppen druk op de RANDOM knop.
MUTE AFSPELEN
1. Druk op de MUTE knop om het geluid van de CD te dempen tijdens het afspelen. *De MUTE
indicator op het CD controle menu zal gaan oplichten.
2. Om te hervatten druk nogmaals op de MUTE knop en de MUTE indicator zal uit gaan.
RADIO FUNCTIE
1. Zet de MODE selector naar uw gewenste band.
2. Pas het volume aan met de VOLUME knop.
3. Stel bij naar uw gewenste radio station met de TUNING knop.
4. Om de radio uit te schakelen druk op de POWER knop.
LICHT FUNCTIE
1. Druk op de LIGHT knop om al het licht in te schakelen.
2. Om het licht uit te schakelen druk nogmaals op de LIGHT knop.
12

NOTITIE:
1. (ALLEEN VOOR “NEON LIGHTS” VERSIES)
Neon licht zal niet functioneren tijdens de AM / MW radio mode. Deze storing word veroorzaakt
door neon lichten en is veel voorkomend.
2. LIGHT MODE (ALLEEN ALS HET GEINSTALLEERD IS. (ALLEEN DE“BULB LIGHTS”
VERSIE)
Wijzig de MODE selector op de achterkant om naar de licht mode te schakelen.
3. LIGHT MODE (ALS DEZE GEINSTALLEERD IS AAN DE ACHTERKANT(ALLEEN DE “LED
LIGHTS” VERSIE)
De kleuren van het licht veranderen met de tijd schakel over naar de HOLD positie om je favorite
kleur te behouden. Schakel over naar PLAY om het afwisselen te hervatten.
*BELANGRIJKE NOTITIE: (ALLEEN DE LED LIGHTS VERSIE)
Het veranderen van de kleur volgorde word geregeld door de IC, de lichten kunnen uit-
geschakled worden als de light mode in HOLD positie normaal is.
EXTERNE SPEAKER VERBINDING(ALS DEZE GEINSTALLEERD IS)
Sluit elke speaker aan kabel aan met de speaker aansluiting op de achterkant. Schakel de speak-
er knop over naar externe speaker.
AUXILIARY CONNECTIE “AUX IN” (ALS DEZE GEINSTALLEERD IS)
1. Sluit uw eigen apparaat (i.e. MP3 player or IPOD) aan op de “AUX IN connectie” ( geplaatst aan
de achterzijde van het apparaat.) aan met de stereo plug en de afkoppelbare stelling (apart ver-
pakt ).
2. Schakelde ON / OFF schakelaar aan naast de jack naar de‘ON’ positie
3. Draai de mode selector naar “CD-AUX”.
4. Pas het geluid aan met de VOLUME knop of de volume knop van uw eigen apparaat.
5. Tijdens het overschakelen naar een ander menu zal het eigen apparaat blijven doorspelen
zonder geluid tot dat de ON / OFF knop word aangepast naar de ‘OFF’ positie en het apparaat
word uitgeschakelt.
BELANGRIJKE NOTITIE:
1. Schakel de ON / OFF knop naar de ‘OFF’ positive als deze niet word gebruikt.
2. De CD functie zal alleen weer normaal terug schakelen als de ON / OFF knop is aangepast
naar de ‘OFF’ positie.
13

Garantie :
Ricatech BVstaat garant voor alle producten (Excl. accessories) met een 2 jarige garantie periode
die geldig is voor alle defecten veroorzaakt door fabrieksfouten. Externe schade valt niet onder de
garantie.
Garantie :
Alle hardware fouten die voorkomen tijdens de 2 jarige periode na aankoopTenzij het word veroor-
zaakt door de volgende punten weergegeven hier beneden.
Geen Garantie :
Defecten veroorzaakt door:
*Fouten door een andere service als die van Ricatech.
*Water en vloeistof schade.
*Val en stoot schade.
*Gebruik van andere accessories die niet zijn goedgekeurd door Ricatech.
*Kortsluiting of overspanning
*Fysieke schade, verlies of schade aan de accessories
Buiten garantie vallende reparaties :
Voor buiten garantie vallende reparaties kan u altijd contact met ons openemen.We zillen u een
factuur geven van de verwachte kosten Producten die buiten de garantie vallen kunnen niet
teruggebracht worden naar de winkel.
14

KLANTENONDERSTEUNING
Voor vragen of een probleem met uw Ricatech product kunt u telefonisch en per email contact
opnemen met de Ricatech klantenservice.
Email
niet het modelnummer, serienummer van het product en uw naam & adres te vermelden en be-
schrijf duidelijk uw vraag of probleem.
Telefoon
Bel voor telefonische klantenondersteuning naar +32 3 3265694. Onze servicemedewerkers staan
klaar om u te helpen.
Bezoek de website van Ricatech voor de volledige procedure: www.ricatech.com
15

MODE D’EMPLOI
Si un problème survient, débranchez le câble d’alimentation CA et contactez un profession-
nel qualié. Ne posez rien directement sur l’appareil : cela pourrait l’endommager.
En cas de malfonctionnement dû à une charge électrostatique, l’appareil doit être redémar-
ré en le débranchant de la source d’alimentation principale.
A propos de l’installation
N’utilisez pas cet appareil dans des lieux très chauds, froids, poussiéreux ou humides.
Installez l’appareil sur une surface plate et homogène.
Ne gênez pas l’aération de l’appareil en l’installant dans un lieu sans air, ou en le couvrant avec
un vêtement.
A propos de la sécurité
Quand vous branchez ou débranchez le câble CA, tirez sur la prise et non sur le câble lui-même.
Tirer sur le câble pourrait l’endommager et créer un court-circuit.
Quand vous vous préparez à ne pas utiliser l’appareil pour une longue période, débranchez le
câble CA.
La èche en forme d’éclair, à l’intérieur d’un trian-
gle équilatéral, est destinée à alerter l’utilisateur de
la présence d’un voltage dangereux et non isolé à
l’intérieur des produits, qui peut être d’une magnitude
sufsante pour constituer un risque de choc électrique
pour une personne y étant exposée.
Le point d’exclamation, à l’intérieur d’un triangle équi-
latéral, est destiné à alerter l’utilisateur de la présence
d’instructions d’utilisation et d’entretien importantes à
l’intérieur du guide de l’utilisateur.
WARNING : POUR REDUIRE LE RISQUE DE CHOC ELECTRIQUE,
N’ENLEVEZ PAS L’ARMATURE (OU LA PARTIE ARRIERE).
ELEMENTS NON-REPARABLES A L’INTERIEUR.
POUR TOUTE REPARATION CONTACTEZ UN PROFESSIONNEL.
WARNING : AFIN D’EVITER UN INCENDIE OU UN CHOC ELECTRIQUE,
N’EXPOSEZ PAS CET APPAREIL A LA PLUIE OU L’HUMIDITE.
16

A propos du voltage en courant alternatif
Avant toute utilisation, vériez que le voltage de votre appareil corresponde à celui de votre cou-
rant secteur.
A propos de la condensation
Quand l’appareil est situé dans une pièce chaude et humide, des goutelettes ou de la condensa-
tion peuvent se former à l’intérieur de l’appareil.
Quand de la condensation apparaît à l’intérieur de l’appareil, il peut ne pas fonctionner normale-
ment. Laissez reposer l’appareil 1 ou 2 heures avant de l’allumer, ou réchauffez la pièce graduel-
lement et séchez l’appareil avant.
Vériez que la ventilation n’est pas obstruée par des objets tels que journaux, serviettes, rideaux,
etc…
Ne mettez pas des ammes à nu, comme des bougies, sur l’appareil.
Respectez les consignes environnementales liées à l’utilisation des piles.
Utilisez cet appareil dans des climats modérés (non tropicaux).
N’exposez pas l’appareil à l’eau ou aux éclaboussures.
LASER SAFETY
THIS UNIT EMPLOYS A LASER.
ONLY A QUALIFIED SERVICE PERSONNEL SHOULD OPEN COVER IN ATTEMPT TO SER-
VICE THIS DEVICE DUE TO POSSIBLE EYE INJURY.
CAUTION: USE OF ANY CONTROLS, ADJUSTMENTS, OR PROCEDURES OTHER THAN
THOSE SPECIFIED HEREIN MAY RESULT IN HAZARDOUS RADIATION EXPOSURE.
CLASS 1 LASER PRODUCT
APPAREIL A LASER DE CLASSE 1
PRODUCTO LASER DE CLASE 1
CAUTION
INVISIBLE LASER RADIATION WHEN OPEN AND
INTERLOCKS DEFECTED.
AVOID EXPOSURE TO BEAM
17

18
Table of contents
Languages:
Other Ricatech Jukebox manuals

Ricatech
Ricatech RR3100 User manual

Ricatech
Ricatech RR200 User manual

Ricatech
Ricatech RR700 User manual

Ricatech
Ricatech RR1000 User manual

Ricatech
Ricatech RR500 User manual

Ricatech
Ricatech RR3000 Retro Classic User manual

Ricatech
Ricatech RR300 User manual

Ricatech
Ricatech RR2000 User manual

Ricatech
Ricatech RR510 User manual

Ricatech
Ricatech RR340 User manual