manuals.online logo
Brands
  1. Home
  2. •
  3. Brands
  4. •
  5. Richell
  6. •
  7. Pet Care Product
  8. •
  9. Richell L6 User manual

Richell L6 User manual

UPC
JAN
94170,94171,94188,
94196,94198,94199,
94901,94936,94937
5006,5007,5059,
5060,98754-98757
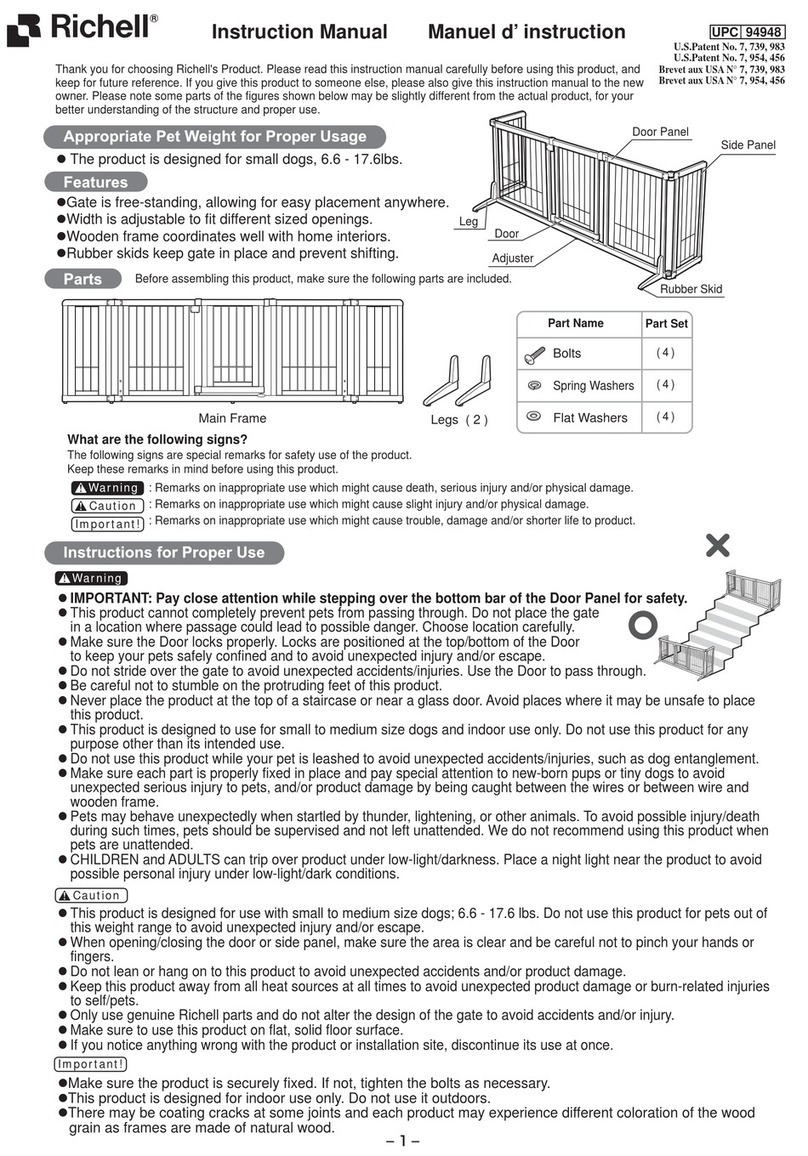
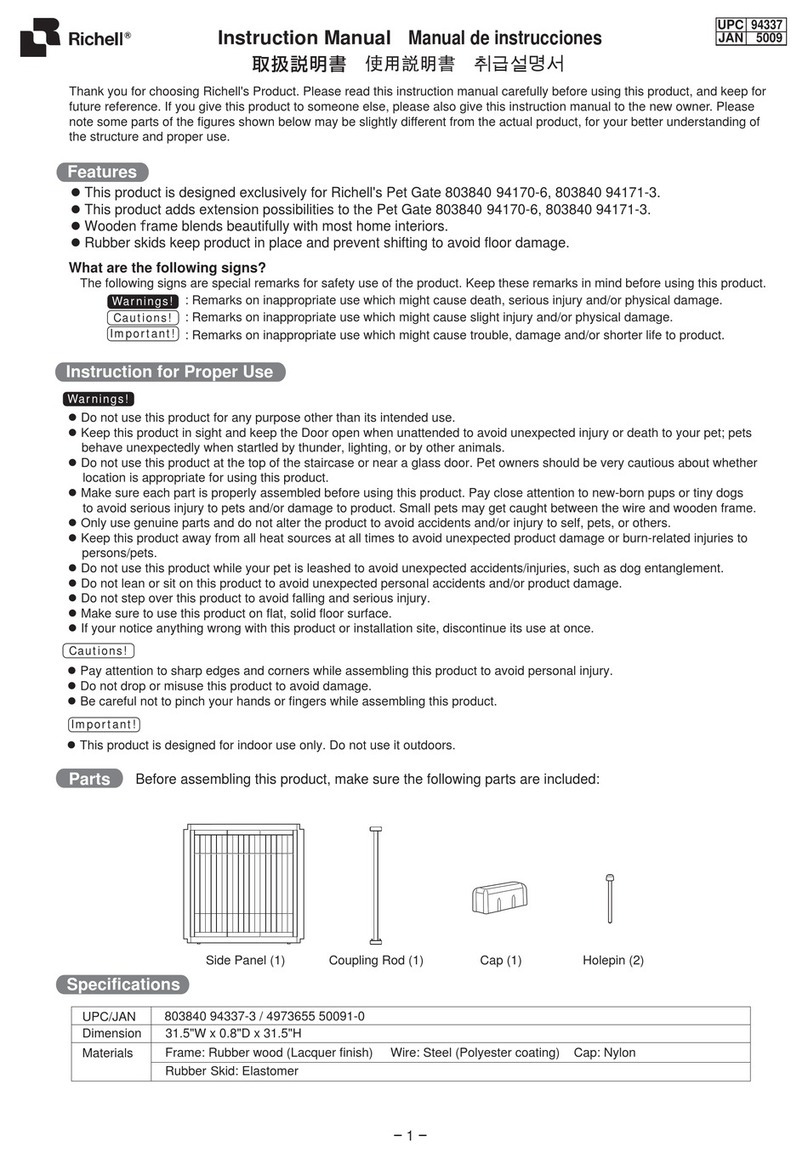
Thank you for choosing Richell's Product. Please read this instruction manual carefully
before using this product, and keep for future reference. If you give this product to
someone else, please also give this instruction manual to the new owner. Please note
some parts of the figures shown below may be slightly different from the actual product,
for your better understanding of the structure and proper use.
lThis product is designed exclusively for dogs. Model L6 and L4 is designed for small size dogs (appropriate
dog weight is 8.8 - 17.6 lbs.); Model O6 and O4 is designed for small to medium size dogs (appropriate
dog weight is 8.8 - 44 lbs.); Model H6 and H4 is designed for small to large size dogs (appropriate dog
weight is 8.8 - 88 lbs.).
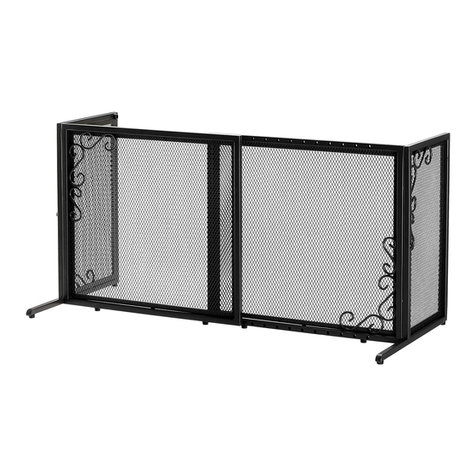
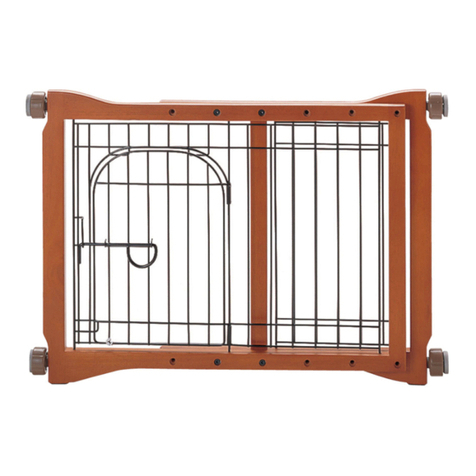
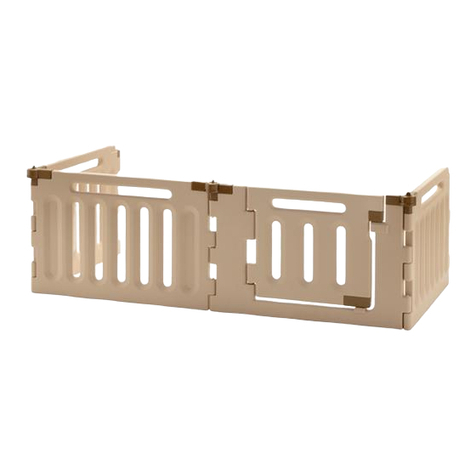
lThis product is designed for use as a Pet Gate, Pet Pen, and Room Divider.
lConfigure panels at 90 or 180 degree angles to avoid the product from falling and/or damage.
lDoor automatically locks after closing.
lWooden frame blends beautifully with most home interiors.
lRubber skids keep product in place and prevent shifting to avoid floor damage.
<Common Warnings>
l This product cannot completely prevent pets from passing through. Do not place this product in a location where passage
through could lead to danger.
l Do not use this product for any purpose other than its intended use.
l Keep this product in sight and keep the door open when unattended to avoid unexpected injury or death to your pet; pets
behave unexpectedly when startled by thunder, lighting, or by other animals.
l Make sure door is locked securely to avoid unexpected injury.
l Make sure each part is properly assembled before using this product. Pay close attention to new-born pups or tiny dogs
to avoid serious injury to pets and/or damage to product. Small pets may get caught between the wire and wooden frame.
l Only use genuine parts and do not alter the product to avoid accidents and/or injury to self, pets, or others.
l Keep this product away from all heat sources at all times to avoid unexpected product damage or burn-related injuries to
persons/pets.
l Do not use this product while your pet is leashed to avoid unexpected accidents/injuries, such as dog entanglement.
l Do not lean or sit on this product to avoid unexpected personal accidents and/or product damage.
l Make sure to use this product on a flat solid floor surface.
l If your notice anything wrong with this product or installation site, discontinue its use at once.
l CHILDREN and ADULTS can trip over product under low-light/darkness. Place a night light near the product to avoid
possible personal injury under low-light/dark conditions.
<Main warning while this product is used as a pet gate>
lDo not use this product at the top of the staircase or near a glass door. Pet owners should be very cautious about whether
their place is appropriate for using this product.
lDo not step over this product to avoid falling and serious injury.
lBe careful not to stumble on bottom of door frame.
l Pay attention to sharp edges and corners while assembling this product to avoid personal injury.
l Make sure the door is locked properly (lock is positioned at top/bottom of door), to keep your pets safely confined and
to avoid unexpected injury and/or escape.
l When opening/closing the door, be careful not to pinch your hands, fingers, or pets.
l Do not drop or misuse this product to avoid damage.
l Be careful not to pinch your hands or fingers while assembling this product.
l This product is designed for indoor use only. Do not use it outdoors.
l Do not force the door to open wider than it is intentionally designed as this may cause damage/separation from
the wooden frame.
The following signs are special remarks for safety use of the product.
Keep these remarks in mind before using this product.
: Remarks on inappropriate use which might cause death, serious injury and/or physical damage.
: Remarks on inappropriate use which might cause slight injury and/or physical damage.
: Remarks on inappropriate use which might cause trouble, damage and/or shorter life to product.
What are the following signs?
Important!
Important!
Cautions!
Cautions!
Warnings!
Warnings!
Wire Slat Model Mesh Panel Model
Instruction Manual
Features
Instruction for Proper Use
1
Before assembling this product, make sure the following parts are included: Part Images are for Wire Slat Model.
Part Images
UPC 94196・94170・94198
JAN 98754・5006・98755
UPC 94936
JAN 5059
Wire Slat
Model
ModelProduct code
Mesh Panel
Model
Mesh Panel
Model
UPC 94199・94171・94188・94901
JAN 98756・5007・98757
UPC 94937
JAN 5060
Wire Slat
Model
Door Panel
(1)
Door Panel
(1)
Side Panel
(3)
Side Panel
(5)
Coupling
Rod
(4)
Coupling
Rod
(6)
Cap
(4)
Cap
(6)
Hole pin
(8)
Hole pin
(12)
Part Name
4-Panel Pet Pen 6-Panel Pet Pen
Corner Divider1 Corner Divider2
Gate Room Divider
Pet Pen
Parts
Examples of Product Configurations
2
2. Insert Hole pins
Insert 2 Hole pins in to the Holes on top
of the Coupling Rods as shown.
3. Insert Caps
After selecting your desired configuration,
insert Caps as shown. Check to make sure
each Cap is in position.
To make sure the product is placed
properly on the floor, turn the Adjuster
Knob on the bottom of the Coupling
Rod until it touches the floor.
l Caps can only be inserted at 90 or 180 degree angles.
l There will be a small gap between Panel and Cap.
Cautions!
1. Attach Panels
Wood Dowel
Hole
Hole pin
90 degree angle 180 degree angle
Hole
4. Level the product using the Adjuster
Adjuster Knob
Adjuster Knob
Loosen
Loosen
(Higher)
(Higher)
(Lower)
(Lower)
Tighten
Tighten
①Locate the hole on the bottom of the
Panel and insert the Wood Dowel on the
Coupling Rod in the direction as shown.
②Attach the top of the Coupling Rod to the Panel as shown.
(After inserting Wood Dowel, do not force the Coupling
Rod by twisting/turning).
How to assemble
3
lWipe off this product with washing cloth after squeezed firmly using a mild detergent and water. Do not use a scrub brush
and/or a polishing powder as these may cause scratched, rust and discolor to the product.
lWhen using creosol or other disinfectants, make sure to dilute them, otherwise damage to the wooden finish or discoloration
may occur.
lDo not use harsh chemicals such as thinner, benzene or alcohol as these may cause damage/discoloration to the finish.
lAfter cleaning, wipe dry with soft cloth or place in a shaded area to air dry; do not place product in direct sunlight.
l Grip and lift the Upper Gate Lock so that
the Gate Door is opened by releasing
Upper and Lower Gate Locks.
l The product is designed to lock automatically
when closed. If too much or too little force is
used when closing, the Gate Door may not
lock.
Upper Gate Lock
Lower Gate Lock
Please adjust the Upper Gate Lock to lock the
gate properly when the Gate Door is closed.
1.The adjusting Screw is located underneath
the Upper Gate Lock. Using a phillips
screwdriver, loosen the Screw but do not
remove it completely.
2.Using a phillips screwdriver, slide the Upper
Gate Lock until there is no gap between
Upper Gate Lock and Upper Lock Receiver.
3.Tighten the Screw securely in place. The Gate
Door should now lock properly.
Upper Lock ReceiverUpper Gate Lock
Gap No gap
Screw
1. Loosen the Screw 3. Tighten the Screw
2. Slide the Upper
Gate Lock
①②
③
Cautions!
①Remove Caps.
②Remove Hole Pins as shown.
③Slide Panel forward to separate from
Coupling Rod as shown.
(Do not force by pulling or twisting
Coupling Rod.)
l Take care that product does not collapse while disassembling.
l Leave Door locked when assembling Door Panel.
lPlease note that product specifications and design may change without prior notice for the purpose of quality improvement.
l
There may be coating cracks at some joints and each product may experience different coloration of the wood grain as frames are made of natural wood.
lIf you find something wrong with this product, please let us know. Thank you!
UPC/JAN Model
Wire
Slat
Model
Mesh
Panel
Model
L4
O4
H4
L6
O6
H6
Dimension  Width x Depth x Height (inches)
Pet Pen Gate Room Divider Material
94196-6 98754-4
94170-6 50061-3
94198-0 98755-1
94199-7 98756-8
94188-1 50070-5
94901-6 98757-5
803840 / 4973655 31.9×36.2×20" 64.6〜68.7×31.7〜33.7×20" 91.7×24.8×20"
64.6〜68.7×31.7〜33.7×31.5" 91.7×29.1×31.5"
64.6〜68.7×31.7〜33.7×35.8" 91.7×24.8×35.8"
129.9〜134.4×31.7〜33.7×20" 138.2×24.8×20"
129.9〜134.4×31.7〜33.7×31.5" 135.8×29.1×31.5"
129.9〜134.4×31.7〜33.7×35.8" 138.2×24.8×35.8"
31.9×36.2×31.5"
31.9×36.2×35.8"
H4
94936-8 50591-5 64.6〜68.7×31.7〜33.7×35.8" 91.7×24.8×35.8"
31.9×36.2×35.8"
31.9×68.9×20"
31.9×68.9×31.5"
O6
94171-3 50071-2 129.9〜134.4×31.7〜33.7×31.5" 135.8×29.1×31.5"
31.9×68.9×31.5"
31.9×68.9×35.8"
H6
94937-5 50601-1 129.9〜134.4×31.7〜33.7×35.8" 138.2×24.8×35.8"
31.9×68.9×35.8"
Wooden Frame: Natural wood
Metal Part: Steel
Door Plastic Part: Polypropylene
Cap: Nylon
(Only for Wire Slat Model)
Wire Slat: Steel
Rubber Skid: Elastomer
(Only for Mesh Panel Model)
Mesh Panel: Steel
Rubber Skid: Silicon
How to disassmble
How to open and close the Gate Door
How to Adjust Upper Gate Lock
How to clean
Specifications
※
※
Shop for other Pet Supplies on our website.

This manual suits for next models

22

Other Richell Pet Care Product manuals

Richell 80004 User manual

Richell

Richell 80004 User manual

Richell 3-Step Pet Stool V1 User manual

Richell

Richell 3-Step Pet Stool V1 User manual

Richell Easy-Lock User manual

Richell

Richell Easy-Lock User manual

Richell PAW TRAX 60031 User manual

Richell

Richell PAW TRAX 60031 User manual

Richell 94951 User manual

Richell

Richell 94951 User manual

Richell 30000 User manual

Richell

Richell 30000 User manual

Richell 3-Step Pet Stool V1 User manual

Richell

Richell 3-Step Pet Stool V1 User manual

Richell 80039 User manual

Richell

Richell 80039 User manual

Richell 80015-7 User manual

Richell

Richell 80015-7 User manual

Richell 80041 User manual

Richell

Richell 80041 User manual

Richell 60022 User manual

Richell

Richell 60022 User manual

Richell 94193 User manual

Richell

Richell 94193 User manual

Richell Pet Sitter Gate User manual

Richell

Richell Pet Sitter Gate User manual

Richell 94944 User manual

Richell

Richell 94944 User manual

Richell 80019 User manual

Richell

Richell 80019 User manual

Richell 80043 Manual

Richell

Richell 80043 Manual

Richell 70000 User manual

Richell

Richell 70000 User manual

Richell 803840 70001-3 User manual

Richell

Richell 803840 70001-3 User manual

Richell 80037 User manual

Richell

Richell 80037 User manual

Richell 803840 94337-3 User manual

Richell

Richell 803840 94337-3 User manual

Richell 94948 User manual

Richell

Richell 94948 User manual

Richell 50000 User manual

Richell

Richell 50000 User manual

Richell L4 User manual

Richell

Richell L4 User manual

Richell 60025 User manual

Richell

Richell 60025 User manual

Popular Pet Care Product manuals by other brands

Pet Gear PG4525SC instruction manual

Pet Gear

Pet Gear PG4525SC instruction manual

Aquatop LEDC-21 Easy setup guide

Aquatop

Aquatop LEDC-21 Easy setup guide

MGG Maxi Dog Fencing System Operating and training guide

MGG

MGG Maxi Dog Fencing System Operating and training guide

Halo Halo Collar manual

Halo

Halo Halo Collar manual

Droll Yankees B-7 quick start guide

Droll Yankees

Droll Yankees B-7 quick start guide

LosTnFound OPACUS Technical specification

LosTnFound

LosTnFound OPACUS Technical specification

Kathrein KAWE 21 manual

Kathrein

Kathrein KAWE 21 manual

Hanover HANRH0103-GRY quick start guide

Hanover

Hanover HANRH0103-GRY quick start guide

Kerbl NoFrost Superior 2.0 Instructions for use

Kerbl

Kerbl NoFrost Superior 2.0 Instructions for use

WaterDog Adventure Gear WAG Boarding Steps PM-6H owner's manual

WaterDog Adventure Gear

WaterDog Adventure Gear WAG Boarding Steps PM-6H owner's manual

Garmin ALPHA owner's manual

Garmin

Garmin ALPHA owner's manual

Petsafe ScoopFree Get started

Petsafe

Petsafe ScoopFree Get started

Thermo Technologies thermodog 4060-20 operating manual

Thermo Technologies

Thermo Technologies thermodog 4060-20 operating manual

Petsafe Stay & Play PIF00-14288 product manual

Petsafe

Petsafe Stay & Play PIF00-14288 product manual

Aquatop RC-24G owner's manual

Aquatop

Aquatop RC-24G owner's manual

Prevue Hendryx Penthouse Suites Assembly instructions

Prevue Hendryx

Prevue Hendryx Penthouse Suites Assembly instructions

Petsafe PAW POINT PIF00-13651 Operating and training guide

Petsafe

Petsafe PAW POINT PIF00-13651 Operating and training guide

Ferplast VEGA user manual

Ferplast

Ferplast VEGA user manual

manuals.online logo
manuals.online logoBrands
  • About & Mission
  • Contact us
  • Privacy Policy
  • Terms and Conditions

Copyright 2025 Manuals.Online. All Rights Reserved.