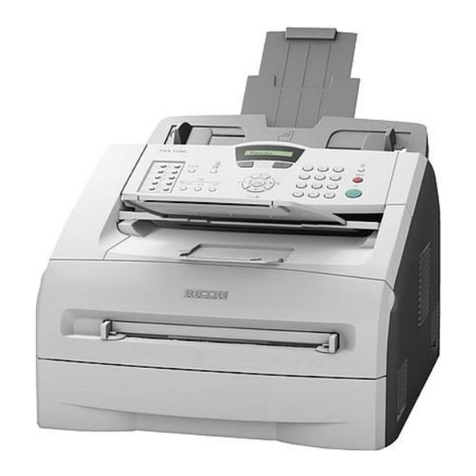
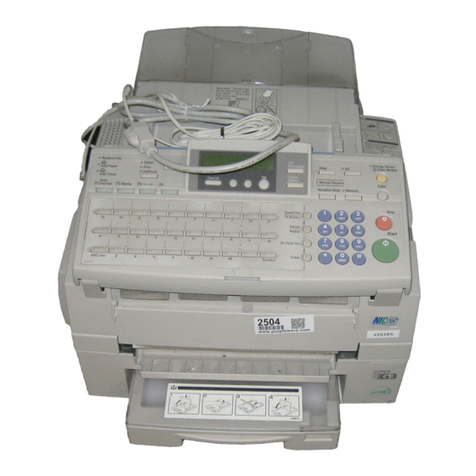
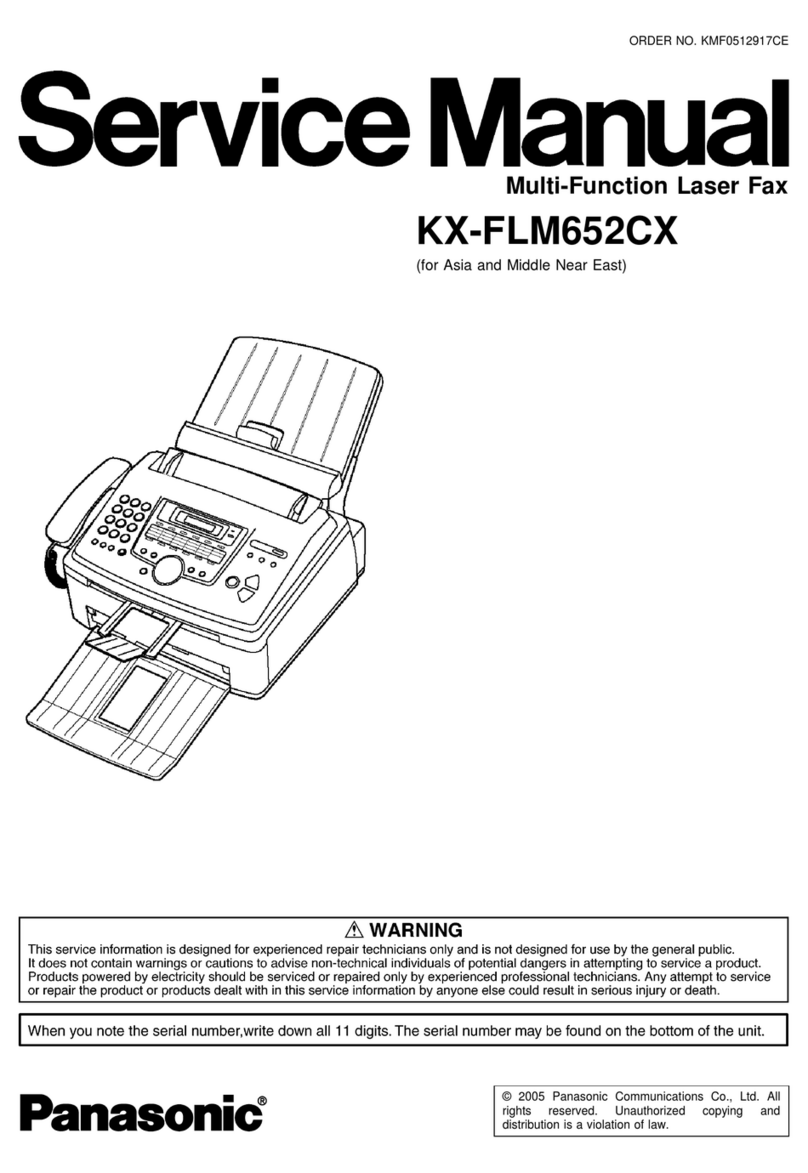
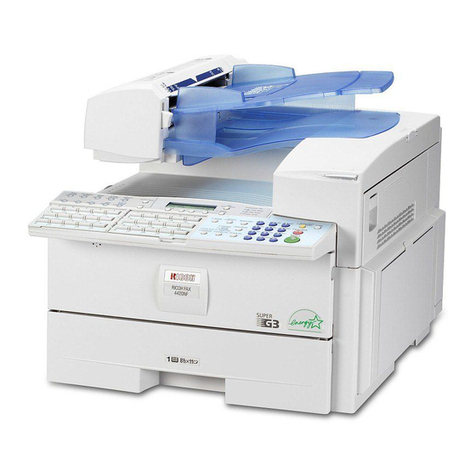
Ricoh 4430NF User manual

Paper type: OK Prince Eco G100(55kg), Paper Thickness=80 µm // Pages in book=116 // Print scale=81%
Gap (when printed at 81% scale) = Pages in book ×Paper thickness / 2 = 4.640000 mm
Operating Instructions Basic Features
Operating Instructions
Basic Features
For safe and correct use of this machine, please be sure to read the Safety Information before you use it.
Getting Started
Faxing
Programming
Troubleshooting
1
2
3
4
Printed in The Netherlands
GB GB H557-8201

Paper type: OK Prince Eco G100(55kg), Paper Thickness=80 µm // Pages in book=116 // Print scale=81%
Gap (when printed at 81% scale) = Pages in book ×Paper thickness / 2 = 4.640000 mm
Declaration of Conformity
Notice to Users in EEA Countries
This product complies with the essential requirements and provisions of Directive 1999/5/EC of the Eu-
ropean Parliament and of the Council of 9 March 1999 on radio equipment and telecommunications
terminal equipment and the mutual recognition of their conformity.
Notice to Users Accessing Analog PSTN in EEA Countries
This product is designed to be able to access analog PSTN in all EEA countries. Local PSTN compat-
ibility is dependent on software switch settings. Please contact your service representative if relocating
this product to another country. In the event of problems, please contact your service representative
in the first instance.
The CE Declaration of Conformity is available by accessing the URL:
http://www.ricoh.co.jp/fax/ce_doc/ and selecting the product applicable.
In accordance with IEC 60417, this machine uses the following symbols for the main power switch:
ameans POWER ON.
bmeans POWER OFF.
Introduction
This manual contains detailed instructions and notes on the operation and use of this machine. For your
safety and benefit, read this manual carefully before using the machine. Keep this manual in a handy
place for quick reference.
Notes:
Some illustrations in this manual might be slightly different from the machine.
Certain options might not be available in some countries. For details, please contact your local dealer.
Caution: Use of controls or adjustment or performance of procedures other than those specified in this
manual might result in hazardous radiation exposure. This product (see specification in the Operating
Instructions) is considered a class 1 laser device. Safety precautions and interlock mechanisms have
been designed to prevent any possible laser beam exposure to the operator. The following marking is
attached on the back of the product.
Two kinds of size notation are employed in this manual. With this machine refer to the metric version.
For good copy quality, the supplier recommends that you use genuine toner from the supplier.
The supplier shall not be responsible for any damage or expense that might result from the use of parts
other than genuine parts from the supplier with your office products.
Important
Contents of this manual are subject to change without prior notice. In no event will the company be li-
able for direct, indirect, special, incidental, or consequential damages as a result of handling or oper-
ating the machine.
Power Source:
220–240V, 50/60Hz
Please be sure to connect the power cord to a power source as above. For details about the power
source, see Chapter 10, “Connecting the Power and Switching On” in the Advanced Features manual.
Trademarks
Adobe®and Acrobat®are registered trademarks of Adobe Systems Incorporated.
Microsoft®, Windows®and Windows NT®are registered trademarks of Microsoft Corporation in the
United States and/or other countries.
Other product names used herein are for identification purposes only and might be trademarks of their
respective companies. We disclaim any and all rights in those marks.
Note
The proper names of the Windows operating systems are as follows:
•Microsoft
®Windows®95 operating system
•Microsoft
®Windows®98 operating system
•Microsoft
® Windows® Millennium Edition (Windows Me)
•Microsoft
®Windows®2000 Professional
•Microsoft
®Windows®XP Professional
•Microsoft
®Windows®XP Home Edition
•Microsoft
®Windows®2000 Server
•Microsoft
®Windows NT®Server operating system Version 4.0
•Microsoft
®Windows NT®Workstation operating system Version 4.0
For information about the latest available drivers, see the relevant manufacturer's Web site.
For safe and correct use of this machine, please be sure to read the Safety Information before you use it. Copyright © 2006

i
TABLE OF CONTENTS
What Do You Want to Do with This Machine? ....................................................1
Notice ...................................................................................................................... 3
Safety Information ......................................................................................................3
Safety During Operation .......................................................................................... 3
Position of the RCAUTION Label ........................................................................8
User Information on Electrical & Electronic Equipment ....................................9
Users in the EU, Switzerland and Norway .................................................................9
All Other Users...........................................................................................................9
ENERGY STAR Program .....................................................................................10
Energy Saver Modes................................................................................................11
Remarks................................................................................................................13
How to Read This Manual ...................................................................................15
Paper Mark............................................................................................................... 16
Manuals for This Machine ...................................................................................17
Basic Features (this manual) ...................................................................................17
Advanced Features (on CD-ROM)...........................................................................17
Before You Use This Machine .................................................................................17
NIC FAX Unit Manual (on CD-ROM)........................................................................17
NIC FAX Unit CD-ROM Manual ...............................................................................17
1. Getting Started
Guide to Components .........................................................................................19
Front View ................................................................................................................19
Side View .................................................................................................................21
Control Panel........................................................................................................ 22
Reading the Display .................................................................................................25
Reading the Display and Using Keys ....................................................................25
Standby Display.....................................................................................................26
Communication Display.........................................................................................26
Display Prompts ....................................................................................................27
Energy Saver Mode Display ..................................................................................27
Restricted Access Display .....................................................................................28
Turning On or Off the Power............................................................................... 29
Turning On the Power ..............................................................................................29
Turning Off the Power ..............................................................................................29
2. Faxing
Transmission Modes ...........................................................................................31
Switching between Memory Transmission and Immediate Transmission................31
Placing Originals..................................................................................................33
Placing Originals in the ADF .................................................................................... 34
Originals Unsuitable for the Auto Document Feeder (ADF) ..................................... 34
Memory Transmission.........................................................................................36
StellaF26_combine_F-GB_FM_forPaper.book Page i Tuesday, January 16, 2007 10:08 AM

ii
Canceling a Memory Transmission....................................................................38
Before Pressing the Start Key..................................................................................38
While Scanning the Original.....................................................................................38
When an Original Is Jammed...................................................................................38
During Transmission ................................................................................................38
While Awaiting Transmission ................................................................................... 39
Immediate Transmission.....................................................................................41
If the Connection Could Not Be Made......................................................................42
Canceling an Immediate Transmission .............................................................43
Before Pressing the Start Key..................................................................................43
After Pressing the Start Key.....................................................................................43
When an Original Is Jammed...................................................................................43
Scan Settings .......................................................................................................44
Resolution ................................................................................................................44
Original Type............................................................................................................45
Changing Scan Settings...........................................................................................46
Dialing ................................................................................................................... 47
Entering Numbers Directly .......................................................................................47
Pause ....................................................................................................................48
Tone ......................................................................................................................48
Using Quick Dials.....................................................................................................49
Using Speed Dials....................................................................................................50
Using Group Dials....................................................................................................51
When specifying a group with a Quick Dial ...........................................................52
When specifying a group with the Group Key .......................................................52
Reception Modes .................................................................................................54
Selecting the Reception Mode ................................................................................. 54
Receiving Messages in Manual Receive .................................................................55
3. Programming
Own Name/Fax Header/Own Fax Number .........................................................57
Own Name / Fax Header .........................................................................................58
Programming ......................................................................................................... 58
Editing....................................................................................................................59
Deleting .................................................................................................................60
Own Fax Number .....................................................................................................61
Programming ......................................................................................................... 61
Editing....................................................................................................................62
Deleting .................................................................................................................63
Quick Dial .............................................................................................................64
Programming............................................................................................................65
Editing .....................................................................................................................67
Deleting ...................................................................................................................68
Quick Dial Key Label (Dial Label) ............................................................................ 69
Label paper............................................................................................................70
Speed Dial.............................................................................................................72
Programming ...........................................................................................................73
Editing ......................................................................................................................75
Deleting ...................................................................................................................76
StellaF26_combine_F-GB_FM_forPaper.book Page ii Tuesday, January 16, 2007 10:08 AM
iii
Groups ..................................................................................................................78
Programming ...........................................................................................................78
Editing ......................................................................................................................82
Deleting ....................................................................................................................84
To delete a destination from a group..................................................................... 84
To delete an entire group ......................................................................................85
Entering Characters.............................................................................................87
Available Characters ................................................................................................87
Keys .........................................................................................................................87
How to Enter Characters..........................................................................................88
4. Troubleshooting
Loading Paper in the Main Paper Tray...............................................................91
Replacing the Toner Cartridge ........................................................................... 92
Toner Cartridge Storage......................................................................................95
Adjusting Volume ................................................................................................ 96
Clearing Original Jams........................................................................................98
Clearing a Copy, Fax, or Print Jam ....................................................................99
Error Messages .................................................................................................. 101
Indicators............................................................................................................103
Solving Problems...............................................................................................104
When Things Don't Go as Expected ................................................................ 106
Printing the Help List.........................................................................................107
INDEX....................................................................................................... 108
StellaF26_combine_F-GB_FM_forPaper.book Page iii Tuesday, January 16, 2007 10:08 AM

iv
StellaF26_combine_F-GB_FM_forPaper.book Page iv Tuesday, January 16, 2007 10:08 AM

1
What Do You Want to Do with This
Machine?
This is a summary of this machine's features including which pages to consult
for detailed information.
I want ... Reference
to specify several destinations with a single
key
p.51 “Using Group Dials” and p.78 “Groups”
to print Quick Dial key labels that can be at-
tached to the control panel so that I can find
quickly the Quick Dial with the destination I
want to specify programmed in
p.69 “Quick Dial Key Label (Dial Label)”
to check whether a fax transmission was suc-
cessful or not
p.34 “Checking the Transmission Result (TX
Status)”, Advanced Features
to find a stored Speed Dial quickly p.44 “Telephone Directory”, Advanced Fea-
tures
to send a fax at a specific time p.5 “Sending at a Specific Time (Send Later)”,
Advanced Features
to cut down on my telephone bill p.137 “Economy Transmission”, Advanced
Featuresand p.20 “Transfer Request”, Ad-
vanced Features
to cut down on my paper consumption p.76 “Two in One”, Advanced Featuresand p.76
“Two-sided Reception”, Advanced Features
to prevent many sheets of paper from being
printed out if fax messages are received during
the night or on holidays
p.138 “Energy Save Timer”, Advanced Features
to block out unwanted messages p.118 “Authorized Reception”, Advanced Fea-
tures
to send a message on a two-sided original p.53 “Duplex Original Settings”, Advanced
Features
to send a fax message which has the large
number of pages in one transmission
p.55 “Batch Original Documents Transmis-
sion”, Advanced Features
to have multiple copies of incoming messages p.75 “Multi-copy Reception”, Advanced Fea-
tures
to retry a failed transmission p.31 “Retrying a Failed Transmission”, Ad-
vanced Features
to change destination(s) or alter the transmis-
sion time for a file queued for transmission
p.27 “Changing Transmission Files”, Ad-
vanced Features
to find frequently used functions by just press-
ing a single key instead of searching through
several menus
p.101 “User Function Keys”, Advanced Fea-
tures
to prevent my message being picked up casu-
ally by anyone at the other end
p.7 “Sending Confidential Messages”, Ad-
vanced Featuresand p.163 “Personal Boxes”,
Advanced Features
StellaF26_combine_F-GB_FM_forPaper.book Page 1 Tuesday, January 16, 2007 10:08 AM
2
to prevent a received message being picked up
casually by other people
p.37 “Printing a Confidential Message”, Ad-
vanced Featuresand p.42 “Printing Personal
Box Messages”, Advanced Features
to have backups automatically made of faxes I
send
p.136 “Backup File Transmission Settings”,
Advanced Features
to have backups automatically made of incom-
ing faxes
p.131 “Forwarding”, Advanced Featuresand
p.163 “Personal Boxes”, Advanced Features
to restrict access to the machine to specified us-
ers
p.28 “Restricted Access”
to monitor machine usage by user or depart-
ment
p.28 “Restricted Access” and p.9 “User Code
Transmission”, Advanced Features
to receive messages while I am away on a trip p.131 “Forwarding”, Advanced Features
to program in memory a document I often use p.97 “Auto Documents”, Advanced Features
to perform multiple keypad operations with a
single key
p.95 “Programs”, Advanced Features
I want ... Reference
StellaF26_combine_F-GB_FM_forPaper.book Page 2 Tuesday, January 16, 2007 10:08 AM
3
Notice
RCAUTION:
Use of controls, adjustments, or performance of procedures other than those
specified herein may result in hazardous radiation exposure.
Safety Information
When using this machine, the following safety precautions should always be fol-
lowed.
Safety During Operation
In this manual, the following important symbols are used:
Direct (or indirect reflected) eye contact with the laser beam may cause serious eye damage.
Safety precautions and interlock mechanisms have been designed to prevent any possible laser
beam exposure to the operator.
R
WARNING:
Indicates a potentially hazardous situation which, if instructions
are not followed, could result in death or serious injury.
R
CAUTION:
Indicates a potentially hazardous situation which, if instructions are not
followed, may result in minor or moderate injury or damage to property.
StellaF26_combine_F-GB_FM_forPaper.book Page 3 Tuesday, January 16, 2007 10:08 AM
4
RWARNING:
•Connect the power cord directly into a wall outlet and never use an
extension cord.
•Disconnect the power plug (by pulling the plug, not the cable) if the
power cable or plug becomes frayed or otherwise damaged.
•To avoid hazardous electric shock or laser radiation exposure, do
not remove any covers or screws other than those specified in this
manual.
•Turn off the power and disconnect the power plug (by pulling the
plug, not the cable) if any of the following occurs:
•You spill something into the machine.
•You suspect that your machine needs service or repair.
•The external housing of your machine has been damaged.
•Do not incinerate spilled toner or used toner. Toner dust might ig-
nite when exposed to an open flame.
•Disposal can take place at our authorized dealer.
•Dispose of the used toner cartridge in accordance with the local
regulations.
•Keep the machine away from flammable liquids, gases, and aero-
sols. A fire or an electric shock might occur.
•Connect the machine only to the power source described on the in-
side front cover of this manual. Connect the power cord directly into
a wall outlet and do not use an extension cord.
•Do not damage, break or make any modifications to the power cord.
Do not place heavy objects on it. Do not pull it hard nor bend it more
than necessary. These actions could cause an electric shock or fire.
•If the power cord is damaged (exposure of the core, disconnec-
tion,etc.), contact your service representative to change a new one.
Operating the machine with a damaged power cord may cause an
electric shock or fire.
StellaF26_combine_F-GB_FM_forPaper.book Page 4 Tuesday, January 16, 2007 10:08 AM
5
RCAUTION:
•Protect the machine from dampness or wet weather, such as rain and
snow.
•Unplug the power cord from the wall outlet before you move the machine.
While moving the machine, you should take care that the power cord will
not be damaged under the machine.
•When you disconnect the power plug from the wall outlet, always pull the
plug (not the cable).
•Do not allow paper clips, staples, or other small metallic objects to fall in-
side the machine.
•Keep toner (used or unused) and toner cartridge out of reach of children.
•For environmental reasons, do not dispose of the machine or expended
supply waste at household waste collection points. Disposal can take
place at an authorized dealer.
•The inside of the machine could be very hot. Do not touch the parts with
a label indicating "hot surface". Otherwise an injury might occur.
•Our products are engineered to meet high standards of quality and func-
tionality, and we recommend that you use only the expendable supplies
available at an authorized dealer.
StellaF26_combine_F-GB_FM_forPaper.book Page 5 Tuesday, January 16, 2007 10:08 AM
6
•Before moving the machine, be sure to disconnect all external connec-
tions, especially the power cord from the wall outlet. Damaged power
cords are a fire and electric shock hazard.
•To disconnect the power cord, pull it out by plug. Do not drag the cord
itself. Doing so may result in damage to the cord, leading to fire or electric
shock.
•For safety reason, unplug the power cord from the wall outlet if the ma-
chine will not be used for an extended period of time such as holidays.
•The fusing section of this machine might be very hot. Caution should be
taken when removing misfed paper.
•Keep the machine away from humidity and dust. Otherwise a fire or an
electric shock might occur. Do not place the machine on an unstable or
tilted surface. If it topples over, an injury might occur.
•Do not use aluminum foil, carbon paper, or similar conductive paper to
avoid a fire or a machine failure.
•Make sure the room where you are using the machine is well ventilated
and spacious. Good ventilation is especially important when the machine
is used heavily.
•Do not open toner cartridges forcefully. Toner can spill, dirtying your
clothes or hands, and possibly resulting in accidental ingestion.
•If toner or used toner is inhaled, gargle with plenty of water and move into
a fresh air environment. Consult a doctor if necessary.
•If toner or used toner gets into your eyes, flush thoroughly with eyswash
or water. Consult a doctor if necessary.
•If toner or used toner is swallowed, dilute by drinking a large amount of
water. Consult a doctor if necessary.
•Avoid getting toner on your clothes or skin when removing a paper jam
or replacing toner. If your skin comes into contact with toner, wash the af-
fected area throughly with soap and water.
•If toner gets on your clothing, wash with cold water. Hot water will set the
toner into the fabric and may make removing the stain impossible.
StellaF26_combine_F-GB_FM_forPaper.book Page 6 Tuesday, January 16, 2007 10:08 AM
7
•During operation, rollers for transporting the paper and originals revolve.
A safety device is being installed so that the machine can be operated
safely. But take care not to touch the rollers during operation. An injury
might occur.
•Fire and breakdown can result from heavy accumulation of dust inside
this machine. Consult your service representative for details about and
charges for cleaning the machine’s interior.
•If you have to move the machine when the optional paper tray unit is at-
tached, do not push on the main unit's top section. Doing so can cause
the optional paper tray unit to detach, possibly resulting in injury.
StellaF26_combine_F-GB_FM_forPaper.book Page 7 Tuesday, January 16, 2007 10:08 AM
8
Position of the RCAUTION Label
This machine has a RCAUTION label at the position shown below. For safety,
please follow the instructions and handle the machine as indicated.
The inside of the machine becomes very hot. Do not touch the inside. Doing so
could result in a burn.
High temperature. Be careful of hot parts when clearing paper jams.
AZX002
AZX003
StellaF26_combine_F-GB_FM_forPaper.book Page 8 Tuesday, January 16, 2007 10:08 AM
9
User Information on Electrical & Electronic
Equipment
Users in the EU, Switzerland and Norway
Our Products contain high quality components and are designed to facilitate re-
cycling.
Our products or product packaging are marked with the symbol below.
The symbol indicates that the product must not be treated as municipal waste.
It must be disposed of separately via the appropriate return and collection sys-
tems available. By following these instructions you ensure that this product is
treated correctly and help to reduce potential impacts on the environment and
human health, which could otherwise result from inappropriate handling. Recy-
cling of products helps to conserve natural resources and protect the environ-
ment.
For more detailed information on collection and recycling systems for this prod-
uct, please contact the shop where you purchased it, your local dealer or
sales/service representatives.
All Other Users
If you wish to discard this product, please contact your local authorities, the
shop where you bought this product, your local dealer or sales/service repre-
sentatives.
StellaF26_combine_F-GB_FM_forPaper.book Page 9 Tuesday, January 16, 2007 10:08 AM
10
ENERGY STAR Program
• Low-power Mode
At the factory, this fax machine was set to enter the low power mode 5 minutes
after the last operation is completed. To exit the low power mode, press the {En-
ergy Saver/Clear Modes}key. The machine can start printing in about 40 seconds
from the Energy Saving Standby mode or in about 30 seconds from the Fax
Standby Mode.
❖Specifications
ENERGY STAR®Program
The ENERGY STAR®Program encourages energy conservation by promoting energy efficient
computers and other office equipment.
The program backs the development and dissemination of products that feature energy saving
functions.
It is an open program in which manufacturers participate voluntarily.
Targeted products are computers, monitors, printers, facsimiles, copiers, scanners, and multi-
function devices. Energy Star standards and logos are internationally uniform.
Specification Power Consumption Default Time
With NIC FAX unit installed 6.0W 5 minutes
StellaF26_combine_F-GB_FM_forPaper.book Page 10 Tuesday, January 16, 2007 10:08 AM
11
Energy Saver Modes
Energy Saver mode enables you to avoid using unnecessary power and econo-
mize on electricity. Although we recommend you use this mode from the view-
point of environmental consciousness, you can also turn it off.
When you install this machine for the first time, Energy Saver mode is turned on
by default.
Two types of Energy Saver mode are available:
• Fax Standby: Use when you receive faxes regularly.
• Energy Saver Standby: Use when you want to economize on power consump-
tion.
Choose the one that best suits your circumstances.
Even though the control panel display isn't on in Energy Saver mode, indicators
that blink or light during communication or reception still work. When the Re-
ceive File indicator lights, exit Energy Saver mode and take the appropriate ac-
tion.
*1 When options are not installed.
You can turn Energy Saver mode on or off with the User Parameters. By default,
Energy Saver Standby is turned on.
The machine enters Energy Saver mode when:
• Nobody uses the machine for about 5 minutes (the machine automatically en-
ters Energy Saver mode).
• The user holds down the {Energy Saver/Clear Modes}key for about 2 seconds.
Energy Saver
mode type
Status How long be-
fore you can
print after exit-
ing Energy Sav-
er mode
Power consumption *1
Fax Standby Display is off
The machine maintains the
heating roller temperature at
half the full temperature; warm
up takes less time. (Heater half
cool)
Within about 30
seconds
20W
Energy Saver
Standby
Display is off
The machine lets the heating
roller cool to room tempera-
ture; warm-up takes longer.
(Heater off)
Within about 40
seconds
6W
StellaF26_combine_F-GB_FM_forPaper.book Page 11 Tuesday, January 16, 2007 10:08 AM
12
To exit Energy Saver mode:
• In Energy Saver Standby mode, press the {Energy Saver/Clear Modes}key.
• In FAX Standby mode, press any key.
• Place an original.
• Pick up the optional handset or the external telephone handset.
Note
❒When you load paper in Energy Saver mode, an error message will not be dis-
played even if the tray is not pushed in correctly.
❒After loading paper, press the {Energy Saver/Clear Modes}key and check that
"Ready” is shown on the display.
Reception in Energy Saver mode
In Energy Saver mode, originals that have been stored in memory are still sent
and the machine can still receive messages.
When a message is received in Energy Saver mode, the machine prints it and re-
turns to Energy Saver mode.
Recycled Paper
In accordance with the ENERGY STAR Program, we recommend use of recycled
paper which is environmentally friendly. Please contact your sales representa-
tive for recommended paper.
StellaF26_combine_F-GB_FM_forPaper.book Page 12 Tuesday, January 16, 2007 10:08 AM
13
Remarks
Be sure to read the following information before you use this machine:
• Do not turn off the power during output. Make sure that output has complet-
ed before you turn off the power.
• Do not open the front cover, right cover, lower right cover, main paper tray,
or optional paper tray unit while paper is being printed out. The machine will
stop printing and paper may become jammed.
• Do not move, tilt, or shake the machine during output.
• Be sure to make a copy of information stored in the machine memory. This
information might be deleted when you operate the machine improperly or
some trouble occurs with the machine.
•Notebeforehandthatthecompanyisnot liable for damages resulting from
malfunctions of the machine, loss of information stored in memory, or use of
the machine.
• If sending or receiving an important message by fax , confirm that the mes-
sage is sent or received with a telephone call.
• Be sure to ventilate the room where the machine is used to maintain a com-
fortable work environment. If the machine is used for a long period of time in
a room with bad ventilation, you may notice an unpleasant odor.
• Sudden changes in temperature or humidity may cause condensation to form
inside the machine. This can result in patchy output. In this case, wait a while
before reattempting copying or requesting a fax be sent again.
Important
❒Make sure that 100% appears on the display before you turn off the power. If
the power is turned off for 12 hours or longer, all documents stored in mem-
ory are deleted.
Note
❒If the power is turned off, fax documents cannot be received. The power
should normally be turned on.
The fax machines in current use are classified by communication speed. Interna-
tionally defined standards include G4, G3, and G2. This machine can communi-
cate with G3 fax machines.
When the other party's machine does not support the same functions as this ma-
chine, settings made with those functions might be invalid or transmission
might not be possible.
• If the other party's machine does not support the resolution at which you are
sending, this machine automatically switches to a resolution which is sup-
ported. See p.44 “Resolution”.
• Polling Reception requires that the other party's machine can perform Polling
Transmission. See p.13 “Polling Reception”, Advanced Features.
If the other party's machine does not have paper loaded of the same size and ori-
entation as your original, the message may be split and printed on two or more
sheets, or reduced and printed on one sheet.
StellaF26_combine_F-GB_FM_forPaper.book Page 13 Tuesday, January 16, 2007 10:08 AM

14
• For example, if the other party's machine has A5 paper loaded and it receives
a A4 size document, the A4 size image will be reduced to A5 size and printed
on A5 paper. For further information, see p.79 “When There Is No Paper of
the Correct Size”, Advanced Features.
StellaF26_combine_F-GB_FM_forPaper.book Page 14 Tuesday, January 16, 2007 10:08 AM
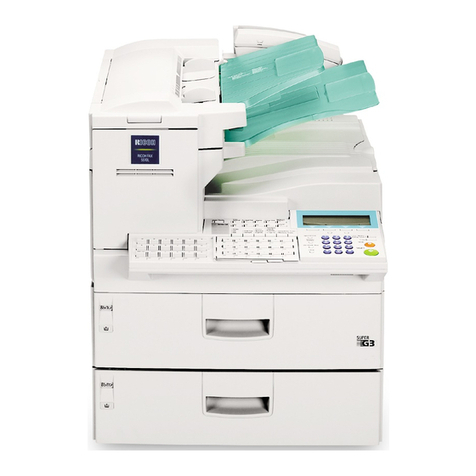
Table of contents
Other Ricoh Fax Machine manuals

Ricoh
Ricoh 4410L User manual

Ricoh
Ricoh 1195L User manual

Ricoh
Ricoh D3D9 Quick start guide

Ricoh
Ricoh 4420NF User manual

Ricoh
Ricoh 1000L Quick start guide

Ricoh
Ricoh B383 User manual

Ricoh
Ricoh FAX 1190L Safety guide

Ricoh
Ricoh FAX 1190L User manual

Ricoh
Ricoh Fax 680 MP User manual

Ricoh
Ricoh F102 User manual

Ricoh
Ricoh MV310 User manual

Ricoh
Ricoh 1232 Series User manual

Ricoh
Ricoh FAX1180L User manual

Ricoh
Ricoh LASER FACSIMILE User manual

Ricoh
Ricoh 2400L User manual

Ricoh
Ricoh Fx880 User manual

Ricoh
Ricoh FAX220 User manual

Ricoh
Ricoh FAX1400L Owner's manual

Ricoh
Ricoh Fax 2210L User manual

Ricoh
Ricoh FAX 2900Li User manual