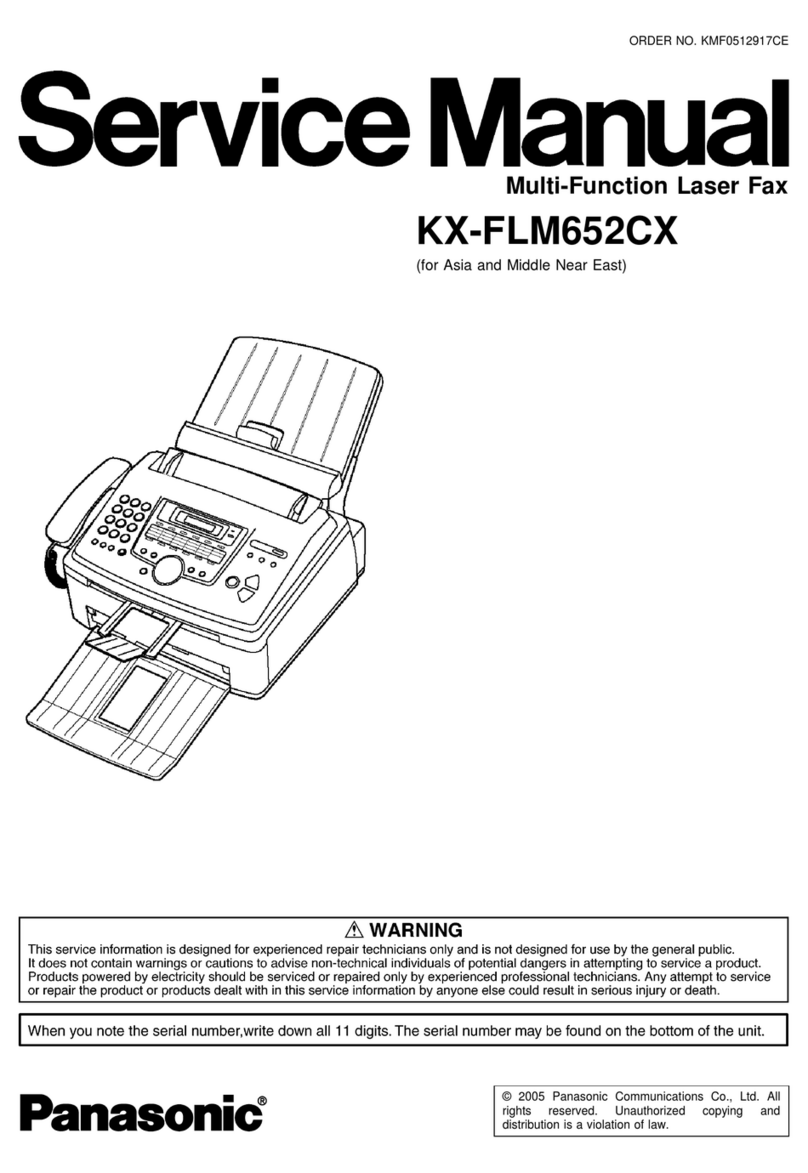
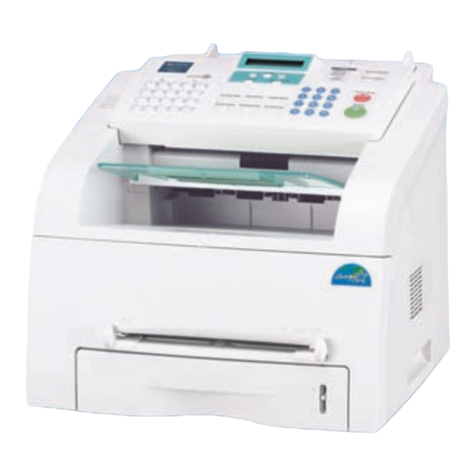
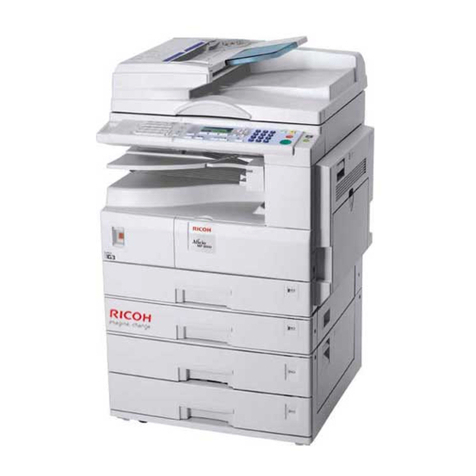
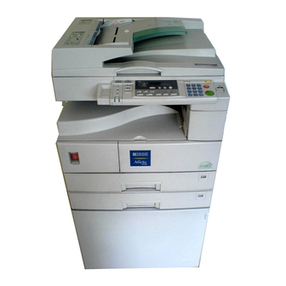
Ricoh 1232 Series User manual

Paper type: Wood Free 80g/m2, Paper Thickness=100 µm // Pages in book=60 // Print scale=81%
Gap (when printed at 81% scale) = Pages in book ×Paper thickness / 2 = 3.000000 mm
FAX Option Type 1232 Operating Instructions Facsimile Reference (option) <Basic Features>
FAX Option Type 1232
Operating Instructions
Facsimile Reference (option)
<Basic Features>
For safe and correct use of this machine, please be sure to read the Safety Information in the
General Settings Guide before you use it.
Getting Started
Faxing
Registering
Troubleshooting
Printed in the Netherlands
EE GB B502-8600

Paper type: Wood Free 80g/m2, Paper Thickness=100 µm // Pages in book=60 // Print scale=81%
Gap (when printed at 81% scale) = Pages in book ×Paper thickness / 2 = 3.000000 mm
Declaration of Conformity
Notice to Users in EEA Countries
This product complies with the essential requirements and provisions of Directive 1999/5/EC of the Eu-
ropean Parliament and of the Council of 9 March 1999 on radio equipment and telecommunications
terminal equipment and the mutual recognition of their conformity.
Notice to Users Accessing Analog PSTN in EEA Countries
This product is designed to be able to access analog PSTN in all EEA countries. Local PSTN compat-
ibility is dependent on software switch settings. Please contact your service representative if relocating
this product to another country. In the event of problems, please contact your service representative
in the first instance.
Notice to Users Accessing ISDN in EEA Countries
This product is designed to be able to access ISDN in all EEA countries without requiring changes to
software switch settings. In the event of problems, please contact your service representative in the
first instance.
The CE Declaration of Conformity is available on the Internet at URL: http://www.ricoh.co.jp/fax/ce_doc/
Introduction
This manual describes detailed instructions on the operation and notes about the use of this machine.
To get maximum versatility from this machine all operators are requested to read this manual carefully
and follow the instructions. Please keep this manual in a handy place near the machine.
Notes
Some illustrations in this manual might be slightly different from the machine.
Certain options might not be available in some countries. For details, please contact your local dealer.
Two kinds of size notation are employed in this manual. With this machine refer to the metric version.
Important
Contents of this manual are subject to change without prior notice. In no event will the company be li-
able for direct, indirect, special, incidental, or consequential damages as a result of handling or oper-
ating the machine.
Copyright © 2002

i
TABLE OF CONTENTS
How to Read This Manual .....................................................................................1
Symbols .....................................................................................................................1
Manuals for Facsimile Mode .................................................................................3
Basic Features (this manual) .....................................................................................3
Advanced Features ....................................................................................................3
1. Getting Started
Control Panel..........................................................................................................5
Reading the Display...............................................................................................7
Reading the Display Panel and Using Keys...............................................................7
Standby Display .........................................................................................................8
Communication Display .............................................................................................9
2. Faxing
Placing Originals..................................................................................................11
Placing a Single Original on the Exposure Glass.....................................................13
Bound original page order .....................................................................................13
Placing Originals in the Optional Document Feeder (ADF)......................................13
Originals unsuitable for the Optional Document Feeder (ADF) .............................14
Setting a Scan Area .................................................................................................14
Original sizes difficult to detect..............................................................................16
Memory Transmission.........................................................................................17
Canceling a Memory Transmission....................................................................20
Before the Original is Scanned ................................................................................20
While the Original is Being Scanned........................................................................20
While the Message is Being Sent ............................................................................20
Canceling a transmission using [Change/Stop TX File].............................................20
Canceling a transmission using the {Clear/Stop}key.............................................21
Immediate Transmission.....................................................................................22
Canceling an Immediate Transmission .............................................................24
Before You Have Pressed the Start Key..................................................................24
After You Have Pressed the Start Key.....................................................................24
Scan Settings .......................................................................................................25
Resolution ................................................................................................................25
Original Type............................................................................................................26
Image Density (Contrast) .........................................................................................27
Mixing Scan Settings for a Multiple Page Original ...................................................28
Dialing ...................................................................................................................29
Number Keys ...........................................................................................................29
Restrictions when dialing with the number keys....................................................29
Pause ....................................................................................................................30
Tone ......................................................................................................................30
Quick Dials ...............................................................................................................31
Groups .....................................................................................................................32
UranosC1-GBFAX_Combined_F7_FM.book Page i Tuesday, June 11, 2002 1:57 PM

ii
Reception..............................................................................................................34
Selecting the Reception Mode .................................................................................34
Manual Reception..................................................................................................34
Auto Reception......................................................................................................34
3. Registering
Initial Settings and Adjustments ........................................................................35
Programming............................................................................................................36
Editing ......................................................................................................................37
Deleting ....................................................................................................................37
Quick Dial .............................................................................................................38
Programming............................................................................................................39
Editing ......................................................................................................................41
Deleting ....................................................................................................................41
Groups ..................................................................................................................42
Programming............................................................................................................42
Editing ......................................................................................................................45
Deleting ....................................................................................................................47
Deleting a destination programmed in a Group.....................................................47
Deleting Groups.....................................................................................................48
4. Troubleshooting
Adjusting Volume ................................................................................................49
When the {
{{
{Facsimile}
}}
}Key is Lit in Red................................................................50
Error Messages and Their Meanings .................................................................51
Solving Problems.................................................................................................53
INDEX......................................................................................................... 55
UranosC1-GBFAX_Combined_F7_FM.book Page ii Tuesday, June 11, 2002 1:57 PM
1
How to Read This Manual
Symbols
In this manual, the following symbols are used:
R
WARNING:
This symbol indicates a potentially hazardous situation that might result in
death or serious injury when you misuse the machine without following the in-
structions under this symbol. Be sure to read the instructions, all of which are in-
cluded in “Safety Information” in the General Settings Guide.
R
CAUTION:
This symbol indicates a potentially hazardous situation that might result in mi-
nor or moderate injury or property damage that does not involve personal injury
when you misuse the machine without following the instructions under this
symbol. Be sure to read the instructions, all of which are included in “Safety In-
formation” in the General Settings Guide.
* The statements above are notes for your safety.
Important
If this instruction is not followed, paper might be misfed, originals might be
damaged, or data might be lost. Be sure to read this.
Preparation
This symbol indicates information or preparations required prior to operating.
Note
This symbol indicates precautions for operation, or actions to take after abnor-
mal operation.
Limitation
This symbol indicates numerical limits, functions that cannot be used together,
or conditions in which a particular function cannot be used.
Reference
This symbol indicates a reference.
[]
Keys that appear on the machine's panel display.
[]
Keys and buttons that appear on the computer's display.
{}
Keys built into the machine's control panel.
UranosC1-GBFAX_Combined_F7_FM.book Page 1 Tuesday, June 11, 2002 1:57 PM
2
Notice
B4 JISKL, B5 JISKL, B6 JISLare referred to as B4KL, B5KL, B6Lin this
manual.
UranosC1-GBFAX_Combined_F7_FM.book Page 2 Tuesday, June 11, 2002 1:57 PM

3
Manuals for Facsimile Mode
Two Facsimile Reference manuals are provided, the Basic Features manual and
the Advanced Features manual. Please refer to the manual that suits your needs.
Basic Features (this manual)
The Basic Features manual explains the most frequently used fax functions and
operations.
Advanced Features
The Advanced Features manual describes more advanced functions and also ex-
plains settings for key operators.
❖
❖❖
❖Chapter 1 Transmission Mode
Explains how to send a fax at a specific time without being by the machine
and also take advantage of off-peak telephone line charges.
❖
❖❖
❖Chapter 2 Checking and Canceling Transmission Files
Explains how to cancel a transmission and resend a message when it fails to
be transmitted.
❖
❖❖
❖Chapter 3 Communication Information
Explains how to erase a fax message programmed in memory and check the
contents of any file in memory.
❖
❖❖
❖Chapter 4 Other Transmission Features
Explains the useful transmission functions. Learn how to dial numbers easily.
❖
❖❖
❖Chapter 5 Reception Features
Explains how to receive fax messages. You can learn the various functions for
easily receiving faxes, as well as functions for accurately receiving faxes, such
as printing received two page originals onto one sheet, and automatically
switching between facsimile and telephone when a call comes in.
❖
❖❖
❖Chapter 6 Simplifying the Operation
Explains how to specify a Program and use the Document Server.
❖
❖❖
❖Chapter 7 Facsimile Features
Explains functions for printing lists and various types of reports, as well as set
functions when sending and receiving faxes.
❖
❖❖
❖Chapter 8 Key Operator Setting
Explains functions which the key operator handles. Learn how to setup the
phone line type and how to store the Memory Locked ID and the Confidential
ID.
UranosC1-GBFAX_Combined_F7_FM.book Page 3 Tuesday, June 11, 2002 1:57 PM
4
❖
❖❖
❖Chapter 9 LAN FAX Features
Explains how to fax directly from a computer and make necessary settings.
❖
❖❖
❖Chapter 10 Solving Operation Problems
Explains what to do when toner runs out and when power is turned off or
fails.
❖
❖❖
❖Chapter 11 Appendix
You can check the consumables and options for facsimile functions.
UranosC1-GBFAX_Combined_F7_FM.book Page 4 Tuesday, June 11, 2002 1:57 PM
5
1. Getting Started
Control Panel
The illustration of the control panel will differ depending on the installed op-
tional unit. The following illustration has all the options installed.
1. {
{{
{User Tools/Counter/Inquiry}
}}
}key
User Tools:
Press to enter User Tools mode. These
tools allow you to customize the default
settings. See p.92 “Accessing the User
Tools”, Facsimile Reference (option) <Ad-
vanced Features> .
Counter:
Displays and prints the total number of
copied or printed pages.
Inquiry:
Gives your service representative infor-
mation when the machine needs servic-
ing or a new toner cartridge.
2. Receive File Indicator
Lights when a message other than a Con-
fidential Reception or Memory Lock file
has been received. See p.64 “Substitute
Reception”, Facsimile Reference (option)
<Advanced Features> .
3. Communicating Indicator
Lights during transmission or reception.
4. Confidential File Indicator
Lights when a message has been received
into memory with Confidential Recep-
tion. See p.24 “Printing a Confidential
Message”, Facsimile Reference (option)
<Advanced Features> .
Blinks when a Memory Lock file has been
received into memory. See p.26 “Printing
a File Received with Memory Lock”, Fac-
simile Reference (option) <Advanced Fea-
tures> .
5. LCD display
This guides you through tasks and in-
forms you of the machine status. Messag-
es appear here.
6. {
{{
{Start Manual RX}
}}
}key
Press when using fax-on-demand servic-
es, or when Reception Mode is set to
Manual Reception.
7. {
{{
{Check Modes}
}}
}key
Press this key before pressing the {
{{
{Start}
}}
}
key to check the settings selected for the
fax about to be sent.
UranosC1-GBFAX_Combined_F7_FM.book Page 5 Tuesday, June 11, 2002 1:57 PM

Getting Started
6
1
8. {
{{
{Program}
}}
}key
Enables you to program frequently used
settings and recall the programmed set-
tings. See p.81 “Programs”, Facsimile Ref-
erence (option) <Advanced Features> .
9. {
{{
{Clear Modes}
}}
}key
Press to cancel the current settings.
10. Operation Switch
Press this switch to turn the power on
(the On indicator lights up). To turn the
power off, press this switch again (the On
indicator goes off). See p.149 “Power Fail-
ure Report”, Facsimile Reference (option)
<Advanced Features> .
11. Main Power indicator
This indicator goes on when the main
power switch is turned on.
12. On indicator
This indicator goes on when the opera-
tion switch is turned on.
13. {
{{
{Facsimile}
}}
}key
Press to switch to the Facsimile mode.
•Lights up in yellow
Facsimile mode has been selected.
•Lights up in green
Facsimile mode has been printing.
•Lights up in red
Lights up whenever any facsimile er-
ror occurs. Press the {
{{
{Facsimile}
}}
}key to
display the error message and take the
appropriate action.
14. {
{{
{On Hook Dial}
}}
}key
Press when the manual facsimile recep-
tion is set, or using the facsimile informa-
tion services.
15. {
{{
{Pause/Redial}
}}
}key
Pause:
Insert a pause when you are dialing or
storing a fax number. A pause cannot be
inserted as the first digit.
Redial:
Press to redial one of the last ten num-
bers. See p.33 “Redial”, Facsimile Refer-
ence (option) <Advanced Features> .
16. {
{{
{Tone}
}}
}key
Press to send tonal signals down a pulse
dialing line.
17. Number keys
Use to dial fax numbers or enter the
number of copies.
18. {
{{
{#}
}}
}key (Enter key)
Registers entered numbers or settings.
19. {
{{
{Clear/Stop}
}}
}key
Clear:
Cancels entered numbers.
Stop:
Interrupts the current operation (trans-
mission, scanning, copying or printing).
20. {
{{
{Start}
}}
}key
Press to start faxing, scanning, copying or
printing.
UranosC1-GBFAX_Combined_F7_FM.book Page 6 Tuesday, June 11, 2002 1:57 PM
Reading the Display
7
1
Reading the Display
The display tells you the machine status, messages and guides you through op-
erations.
Note
❒Functions that have been selected are highlighted (for example ).
Keys that you cannot select are shown with a dashed outline (for example
).
❒All procedures in this manual assume you are in Facsimile mode. If the ma-
chine is not in Facsimile mode, press the {
{{
{Facsimile}
}}
}key to change to Facsim-
ile mode. You can have the machine start in Facsimile mode. See “General
Features”in the General Settings Guide.
❒This machine automatically returns to the standby mode if you do not use the
machine for a certain period of time. You can select the period in Fax Reset
Timer. See “Timer Setting”in the General Settings Guide.
Reading the Display Panel and Using Keys
The display contents will be different depending on the installed optional unit.
1. Displays the scanning conditions
and sizes you can choose.
2. Displays the date and time, the
name and facsimile number of a des-
tination when transmitting, and the
size of the original.
3. Displays the entered number of a
destination. When adding destina-
tions with the number keys, press
[Add].
4. Displays messages and the ma-
chine status.
UranosC1-GBFAX_Combined_F7_FM.book Page 7 Tuesday, June 11, 2002 1:57 PM

Getting Started
8
1
5. Press to display various informa-
tion about transmission.
6. Appears when a destination is en-
tered. Press [Clear]or the {
{{
{Clear/Stop}
}}
}
key to erase characters or numbers
one by one.
7. Switches the transmission mode
between Memory Transmission and
Immediate Transmission.
8. Displays Quick Operation Keys
set for often used functions. [TX sta-
tus display]and [Dest. Management]are
preset.
9. Displays various functions for
transmitting.
10. Displays the Quick Dial Table
of programmed destinations.
Standby Display
While the machine is in standby mode (immediately after the {
{{
{Facsimile}
}}
}key is
pressed or after the {
{{
{Clear Modes}
}}
}key is pressed), the following display is
shown.
❖
❖❖
❖Initial display
Note
❒To return the machine to standby mode, do one of the following:
•If you have placed the original on the optional Document Feeder (ADF)
and have not pressed the {
{{
{Start}
}}
}key, remove the original.
•If you have not placed an original, press the {
{{
{Clear Modes}
}}
}key.
•If you are in User Tools mode, press the {
{{
{User Tools/Counter/Inquiry}
}}
}key.
UranosC1-GBFAX_Combined_F7_FM.book Page 8 Tuesday, June 11, 2002 1:57 PM
Reading the Display
9
1
Communication Display
While the machine is communicating, the status is displayed.
❖
❖❖
❖Memory Transmission
❖
❖❖
❖Reception
Note
❒Even when the machine is using memory to fax a message or receive a mes-
sage, you can still scan the next original into memory. See p.59 “Dual Access”,
Facsimile Reference (option) <Advanced Features> .
❒Even when the machine is being used as a copier, printer or scanner, the send-
er's name or number will be displayed for received faxes.
❖
❖❖
❖Immediate Transmission
UranosC1-GBFAX_Combined_F7_FM.book Page 9 Tuesday, June 11, 2002 1:57 PM
Getting Started
10
1
UranosC1-GBFAX_Combined_F7_FM.book Page 10 Tuesday, June 11, 2002 1:57 PM

11
2. Faxing
Placing Originals
You can place your originals either in
the optional Document Feeder (ADF)
or on the exposure glass. Some types
of originals are unsuitable for the op-
tional Document Feeder (ADF) so
they must be placed on the exposure
glass.
Which way you place your original
depends on its size and whether you
are using the optional Document
Feeder (ADF) or the exposure glass.
See p.16 “Original sizes difficult to
detect”.
Limitation
❒If you place A5 size documents on
the exposure glass, they will not be
detected. A5 size documents
placed in the optional Document
Feeder (ADF) are sent as A4 size.
Note
❒When sending a fax, the image
output at the other end depends on
the size and direction of paper
used in the destination's terminal.
If the destination does not use pa-
per of the same size and direction
as that of the original, the fax im-
age may be reduced in size,
trimmed at both edges, or divided
into two or more sheets. When
sending an important original, we
recommend that you ask the re-
ceiver about the size and direction
of the paper used in their terminal.
❒When sending an original of an ir-
regular (i.e. non-standard) size or
part of a large original, you can
specify the scan area precisely. See
p.14 “Setting a Scan Area”.
❒You can scan non-standard sized
documents as standard sized doc-
uments with the Irregular Scan
Area function. When you turn on
this function, the area scanned will
be in the specified range regardless
of the actual document size. A
blank margin will appear or the
image will be cut at the receiving
end.
❒If you place an A4 size original in
the portrait direction, the machine
rotates the image by 90 degrees be-
fore sending it. See p.59 “Trans-
mission with Image Rotation”,
Facsimile Reference (option) <Ad-
vanced Features> .
❒You can send the first pages from
the exposure glass then the re-
maining pages from the optional
Document Feeder (ADF). After
you have removed the last page
from the exposure glass, insert the
remaining pages in the optional
Document Feeder (ADF), then
press the {
{{
{Start}
}}
}key.
Reference
For how to place 2-sided documents,
see
p.46 “2-Sided Transmission
(Double-Sided Transmission)”,
Facsimile Reference (option) <Ad-
vanced Features> .
UranosC1-GBFAX_Combined_F7_FM.book Page 11 Tuesday, June 11, 2002 1:57 PM

Faxing
12
2
-
--
-How to place A4, B4, A3,
81/2"×
××
×11", 11"×
××
×14", and 11"×
××
×17"
size originals
Note
❒When you place originals in the
optional Document Feeder (ADF)
as shown in the above illustration,
the Fax Header will be printed on
the received faxes at the destina-
tion as follows:
•*1 On the top of the fax
•*2 On the left side of the fax
-
--
-How to place A4, A5 and B5
size originals
Limitation
❒A5 size documents are not detect-
ed on the exposure glass. Place A5
size documents in the optional
Document Feeder (ADF).
Note
❒When you place originals on the
optional Document Feeder (ADF)
as shown in the above illustration,
the Fax Header will be printed on
the received faxes at the destina-
tion as follows:
•*1 On the top of the fax
•*2 On the left side of the fax
UranosC1-GBFAX_Combined_F7_FM.book Page 12 Tuesday, June 11, 2002 1:57 PM
Placing Originals
13
2
Placing a Single Original on
the Exposure Glass
Place originals that cannot be placed
in the optional Document Feeder
(ADF), such as a book, on the expo-
sure glass one page at a time.
A
AA
ALift the exposure glass cover or
the optional Document Feeder
(ADF) by at least 30 degrees. Place
the original face down on the ex-
posure glass. The original should
be aligned to the left scale.
1. Reference mark
2. Scale
B
BB
BClose the optional Document
Feeder (ADF).
Note
❒When setting a bound original, the
received image may contain some
black areas. To reduce this effect,
hold down the original to prevent
its bound part from rising.
Bound original page order
When setting bound originals (books,
magazines, etc.), you can choose to
have either the left page or right page
sent first. See p.45 “Book Fax”, Fac-
simile Reference (option) <Advanced
Features> .
Note
❒You can choose whether the left
page or right page is sent first. See
p.113 “Changing the User Parame-
ters”, Facsimile Reference (option)
<Advanced Features> (Switch14,
Bit1).
Placing Originals in the
Optional Document Feeder
(ADF)
Use the optional Document Feeder
(ADF) to scan in a stack of originals in
one operation. The optional Document
Feeder (ADF) can handle both single-
sided and double-sided originals.
Limitation
❒Place all the originals to be sent in
a single stack.
❒You cannot place originals in the
optional Document Feeder (ADF)
one page at a time or in sheaves.
Note
❒The maximum document length is
1200 mm (47").
❒If you send documents longer than
420 mm (17"), select Long Docu-
ment mode with the User Parame-
ters. If a jam occurs, the document
might be damaged because scan-
ning will not stop. See p.14 “Set-
ting a Scan Area”. See p.113
“Changing the User Parameters”,
Facsimile Reference (option) <Ad-
vanced Features> (Switch14, Bit1).
❒Documents longer than 432 mm
(17") must be sent by memory
transmission (immediate transmis-
sion is not possible).
❒If an original jams, press the
{
{{
{Clear/Stop}
}}
}key then remove the
original carefully.
UranosC1-GBFAX_Combined_F7_FM.book Page 13 Tuesday, June 11, 2002 1:57 PM
Faxing
14
2
❒Place thin originals on the expo-
sure glass.
❒You can check information about
the sizes and number of originals
that can be placed in the optional
Document Feeder (ADF) with “Ac-
ceptable types of Originals“. See
p.160 “Acceptable Types of Origi-
nals”, Facsimile Reference (option)
<Advanced Features> .
A
AA
AAdjust the document guide to
match the size of your originals.
Align the edges of your originals
and stack them in the optional
Document Feeder (ADF) face up.
1. Limit mark
2. Document guide
Originals unsuitable for the Optional
Document Feeder (ADF)
Do not place the following types of
originals in the optional Document
Feeder (ADF) because they may be
damaged. Place them on the exposure
glass instead.
•Originals containing staples or clips
•Perforated or torn originals
•Curled, folded, or creased originals
•Pasted originals
•Originals with any kind of coating,
such as thermosensitive paper, art
paper, aluminum foil, carbon pa-
per, or conductive paper
•Originals with index tabs, tags, or
other projecting parts
•Sticky originals, such as translu-
cent paper
•Thin and soft originals
•Originals of inappropriate weight
•Originals in bound form, such as
books
•Transparent originals, such as
OHP transparencies or translucent
paper
Setting a Scan Area
Normally, the area of a placed docu-
ment is scanned automatically. If a
scan area is specified, the document is
scanned accordingly. Thus, docu-
ments can be sent without extra space
or blank margins.
❖
❖❖
❖Auto Detect
The area of a placed document is
scanned automatically.
Note
❒
If the machine cannot detect the
original size, the confirmation dis-
play is shown. Replace the origi-
nal and make the copy again.
❖
❖❖
❖Regular
The placed document is scanned
according to the specified size re-
gardless of its actual size.
The sizes that can be specified are
A4
KL
, B4
L
, A3
L
, 8
1
/
2
"
×
11"
KL
,
11"
×
14"
L
, and 11"
×
17"
L
.
❖
❖❖
❖Area
Enter the area to be scanned. The
placed document is scanned ac-
cording to the entered size regard-
less of its actual size. See p.99
“Programming and Changing a
Scan Size”, Facsimile Reference (op-
tion) <Advanced Features> .
UranosC1-GBFAX_Combined_F7_FM.book Page 14 Tuesday, June 11, 2002 1:57 PM
Placing Originals
15
2
A
AA
APlace the originals, and select any
scan settings you require.
Note
❒When placing different size
originals into the optional Doc-
ument Feeder (ADF), adjust the
document guide to the largest
original.
❒Small originals may be sent at a
slight slant since they do not
match the document guide.
B
BB
BPress [Scan Area].
The Scan Area menu is shown.
C
CC
CSelect the scan area.
Specifying standard sizes
APress [Regular].
BPress the size of the originals
to be sent, and then press [OK].
Note
❒To cancel the specified stand-
ard size, press [Cancel]. The
display appears as in step B.
CPress [OK].
[Regular]is highlighted on the
display and the size is shown
above this.
Specifying programmed sizes
APress [Area 1]or [Area 2], and
then press [OK].
[Area 1]or [Area 2]is highlighted
on the display the scan area is
shown above this.
Note
❒
To cancel the set programmed
size, press
[Cancel]
. The menu
returns to that of step
B
.
D
DD
DDial a destination and press the
{
{{
{Start}
}}
}key.
UranosC1-GBFAX_Combined_F7_FM.book Page 15 Tuesday, June 11, 2002 1:57 PM
Faxing
16
2
Original sizes difficult to detect
The machine finds it difficult to detect the size of the following kinds of origi-
nals. If this happens, the receiving machine may not select print paper of the cor-
rect size.
•Documents placed on the exposure glass of sizes other than those listed in the
table below
•Originals with index tabs, tags, or projecting parts
•Transparent originals, such as OHP transparencies or translucent paper
•Dark originals with many characters or drawings
•Originals which partially contain solid printing
•Originals which have solid printing at their edges
•Slippery originals
•Originals in bound form of more than 10mm (0.3") thick such as books
The following paper sizes are automatically detected in Facsimile mode.
❖
❖❖
❖Metric Version
❖
❖❖
❖Inch Version
Ο- Auto detect
×- Unable to auto detect
Paper Size
Where Original is placed
A3L
LL
L81/2"×
××
×13"
(F4)
B4L
LL
LA4K
KK
KL
LL
LB5K
KK
KL
LL
LA5K
KK
KL
LL
L
Exposure Glass ΟΟΟΟΟ ×
Optional Document
Feeder (ADF) ΟΟΟΟΟΟ
Paper Size
Where Original is Placed
11"×
××
×17"L
LL
L81/2"×
××
×14"L
LL
L81/2"×
××
×11"K
KK
KL
LL
L51/2"×
××
×81/2"K
KK
KL
LL
L
Exposure Glass ΟΟΟ ×
Optional Document
Feeder (ADF) ΟΟΟ Ο
UranosC1-GBFAX_Combined_F7_FM.book Page 16 Tuesday, June 11, 2002 1:57 PM
Table of contents
Other Ricoh Fax Machine manuals

Ricoh
Ricoh Aficio FAX5000L User manual

Ricoh
Ricoh FAX75 User manual

Ricoh
Ricoh B383 User manual

Ricoh
Ricoh FAX 1190L User manual

Ricoh
Ricoh J-CF User manual

Ricoh
Ricoh FAX07 Quick start guide

Ricoh
Ricoh 1195L User manual

Ricoh
Ricoh Fax 2100L User manual

Ricoh
Ricoh FAX1400L User manual

Ricoh
Ricoh 3245 User manual

Ricoh
Ricoh LASER FACSIMILE User manual

Ricoh
Ricoh HL-F1 Quick start guide

Ricoh
Ricoh Fax 2210L User manual

Ricoh
Ricoh FAX2900L User manual

Ricoh
Ricoh Stella-C1 Service manual

Ricoh
Ricoh 2400L User manual

Ricoh
Ricoh FAX1130L User manual

Ricoh
Ricoh Aficio 250 User manual

Ricoh
Ricoh 1195L Operating and maintenance manual

Ricoh
Ricoh FAX1180L Installation instructions