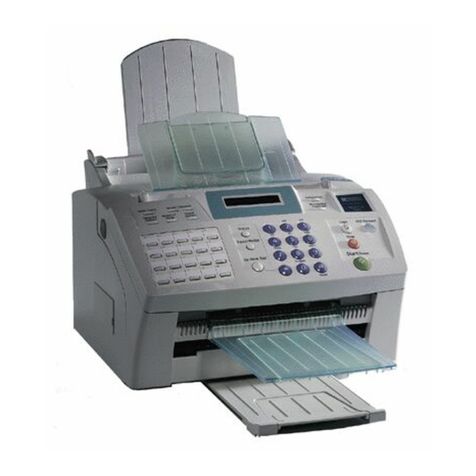
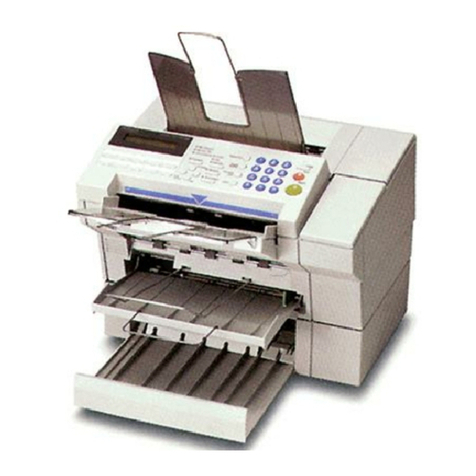
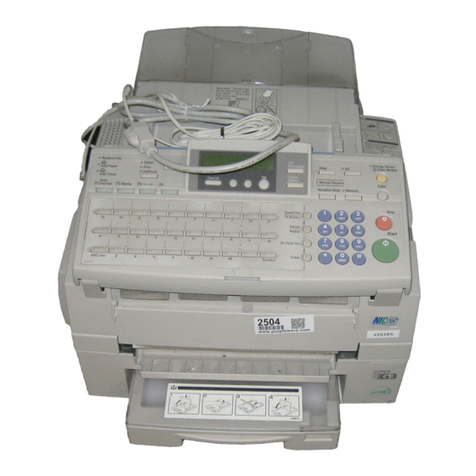
Ricoh Fax 680 MP User manual

GB
OPERATOR’S MANUAL
RICOH FAX680MP
Please read all of these instructions and keep this manual by your machine.

OPTIONAL EQUIPMENT
MEMORY
FAX EXPANSION BOARD TYPE 60 1MB
Trademark Notice:
Other brand and product names may be trademarks or registered trademarks
of their respective companies.

TABLE OF CONTENTS
INTRODUCTION ......................................................................................... 1
WHAT DOES A FAX MACHINE DO?.........................................2
PRINTING FROM A PC................................................................2
ABOUT THIS MANUAL................................................................3
GENERAL PRECAUTIONS .........................................................4
GUIDE TO COMPONENTS......................................................................... 9
OPERATION PANEL ...................................................................10
LCD PANEL..................................................................................12
EXTERNAL VIEW.........................................................................14
BASIC FAX OPERATION............................................................................ 17
HOW TO SEND A FAX MESSAGE.............................................18
MEMORY TRANSMISSION AND IMMEDIATE
TRANSMISSION...........................................................................19
SENDING A FAX BY IMMEDIATE TRANSMISSION.................21
SENDING A FAX BY MEMORY TRANSMISSION.....................21
IF YOU MAKE A MISTAKE.........................................................23
POSSIBLE PROBLEMS...............................................................23
SENDING A PAGE WITH VERY FINE DETAIL..........................24
OTHER FEATURES FOR TRANSMISSION ...............................25
REDIALLING.................................................................................27
RECEIVING FAX MESSAGES.....................................................28
RECEIVING FAX MESSAGES WHEN THERE IS A
PROBLEM.....................................................................................31
MAKING TELEPHONE CALLS ...................................................32
ERASING & PRINTING STORED MESSAGES..........................35
COPYING ......................................................................................36
OTHER FAX FEATURES ............................................................................... 37
ECM (Error Correction Mode) AND PAGE RETRANSMISSION.......38

CALLING TO REQUEST A MESSAGE (POLLING) ..................39
USING THE PRINTER ..................................................................................43
SETTING UP THE PRINTER.......................................................44
USING THE PRINTER .................................................................45
USING THE FAX/MODEM ........................................................................47
FAX/MODEM OUTLINE...............................................................48
SETTING UP THE FAX/MODEM.................................................49
REPORTS.....................................................................................................51
AUTOMATICALLY PRINTED REPORTS ...................................52
HOW TO PRINT OUT A REPORT..............................................54
MAINTAINING YOUR MACHINE ..............................................................57
ADDING PAPER ..........................................................................58
REPLACING THE INK CARTRIDGE ..........................................59
CLEANING THE MACHINE.........................................................60
SOLVING PROBLEMS.................................................................................63
DOCUMENT JAMS......................................................................64
COPY JAMS.................................................................................64
NOZZLE TEST..............................................................................64
TECHNICAL REFERENCE............................................................................65
DOCUMENT SPECIFICATIONS..................................................66
SUITABLE COPY PAPER...........................................................68
FAX SPECIFICATIONS................................................................69
PRINTER SPECIFICATIONS.......................................................70
ERROR MESSAGE LIST.............................................................71
FUNCTION LIST...........................................................................72
APPENDIX (INSTALLING THE MACHINE & INITIAL SETTINGS).................73
LOCATION....................................................................................74
INSTALLATION............................................................................75

INSTALLING THE PAPER SUPPORTER...................................76
SOME ITEMS MUST BE PROGRAMMED FIRST......................80
PROGRAMMING ..........................................................................81

IMPORTANT SAFETY INSTRUCTIONS
1. Read all of these instructions.
2. Save these instructions for later use.
3. Follow all warnings and instructions marked on the product.
4. Unplug this product from the wall outlet before cleaning.Do not use liquid cleaners or
aerosol cleaners.Use a damp cloth for cleaning.
5. Do not use this product near water.
6. Do not place this product on an unstable cart, stand or table.The product may fall, causing
serious damage to the product or injuring the user.
7. Slots and openings underneath or at the rear of the cabinet are provided for ventilation; to
ensure reliable operation of the product and to protect it from overheating, these openings
must not be blocked or covered.The openings should never be blocked by placing the
product on a bed, sofa, rug or other similar surface. This product should not be placed in a
built-in installation unless proper ventilation is provided.
8. This product should be operated from the type of power source indicated on the marking
label. If you are not sure of the type of power available, consult an authorised sales person
or your local power company.
9. This product is equipped with a 3-wire grounding type plug, a plug having a third
(grounding) pin.This plug will only fit into a grounding-type power outlet.This is a safety
feature. If you are unable to insert the plug into the outlet, contact your electrician to
replace your obsolete outlet. Do not defeat the purpose of the ground grounding type plug.
(This does not apply in countries in which the 2-wire, non-grounded type plug is used,)
10. Do not allow anything to rest on the power cord. Do not locate this product where persons
will walk on the cord.
11. If an extension cord is used with this product, make sure that the total of ampere ratings
of the products plugged into the extension cord does not exceed the extension cord
ampere rating.Also, make sure that the total of all products plugged into the wall outlet
does not exceed 15 amperes.
12. Never push objects of any kind into this product through cabinet slots as they may touch
dangerous voltage points or short out parts that could result in a risk of fire or electric
shock.Never spill liquid of any kind on the product.
13. Do not attempt to service this product yourself, as opening or removing covers may
expose you to dangerous voltage points or other risks.Refer all servicing to qualified
service personnel.
14. Unplug this product from the wall outlet and refer servicing to qualified service personnel
under the following conditions:
A. When the power cord or plug is damaged or frayed.
B.If liquid has been spilled into the product.
C.If the product has been exposed to rain or water.
D.If the product does not operate normally when the operating
instructions are followed. Adjust only those controls that are covered
by the operating instructions since improper adjustment of other
controls may result in damage and will often require extensive work
by a qualified technician to restore the product to normal operation.
E. If the product has been dropped or the cabinet has been damaged.
F.If the product exhibits a distinct change in performance, indicating a
need for service.
INTRODUCTION
Thank you for purchasing this product. This compact machine is ideal for
small businesses and home office users.It is very easy to operate.Also, you
can get printouts from your computer just by entering printer mode.If you
install the colour cartridge option, you can get printouts in colour.You will
soon become accustomed to its features and will be able to enjoy years of
service from it.
Your machine is equipped with a wide range of labour-saving and cost-
saving features. Please keep this manual near the machine at all times.
INTRODUCTION
1

WHAT DOES A FAX MACHINE DO?
A fax machine scans your document and converts it into a series of black
and white dots (the number of dots there are across and down the page
depends on the resolution that you selected—refer to the specifications
section of this manual for details).This series of dots is transformed into an
electrical signal and sent out over the telephone line to the destination fax
machine.
The receiving fax machine reconstructs your document from the incoming
signal, and prints it.
If you are worried about whether the message arrived at the destination, you
can check a report called the TCR (Transaction Confirmation Report).When
you print this report, you can see the result of the most recent fax
communications made by your machine.
You can use your fax machine to send and receive many types of
documents, even photographs.
PRINTING FROM A PC
When in printer mode, you can use this machine as a desktop printer for your
personal computer. To ensure that the printer can be used with a wide range
of application programs, emulation modes for different printer types have
been provided.
WHAT DOES A FAX MACHINE DO?
2

ABOUT THIS MANUAL
This manual contains instructions on how to operate and take care of your
machine.Please keep it near the machine at all times.
Note that the external appearance of the machine in some illustrations may
differ slightly from the actual machine.
This manual is organised into the following sections:
❐How to Use This Manual - What you are reading now.
❐General Precautions - Precautions that you should keep in mind when
operating the machine.Read this section before you begin to use your
machine.
❐Guide to Components - This contains a diagram that shows where the
main components of your machine are situated. It also describes the
functions of the various buttons and indicators that are on your
machine’s operation panel.
❐Basic Fax Operation - Features and settings that would normally be
used on a daily basis.
❐Other Fax Features - Explains how to take advantage of the special
features of your fax machine.
❐Using The Printer - How to use the machine as a printer and take
advantage of the printer features.
❐Reports - This section explains the reports that the machine generates.
When there are error codes or paper jams refer to this section (many
routine problems do not need to be solved by an experienced
technician).
❐Maintaining Your Machine - What to do when consumable supplies run
out.
❐Solving Problems - For example when your machine cannot
communicate or there is a paper jam.
❐Technical Reference - Inputting characters, setting up the user
switches, specifications and other technical information.
❐Appendix - The best place to install your machine is described here.
Please also refer to it when you plan to move the machine to another
location. It also explains the things you have to do before you can send
your first fax message, and lists important features that will make faxing
more convenient.
INTRODUCTION
ABOUT THIS MANUAL
3

GENERAL PRECAUTIONS
WARNING : Do not attempt any maintenance or troubleshooting other
than that mentioned in this manual.
Pay attention to the following :
Power Supply
1. Power requirements:
220-240Vac, 50 Hz.
2. Insert the power plug securely into the wall
socket.
3. Make sure that the wall outlet is near
the machine and readily accessible.
4. Do not connect other equipment to the same
socket.
5. Do not step on or set anything on the power
cord.
6. Do not connect other equipment to the same
extension cord.
7. Be sure that the power cord is not in a
position where it could trip someone.
Grounding
Ground the machine and the lightning protection circuit in accordance with
the regulations. Do not ground to gas or water pipes, or to a telephone
ground plug. Proper grounding is to the ground terminal of the power outlet.
Be sure that the ground terminal of the power outlet is properly grounded.
The lightning protection circuit for the machine requires the machine to be
properly grounded. If proper grounding is provided, about 90% of lightning
damage can be prevented. For safety, be sure to connect the machine to a
three-prong grounded outlet.
GENERAL PRECAUTIONS
4

COLD WEATHER POWER-UP
Avoid raising the room temperature
abruptly when it is below 14°C , or
condensation may form inside the machine.
1. Raise the room temperature to 20°C
at less than 10°C per hour.
2. Wait for 30 to 60 minutes.
3. Turn the power on.
Do not use the machine near a
humidifier.
THUNDERSTORMS
With proper grounding, about 90% of
lightning damage can be prevented.
However, if possible, during severe electric
storms turn the power switch off and
disconnect the power cord and telephone line cord.
PAPER PRECAUTIONS
The following list of precautions tells you how to store and handle your
printer paper.
Unused paper
❐Store in a dry, cool, dark place.
❐Do not store under uneven pressure.
❐Only use fresh unmarked paper.
Copies
❐Store in a dry, cool, dark place.
INTRODUCTION
GENERAL PRECAUTIONS
5

❐Do not use adhesives or writing materials containing alcohol or other
organic solvents.
❐Avoid contact with films or adhesive tapes containing plasticisers.
❐Avoid contact with diazo photosensitive paper.
❐When a copy gets wet, dry it by wiping it gently with a soft cloth or tissue.
❐Do not scratch or rub it with hard materials.
❐Do not copy with a mercury lamp diazo copier.
❐Make a photocopy if the information is to be kept for a long time.
❐Do not store copies in vinyl file folders.
INK CARTRIDGES
❐Ink Cartridge Type110 Black is recommended for the best
performance.If you use the optional colour printer option, Ink Cartridge
Type115 Color is recommended.
❐Store in a cool, dark place.
❐Keep out of reach of children.
❐Never store where it may be exposed to heat.
❐Do not unpack a cartridge until you need to use it.
❐Do not touch the print head : This is a precision
component.
❐Do not lay heavy objects on the ink cartridge.
❐Do not remove the ink cartridge from the printer
unless you have to; ink inside the cartridge will dry
out and the cartridge will not disperse ink.
❐For best results, change the cartridge at least once
a year.
❐Do not attempt to refill ink cartridges. Printouts with
refilled cartridges may be of poor quality.
❐Do not disassemble ink cartridges. Ink may be spilled on your hands or
clothes.
❐Do not subject cartridges to shock or vibration; ink may spill out of the
cartridge.
❐Do not touch the copper plate on the cartridge.
❐Do not replace the protective seal and head cap after removing them
from a new cartridge.
❐If you unwrap a cartridge and do not install it, store it in the ink cartridge
container.
GENERAL PRECAUTIONS
6

OPERATING PRECAUTIONS
❐Do not unplug the power cord while the machine is operating.
❐Do not overload the paper feed unit.
❐Keep corrosive liquids, such as acid, off the machine.
❐Do not touch copy paper if your fingers are wet or oily; fingerprints may
appear on the copy.
❐Do not let paper clips, staples or other small metal objects fall into the
machine.
❐Do not place beverages on or near the machine, they may spill on or into
it.
❐If you open the front cover, the machine does not stop printing at once.
Do not touch the inside the machine while it is working.
❐Make sure the ink cartridge is in its home position.
❐Hold up the top cover while changing the ink cartridge to avoid it falling
on your fingers.
GENERAL
❐Since some parts of the machine are supplied with high voltage, make
sure that you do not attempt any repairs or attempt to access any part of
the machine except those described in this manual.
❐Do not modify or replace parts other than those mentioned in this
manual.
❐After unplugging the power cord, always wait for more than three
seconds before plugging it back in.
❐Do not place the machine in direct sunlight.
❐Ink is readily removed form skin by waterless band cleaners followed by
washing with soap and water.
❐Be careful not to get any ink on your clothing.
INTRODUCTION
GENERAL PRECAUTIONS
7

GENERAL PRECAUTIONS
8

GUIDE TO COMPONENTS
GUIDE TO
CO O S
9

OPERATION PANEL
1
Pause / Redial key Press to insert a pause when dialling. Also
use to redial the last number dialled.
2
Stop key Stops the current operation and returns the
machine to standby mode.
3
Voice Request /
On Hook key Press to make a phone call after sending a
fax message. Also use to dial without
picking up the handset.
4
Start / Copy key Sends a fax or copies a document in the
document feeder.
5
Ten Key Pad Use to enter numbers and codes.The *
and #keys are for selecting letters and
symbols in function selection mode.
6
Density key Press to select the density.
Communi-
cating Check
Mode
TAD Auto
FAX Memory
ABC D
F
E
GHIJ
Emulation
Form Feed Line Feed
Font
Function Yes No/Reserv.
Fine
Halftone Density
Speed Dial Pause
Redial Voice Request
On Hook Dial Clear / Printer
Stop
Start/Copy
Reset
Display
/
21 15 16 17 18 19 20 10 27 6542
81313 22 14
12
11
28 24 926 7
23 25
OPERATION PANEL
10

7
Memory key Switches between Memory and Immediate
Transmission modes.The Memory
indicator is lit when in Memory
Transmission mode.
8
Speed Dial key Press to enter a Speed Dial code.
9
Mode key Switches between Fax, Tel, Auto Receive,
and TAD modes.
10
Function key Press to access one of the numbered
functions explained in this manual.
11
Yes key Use to answer questions on the display.
12
No / Reserv.key Use to answer questions on the display.
Also press this to transmission reservation
of documents in the ADF when receiving.
13
Clear key Deletes the last character entered.
14
Printer key Switches Printer mode on and off.The
Printer mode indicator is lit in Printer mode.
15
Emulation key In Printer mode, press to switch between
emulation modes (PCL3, PPDS or HEX).
In Fax mode this key is a Quick Dial key.
16
Paper Direction key
(;/ :)Switches between Landscape and Portrait
print modes.
17
Font key Selects the font in Printer mode.
18
Form Feed key Performs a Form Feed in Printer mode.
19
Line Feed key Performs a Line Feed in Printer mode.
20
Reset key Resets the printer in Printer mode.
21
Quick Dial keys (01-10) Use to dial numbers stored in Quick Dials
or Groups. In Printer mode, these keys are
used to change printer settings.
22
Printer indicator Lights in Printer mode, flashes while
printing.
23
Check Display If this flashes, there is a problem—check
the display for details.
24
Communication indicator Lights when a fax message is being
transmitted or received.
25
Voice Request indicator Lights if you select Voice Request.
26
Memory indicator Lit: Memory Transmission mode
Off: Immediate Transmission mode
GUIDE TO
COMPONENTS
OPERATION PANEL
11

27
Fine and Halftone
indicators Resolution
Standard: FINE=OFF, Halftone =OFF
Fine: FINE=ON, Halftone=OFF
Halftone: FINE=ON, Halftone=ON
28
TEL and AUTO
indicators These indicators show the current
reception mode:
Mode: Auto Fax Tel TAD(Telephone
Answering
device)
Auto LED: ON OFF OFF ON
Fax LED: OFF ON OFF ON
Note: TAD mode is not available in France.
LCD PANEL
Standby Display in Fax Mode
Amount of free memory
Time
5($'<
When "Ready" is displayed, the machine is ready to be used.
The amount of free memory will depend on how the machine is used. If it
reaches 0%, you can still send or receive fax messages using features that do
not require memory (e.g.Immediate Transmission).
LCD PANEL
12

Standby Display in Printer Mode
Current emulation mode
5HDG\ 3&/
When "Ready" is displayed, the machine is ready to be used.
For more about which emulation modes are available, see page 53.
Display While Sending or Receiving
The name/telephone number of the other party is displayed.
GUIDE TO
COMPONENTS
LCD PANEL
13

Display When Using the Machine
The display will prompt you to enter information and make selections using the
Ten Key Pad and the Yes and No keys. If no key is pressed within about 40
seconds, the machine will return to the standby display.
Error Messages
If an error message is shown, check the list on page 81 to find a remedy to the
problem.
EXTERNAL VIEW
Front view
Paper supporter
Document supporter
Document guide
Automatic sheet
feeder
Automatic sheet
feeder cover
Operation panel
Document tray
Cover release
button
Paper supporter
Paper tray
EXTERNAL VIEW
14
Other manuals for Fax 680 MP
1
Table of contents
Other Ricoh Fax Machine manuals

Ricoh
Ricoh fax4700l User manual

Ricoh
Ricoh FAX4430L User manual

Ricoh
Ricoh MV310 User manual

Ricoh
Ricoh Aficio FAX5000L User manual

Ricoh
Ricoh FAX1400L Owner's manual

Ricoh
Ricoh 2000 User manual

Ricoh
Ricoh B383 User manual

Ricoh
Ricoh MV310E User manual

Ricoh
Ricoh 170 / 180 User manual

Ricoh
Ricoh FAX3800L User manual

Ricoh
Ricoh FAX550 User manual

Ricoh
Ricoh LASER FACSIMILE User manual

Ricoh
Ricoh J-CF User manual

Ricoh
Ricoh Aficio 250 User manual

Ricoh
Ricoh 3245 User manual

Ricoh
Ricoh FAX2900L User manual

Ricoh
Ricoh Fax 680 MP User manual

Ricoh
Ricoh FAX4430NF Operating instructions

Ricoh
Ricoh FAX 2900Li User manual

Ricoh
Ricoh FAX07 Quick start guide