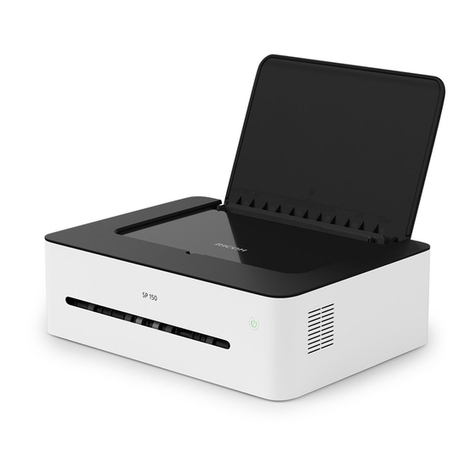
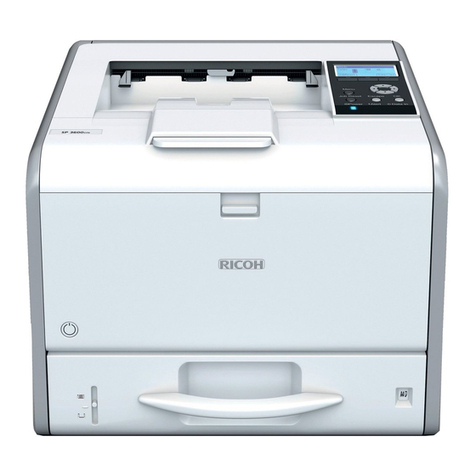
Ricoh GX7000 SubliJet R User manual

DO NOT INSTALL THE RICOH (OEM) INKS THAT WERE PROVIDED WITH THE PRINTER.
DO NOT POWER ON THE PRINTER BEFORE INSTALLING SAWGRASS SUBLIJET-R INK CARTRIDGES.
DURING DOWNTIME, IT IS HIGHLY RECOMMENDED TO LEAVE THE PRINTER POWERED ON TO ALLOW
THE RICOH AUTOMATIC MAINTENANCE UTILITIES TO KEEP THE PRINT HEAD NOZZLES CLEAR.
CAUTION
Ricoh GX7000
INSTALLATION GUIDE

SECTIONS:
Microsoft Windows Operating System Verication (1 page)
Ricoh (OEM) Printer Setup (2 pages)
Ricoh (OEM) Driver Download & Installation (8 pages)
PowerDriver-R Installation & Registration (7 pages)

Ricoh GX7000 – Installation Guide: (3:20)
Microsoft Windows OS Verication (1:1)
PAGE 1 Of 1 >>
Before you begin, you will need to verify the Windows Edition and System Type you are using on your PC. This is
important when deciding which drivers to download. You should only download those drivers, which are compat-
ible with your version of Operating System.
1.) To check your version of Operating System, rst click the Start icon in the bottom left corner of your
desktop. Then, right-click Computer. Finally, click Properties (see FIGURE 1).
FIGURE 1
2
3
1
2.) The following screen containing the Windows Edition and System Type should appear (see FIGURE
2). The below example is running Windows 7 on a 32-bit OS. Please note your version number and
remember to only download those utilities which correspond with your version of Windows OS.
FIGURE 2
1
2

PAGE 1
1.) Open the printer box, remove the cables and other accessories, and place them aside. Next, remove
the printer from the box, and place it on a sturdy work surface with sufficient operational clearances
(the printer weighs approximately 43 lb). Finally, remove the orange adhesive tape and attach the
power cord and the USB cable. DO NOT POWER ON THE PRINTER AT THIS TIME.
2.) Remove the SubliJet-R ink cartridges from their packages. Open the right front cover on the printer, and
insert the cartridges in the order indicated—from left to right (as you face the printer): black (K), cyan (C),
magenta (M) and yellow (Y). Press each cartridge in until it engages securely, and close the cover once
all of the cartridges are in place. Never shake or agitate the cartridges.
3.) Remove the paper tray, pull the cover straight up, and adjust the guides for the paper size you will be
using. Load the paper, put the cover back on, and reinsert the tray into the printer. For larger paper sizes,
refer to the documentation provided with your Ricoh printer for extending the paper tray.
Ricoh GX7000 – Installation Guide: (4:20)
Ricoh (OEM) Printer Setup (1:2)
Of 2 >>

PAGE 2
4.) Plug the power cord into a power outlet and plug the USB cable into a 2.0 USB port located on the back of
the computer. DO NOT POWER ON THE PRINTER AT THIS TIME.
5.) Start your computer, wait until Windows is fully operational and proceed to the Ricoh (OEM) driver
download and installation section.
Note: If you experience any communication errors, a powered USB Hub may be required.
During downtime, it is HIGHLY RECOMMENDED to leave the printer powered ON to allow the Ricoh Automatic
Maintenance Utilities to keep the print head nozzles clear. The Ricoh GelSprinter has been engineered to perform
automatic maintenance at various times in an effort to keep the print head nozzles in top condition. If this mainte-
nance cannot be automatically performed, it is possible that the nozzles may suffer permanent effects. As a result,
head cleanings may be unable to restore the print head to optimal operation.
CAUTION
SubliJet-R: Ricoh GX7000 – Installation Guide: (5:20)
Ricoh (OEM) Printer Setup (cont’d 2:2)
Of 2 >>

PAGE 1
The following instructions will demonstrate how to install the Ricoh (OEM) printer driver on computers running
Windows Operating Systems.
1.) Before installing the SubliJet-R PowerDriver, you will need to install the Ricoh (OEM) printer driver. If the
Ricoh (OEM) printer driver has already been installed on your machine, then please proceed to the
SubliJet-R PowerDriver Installation section. First, access the Ricoh website by entering
http://www.ricoh-usa.com/downloads/downloads.aspx in the address eld of your web browser. Once
there, enter the model number of your printer and click Search. Finally, click the link for your printer
model under Driver in the results eld (see FIGURE 1).
FIGURE 1
1
3
2
4
Ricoh GX7000 – Installation Guide: (6:20)
Ricoh (OEM) Driver Download & Installation (1:8)
Of 8 >>

PAGE 2
2.) To proceed, read the Ricoh Software License Agreement. If you agree with the terms of the agreement,
click I Agree (see FIGURE 2).
FIGURE 2
3.) Clicking I Agree will open the following web page. Locate and click the link that corresponds with your
computers Operating System (see FIGURE 3).
FIGURE 3
Of 8 >>
SubliJet-R: Ricoh GX7000 – Installation Guide: (7:20)
Ricoh (OEM) Driver Download & Installation (cont’d 2:8)

PAGE 3
4.) Locate the RPCS Raster Driver for your Operating System and click the Download Icon
(see FIGURE 4).
FIGURE 4
5.) The following screen will appear asking to Run the installation or Save the le to your computer. In this
example we will choose to Run the installation (see FIGURE 5).
FIGURE 5
6.) The following screen displaying the download status should now appear (see FIGURE 6).
FIGURE 6 Of 8 >>
SubliJet-R: Ricoh GX7000 – Installation Guide: (8:20)
Ricoh (OEM) Driver Download & Installation (cont’d 3:8)

PAGE 4
7.) Once the download has completed, the following screen may appear (see FIGURE 7). Click Run to
continue.
FIGURE 7
8.) The executable will need to be extracted before continuing. Note the folder location where the les will
be stored and click Unzip (see FIGURE 8).
FIGURE 8
9.) Once the les have been unzipped, the following screen will appear (see FIGURE 9). Click OK to
continue. This will return you to the WinZip Self-Extractor (see FIGURE 10). Again, note the folder
location of the unzipped les and click Close.
FIGURE 9
1
2
FIGURE 10
1 2
Of 8 >>
SubliJet-R: Ricoh GX7000 – Installation Guide: (9:20)
Ricoh (OEM) Driver Download & Installation (cont’d 4:8)

PAGE 5
10.) Navigate to the folder location containing the unzipped les. In this example the folder location was
Computer > C: > temp > z48495Lf. However, your folder location may differ. Once you have located
the folder, double-click RDISETUP.exe (see FIGURE 11). This will begin the installation process.
FIGURE 11
FIGURE 12
11.) You must accept the Software License Agreement before you can install the printer driver. If you agree
with the terms select I accept the agreement and click Next (see FIGURE 12).
1
2
Of 8 >>
SubliJet-R: Ricoh GX7000 – Installation Guide: (10:20)
Ricoh (OEM) Driver Download & Installation (cont’d 5:8)

PAGE 6
12.) Select how the printer is connected to your computer and click Next (see FIGURE 13). For this example
we will select USB cable.
FIGURE 13
1
2
13.) The following screen will appear asking you to conrm the printer is powered OFF (see FIGURE 14).
Ensure your printer is powered OFF and click Next to continue.
FIGURE 14
Of 8 >>
SubliJet-R: Ricoh GX7000 – Installation Guide: (11:20)
Ricoh (OEM) Driver Download & Installation (cont’d 6:8)

PAGE 7
14.) The following screen displaying the installation status should now appear (see FIGURE 15).
FIGURE 15
15.) The following screen will appear asking you to power the printer ON (see FIGURE 16).
Power the printer ON to allow the software to Auto-detect the printer.
FIGURE 16
Of 8 >>
SubliJet-R: Ricoh GX7000 – Installation Guide: (12:20)
Ricoh (OEM) Driver Download & Installation (cont’d 7:8)

PAGE 8
Congratulations! The Ricoh (OEM) printer driver has successfully been installed. Please proceed to the
PowerDriver-R Installation & Registration section.
16.) In the following screen you are asked to customize the Status Monitor (see FIGURE 17). Adjust the
settings according to your preferences and click Next to continue.
FIGURE 17
17.) You must restart your computer to complete the printer driver installation. Save and close any work that
may be open and click Finish (see FIGURE 18).
FIGURE 18
Of 8 >>
SubliJet-R: Ricoh GX7000 – Installation Guide: (13:20)
Ricoh (OEM) Driver Download & Installation (cont’d 8:8)

PAGE 1
1.) Visit the Sawgrass Technologies website at www.sawgrassink.com and navigate to the Sublijet
PowerDriver download page. From the home page, rst highlight Technical Support, next highlight
SubliJet-R, then highlight Ricoh GX7000, and nally highlight and click PowerDrivers and
MacProles (see FIGURE 1). This will open the PowerDriver Downloads for SubliJet page (see
FIGURE 2).
2.) From the list, click on the name of your printer that is associated with your operating system, and save the le
to your desktop (see FIGURE 2).You should now see the following Executable icon on your desktop (see
FIGURE 3). Double-click the Executable icon to begin the installation process.
FIGURE 1
FIGURE 2
1
2
3
FIGURE 3
GX7000R_v3.0.4.exe
Ricoh GX7000 – Installation Guide: (14:20)
PowerDriver-R Installation & Registration (1:7)
Of 7 >>
4

PAGE 2
3.) Select your appropriate locale and click Next (see FIGURE 4).
FIGURE 4
4.) Ensure you are installing the correct driver and click Next (see FIGURE 5).
FIGURE 5
5.) If you agree with the terms of the License Agreement, click I Agree (see FIGURE 6).
FIGURE 6
SubliJet-R: Ricoh GX7000 – Installation Guide: (15:20)
PowerDriver-R Installation & Registration (cont’d 2:7)
Of 7 >>

PAGE 3
6.) Choose the components you wish to install and click Next (see FIGURE 7).
FIGURE 7
7.) Click Install if you would like to install the driver in the specied Destination Folder (see FIGURE 8).
FIGURE 8
8.) The following screen displaying the installation status should now appear (see FIGURE 9).
FIGURE 9
SubliJet-R: Ricoh GX7000 – Installation Guide: (16:20)
PowerDriver-R Installation & Registration (cont’d 3:7)
Of 7 >>

PAGE 4
9.) If you receive the following screen, click Install this driver software anyway (see FIGURE 10).
FIGURE 10
10.) As installation nears completion, the following window will prompt you to register your product (see
FIGURE 11). DO NOT SKIP THIS STEP, registration is required to use the software. Click YES to
continue.
FIGURE 11
11.) You will use the Product ID to register your product. The Product ID is located in the PowerDriver
Registration window (see FIGURE 12). The easiest and fastest way to obtain a Registration Code
24/7 is by clicking the Obtain Registration Code button also located in the PowerDriver Registration
window. Follow the on-screen instructions to receive a Registration Code via an automatic E-mail.
If you have difficulties with the e-mail option or if the computer being used to run PowerDriver is
not connected to the Internet, note the Product ID and call (843) 884-1575, Option 1 or e-mail
support@sawgrassink.com. Registration codes via phone or direct e-mail are provided 8:00 a.m. -
5:00 p.m. EST, Monday - Friday.
Note: You must have a separate Registration Code for every machine on which the“PowerDriver-R”is
installed.
SubliJet-R: Ricoh GX7000 – Installation Guide: (17:20)
PowerDriver-R Installation & Registration (cont’d 4:7)
Of 7 >>

PAGE 5
12.) The following instructions will show how to register On-line. Note the Product ID as this will be
needed during the registration process and click Obtain Registration Code (see FIGURE 12).
FIGURE 12
13.) On the Product Registration web page, ll in the required information and click Submit when
complete (see FIGURE 13). Your Registration Code will now be sent to the e-mail address used
during registration.
FIGURE 13
1
2
SubliJet-R: Ricoh GX7000 – Installation Guide: (18:20)
PowerDriver-R Installation & Registration (cont’d 5:7)
Of 7 >>

PAGE 6
FIGURE 14
15.) You should receive the following screen conrming that registration was successful (see FIGURE 15).
Click OK to continue.
FIGURE 15
1
2
16.) Click OK to select the appropriate Ricoh (OEM) printer you wish to use (see FIGURE 16).
FIGURE 16
SubliJet-R: Ricoh GX7000 – Installation Guide: (19:20)
PowerDriver Installation & Registration (cont’d 6:7)
Of 7 >>
14.) Enter the Registration Code you receive into the Registration Code text box and click Apply Code (see
FIGURE 14).

PAGE 7
17.) Click the drop-down arrow and select the GelSprinter GX7000 as the OEM Printer (see FIGURE 17).
Once you have selected your printer, click Apply then OK to nalize the installation.
1
23
FIGURE 17
18.) You should receive the following screen informing you that installation was completed successfully (see
FIGURE 18). You must restart your computer to complete the installation. Save and close any work that
may be open and click Yes.
FIGURE 18
Congratulations! The PowerDriver-R GX7000 has successfully been installed. Please proceed to the Print
Setup Guide that corresponds with your version of graphics software.
For the absolute latest information and updates on all products, materials, processes and/or procedures
relative to all offerings by or through Sawgrass Technologies, Inc., please refer to our website:
www.sawgrassink.com
SubliJet-R: Ricoh GX7000 – Installation Guide: (20:20)
PowerDriver Installation & Registration (cont’d 7:7)
Of 7 >>
Table of contents
Other Ricoh Printer manuals

Ricoh
Ricoh P 310 User manual

Ricoh
Ricoh Aficio CL4000DN User manual

Ricoh
Ricoh Aficio SP 3300DN User manual

Ricoh
Ricoh Pro C5300S Manual

Ricoh
Ricoh AficioSP C410DN User manual

Ricoh
Ricoh Aficio 2238C User manual

Ricoh
Ricoh DDP 70e User manual

Ricoh
Ricoh MLP150DN User manual

Ricoh
Ricoh B082 User manual

Ricoh
Ricoh SP C252DN User manual

Ricoh
Ricoh Ri 1000 User manual

Ricoh
Ricoh G-P2 User manual

Ricoh
Ricoh AficioSP C410DN User manual

Ricoh
Ricoh L5160 Installation guide

Ricoh
Ricoh B022 User manual

Ricoh
Ricoh MP 6503 Series User manual

Ricoh
Ricoh SAVIN D0AP User manual

Ricoh
Ricoh Ri 1000X User manual

Ricoh
Ricoh Fiery 3850C User manual

Ricoh
Ricoh M001 User manual