manuals.online logo
Brands
  1. Home
  2. •
  3. Brands
  4. •
  5. Rinnai
  6. •
  7. Ventilation Hood
  8. •
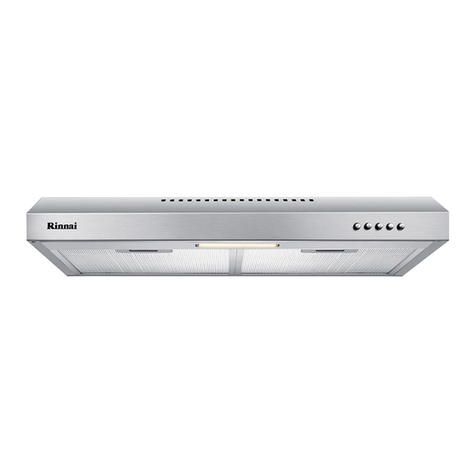
  9. Rinnai RH-60 ER User manual

Rinnai RH-60 ER User manual

This manual suits for next models

11

Other Rinnai Ventilation Hood manuals

Rinnai RH-TL65C-SSVR Guide

Rinnai

Rinnai RH-TL65C-SSVR Guide

Rinnai RH-K609-GB User manual

Rinnai

Rinnai RH-K609-GB User manual

Rinnai RH-S239-SSR User manual

Rinnai

Rinnai RH-S239-SSR User manual

Rinnai RH-S329-PBR User manual

Rinnai

Rinnai RH-S329-PBR User manual

Rinnai RH-C91A-SSVR User manual

Rinnai

Rinnai RH-C91A-SSVR User manual

Rinnai RH-S319-PBR-T User manual

Rinnai

Rinnai RH-S319-PBR-T User manual

Rinnai RH-C779-SB User manual

Rinnai

Rinnai RH-C779-SB User manual

Rinnai RH-S269-SSR User manual

Rinnai

Rinnai RH-S269-SSR User manual

Rinnai RH-C107-GC User manual

Rinnai

Rinnai RH-C107-GC User manual

Rinnai RH-G806-SSVE-R Specification sheet

Rinnai

Rinnai RH-G806-SSVE-R Specification sheet

Rinnai RH-L419-SS Guide

Rinnai

Rinnai RH-L419-SS Guide

Rinnai RH-993CT User manual

Rinnai

Rinnai RH-993CT User manual

Rinnai RH - 60V User manual

Rinnai

Rinnai RH - 60V User manual

Rinnai RH-S3056-PBW User manual

Rinnai

Rinnai RH-S3056-PBW User manual

Rinnai RH-S75A-SSVR User manual

Rinnai

Rinnai RH-S75A-SSVR User manual

Rinnai RH-D3154-BKR User manual

Rinnai

Rinnai RH-D3154-BKR User manual

Rinnai RH-C759-SB User manual

Rinnai

Rinnai RH-C759-SB User manual

Rinnai RH-90 CGT User manual

Rinnai

Rinnai RH-90 CGT User manual

Rinnai RH - 60 ER User manual

Rinnai

Rinnai RH - 60 ER User manual

Rinnai RH-9020A User manual

Rinnai

Rinnai RH-9020A User manual

Rinnai RH-S259-SSV-T User manual

Rinnai

Rinnai RH-S259-SSV-T User manual

Rinnai RH-C1059-PBW Parts list manual

Rinnai

Rinnai RH-C1059-PBW Parts list manual

Rinnai RH-9025A User manual

Rinnai

Rinnai RH-9025A User manual

Rinnai RH-C809-GB User manual

Rinnai

Rinnai RH-C809-GB User manual

Popular Ventilation Hood manuals by other brands

Gorenje S3 IHGC963S4X manual

Gorenje

Gorenje S3 IHGC963S4X manual

KOBE ISX2136SQB-1 Installation instructions and operation manual

KOBE

KOBE ISX2136SQB-1 Installation instructions and operation manual

U.S. Products ADVANTAGE-100H Information & operating instructions

U.S. Products

U.S. Products ADVANTAGE-100H Information & operating instructions

Kuppersberg DUDL 4 LX Technical Passport

Kuppersberg

Kuppersberg DUDL 4 LX Technical Passport

Framtid HW280 manual

Framtid

Framtid HW280 manual

Thermador HGEW 36 FS installation manual

Thermador

Thermador HGEW 36 FS installation manual

Electrolux LFT769X user manual

Electrolux

Electrolux LFT769X user manual

AEG X69453MVO UK user manual

AEG

AEG X69453MVO UK user manual

Broan B5836SS manual

Broan

Broan B5836SS manual

Heinner HDCH-6060RGBK quick start guide

Heinner

Heinner HDCH-6060RGBK quick start guide

Baumatic AS35SS instruction manual

Baumatic

Baumatic AS35SS instruction manual

Franke FTF 604 XS V2 Instructions for use and installation

Franke

Franke FTF 604 XS V2 Instructions for use and installation

Best UCB3I30SBW installation instructions

Best

Best UCB3I30SBW installation instructions

Gram EFU 503-90 X instruction manual

Gram

Gram EFU 503-90 X instruction manual

CIARRA CBCS6803 Installation and user manual

CIARRA

CIARRA CBCS6803 Installation and user manual

sauter SHG501 Instructions for installation and use

sauter

sauter SHG501 Instructions for installation and use

Franke 392-17 User instructions

Franke

Franke 392-17 User instructions

FALMEC Polar Black 35 Instruction booklet

FALMEC

FALMEC Polar Black 35 Instruction booklet

manuals.online logo
manuals.online logoBrands
  • About & Mission
  • Contact us
  • Privacy Policy
  • Terms and Conditions

Copyright 2025 Manuals.Online. All Rights Reserved.

INSTRUCTION MANUAL
MODEL
RH - 60 ER / RH - 71 ER / RH - 90 ER
RH - 60 EV / RH - 71 EV / RH - 90 EV
Thank you very much for purchasing Rinnai cooker hoods.
Before operating the cooker hoods, please read this “Instruction Manual” thoroughly.
Keep this instruction manual in a safe place and do not lose it.
CIRCUIT DIAGRAM
RH - 60 ERI / RH - 71 ERI / RH - 90 ERI (IONIZER)
RH - 60 EVI / RH - 71 EVI / RH - 90 EVI (IONIZER)
M
ON/OFF SPEED LAMP
SW 1 SW 2 SW 3
Pilot Lamp
Capacitor
MOTOR
(50Hz/60Hz 220V - 240V)
Connector
Light Bulb
(220V - 240V)
40 W
3.0 F 400 Vm
Anion generator
Note :
Anion Generator
Only ERI & EVI Series
Connector
Connector
RIT-0003-111-3x02
http://www.rinnai.co.id
Cooker Hoods
020811
Assembly
(1) Make sure that the fan screw, fan, slot filter, rectifier, oil pack, etc, are correctly
fixed.
(2) Incorrect assembly may result in vibration or weaker air-flow.
Cautions
!Don’t touch the spout of negative ion on the front panel, the static electricity
sometimes may occur during the operation. (Only for RH-60ERI/EVI, RH-
71ERI/EVI, RH-90 ERI/EVI).
!When mounting the fan, fix the notch of fan to the motor axis pin and push them
together before tightening the fan screw.
!Fix the rectifier panel and the oil pack firmly to prevent dropping.
To prevent vibration and/or oil leak, tightened the screw and other parts properly.
!If the power cord of this equipment is damaged, replace it with a new cord.
SPECIFICATION
PART NAME
Mount the oil pack (left and right) just below the oil hole of the rectifier-panel.disposal
If the oil pack is not mounted just below this oil discharge hole, the oil will drop directly
to the gas cooker. (Fig. 1)
Mounting the oil pack
Oil Pack
Oil Disposal Hole
Fig. 1
16
Model
RH-60 ERI RH-60 EVI RH-71 ERI RH-71 EVI RH-90 ERI RH-90 EVI
Recycle / Ventilation
Dimension (WxDxH)mm
Weight (kg)
Motor / Fan
Air Volume ( M 3 / H )
Quietness ( dB (A) )
Power Consumption (W)
Lamp (W)
Air Duct dia (mm)
Smoke recovery (%)
Recycle
600x530x150 600x530x150
11.5 kg 11.5 kg
1Motor/1 Fan 1Motor/1 Fan 1Motor/1 Fan 1Motor/1 Fan 1Motor/1 Fan 1Motor/1 Fan
515 515 515 515 515 515
325 325 325 325 325 325
53.5 52.5
43 42 43 42 43 42
121 121 121 121 121 121
40 40 40 40 40 40
-150 dia 150 dia 150 dia
98
75 75 75 75 75 75
98 98 98 98 98
Ventilation Ventilation Ventilation
Recycle
710x530x150 710x530x150 900x530x150 900x530x150
12.2 kg 12.2 kg 13.7 kg 13.7 kg
53.5 52.5 53.5 52.5
-
Recycle
-
MAX
MIN
MAX
MIN
220V~240V
MAX
MIN
RH-60 ER RH-60 EV RH-71 ER RH-71 EV RH-90 ER RH-90 EV
Push Button Switch
Slot Filter
Rectifier Panel Oil Pack
(Accessory)
Ionizer *
Fan Fan Screw
Body
*Only for model:
RH-60 ERI/EVI
RH-71 ERI/EVI
RH-90 ERI/EVI
HOW TO USE
Power button
Speed button
Lamp button
Electric (Fan) ON/OFF
When the power button is “ON” position Fan start running with the
speed according the speed button position (MIN/MAX).
Ionizer will operate when the power button is “ON” position.
(Model RH-60 EVI/ERI, RH-71 EVI/ERI, RH-90 EVI/ERI).
For heavy cooking (For instance, deep fried and etc..)
Lamp turn ON/OFF
MOUNTING OF LIGHT BULB
!A 40 W mini-light bulb has been mounted to this
cooker hoods.
!To replace the light bulb, remove the lamp cover
!Buy a mini-light bulb (in the base diameter 14 mm),
rated 220V-40W or below for replacement. (Fig. 2)
CAUTION
!If a gas cooker / hob is turned on with fire and
nothing is being placed on it (eg. Wok, pan etc..),
the body of the cooker hoods will be heated and
problem may arise.
Fig. 2
Fig. 3
(3) Cleaning the cooker hoods body
!Wipe the cooker hoods body with a cloth
immersed in a neutral detergent.
(4) Cleaning the motor
!Clean the motor by removing dust and other
dirt with dried cloth.
Do not use water for cleaning the motor.
(5) Change the smell reducing filter if dirty and
saturated.
(only for RH-60 ER / RH-71 ER / RH-90 ER)
RH-60 ERI / RH-71 ERI / RH-90 ERI)
How to change smell reducing filter :
!Hold the handles of both ends of filter grill
and pick it up. (Fig. 13)
!Take out the bars from filter grill and then
change smell reducing filter with new one.
(Fig. 14)
!Assemble the filter grill and install it. (Fig. 15)
(2) Cleaning the rectifier panel
!Wash it in a tepid water with a neutral
detergent dissolved and then after washing it
with water again, wipe the rectifier panel
thoroughly with cloth. (Fig.12)
Fig. 12
Filter Grill
Fig. 13
Smell
Reducing
Filter
Bar
Fig. 14
Filter Grill
Fig. 15
52
MAX
Speed button
MIN
For light cooking (For instance, steaming, light fried and etc..)
ON/OFF SPEED LAMP
OFF ON
OFF ON
HOW TO SERVICE
To prevent grease build-up, clean the cooker hoods periodically by cleaning the slot
filter once or twice month.
!Before replacing the light bulb or cleaning the
cooker hoods, be sure to turn the push- button
switch OFF, and then put the power plug off from
a receptacles.
!For safety reason always wear a pair of rubber
gloves while cleaning the filter. (Fig. 4)
!Especially, be careful to prevent such electronic
parts as the motor, switch, connectors or the like
from being splashed with water. (Fig. 5)
!Do not use a spray type detergent to clean the
electric appliances parts.
!Do not use such solvents as thinner, benzine or
the like and polishing powder for cleaning the
painted surfaces, facing plates, etc. As these
parts may become lusterless or scored.
!Do not wash parts with a hard brush or the like
for cleaning as they can be damaged.
(1) Remove the oil pack
!Hold the oil pack at both ends and slide
forward (Fig. 6)
Caution for Servicing
Dismantle
Fig. 4
Gambar. 4
Fig. 5
Gambar. 5
Oil Pack
Gambar. 6 Fig. 6
(2) Remove the rectifier panel
!By loosening the mounting screws from
the rectifier panel dislocated the
temporary fixing holes of the rectifier
panel from the mounting screw, then
move the rectifier panel forward in order
to remove it from the catches of the body.
(Fig. 7)
(3) Remove the slot filter
!Hold the slot filter and remove the screws
(Fig. 8)
(4) Remove the oil panel
!Hold the oil panel, remove the 3 screws
(refer Fig.9) and bring the panel down
slowly.
(5) Remove the fan
!Hold the fan and turn the fan screw to the
“loosen” direction.
The fan screw will come off and the fan
will be removed. (Fig. 10)
(1) Washing the slot filter, fan and oil pack
!After immersing the slot filter, fan and oil
pack in a tepid water with a neutral
detergent dissolved for 30 to 40 minutes,
wash it with a toothbrush or the like to
remove grease and dirt. (Fig. 11)
Cleaning
Temporary Fixing Hole
Rectifier Panel
Fig. 7
Catch
Slot Filter
Screw
Gambar. 8 Fig. 8
Oil Panel
Screw Hinge
Fig. 9
Fan Fan Screw
Fig. 10
Fig. 11
34